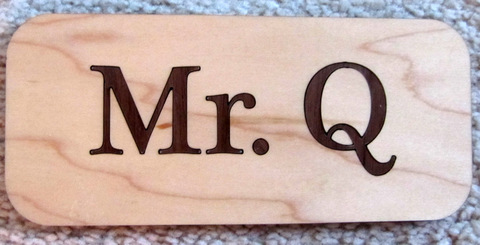
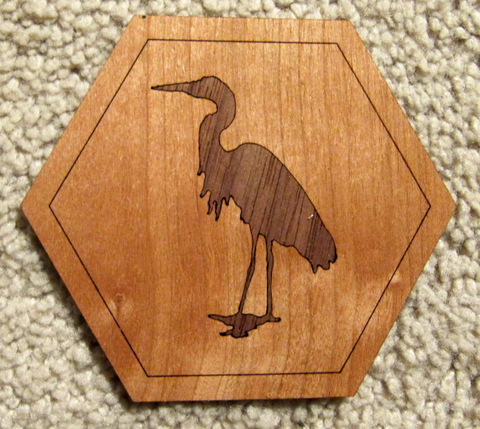
Instead of the classic inlay process using engrave in material A and cutting a veneer in material B, an alternative is to use veneers for both materials with cuts for both. Kerf adjustment is made for one of the cuts. The assembled veneer pieces are glued to a backing material, say PG MD Draftboard. Photos show two first attempts using PG walnut and maple veneers which have adhesive on the veneers, and non-Proofgrade 1/16 inch walnut and cheery veneers.
Not sure what to use for a finish coating.
46 Likes
Thanks for a new technique!
Just a heads up - look up ‘marquetry’.

4 Likes
Thanks! Am aware, was referring to is use with a 

All things get repeated just in different ways. Sometimes I think nothing is “new” just something else re-imagined. Look at the Egyptians engineering, and the Romans.
And watch Stargate episodes 
2 Likes
Sorry, I overlooked that possibility.
I think I’m becoming too used to the idea that ![]() is just there , in the workshop !
is just there , in the workshop !
![]()
3 Likes
Always good to see this technique repeated on the forum. Here’s another recent GF example of it:
I tend to forego veneer altogether, and inlay 1/8" thick woods into each other. Works pretty well too.
You have a good idea.
I wonder if, after assembly, cuts made on 1/8" thick woods with kerf adjustment have a wider visible black border than when made on thinner materials.
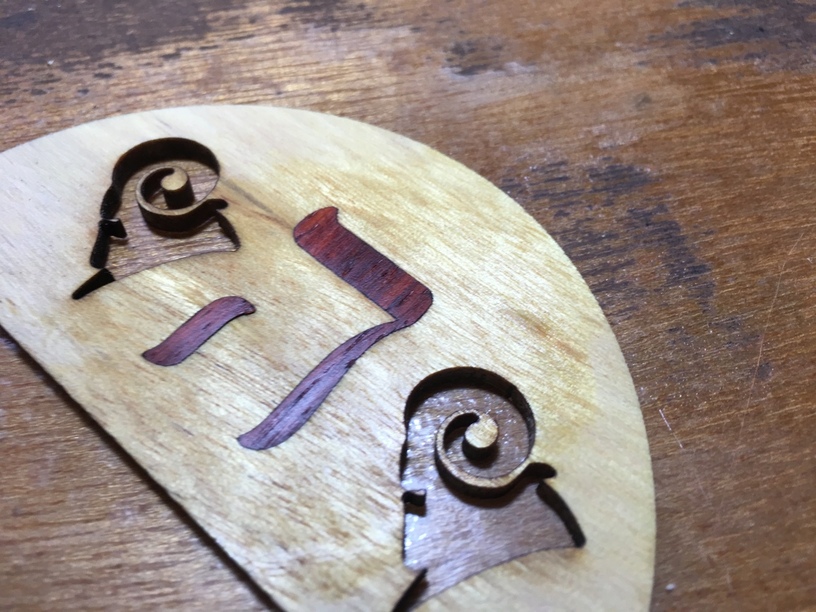
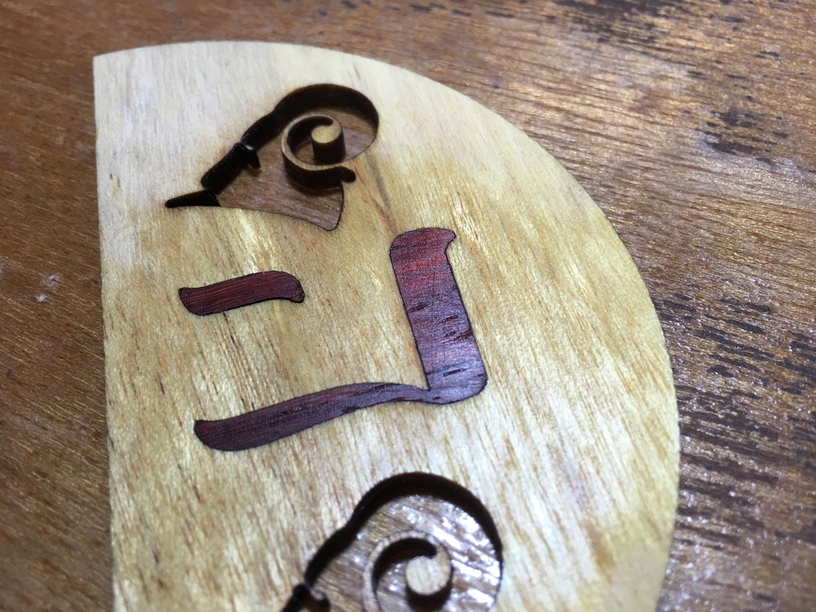
My trick is that I cut the inlaid pieces with a kerf adjustment and then seat them upside down. That is, the “background” is right side up, and the inlaid pieces, you’re seeing the “back”. The cut profiles match and you get a very firmly seated piece with almost zero gap.
The difficulty comes in the fact that different woods have different kerf amounts, so you have to test fit a bit. Also, because you’re cutting 1/8 material, you gotta come in pretty hard. As such, sharp points will typically overburn and you’ll get voids. I’d recommend that you keep your minimum radius on an inlaid corner/point to be .5mm or more, depending on your material.
Also, because you’re showing the back of your inlaid pieces, you need to be sure your settings are dialed in very well, flashback will be a major visible problem if you’re overpowering the cut.
3 Likes
If a Cut is used, I see an overburn whenever there is a slope discontinuity at a node. Guess that’s acceleration change for the tool path. So even when not at points I still get overburn at these spots. I try to do node editing to help this.
Also tried a crazy idea to prevent overburn at points and other places with slope discontinuity: Make a 0.002" wide path for the outline and use Engrave operation to cut through the material. I had the LPI set at a value that gave higher resolution than 0.002". It worked as far as preventing overburns, but it tales too long.
2 Likes
That technique has been used to pretty good effect with paper, but the same paper experiments showed that overlapping the cuts on exterior corners yielded even better results.
https://community.glowforge.com/t/laser-cut-printer-paper-using-engrave/10038and further discussion here:
https://community.glowforge.com/t/playing-with-beamwidth-aka-kerf/17434/15
1 Like
Great job on the inlay work! 
Nice! If you can sacrifice some of the wood outside the cut area, could you get rid of the overburn by going in and putting a bunch of dogbone-style loops into the path? The corner stays in the same place, but the laser doesn’t stop there. (Hard as heck to do by hand)
That’s basically what I meant, but instead of curves, just crosses to prevent deceleration until you’re out of the piece.
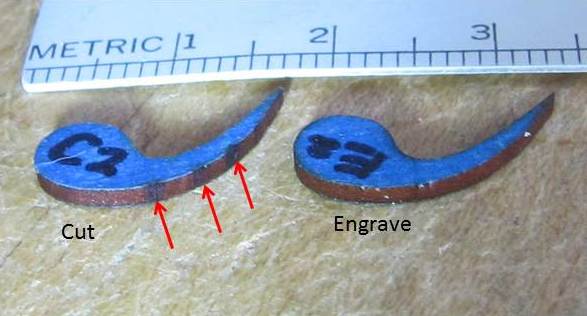
Here’s a photo of the small commas I used for testing Cut vs. Channel Engrave. The comma dimensions are 0.656" X 0.313" . Cut took 6 sec while the channel engrave took 5:20 minutes at 675 LPI with speed/power 250/100 for 1/8" cheery veneer.
The burnthroughs on Cut are where there are 2 to 3 nodes exactly on top of each other. Found this using Node Numbering. Somehow the channel engrave using the same initial svg file showed none of this.
New at Inkscape and haven’t figured out how to implement your good suggestion of looping.
And how does the tool-path algorithm handle node density, slope discontinuities when it has a Speed (IPM) set on the Glowforge? What about PPI (pulses per inch)? I’ve got a lot to learn. This forum has been a great help!