I have just had my Pro shut down in middle of printing, and then I get the interlock open message by my “print” button. I have read thru all of the posts and the staple is in all the way, I tried the tape method, I checked the back of the machine to see if the connection is loose inside of the machine, and it is solid. There is no debris or dust in lid areas, so I am at a loss…
I do have the air filter, and I have not used my machine very much at all in the past four months, I have them in the same plug in, and this shuts down even with the air filter not turned on. It will get to the starting position, and then completely shut down.
Any more suggestions while I wait for tech support? I have sent an email with my issues. Any help is appreciated, as I was going to make the hooks for my fellow co-workers that are returning to work next week.
Thank you,
Teresa
I’m so sorry for the trouble.
I extracted the logs from your Glowforge to investigate, and it looks like the orange button is appearing for a couple of reasons. One is the Glowforge is having trouble communicating with the printer head. There are two key connections I’d like you to check for me.
Could you please do the following?
-
Turn off your Glowforge.
-
Holding only the finished black surfaces, grasp the printer head as shown. Pull gently up and back to disengage the magnets and remove the head.

- There is a small tab in the center of the wire ribbon. Push down fully on the tab to release it, and gently pull the wire ribbon plug from the printer head.

- Take a clear photo of the gold pins inside the printer head where you just unplugged the wire ribbon. It should look like this.

-
Pick up the printer head and wire ribbon. Make sure the tab on the wire ribbon is facing up. Slide the ribbon back into the head until it clicks.
-
As shown, lower the printer head over the metal plate so that it rests next to the two round posts. Then push it gently away from you – you’ll feel a “click” as magnets pull the printer head until it sits snugly atop the metal plate.

-
Pull the laser arm all the way forward.
-
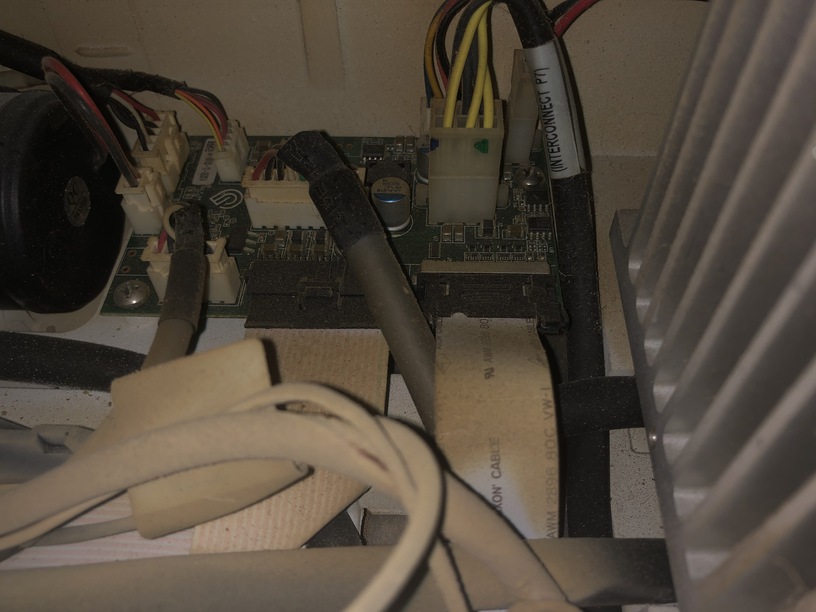
Reach over the laser arm, and to the left of the inside of the unit and you’ll see this circuit board:
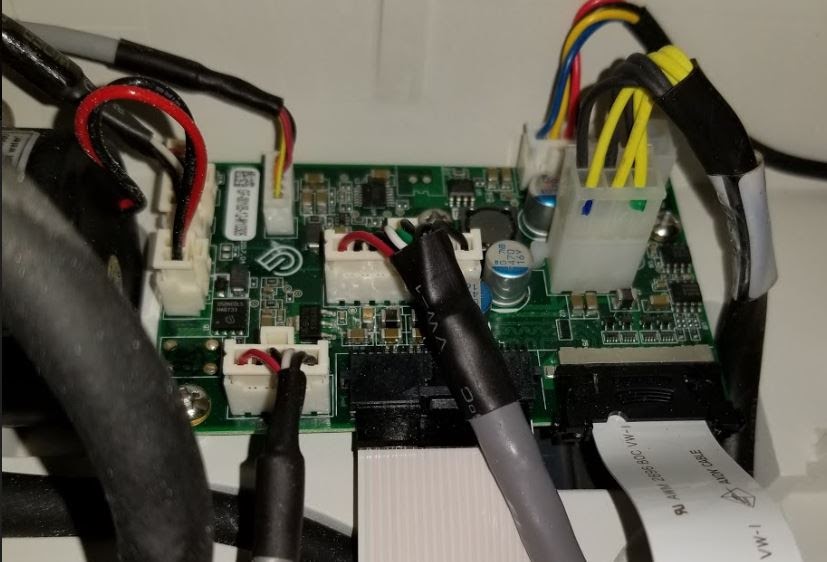
-
Take a photo of this board.
-
Turn your Glowforge back on.
-
Send us the photos you took in step 4 and step 9, we’ll take a look and follow up with the next steps.

Hello Pip,
I have also tried all of these tips, and moved the “Gift of good measure” to the middle of the material. The machine does make a few back and forth motions, but no “fire” is coming out of laser. Here is the breakdown of what I checked and did.
First thing to check and eliminate is Wifi issues.
(A dropped signal will commonly cause the screen to lock up, but it’s pretty easy to clear.)
- Turn off the machine. Turn off the computer. Unplug the router.
- Wait a couple minutes.
- Plug the router back in and let it fully start up.
- Turn on the computer and let it fully start up.
- Turn on the Glowforge and let it complete the startup calibration.
- Then open the app.glowforge.com and check the status for “Ready”.
- Try a print of the Gift of Good Measure on the sheet of draftboard that they sent with the machine for testing purposes, to see if it’s working again. (Or any small print that has a score, an engrave and a cut.)
- If it’s still locked up, wait a couple hours and try again. Your internet service provider might be having issues somewhere along the line. (No other way to tell if it’s a service provider issue.)
- Set up a WiFi hotspot on your phone and connect your Glowforge to it; this will rule out for sure whether it’s a WiFi issue.
Second thing to check for is visibility issues.
- Make sure the lid camera lens is clean. (Use a Zeiss wipe to clean it if needed.)
- Make sure the Glowforge logo on top of the head is clean and clearly visible.
- Make sure there is no glare on the machine from a sunny window or bright overhead light.
- Dark materials on the bed can prevent the laser from taking the Auto-focus reading. Use a light colored masking on dark or shiny materials.
Third thing to check is cable connections.
- Turn off the unit.
- Carefully remove the printer head by pulling gently up and back to disengage the magnets and remove it.
- Check the connection on the white ribbon cable in the laser arm. Make sure it is fully inserted into the printer head, until it has clicked into place and that the pins are in good shape.
- Check all of the ribbon cable connections in the lid. The connectors need to be fully closed.
- Turn off your unit.
- Open the lid.
- Using both hands, gently roll the laser arm to the front of the unit.
- There are 5 clips pictured below. Check each one to ensure it is closed. The clip should lie flat, and you shouldn’t be able to flip it in any direction. Check that the cable is not kinked or bent where it passes over the metal lip at the green arrow shown.
Thank you,
Teresa
Unfortunately, it looks like your unit is experiencing an issue that we can’t resolve remotely. I want you to have a reliable unit, so I’m recommending we replace this one. I’ll be in touch via email to sort out the details. I’m so sorry about the bad news.