I haven’t seen this in about a month, but it was a common failure mode. Between Friday night and Saturday I’ve done about 30 Snapmark operations without any problems, so my sum total of help is: it’s working and I’ve seen that before. Sorry I can’t be of more help.
yeah, i ran it a couple of times last night, no issues.
Thanks–wonder what was done to fix this “common failure mode”?
I even powered down/logged out & made a new template, and still nothing would happen after the Snapmark tried scanning… Grrr. Hoping powersthatbe reboot my setup for SM or something!
I seen the snapmark icon on the printer that was replaced. Could you please change it to Babychick2 and delete the other printer…
I’ve got an idea…
Incorrectly Assigned Snapmarks
@bonny …the Snapmarks testers selected below have had their Snapmarks assigned to the wrong printer due to having multiple accounts, returns or account changes.
User/Correct (Updated) Printer Name
@jamesdhatch / Tanstaafl
@michael_leonard / Glowie Laforge
@bwente / Luci
@carl_schenkenberger / Carvin (not a new machine, but account changed, so maybe a similar problem)
@danielleamorgan / Glowforge
@kennethclapp / Stormageddon II
@pubultrastar / Rogue One v.4
@PFI-Guy / Koptis
@mdcoley5 / Mina
jbpa / Serenity
I’ll make this a Wiki, so anyone who needs to add their name or the name of their machine can do it, and Bonny and the team can go to one place to find the problems to be fixed when they next do a batch. You guys go ahead and add your machine names to speed things up, and if I missed anyone, just go ahead and add your name and new machine name.
13 Likes
I started a new topic for it, but also mentioning here, I made a video.

10 Likes
I don’t remember doing anything to fix it when it happened. My memory isn’t what it was once upon a time.
You could always upload the file and someone may try to see if it works on their machine. If the engraves are proprietary, just delete from the file you upload.
1 Like
They’ll start trying to track it down when they see your post. (“Machine is unavailable” sounds like something they’ll need to take a look at.)
1 Like
Thanks! Will be away from my machine for a couple days, so hope it’s on their radar by the time I’m able to really do more tests!
Thanks–that’s a good idea–will be away until midweek, so hope by then have some other things to try, if not, will follow up on this test!
Silverware Basket Part Deux
Normally I won’t immediately show a rework of a project, but this one used the Snapmarks for a very different reason, and it’s got me so totally tickled I had to share.
I did a quick redesign of the project to get rid of a couple of the nasty bendy spots, and changed the basket to fit on a smaller sheet of acrylic.
One of the things that I wanted to test on the remaining bend spots was whether doing an engrave on the interior side of the bend would make it easier to get a tight bend on it, by taking out a little material there. (It does, but it also makes the remaining material tend to curl while it is being heated, so you have to put a little pressure to hold it down on either side while it heats.)
So the placement on the smaller sheet of acrylic for all the parts looked like this…very tight fit:
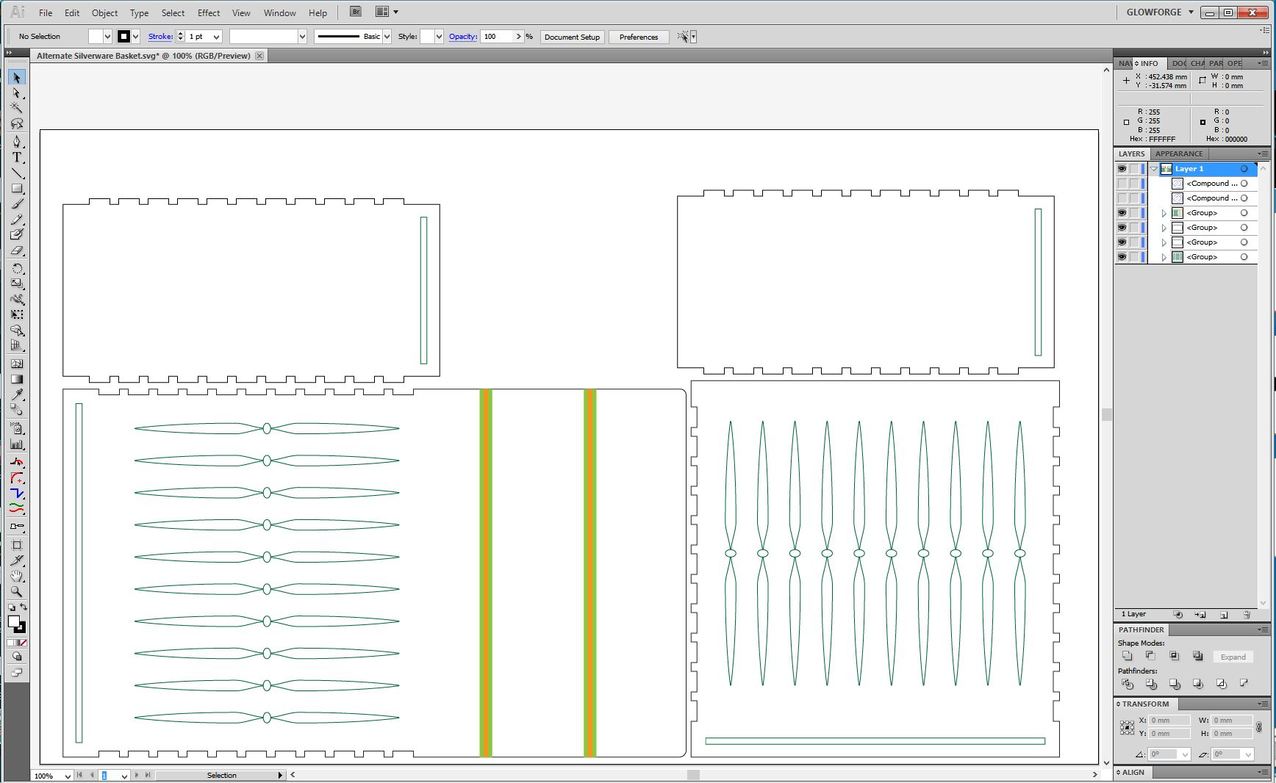
And given the orientation of the engraves, I didn’t want to process it that way. But I also didn’t want to have to break up the longest piece into parts…I could have, and it would have been easy enough to feed through the passthrough lengthwise, but those tolerances were really tight - I didn’t really have enough room to pop two sets of snapmarks in there and make sure that I would be able to cut everything out.
So I added a couple of snapmarks in there sideways. I knew they wouldn’t search and snap in that direction, but I could print them in that orientation:
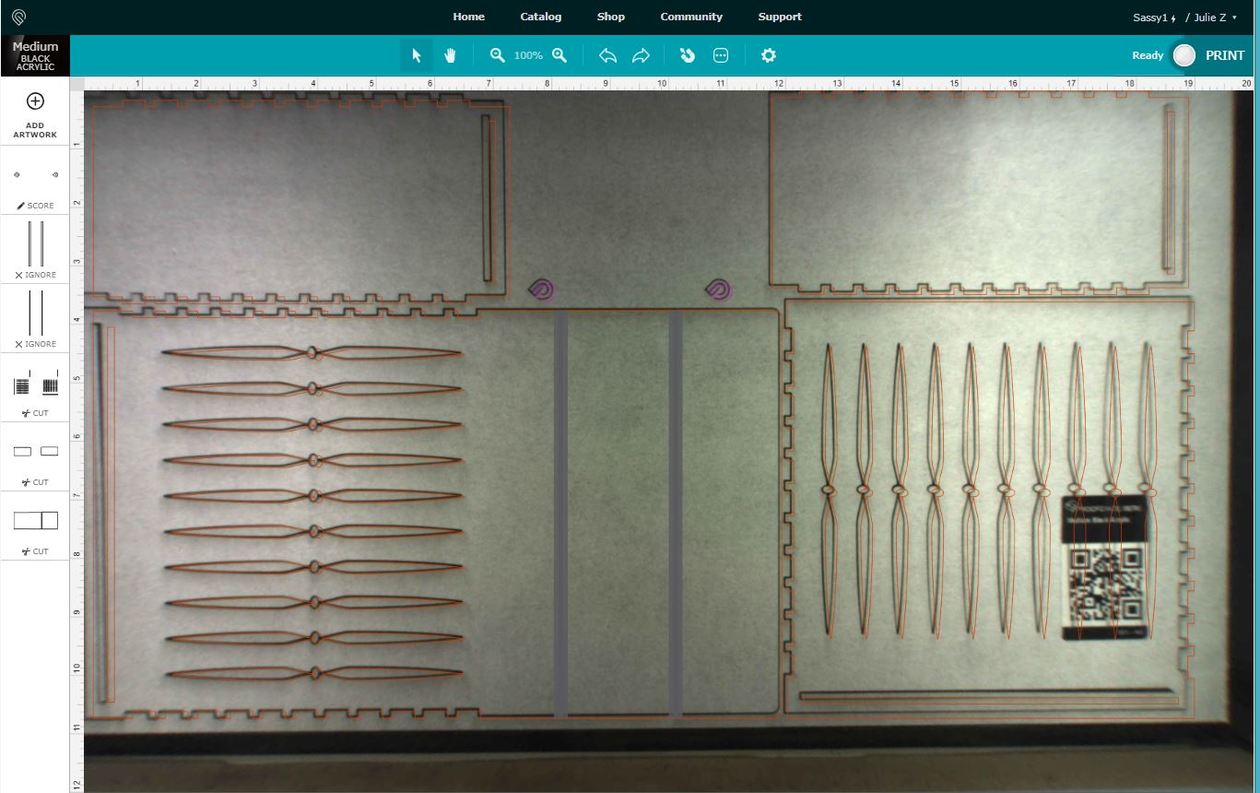
So I ignored the engraves and did all the Scoring and Cutting in the first pass.
Then I completely recopied the entire file into another file, rotated everything through 90° and saved that as a new file.
Then I loaded the new file, rotated the sheet and flipped the engraveable cut over, pinned it down, and let the new orientation snap to the marks.
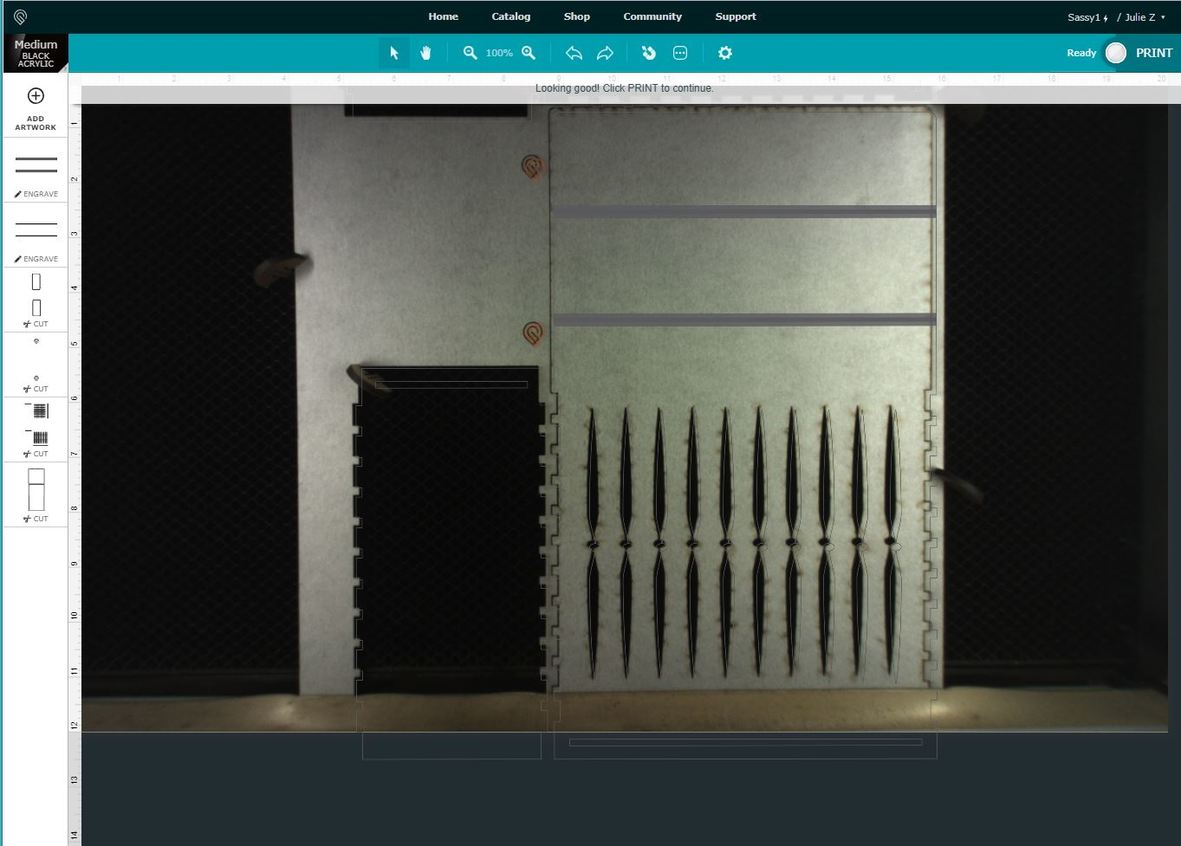
Which it did perfectly. 


The time savings by engraving those strips in a horizontal orientation over vertical:
5 minutes 9 seconds versus 1 hour 5 minutes.
I love this machine! 
And the second basket looks a lot sharper. 
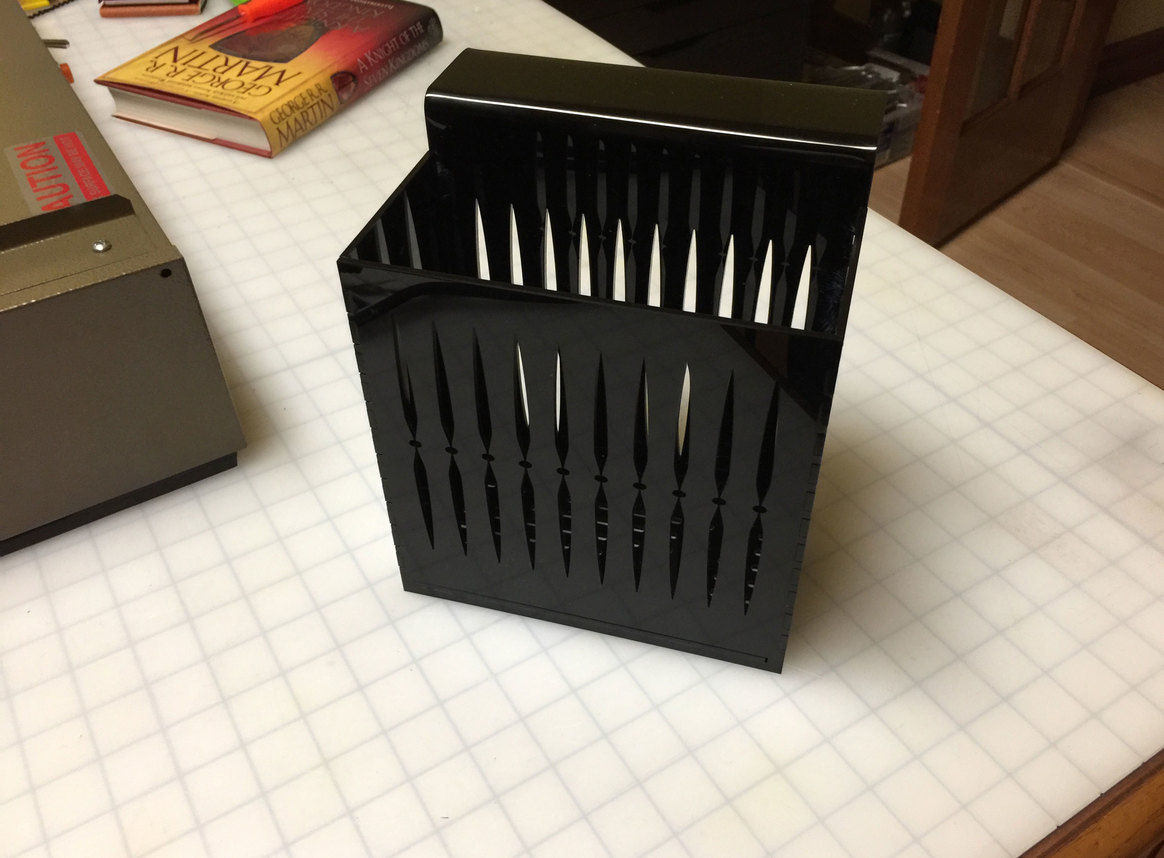
Happy, happy, happy!
23 Likes
In which Chris practices excellent layer hygiene. ![]()
9 Likes
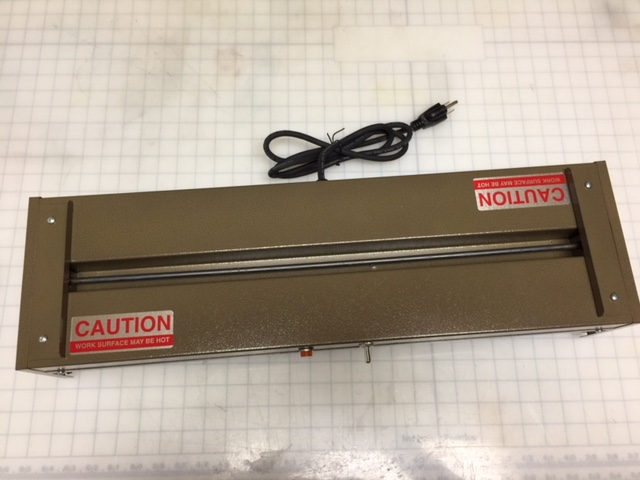
Brilliant use case! What are you using as a heat source? And it looks like George R. R. Martin got pressed into service.
2 Likes
Chuckle! Yeah George gets pressed into service for weighting down glued items while they are drying frequently! (Then I usually wind up re-reading the story.) 
I picked up a small strip heater from Johnson Plastics. (I actually prefer the little hand held one for bending, it’s quicker and more accurate, but it was too small for this…this one takes about 20 minutes to heat up.)
5 Likes
@dan This is a feature I need – I’m about to pull the trigger on the purchase of something else as I can’t get the registration I need. Any chance I could be added to the pool of beta users?
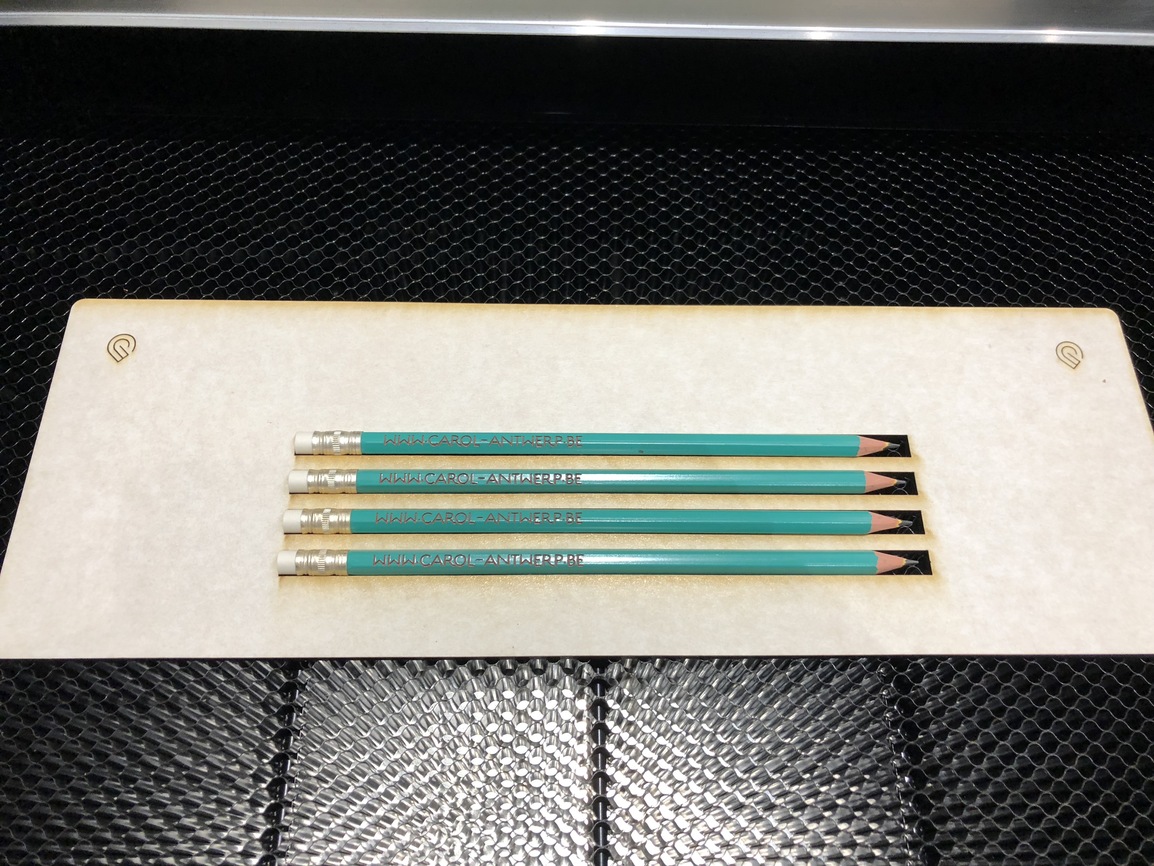
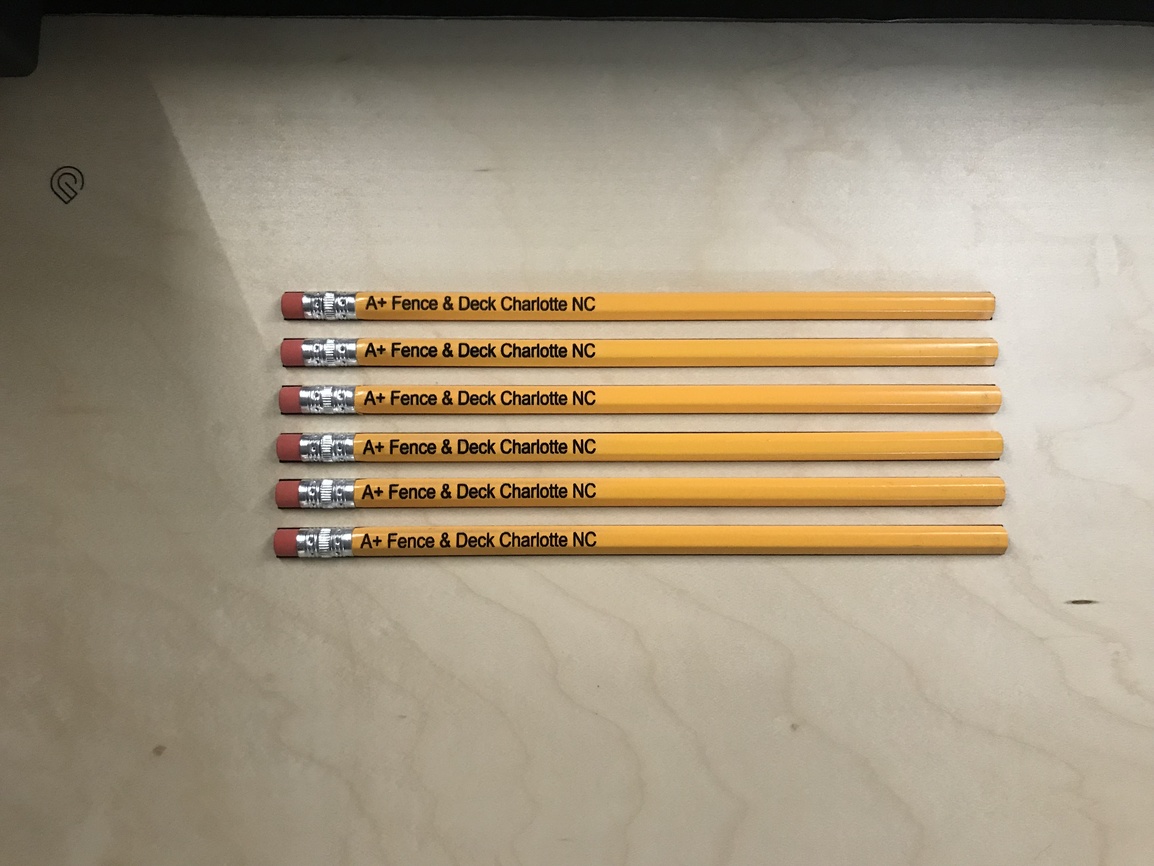
Here is my first print with the Snapmark and WOW what a success. This is going to be so helpful there’s not enough words to describe it…
Thank You GF Team
11 Likes
You have as good a chance as anyone else. The engineers are rolling it out for testing, based on some internal data that they have on the machines. 