I just want to invert a image to get the white areas black for engraving and all i get for help is go to edit menu and hit invert, theres no edit menu and the only menu that had a edit button was image and it only had black or white drawing tool but no invert option so i really have no odea what people are talking about and have been really unhelpful
I believe that people are suggesting you open the file in your graphics program and invert the colors. The Glowforge interface does not have an invert button. Depending on your image, you may be able to use the stamp button to accomplish what you desire, but without seeing your design it is hard to be of much assistance. Did you create your image in MagicCanvas?
4 Likes

i want to make the white areas black and black to white so i can do a resin fill and it seems everywhere I go I’m getting nowhere.
1 Like
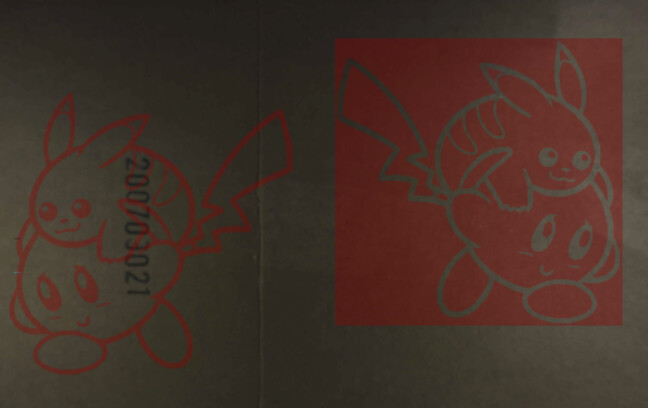
Is this really what you want?

I used a free online editor called Pixlr. But I suspect you had something different in mind from what you described.
2 Likes
Yeah similar, i have pixlr and i couldnt find the invert option and i would need to remove the background black part as well so that wouldnt be engraved
1 Like
what i want to do is engrave the entire picture except the black line because i use resin to fill in the engraved parts with color to make the full picture but if i cant do that then its time to move onto a different hobby then. it was fun while it lasted
1 Like
So first question is, do you want there to be a cut line around it as well?
If yes, do you have Premium?
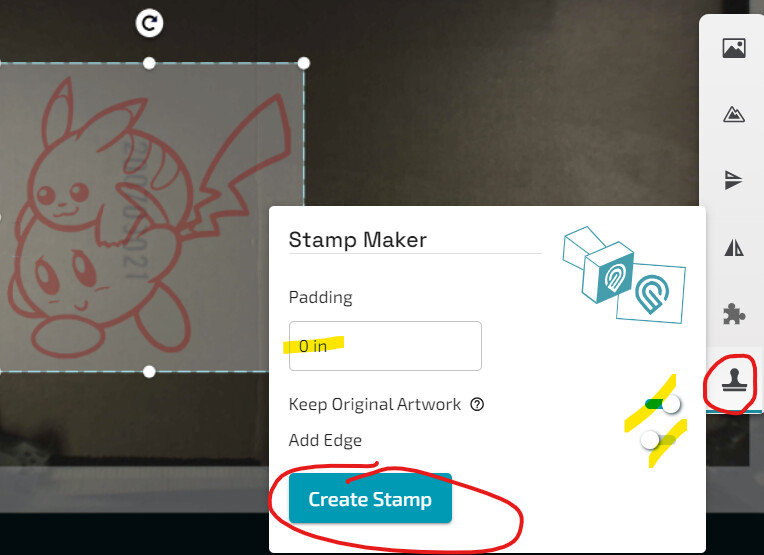
If yes, click on your image.
Click on the lowest command on the menu on the far right.
Change the padding to 0.
Click Keep Original Artwork
Unclick Add Edge
Click Create Stamp
Now you have two (they’ll be overlayed, move the new one off to the side.
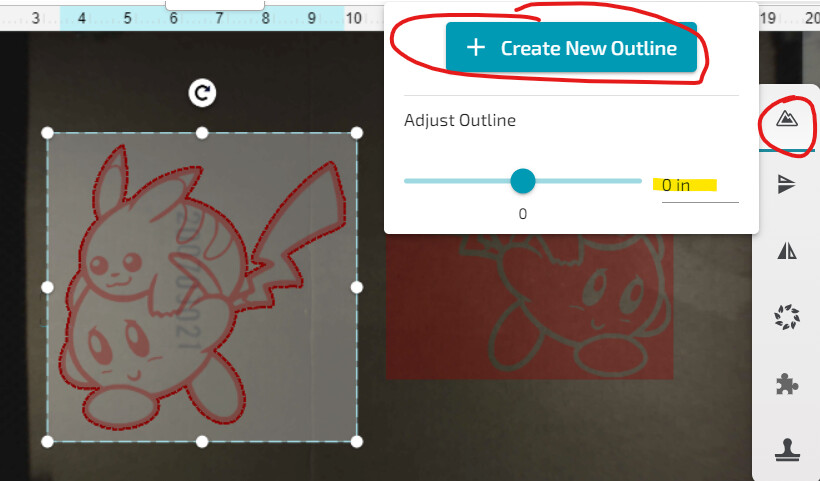
Now click your original again
Click the 2nd from the top on that same right menu
Click Create New Outline (for some reason you can’t adjust it until you’ve created the first one on this command).
Adjust the outline to 0
Now you have a perfect cutout of your original art.
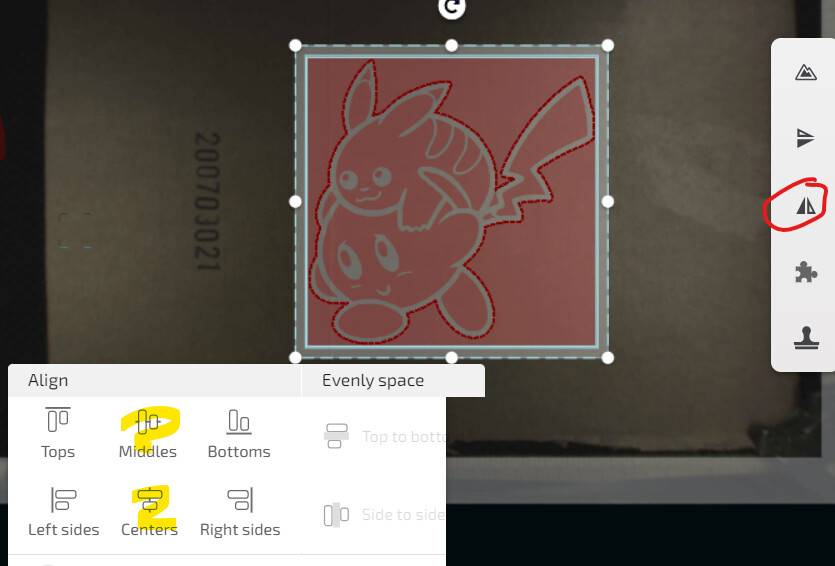
Now move your original off to the side
Using the flip command on the right, flip the stamp version.
Then with both the outline and the stamp selected, use the Align commands bottom left for both middles and centers. Now you have your reversed image ready to be engraved and cut out.
Or, if you don’t have Premium, let us know what graphics (vector) program you use and instructions for that will follow.
5 Likes
1 Like
That looks like you want both the interior and the outlines to be engraved, with just a tiny wall between them, but not the facial features?
If yes, that’s not doable in Premium, but fairly easily done in a graphics program. Which one do you use?
2 Likes
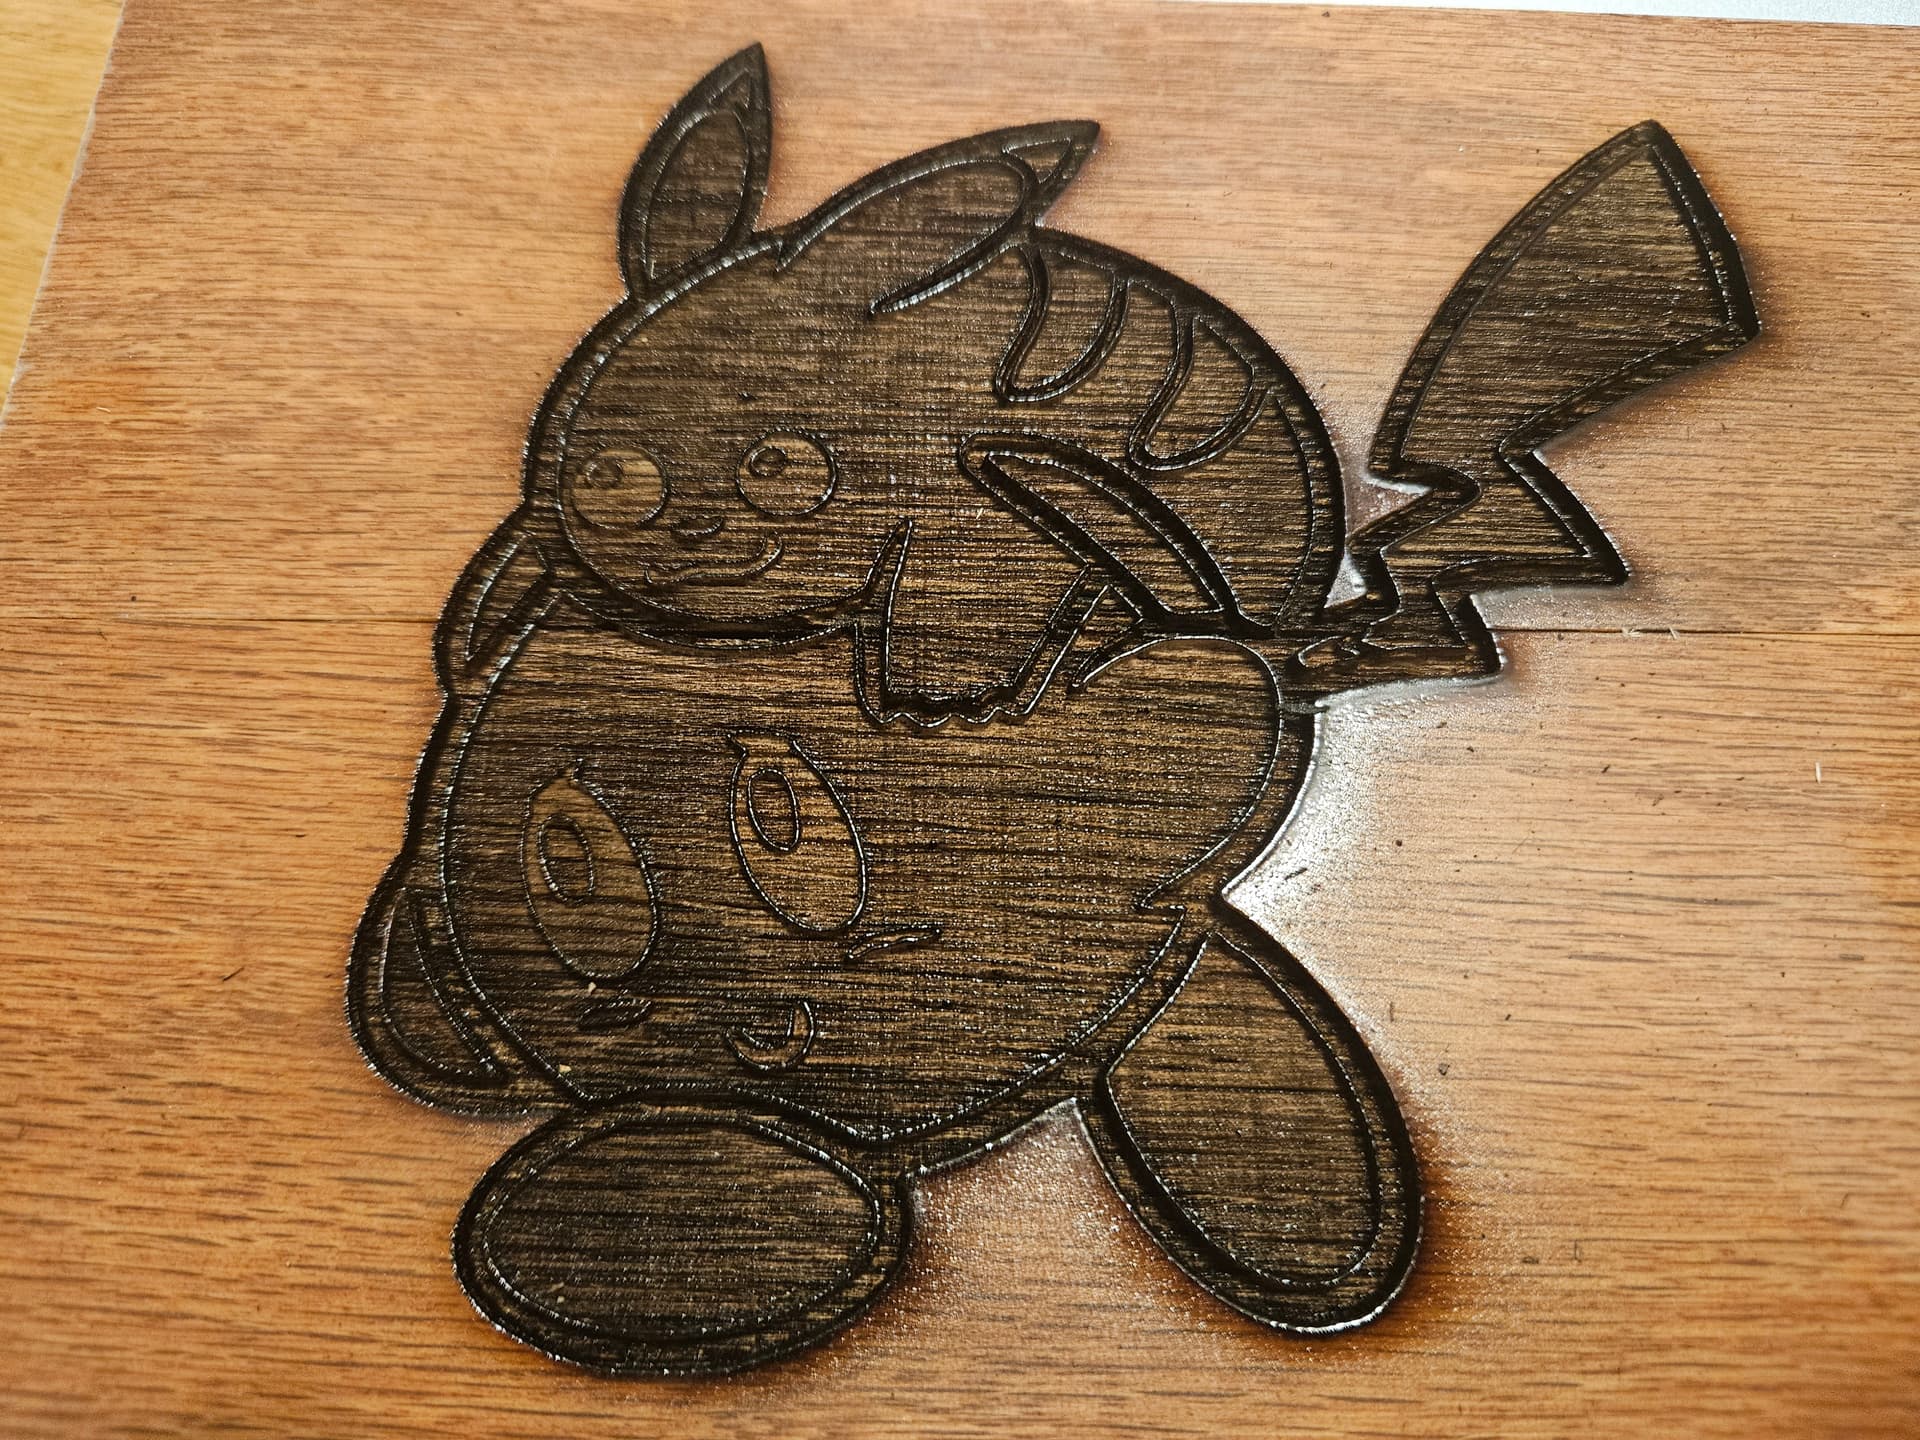
I was using inkscape i wanted the facial features i just missed doing them in this quick trial run, all the empty void engraved areas are to be filled in with colored epoxy resin. Obviously its going to be on better wood / masked / bigger image etc…
1 Like
Ok! In Inkscape.
Open your .png
Select the art
Click Path > Trace Bitmap
Click Apply
Drag the new vector off the bitmap
Select the new vector and click Path > Break Apart
(it will now look like a solid block of black)
Change the fill to nothing, and the stroke to black and it will look vaguely like your original art
Now change your stroke width to something larger than .007" (I’d start with .014")
Change the fill to black and the stroke to white.
Select the piece that outlines everything and turn its fill to nothing, and its stroke to red.
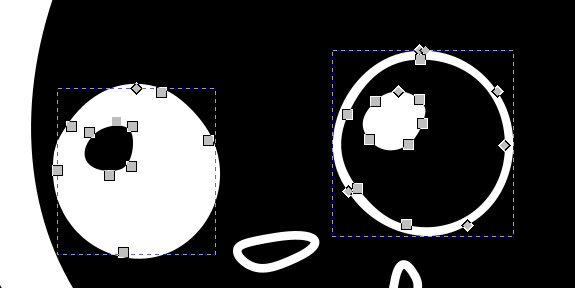
Now the complicated part starts - you need to grab each item and use Path > exclusion to remove the part you do not want to engrave. In the image below I started that process in the 5th image, and in the 6th I’ve done it all. It’ll take a bit to get used to how it works, but once you wrap your mind around it, it’s quite easy.

This would also be the time you decide exactly what you want to be able to fill, and what you want as walls. If you want the eyes to engrave, do you want the pupils not to? If yes, you’ll need to add an extra line around them so you can have a wall, etc.
If you zoom in close on the very last image you’ll see one eye is positive, and the other negative. The negative one I copied the outline of the eye, made it a bit larger, then Path > Combined those two lines, and lastly excluded the pupil from them.
5 Likes
Preferably want the outline to not be engraved but if it has to be that way then i can deal with it
1 Like
I don’t know what you mean by that - if there’s no wall to keep your resin in, it’ll just fall out the sides.
In either case, you now have access and knowledge about all the tools you need to make this go.
2 Likes
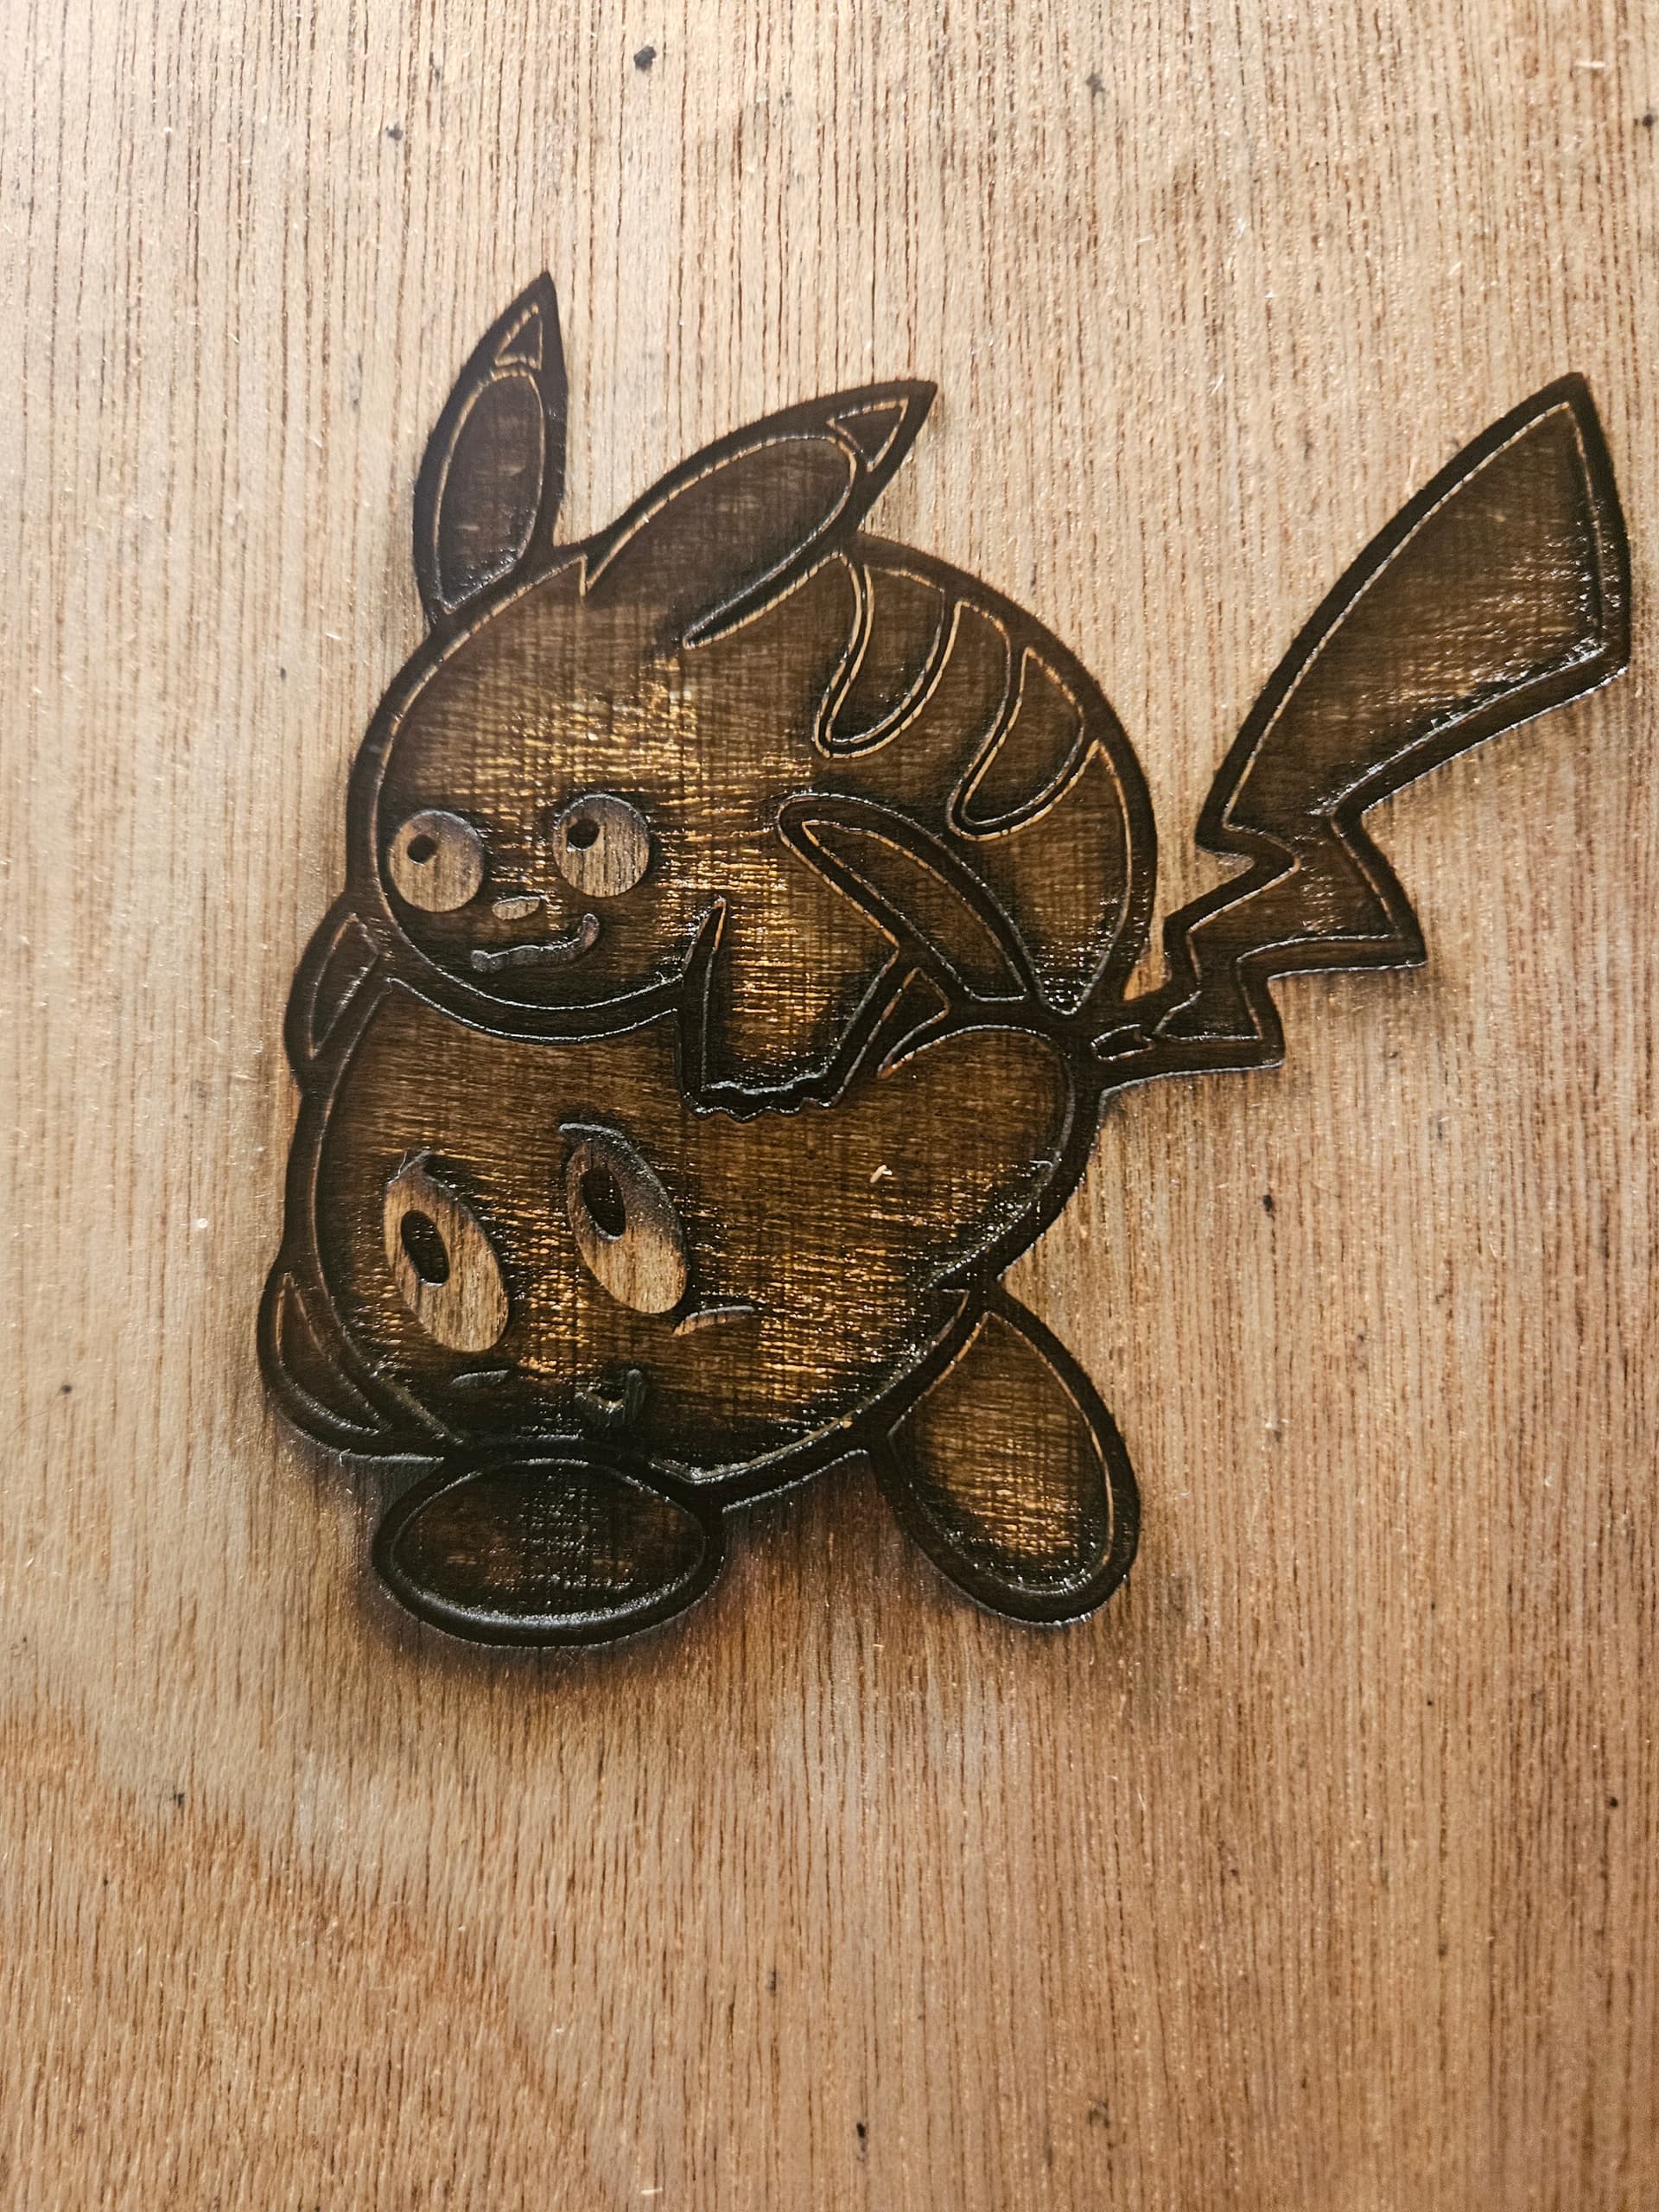
Look at the burnt wood image see how the main seperating line is engraved as well leaving 2 thin lines id preder that to be solid
But if i cant i can deal with 2 thin lines by adding a small bit of black resin wont be an issue
Gotcha. You can change the width of your lines by either shrinking the exterior line, or enlarging the interior lines, or both!
The thinner they are in step one, the thinner they will be at the end!
2 Likes
Hey man thanks alot for all the info and help was able to do 2 quick and dirty trials and they came out about 95% the way i wanted, just need a bit more tweaking and some skill learnong on onkscape and i tho k ill be where i want to be

6 Likes
This topic was automatically closed after 30 days. New replies are no longer allowed.