I know the subject of kerf has been covered many times over, but I’ve hit a snag that I can’t riddle through myself.
So riddle me this, if you will, when adjusting for kerf in a design with concentric shapes which pierces do you adjust? Every other piece?
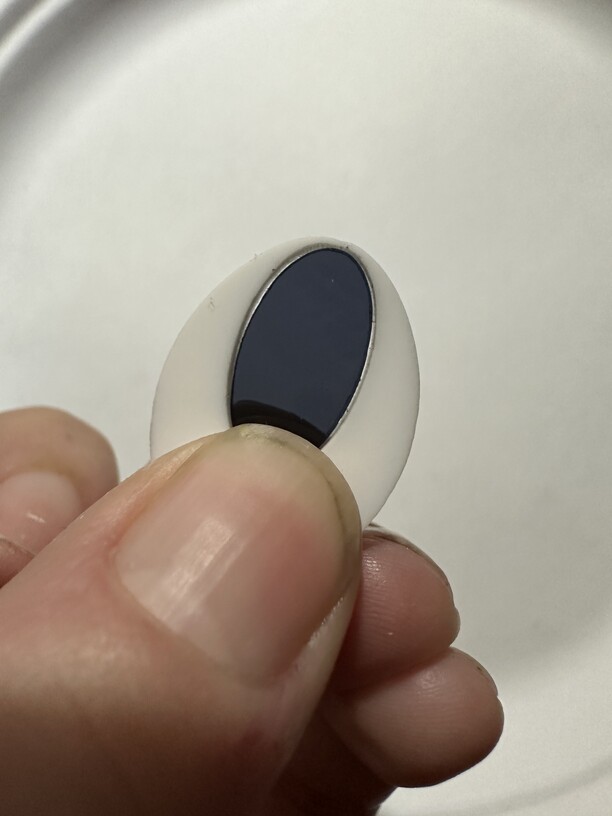
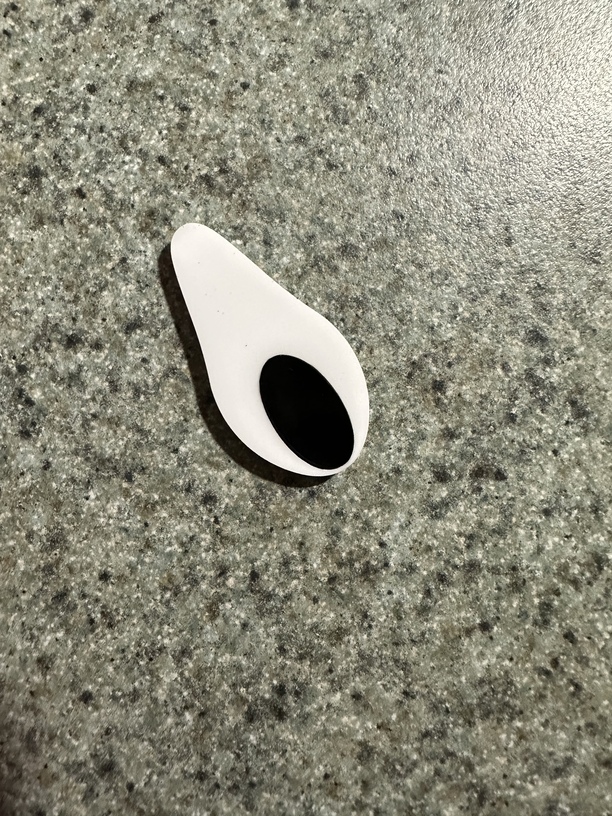
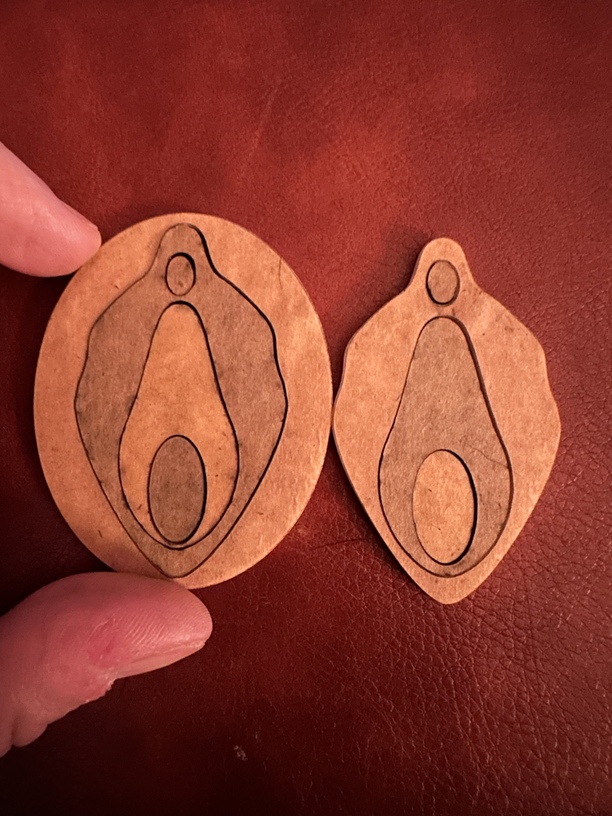
I’ve attached a photo of an avocado-like shaped piece at the center of one of my designs. You can see a gap between the two pieces. The middle piece was not adjusted but the outer piece was. (This was accomplished by adjusting the stroke width of the shape in adobe illustrator for ipad)
If anyone has any insight please help me.
Really going crazy and burning through a bunch of acrylic here.
The laser cuts material on a slight angle so if you put the pieces together with the same sides up it will look like the top example. If you flip the middle piece upside down then you will get a tighter fit. That may still not be to your liking but it will be better and then it’s a matter of playing with kerf to dial it in as tight as you want.
A tricky business to do on an I-pad. If you set the line thickness to the kerf distance and turn it into two lines on the edge of that line (different programs do that differently) then you use the inner line to cut the outer piece and the outer line to cut the inner piece the result should be pretty well set.
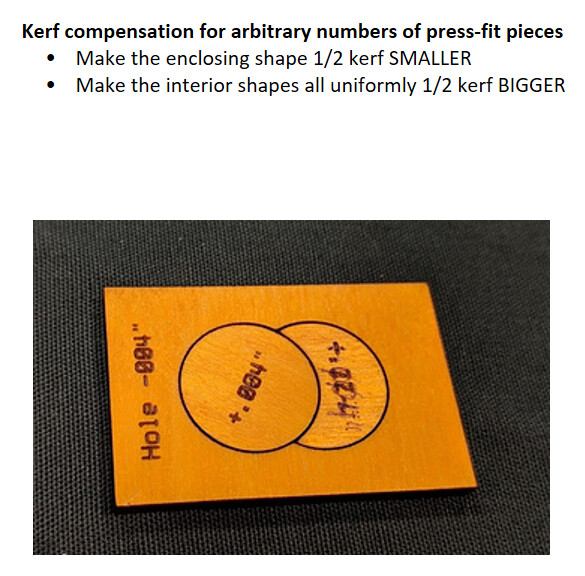
Figure out the correct total kerf compensation, e.g. 0.007". Apply half of that to every cut.
For example, in your piece above, the black inner piece should be cut .0035" bigger (making a bigger part) and the inside cut of the white piece should also be 0.0035" smaller (making smaller hole).
This should work with multiple pieces. Here’s a test I did.
You will definitely need a program like Illustrator or Affinity Designer which lets you do an offset path.
You can get really nice results.
Edit to add:
I should point out that if you are doing only one inset piece, you can certainly compensate the cut for the inner OR outer piece ONLY. That does save a few clicks. That is usually how I do it, in truth.
I’m not familiar with that particular program or what other steps you might have taken, but typically stroke width has no effect at all on a cut operation.
Hello all,
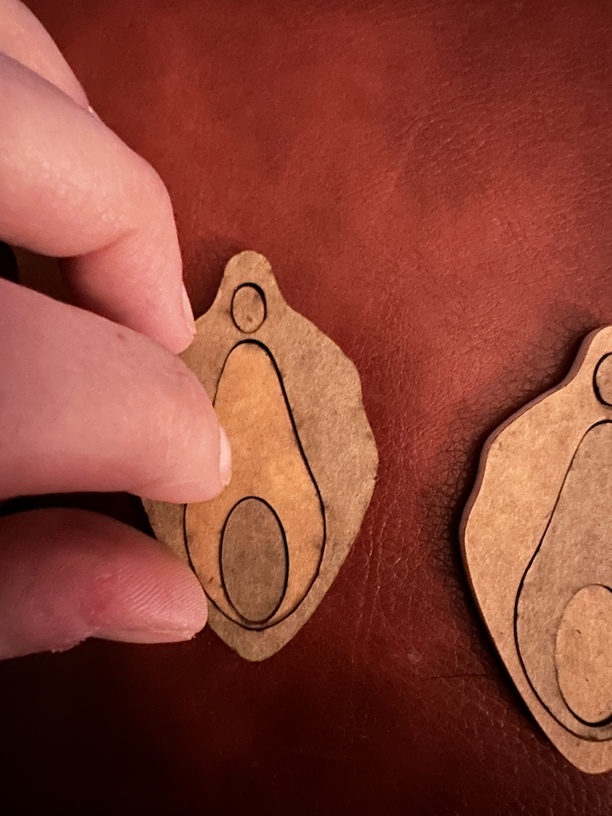
Thank you so much for all of the help. I promise I’m smarter than this is going to sound—for my next trial run I have set the middle oval at normal size, and added kerf adjustment to the piece that surrounds it. That second piece fits inside of a third, which for which I did not add the adjustment. This is so simple but is really kicking my … rear. Will post an update.
Thanks again!
So I’ll show you what I’ve done… added .025 to every OTHER piece, even offsetting them by making two versions, so to speak, out of the negative space. They do not fit tightly.
This is so frustrating.
Generally you have to kerf adjust ALL the pieces for an accurate, not every other.
Is that .025 in inches or mm and did you measure your actual kerf?
Every material/machine/settings combo is slightly different but that kerf amount seems large. My usual kerf for 3mm plywood is .004" and a bit less for acrylic.
This. Each nested piece needs to compensate for those around it. You can ake some small test pieces - nested circles and/or squares - to figure out settings, and what works best between regular inlay, or “alternately flipped” for a really snug fit.
I have made several pieces with multiple nested parts, some held together with a snug fit. In a couple of instances, touching parts could not all be alternated as they weren’t fully surrounded, but rather met with multiple other pieces that were already alternating.