King Snake Pen

Long post but these seem to get lots of likes and discussion. If you hate these, starve them of likes and comments and I’ll shorten them down.

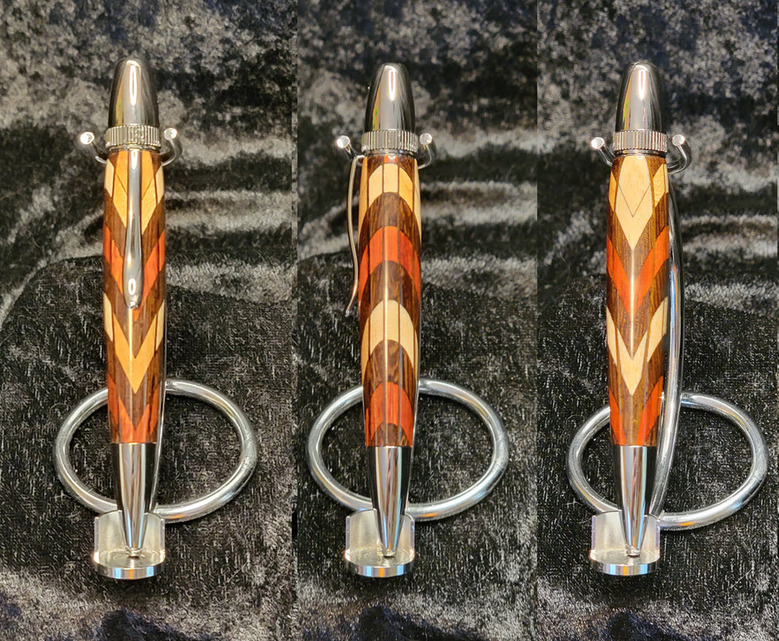
Photo shows front/side/back view of my latest pen which is inspired by the Scarlet King Snake, indigenous in Florida where I grew up.

When laminating paduk (the orange-red wood above) it has a tendency to bleed into lighter woods. To minimize that I wanted to layer the paduk into something darker but keep some lighter colors in the mix. When I started laying out the parts, King Snake came to mind and it stuck.

The other design element inspired by the king snake was to use a mix of woods for the “yellow” bands. They are mostly maple but there are a few cherry and oak scattered in there more or less randomly.

So, what’s the Glowforge part? Cutting all those small laminations, of course! I made several 1"x6" blanks and cut them out inside of larger frames that will hold them for sanding.

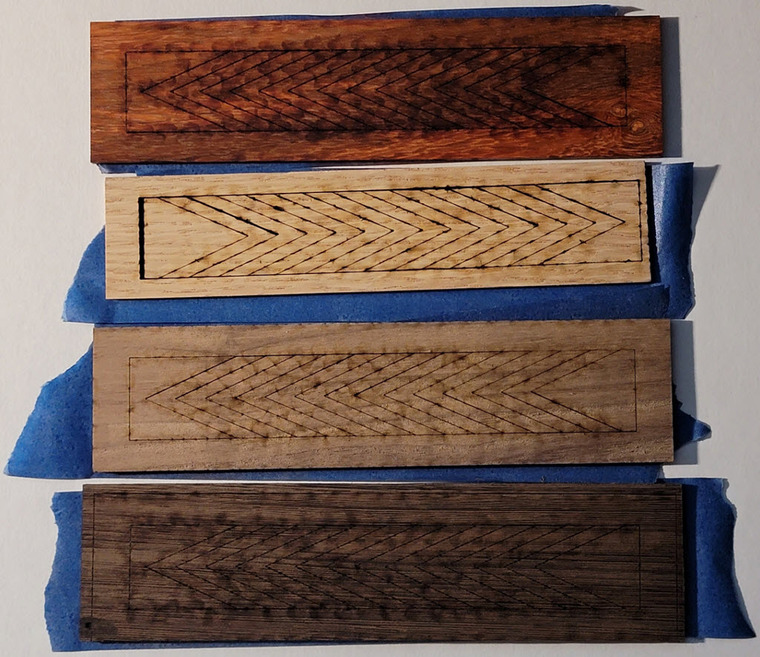
This is another one of those cases where glued butt joints need to be mostly in-register. The face-glued joints will be much stronger, making the segment joints the weakest link.

No worries. Glowforge and a couple small sheets of veneer to the rescue. And the honeycomb hold-down pins. Those are invaluable.

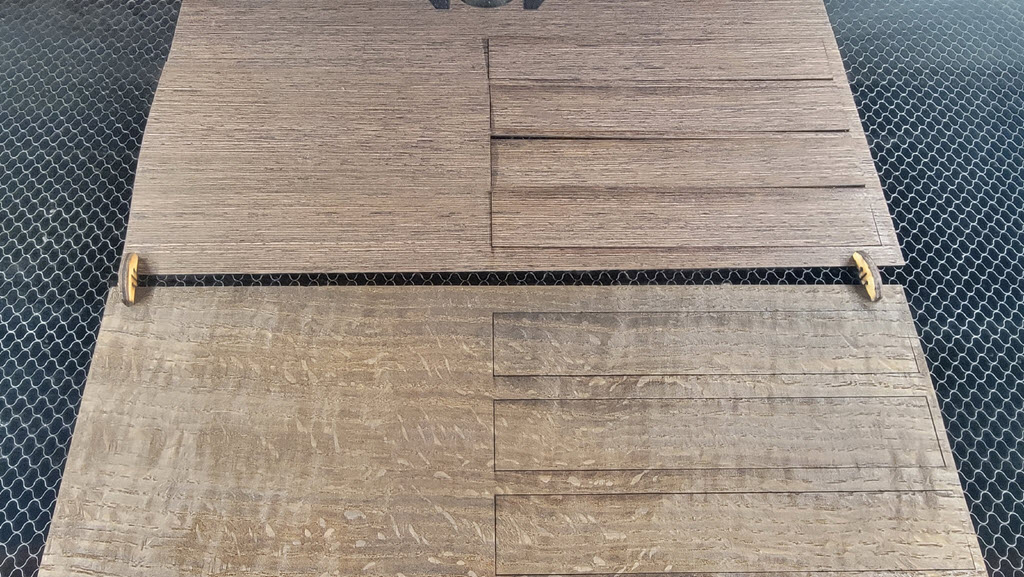
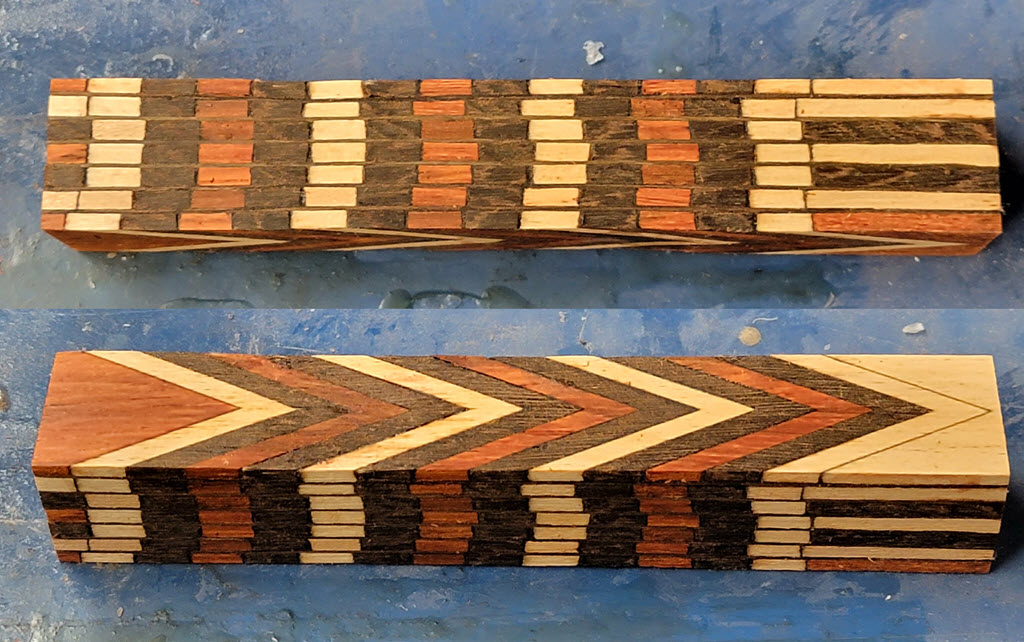
Here are the parts in dry-fit. The tops will be discarded once the blank is cut to length, but I thought the bottom sections might end up in the so I made sure there were a couple of each color. I went back and made two more with wenge bottoms after this was shot.

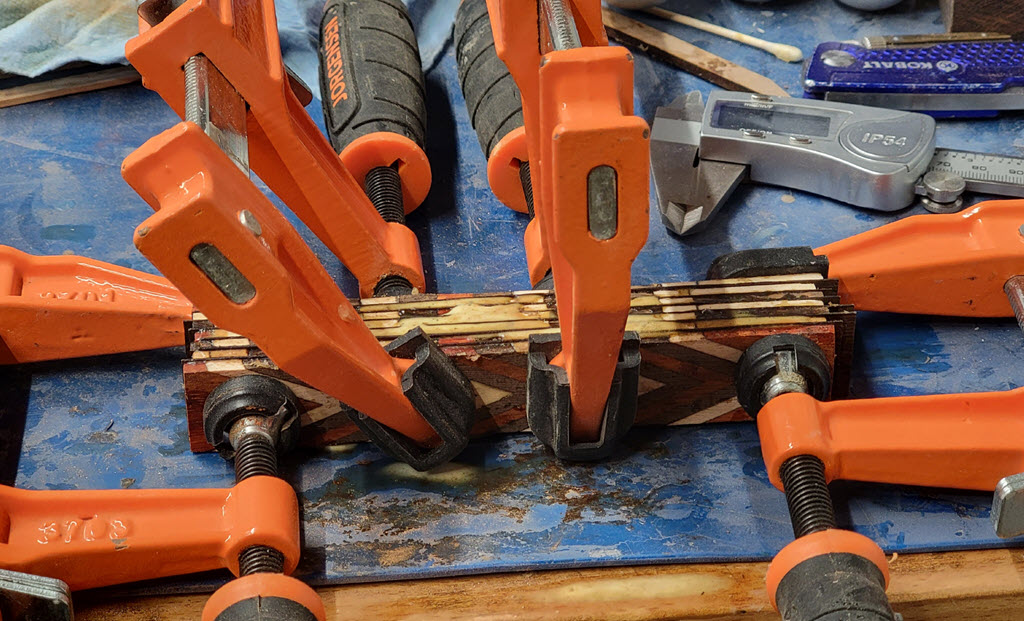
I used CA glue with activator, and glued these up by hand. No need to mask these for cutting because the flash marks come out when sanding the glue off the layers. The frames I made had too much play in them to use during gluing but they sure did help hold the layers together for sanding. The stack at top are glued and sanded layers.

You know what they say - if there’s room for another clamp, you haven’t used enough clamps. In this case if I’d thought about it, I would have used clamps vertically on the ends to help keep the layers in register. Luckily I snuck by this time and the layers stayed close to true register.

Note the layers of veneer between the pattern layers. These provide structural stability with a face-glue joint that spans the stacked butt glue joints. As a design element, it provides some boundary lines to make the layers more resemble snake scales.

Glued blank after clean-up. The registration is imperfect. Some of that is by design (snake feature emulation again) and some of that is inevitable. After stacking 14 glue joints in each layer, the layers themselves are not all the same length. This is evident in the top two layers which are closely aligned on the left but are off by about 3/32" on the right.

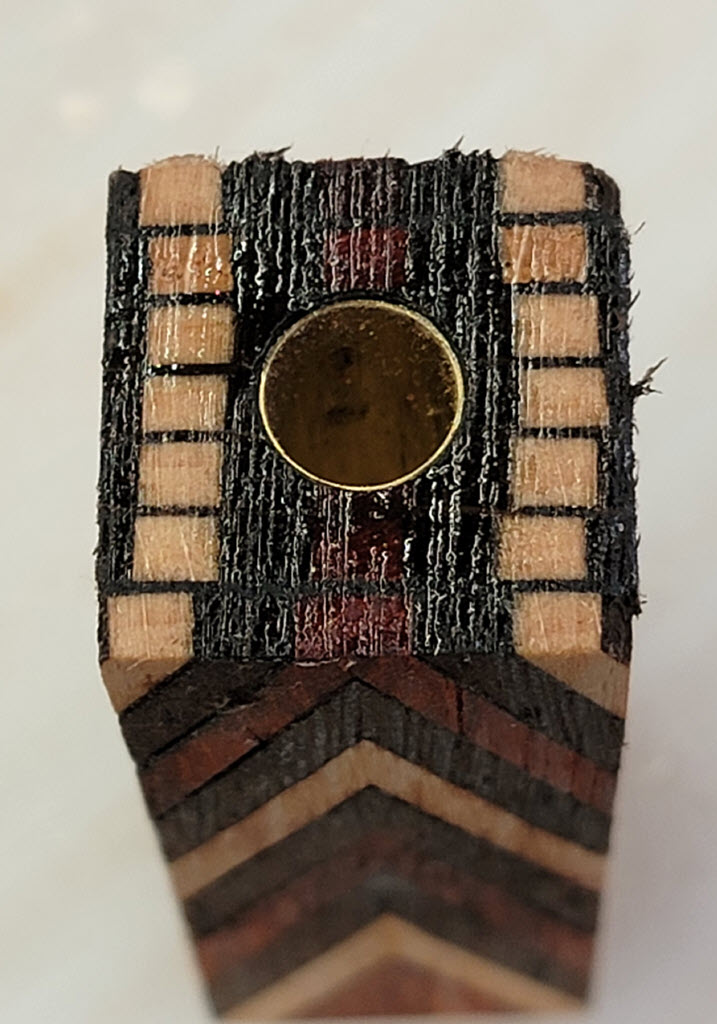
After drilling and epoxying the barrel tube it looks like I got the hole just a tad shifted to the left. I’m claiming intentional mimicry of natural snake asymmetry on this one. As predicted, most of the bottom of the blank was kept. I arranged it to keep as many of the red bands as possible.

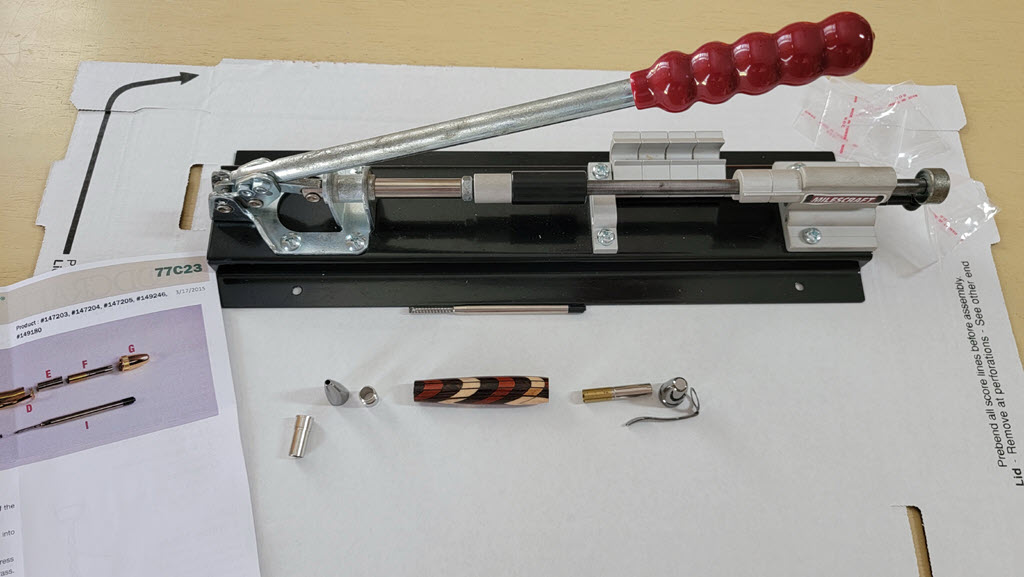
After turning and finishing, the last step is to assemble the pen. Mostly this entails pressing compression fittings into the completed pen tube. Many people use their lathe or a vise as a press. This specialty tool lets me press the pen together in a cleaner space. An air-conditioned space. Sitting down. With optional alcoholic beverage now that no power tools are involved.

Finally, since this project was snake-inspired here are some identification tips.

  • Coral Snake - Dangerous. Red bands between yellow bands.
  • King Snake - Benign. Red bands between black bands.
  • Choral Snake - Dangerous. That creepy guy in the choir who constantly hits on all the women. Wedding band removed but tell-tale tan-line is often visible.
57 Likes

First off, Happy Cake Day.

Thank you for the detailed write up and photos. It is really helpful to see what goes into making something this spectacular. The pens are beautiful.

7 Likes

Red on yellow!
Glad there are no snakes here. :scream:
This is beautiful, thank you for sharing!

5 Likes

Beautiful!!

2 Likes

So cool. Thank you for the write up.

3 Likes

Was my thinking, but needs to be in a different sort of pen :grin:

6 Likes

my father in law turns pens as his retirement business. you’re inspiring me to realize i need to make him a blank or three.

7 Likes

Those turned out beautifully! I am so with you on clamps. Every clamp is a best friend who will come over and hold things together for as long as you like, without a single complaint, but a clamp will never drink all your beer. :grin:

5 Likes

Happy cake day!!! Such a beautiful turn out!

2 Likes

Young Floridians are taught “red touch black, okay for Jack; red touch yellow, kill a fellow”

7 Likes

Gorgeous! My poor lathe is being so neglected right now…but I’m saving up all these ideas for when I have time for it again!

4 Likes

Several people mentioned this and I didn’t know it was a thing until today. I try to learn something new every day. I thought today was going to be a bust but with this I snuck in under the wire. Woo hoo! Thanks, everyone!

Enjoy your rodents, then. :wink: Actually, I’d put up with a few more rodents to live in Hawaii. Hmmm…now that I think about it, the only two US states I haven’t been in are the only two with no indigenous snakes. Now I’m wondering if the snakes conspired to keep me in their territory and now I’m making tributes to them. Oh, this is going to be nightmare material tonight.

You’re welcome! I was on the fence about posting so many pix but these do tend to get good feedback so if anyone complains about the next one I’m pointing them at your reply. :innocent:

Cool! I’m not expert but I think it qualifies as “Made on a Glowforge” if you make the blank and he turns the pen. Please post a pic or two if you and he do this. Be sure to use the “woodturning” tag!

Good point. I had not thought of that! And good thing too because I have close to 100 clamps of different sizes and varieties. This hobby is expensive enough without having to maintain a beer budget for a crowd of that size.

The first part of that tends to vary. Version I learned was “pat him on the back”. The second part is always the same though. Thing is, I always rooted for the Coral snakes. No fangs so they have to work harder than the other venomous snakes. Hardly ever saw them in the wild but was happy to just chat a while and go our separate ways.

Problems of being a generalist. Gotta time-slice all your varied interests. I’m confident that you’ll rotate back to it eventually. Maybe even incorporate the :glowforge: in the work and post a pic or two. When that day comes, be sure to use the new woodturning tag.

6 Likes

I see what you did there! :wink:

3 Likes

i definitely will. i’m thinking it’s a father’s day gift, so i have a little time to deal with it.

3 Likes

A good place to use these (at the very bottom) they now include wood up to an inch thick which is a deal killer for me but I have purchased it when it went to a half-inch. The one-inch thick stuff can be just cut to one inch wide and used directly.

2 Likes

i have tons of ends from buying 24" boards. many from ocooch.

4 Likes

I have a great excess of 3" wide boards also. Then there is this from Green Valley perhaps better for those starting up.

2 Likes

We are going to hold you to it. :smiling_face_with_three_hearts:

2 Likes

Love your work! It’s so fascinating–thanks for the pix and the writeup.

1 Like

These are gorgeous, thanks for sharing do you visualize what the finished turned piece will look like as you’re assembling the layers?

Yeah keep away from this type!

2 Likes