And even with copious amounts of allergy medicine, I can’t finish the joke.
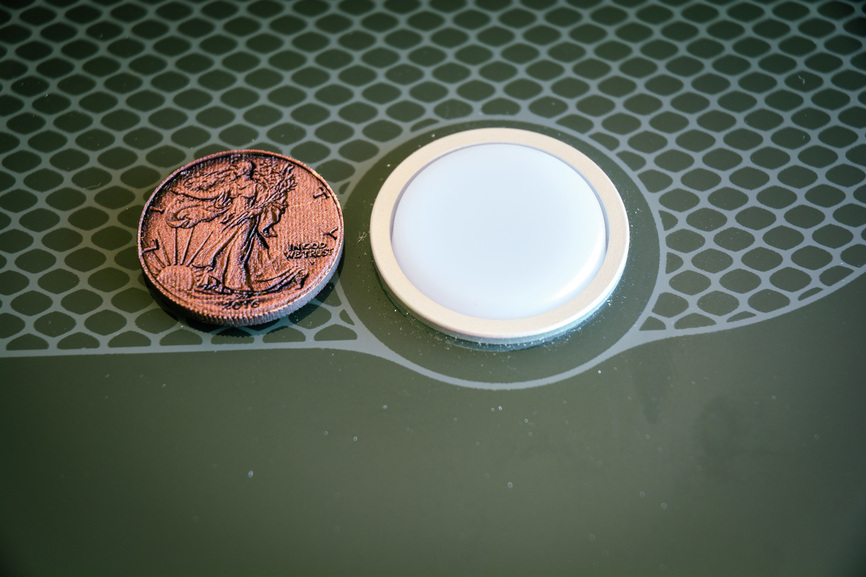
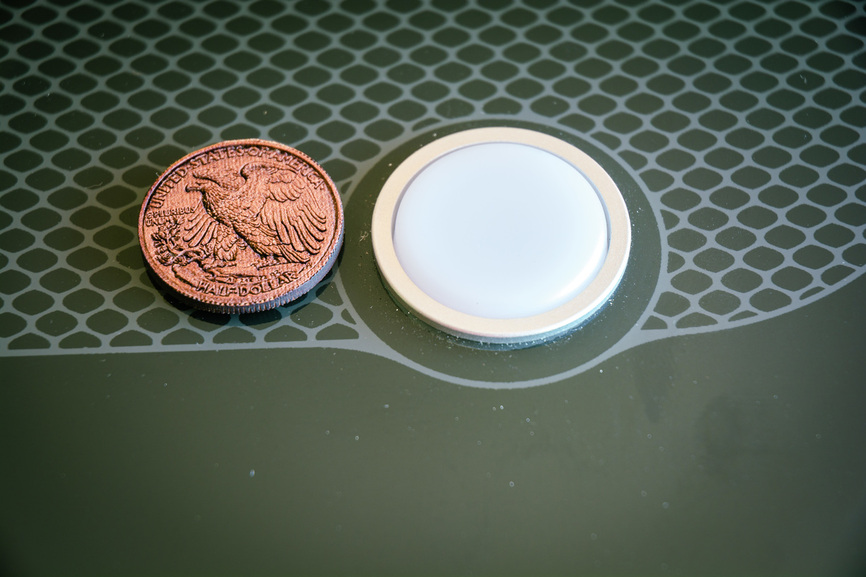
But the results are no joke. Everyone has been playing with the 3d engrave, except me. I found a high-res image of a 2016 American Eagle coin, quickly made a pseudo bump map of it in Photoshop and sent it to the Glowforge.
Shh - not intentionally. I did engrave them though - and with a double sided engrave they basically make it look like I cut the ridges. Pretty cool, huh?
So how did you accomplish this seemingly-perfect double-sided engrave?
Pop it out and then put it back into its hole upside down? And then… what… had both sides on top of each other and turned one off and the other on for the 2nd?
@Tom_A a more precise way (meaning less risk of rotating the coin when flipping it) but also slightly more wasteful way would be to wait to cut the coin out after engraving side 2. For side 1, add a rectangular cut around the first side, then flip this rectangular cutout, engrave side 2, then cut the coin out.
Key to this is to have it all in the same svg as different colors so you can ignore the side 2 stuff (engrave and coin cutout) while engraving and cutting side 1.
I don’t recall exact times. The front was about 6 minutes? I pretty much suck at logging my cuts - and they were different times because I did the front and back at different LPI’s (350 on the front and 675 on the back). If I had chosen to do the same LPI for front and back, they would have come out, I imagine, within seconds of one another - as the overall motion plan of the engrave was basically the exact same.


 - and they were different times because I did the front and back at different LPI’s (350 on the front and 675 on the back). If I had chosen to do the same LPI for front and back, they would have come out, I imagine, within seconds of one another - as the overall motion plan of the engrave was basically the exact same.