I wanted to create a hanging sign for our new office.
Some of the requirements I wanted were
Letters to be at least 50mm thick
Large enough to be legible from a distance
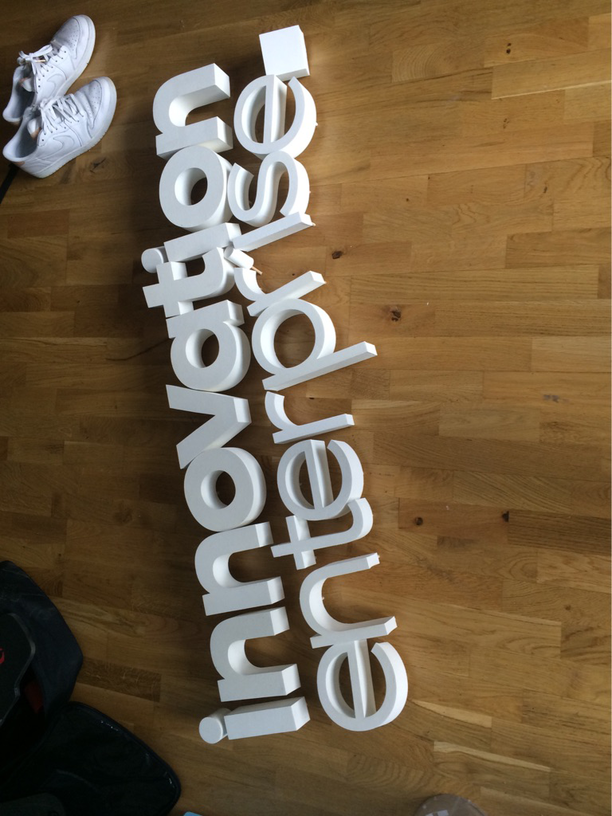
painted white with a smooth finish
Letters must be replaceable, If one gets damaged i want to be able to easily replace it
Initial ideas
Simply Stacked
The obvious route would have been to stack layers of cutout letters but the plywood is 3mm thick so would have been around 16 layers thick to reach 50mm, also there being twenty letters would mean that there would be around three hundred and twenty letters cut out, so would be unnecessarily expensive and also pretty heavy if it fell on someone.
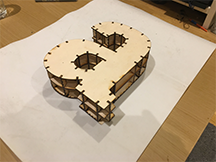
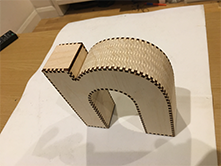
Struts
This method uses less material than stacked. It works by using three cut outs of each letter then joining them with struts
but only builds the frame of the letter and would need covering with somthing!
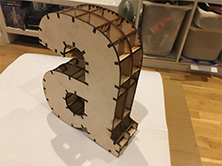
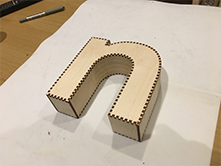
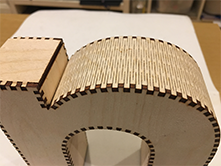
Kerf cuts & finger joints
Kerf cuts for any of the curved parts of the letter, and finger joints to hold it together.
I wanted the finger joints to run along the kerfed edge as well, but it is a little complicated to do.
I found a page that instructed how to do this on instructables
I liked the finish but wasnt really suitable for this project and when i tried to hide the kerf edge with filler it just ended up in a mess
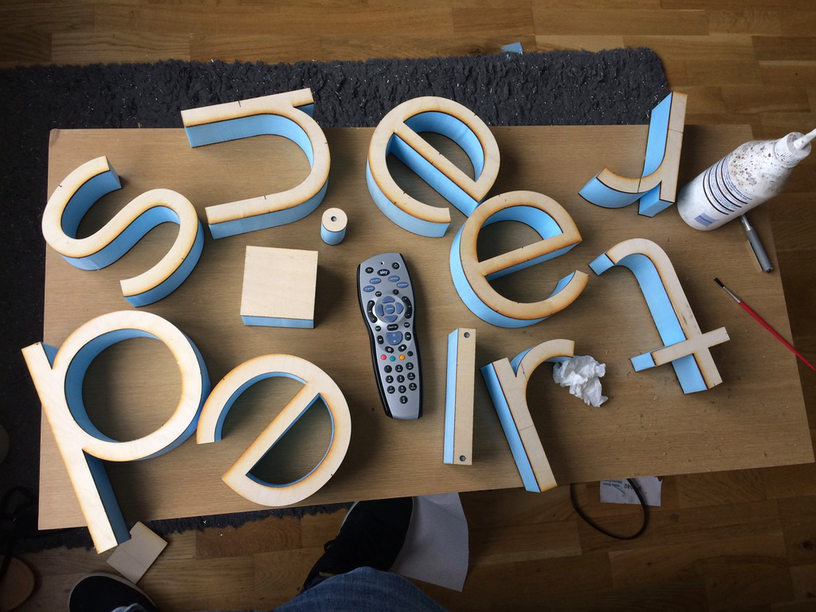
Foam Sandwich
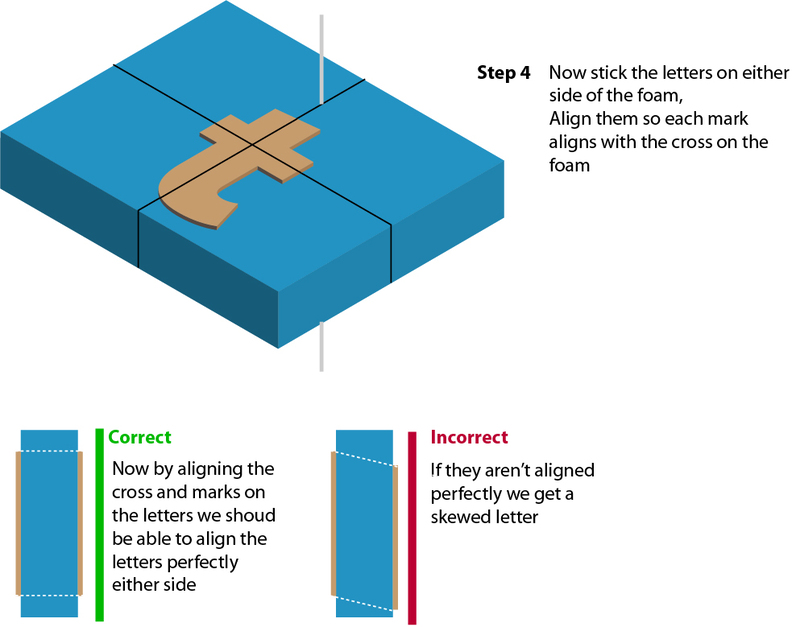
so cutting a front and rear template of each letter then sandwiching it between some blue modelling foam then used a hot wire to cut through it.
It took a little while to perfect the hot wire cutting around the template but once i got the hang of it it came out well
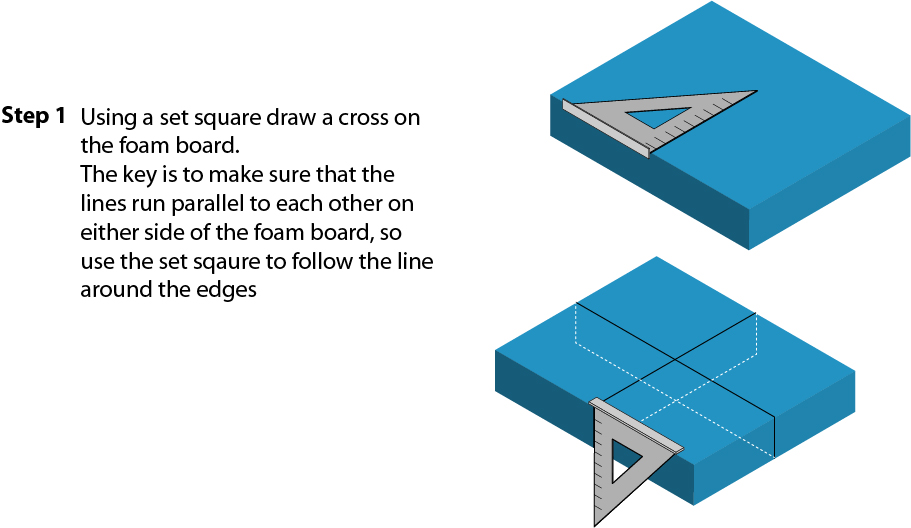
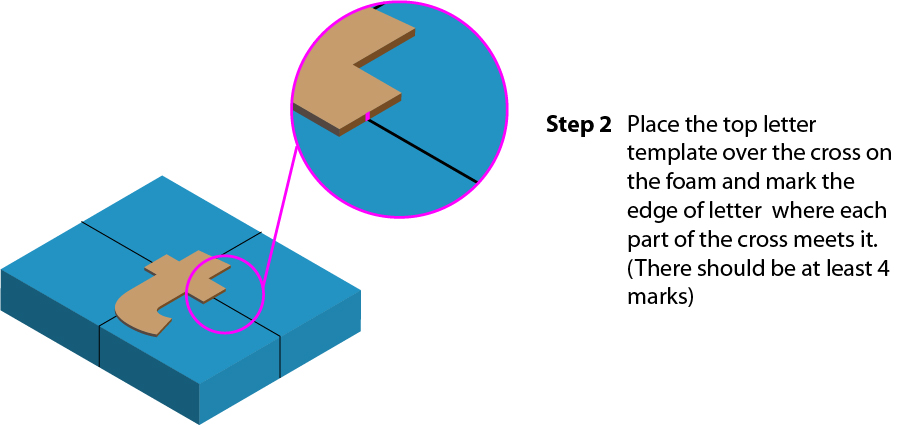
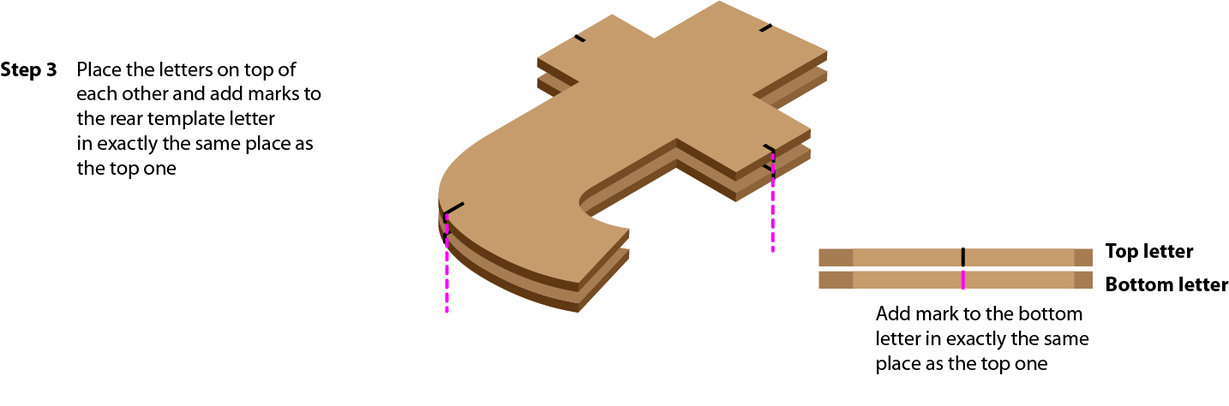
Aligning each side of the foam
Making sure the letters lined up perfectly was achieved by marking the letters and drawing a perfectly symmetrical cross on each side and aligning the markings
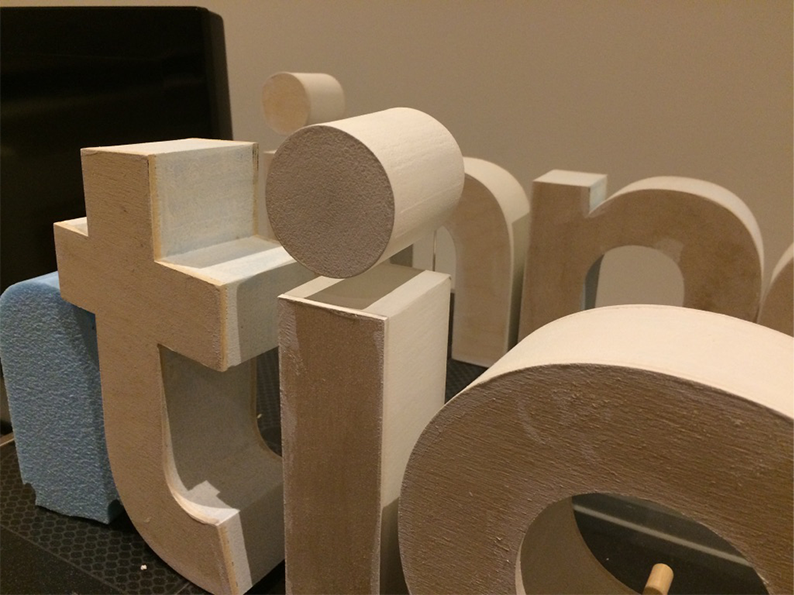
Painting
Modeling foam cant be painted with normal spray paint as it melts it so a normal acrylic paint was used. (as the foam absorbs the paint it took about 10 coats before you could no longer see any traces of the blue foam)
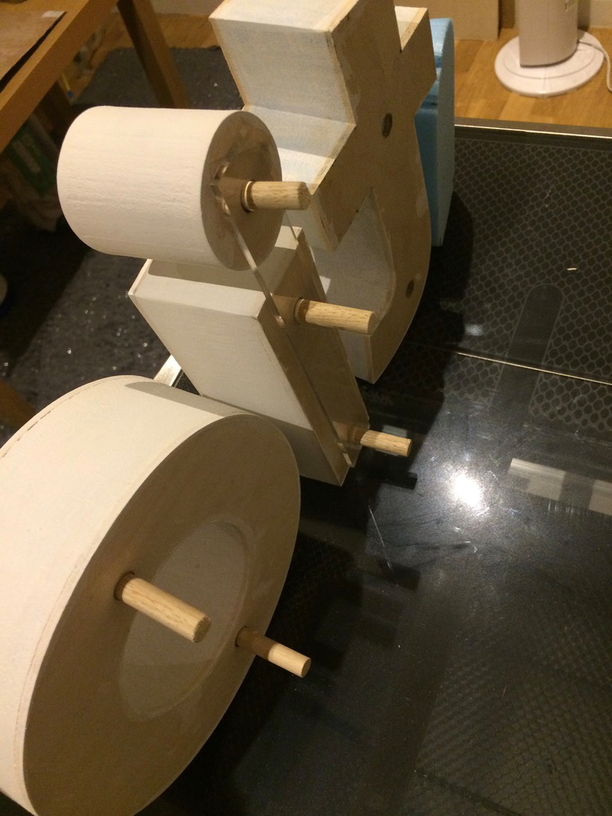
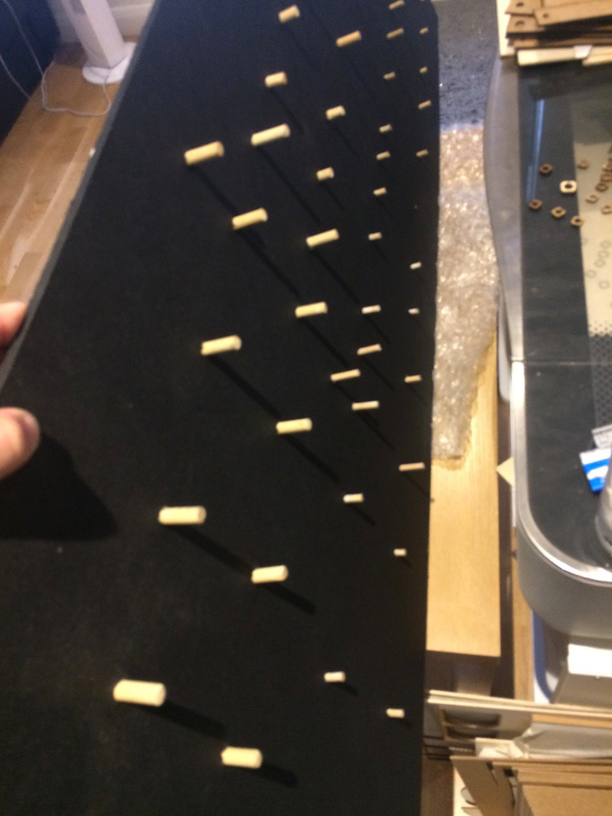
Fix to backing
When starting this project I knew that I wanted to be able to replace individual letters if necessary
so made holes in the rear plate of the letter to fix to a board with dowels
To align the holes with the dowels I printed off a very rough to scale template of the sign (by sticking A4 sheets together) then over laid it on top of a sheet of mdf and drilled where the holes should be
(Next time you have to paint something like foam, I believe that the cosplayers use something like a coat of white glue on it to seal it before painting. It keeps the foam from soaking up the paint.)
I used a 3D Simo Mini, with a wire cutter attachment to cut the letters out
(It was more because I had one lying about than specifically getting this tool for the project)
It had a temperature control on it, it let me dial down the temperature so as not to melt the foam too much, as its hand held it has great dexterity, but 50mm really was the limit that I could cut with it.
Its also worth noting that sanding the edges of the letters really helps as the wire will catch on any little burs and end up over burning the edges
I think that it is entirely possible to do this with a home made wire cutter, but would recommend having a voltage control to set the temperature.
Superb work, excellent write up and documentation. Been thinking about a wire foam cutter and you might have convinced me that it is worth making one. Looks nice! Thanks so much.
I find myself looking at signs and wondering how they make them now. In fact, I don’t look at a new sign without thinking, “I wonder if @jbv makes signs like this!”