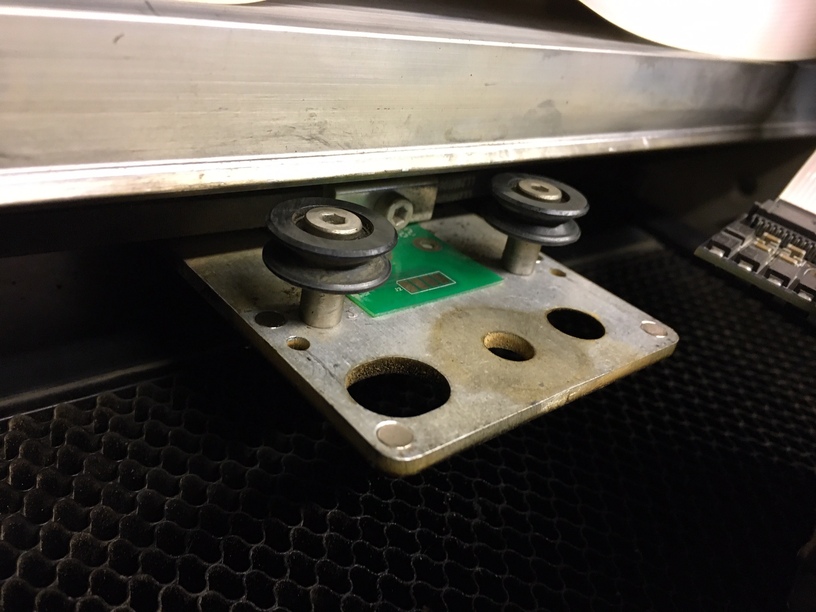
My GF was taking forever to ‘home’. I cleaned everything including my laser head. When I put it back, it started to bump when trying to center. I double checked to see if anything was in the way. I found a tiny piece of wood , to the left where the mechanism that looks like a bulldozer tread is and removed it. Also cleaned lens and under the crumb tray. Still ‘bumping’. I checked the laser head again - it’s sagging and not staying on the track. Any way to fix this? see pics. Thx for any advice. (also contacted supported last night - no response yet)
Oops! You might need to check the installation of the carriage plate - it’s not correctly seated.
There are some instructions below:
1 Like
What do the rollers on the back of that assembly look like? Just curious if they are damaged because you said it kept falling off?
Looks like your rollers are not on the track
2 Likes
Yes, I realize that it’s not seated - that’s the problem. Aafter seeing your response, I just took it off.
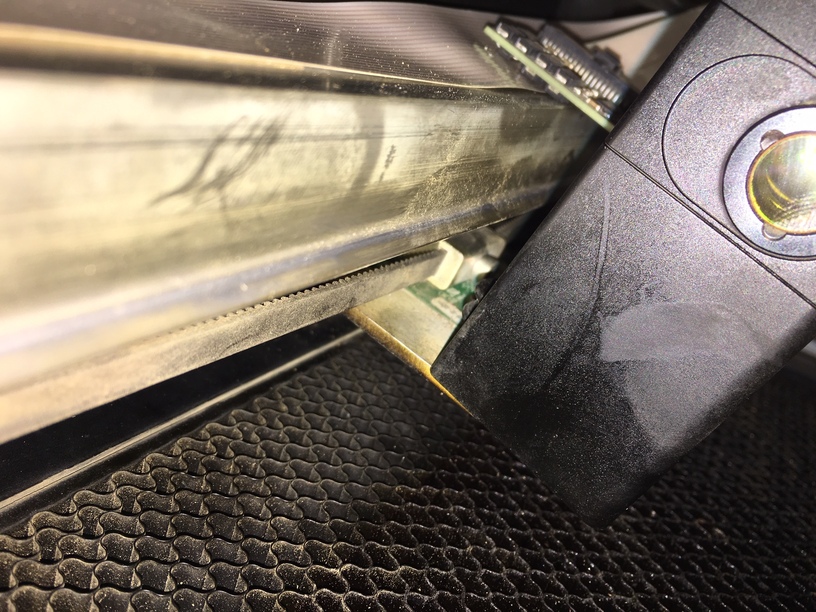
Uploading: entire laser carriage with back rollers. jpg… The back rollers seem fine (as far as I can tell with zero experience ). I don’t know how to get it seated or how it even came off. The carriage was basically dangling by the belt. Thanks to all who have responded 
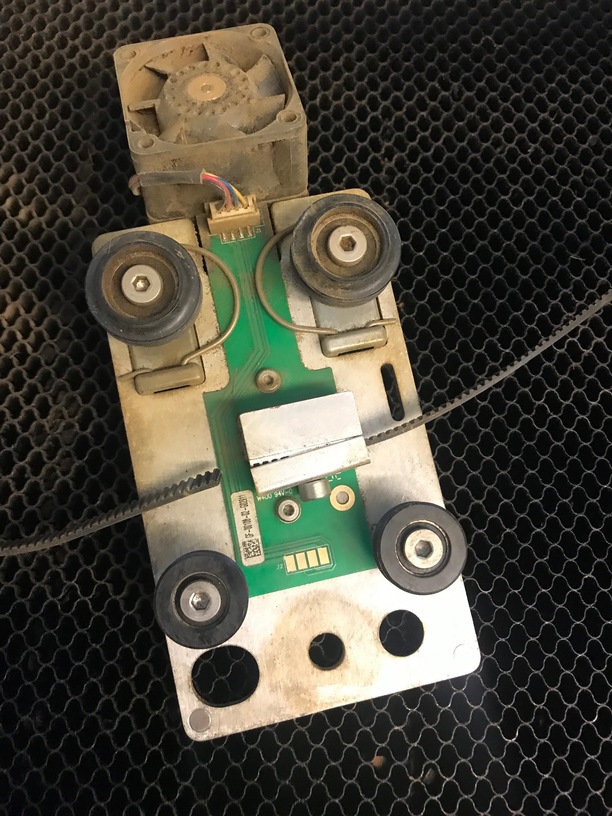
I would suggest if you haven’t yet clicking on the link @Jules posted. you don’t need to remove the carriage that way by unbolting the belt. it has detailed instructions on how to remove and reinstall the carriage. As for why it came off it would be hard to tell. just wanted to see the rear rollers because sometimes they can break or get worn out which could possibly cause it to fall off or be inaccurate when cutting. if they were broken it would be pretty obvious like the wheel being separated into 2 pieces or a chip missing.
1 Like
Thanks, I did try that- it seemed like I need a lot of force to hook onto the back and then pull forward - I was afraid that I would break it or something else. As far at the belt I realized that after 
I’ll go give it a shot again.
1 Like
There is a lot of spring tension on those back rollers it can take a bit to compress them
1 Like
Going to get canned air, as brushing and mini vac is not getting all the dust from the fan.
Thx again, I’ll try it again after getting air - will report back
2 Likes
Best of luck i’m sure you will get it, that air assist fan needed a good cleaning anyway by the looks of it
Push back on one of those rear wheels with your thumb to get an idea of the amount of pressure needed to re-seat the carriage. They are pretty stiff, but need to be to keep it attached securely while in motion.
1 Like
thx! will do
UPDATE:
Cleaned again with canned air - with a bit of a struggle, I was able to get the carriage back on (yay). But, there’s so little give in the belt - is there a trick to getting it on?
1 Like
There are instructions on how to get it back on at that link that I sent you to…did you try the method they recommended to roll it back onto the motor?
1 Like
I do it like it says in the link @jules posted. except i do it on the right hand side because i have issues getting into the left there.
I tried it as I understood it, but I don’t know what you mean by 'rolling it under the motor?
This section of the instructions. (First you hook the right side of the belt on, then follow these instructions.)
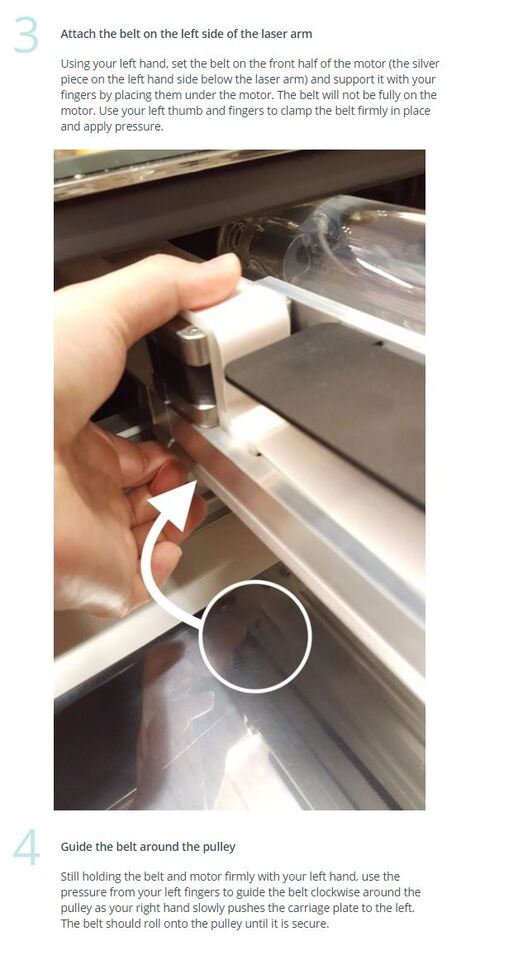
The right side it so tight that i had to thread it thru and reconnect with the bolt on the carriage.
will try again- I missed the part that said use right hand to push carriage to the left
1 Like