Just wanted to start a thread where community members can show their planned process for “3D Printing” objects on the Glowforge. This is a generalized approach to the method shown in another thread. For others who’ve devised another workflow, feel free to add to the thread.
I’m using Rhino for its prolific volume of tools to manipulate points, curves and surfaces – and also for it’s ability to import/export a large number of formats including STL and OBJ meshes.
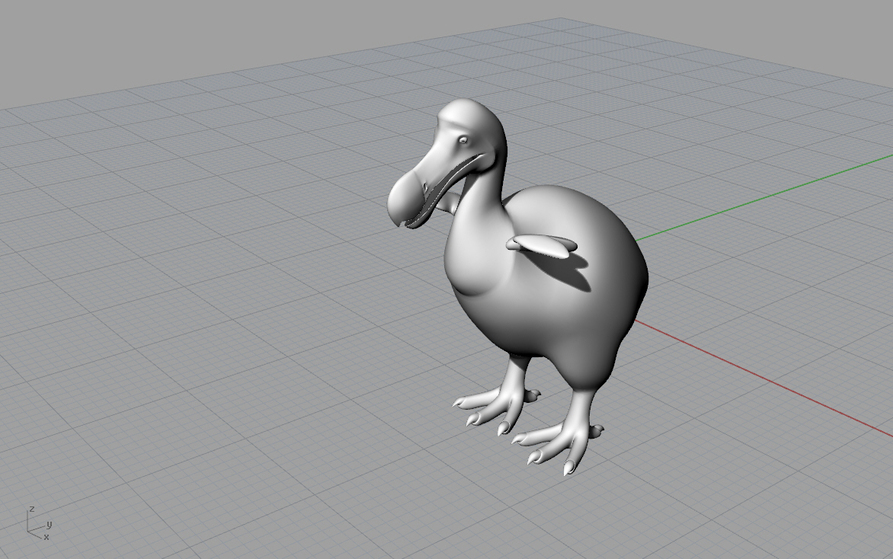
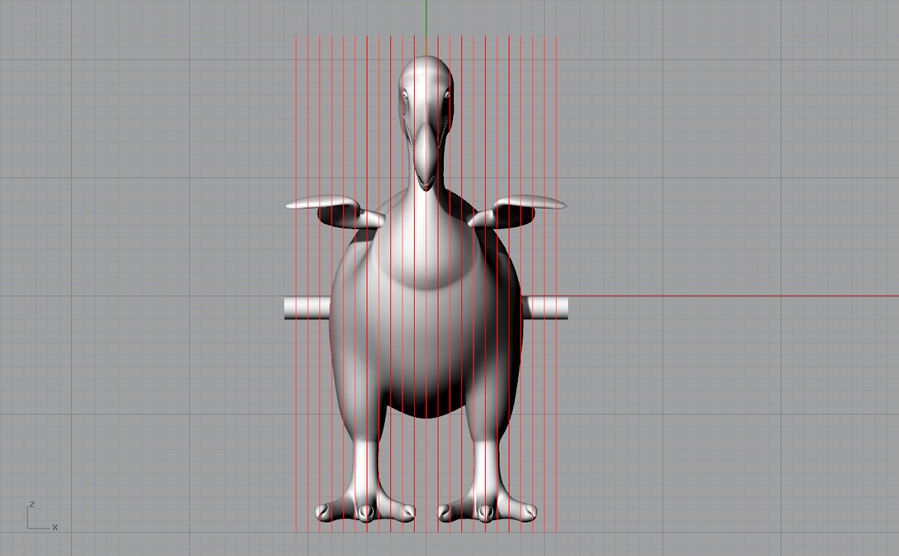
We’ll start with a Dodo I modeled in TSplines, converted to an OBJ mesh. Rhino doesn’t care, it’ll happily apply this procedure to its own 3DM nurbs objects, STL, and OBJ meshes alike.
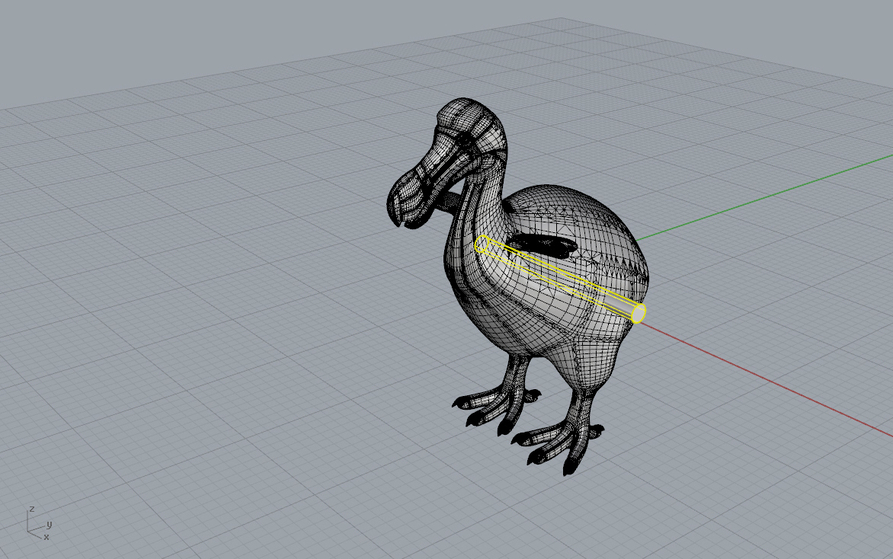
Skewer the object in one or more locations. This represents the registration (alignment) object and should probably be identical to the real-life registration object you plan to use… cylinder for a dowel rod, extruded rectangle for a long block… No Boolean operations necessary, they can just overlap in space.
Array a curtain of lines ahead of the object. Vertical lines if you plan on vertical layers, horizontal lines if the layers are assembled from feet upwards. Rhino’s Transform > Array function permits generating this array based on total lines or by the distance between the lines. THIS is where knowing the thickness of your material can be applied.
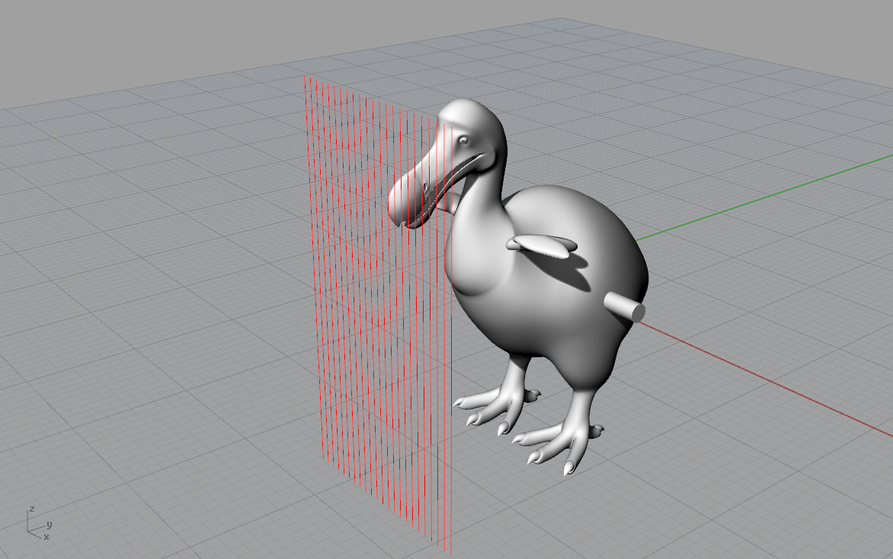
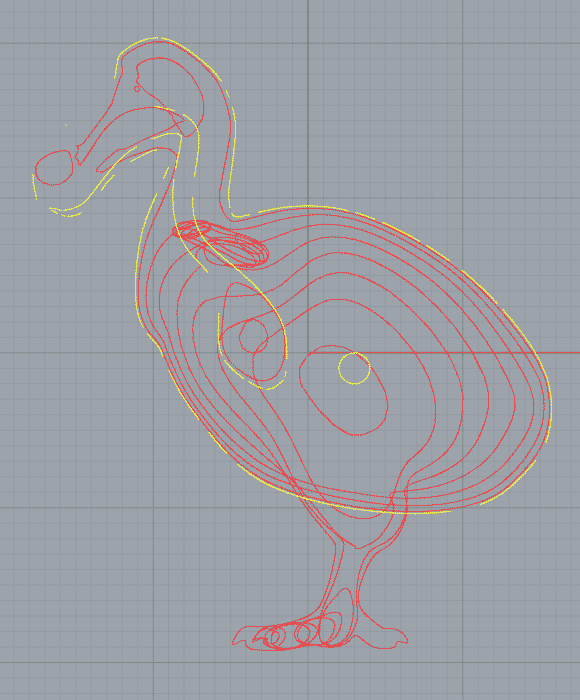
Once that array is created, select all the resulting lines and invoke the Curve > Curve from Objects > Project command. Rhino asks for the target objects the lines are to be projected to. In the front view, select the Dodo mesh and the registration object(s).
In one easy move, a collection of curves are created and ready to be exported to the Glowforge.
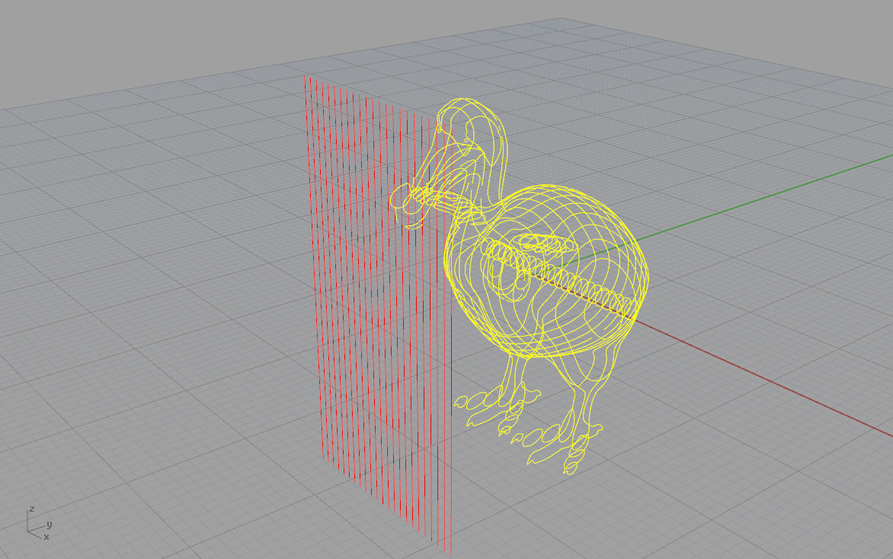
A small handful of curves might need to be completed or touched up, but not shabby for a process that only took a few minutes to complete.