Laser Darc Colors / Powder Coating

Harbor Freight sells at least 4 different colors of powdercoat paint at $6/lb.

http://www.harborfreight.com/catalogsearch/result?q=powdercoat

7 Likes

Sweet, I have a Harbor Frieght just down the street. :grinning:

No experience with powder coating. What temperature is required for finishing it?

The powder coating that I’ve done requires the powder to be applied, then it needs to go into an oven for a while to “flow out” (change from the powdery appearance to a liquidy appearance) then it needs to continue baking to cure. Almost everything from Eastwood (everything I’ve seen, except the clear powders) needs to bake at 450º F to flow out and then continue baking for 20 minutes at 400º to cure. Powders from other companies need different flow out/cure temps/times.

I attempted to change some powder coat from powder to liquid using my laser cutter. The results were pretty bad (not nearly as good as the results achieved by the person that @smcgathyfay linked to). The powder just pilled up and burned without adhering much at all. I was trying to coat aluminum though, maybe the reflective nature of the aluminum makes it trickier. Also, I tried it shortly after getting my laser cutter so maybe I made a rookie mistake or something. I also tried burning off cured powder coat, but that didn’t really work either. My laser is 30 watts, so maybe it didn’t have the necessary power. Also possible is that once the cured powder got thin enough that it became transparent, the aluminum underneath just reflected the laser away, preventing it from heating up enough to vaporize.

Toner is an interesting idea. It’s designed to cure very quickly so might work a lot better.

1 Like

Sorry to hear this isn’t working. I’m hoping to try it as a fill on engraved wood or acrylic. Maybe the rastered surface area of these materials will hold the material better.

I’m surprised the lasering off of cured powder coat didn’t work. Maybe it is a power issue, or multiple passes are needed. Here’s a video of it being done on a powder coated Zippo. Doesn’t say the laser power, but they did multiple passes on it. There a lot of other powder coating removal videos out there. Most look like pretty powerful lasers.

https://youtu.be/NLC599-JCYc

3 Likes

It seems like the rastered surface could indeed help.

I thought I had seen powder coat being removed with a laser as well, but I don’t recall any specific videos. That particular video of the Zippo shows a fiber laser, which produces a different wavelength than CO2 lasers like mine and what will be in the Glowforge. Fiber lasers can “mark” some metals, so I’d guess they’re burning through the powder completely and then engraving the surface of the metal underneath a little bit too.

Maybe more powder coat talk should be put into its own thread?

For now I just edited the topic title. All of this thread talks about attempting to mark with coloring powders, it’s all somewhat applicable, although most discussion may now be on actual powder coating rather than other types of marking.

3 Likes

Sad to say I couldn’t get the laser printer toner to work.

Engraved boxes then filled with a light coat of the powder.

The bottom row from left to right
10% pwr. 100 speed
7% pwr. 100 speed
5% pwr. 100 speed
3% pwr. 100 speed
1% pwr. 100 speed

This is on a 30wt…it seems to be too hot so doubt it would work on a GF.

I’ll try again with filling the hole a bit more with toner to get a thicker layer and report back…

2 Likes

:sob:

2 Likes

Wait!! Stop the presses!!

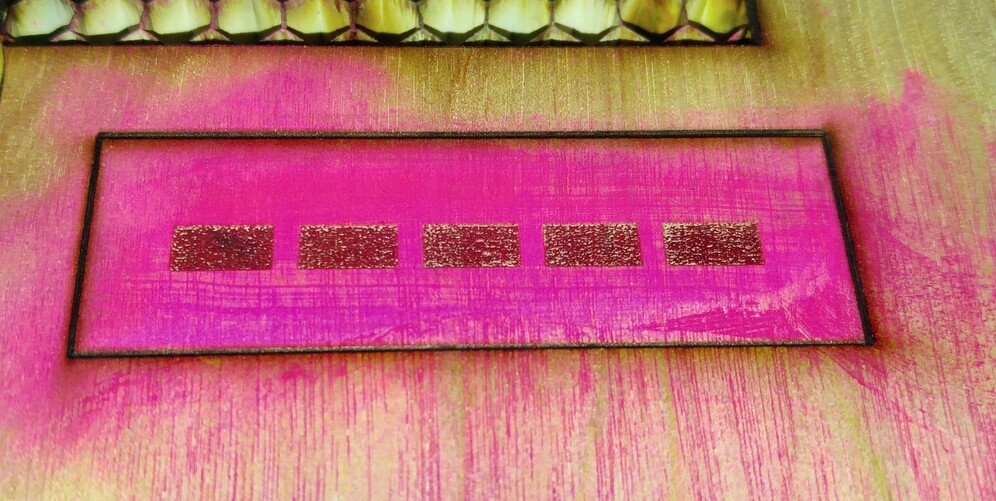
Seems having a thick layer is promising. Now I understand why it was mentioned to squeegee on the color.
Check it out

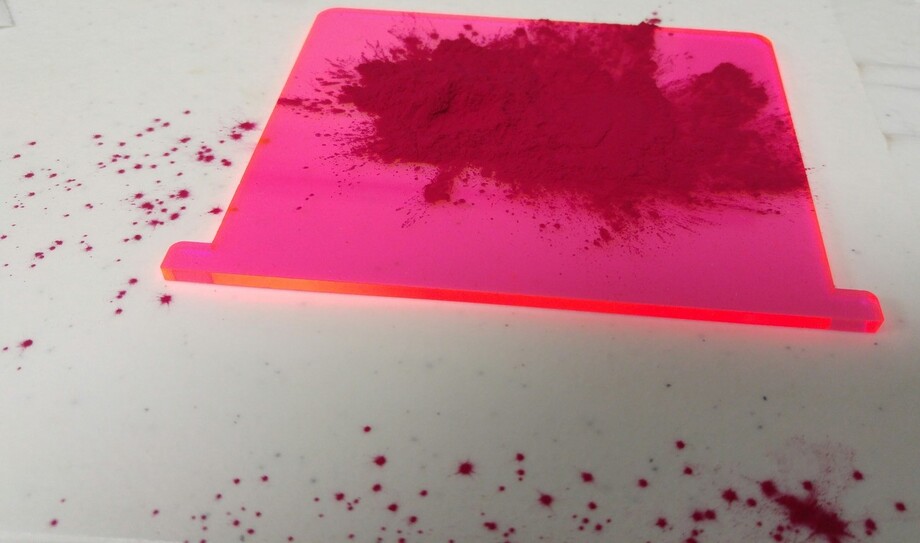
First of all, pouring out toner is messy…lol

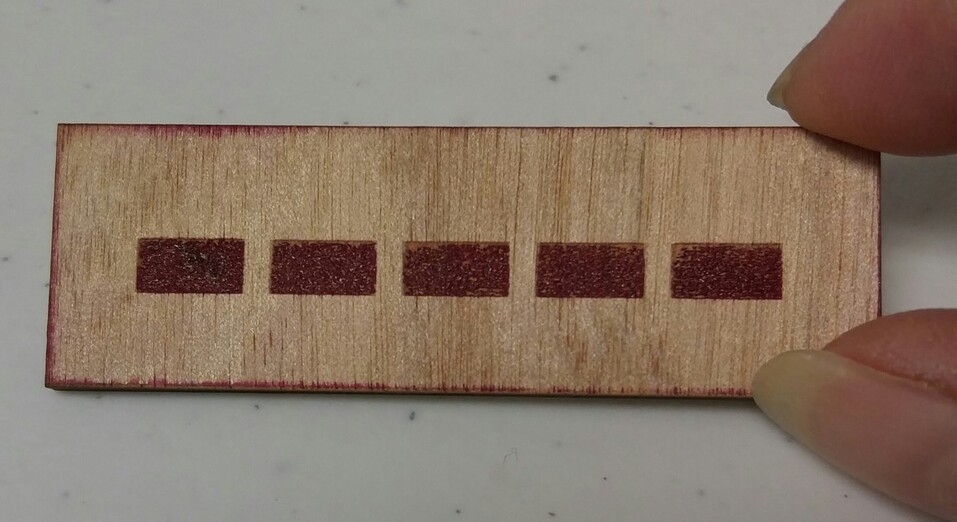
Filled the engraved depressions to the top

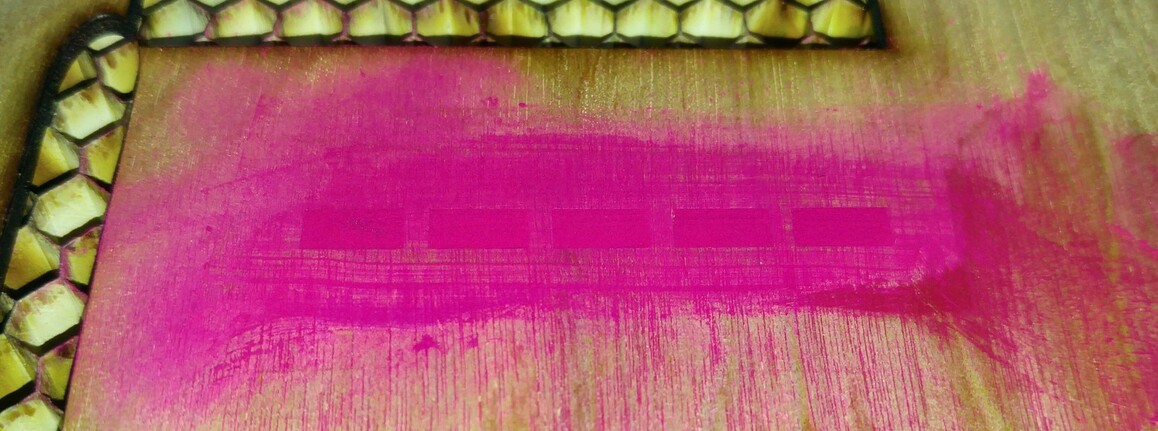
This is before cleaning.
Etched on 30 wt
Settings right to left
10% pwr. 100 speed
7% pwr. 100 speed
5% pwr. 100 speed
3% pwr. 100 speed
1% pwr. 100 speed

After washing it with soap and water…wanted to do the extreme to see if it was bonded.

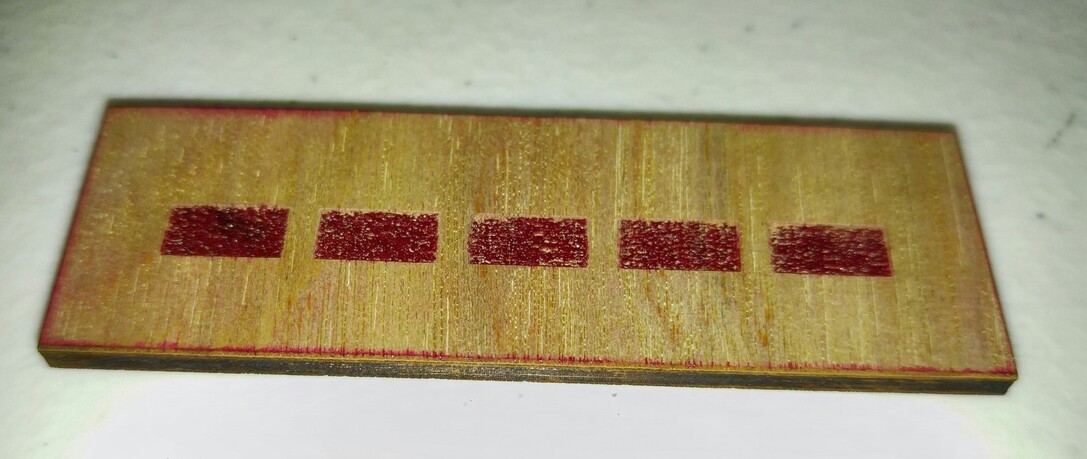
I used a flash to get the color pop…this is more what it looks like under regular fluorescent lighting.

Outside in the sunlight

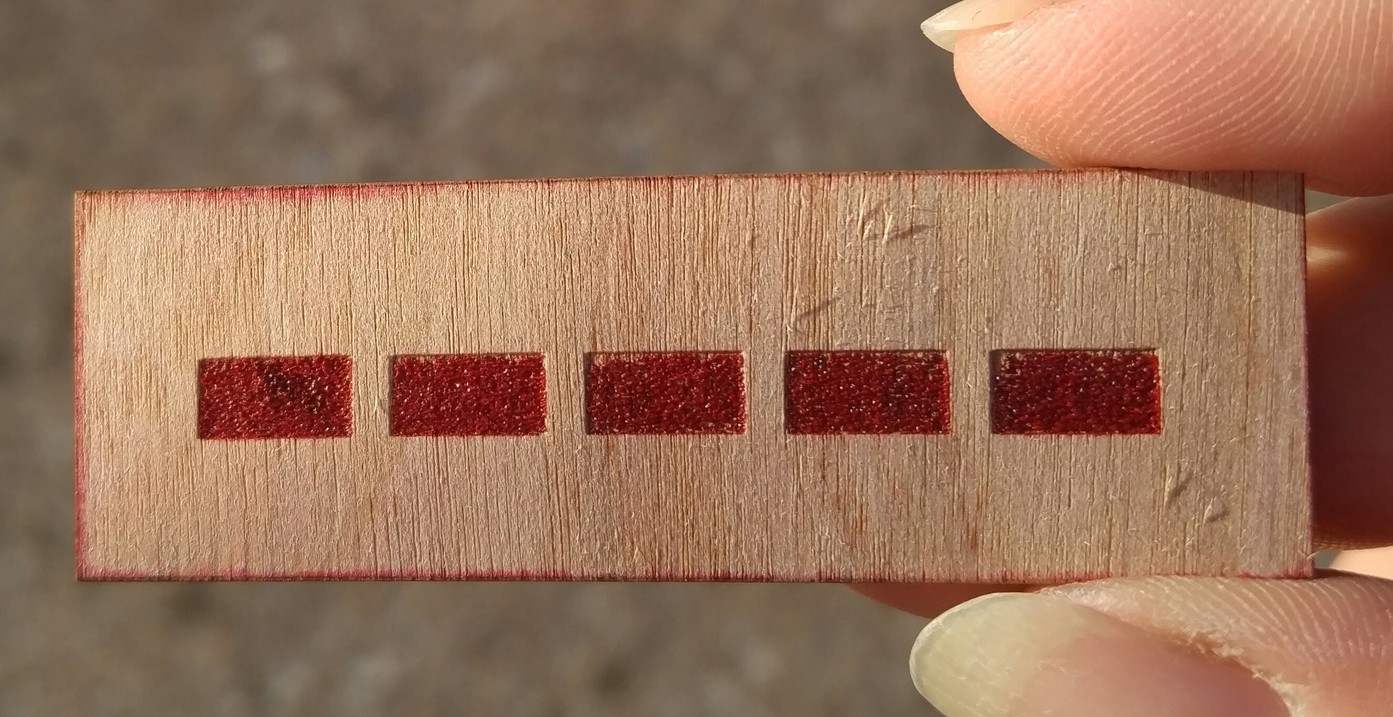
Check out what it does on clear plexi

17 Likes

Thanks for testing this idea and showing the results. Guess I’ll keep those almost empty cartridges a few more months.

3 Likes

Well, it could have some promise after all. Thanks for running with the idea. Toner doesn’t look like it fills as smoothly as the Laser Darc SEEMS to. But it does seem to bond OK. Would hate to do multiple passes with it, but might be worth it for special projects.

Thanks again!

3 Likes

Maybe a deeper engrave resulting in more toner fill would work…

2 Likes

I took your lead and did a little more experimenting with powder coat, this time it went much better! I must not have been using enough powder the first time. Sorry that the photos I got are BOTH blurry, but I figured it would be better to post what I have than to just say “the photos I got weren’t good”…


The left two are a chrome powder. The leftmost one was at 10% power and the second one was at 5%. You can see some separation lines in the squares, that’s where I defocused it by a few mm. I believe the second silver box was lowered to 6mm, then 12mm, then 9mm below the correct focal distance. The third was “silver vein”, which I should have known wouldn’t come out very good but tried anyway. The forth is called “starlight black” (I think that’s the name). That color is mostly black, but with reflective/colorful flecks in it.


These are all “candy raspberry”. These were done by just dumping a pile on the wood and tamping it down into a flat layer (no pre-engraving). They came out OK, but when I ran my thumb over the shapes in an attempt to knock off leftover powder I ended up scraping off some of the print as well. Oops! I’ll try compressed air next time (tomorrow, hopefully).

By the way, these are all Eastwood powders. I have another brand (Prismatic Powders) that I’ll try out as well.

Here’s what the Silver Vein powder looks like when it’s applied and baked… This also has a layer of clear powder coat.

8 Likes

Awesome!! I like those alot more than the toner! Better color variety like metallics. :grinning: Also may work better with the Glowforge since the toner worked best on only 1% power on a 30 wt laser.
I thought about trying without the etch first too but figured it needed to be secure within a channel for durability. I know toner on laser printed paper cracks a bit when you fold it. I figured the powder coat may be more durable.

4 Likes

Defocusing sounds plausible. Also, I’m going to guess that there’s a sweet spot for powder thickeness: too thin and you just zap the powder into nothing, but too thick (unless you can defocus or get the power down or whatever) and you melt the top but don’t get good adhesion.

3 Likes

Many hobbyists use recycled toaster ovens to bake small powder coated parts. I could never find one at the local Goodwill store, so I just waited for a sale at one of the big box stores. A second hand kitchen stove in the garage would be nice for hobbyists with medium-size projects.

5 Likes

Good idea, thanks!

2 Likes

Very interesting topic and idea to try. I have several containers of powder coat that I use as pigment in my acrylic when I pour pen blanks to turn. New project/test for the weekend !!! (157 days until Xmas…) :christmas_tree:

6 Likes