Hi there! Good to hear that change worked for you.
To cut successfully, there are three important things to check. First, your material must lie flat. This requires a clean, properly installed crumb tray and flat materials. Second, there must be no obstructions, dirt, or damage preventing the laser light from reaching your material. Third, your design must be set up properly - for example, with lines that are fully on the material and that are set to cut. It’s hard to know which issue might be affecting your print, so please thoroughly inspect your unit and design according to the suggestions below.
Crumb Tray mispositioned or holding particles
If the Crumb tray is mispositioned or holding bits of material from packaging or printing, it could keep your material from lying flat. Even a millimeter difference in height could affect your laser’s ability to cut.
- To remove the crumb tray, lift the lid, then swing down the front door. Lift the crumb tray slightly and slide it towards you to remove it. Be careful not to tilt the crumb tray up, or it will knock into the printer head and rails.
- Remove all dust and debris from the bottom of your Glowforge.
- There are four dimples for the feet of the crumb tray to sit in. Wipe them with a damp tissue or cloth.
- There is a slot in front of the crumb tray, under the handle. Point it towards a garbage and shake the tray so that debris falls out. If debris is stuck in the honeycomb, gently push it out. Debris can force the honeycomb to be uneven, or prevent your material from resting flat against the honeycomb.
- Replace the tray. Make sure that it’s facing the right direction and that the tray’s four feet drop into the small dimples. When the four feet drop into place, the tray will no longer slide freely.
Material not lying flat
Even when the Crumb Tray is clean and flat, the material may not be lying flat on the surface. Some materials can develop a curve (called ‘warp’), and warped material may not cut through consistently. The problem is especially likely to occur if the print is large.
- Soft materials, like Proofgrade leather may need to be smoothed into place. Any lumps or bumps will affect the print quality.
- Read our troubleshooter on warped material for ideas on how to take care of your materials.
Lens or Windows are Dirty or Damaged
Your Glowforge unit’s laser is powerful, yet it can be stopped by a tiny amount of dirt or damage to the lens or windows. If something gets between the laser light and your materials, they won’t cut through. Here’s how to check for damage and clean your lens and windows at the same time.
1. Remove Printer Head
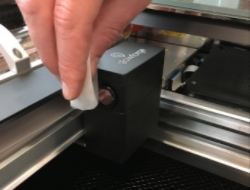
Turn off your Glowforge. Grasp the printer head as shown, and pull gently up and back to disengage the magnets and remove it.
2. Remove lens and check for scratches or dirt.
- Gently insert the lens tool into bottom of the head with the “Remove” arrow pointing in. When you hear the magnet click, withdraw the tool and the lens.
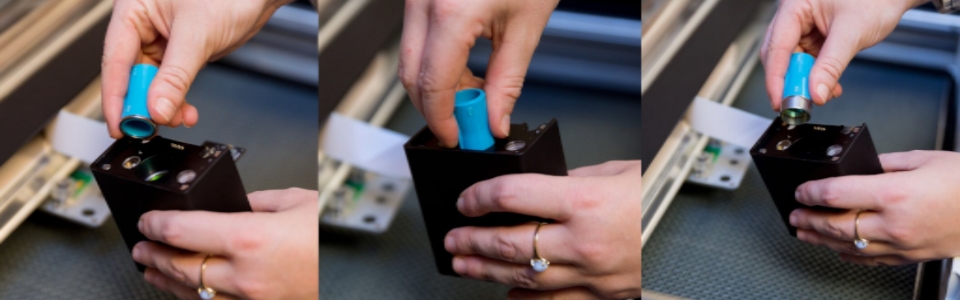
-
Look at the lens on the tool. It should be resting on top of the tool like a bowl, with the top open and with the orange-colored optics on the bottom. If it’s upside down, it won’t work properly.
-
Gently slide the lens off the lens tool. Be careful to touch only the metal ring to avoid fingerprints on the lens.
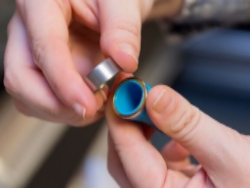
- Check the lens for fingerprints, dirt or scratches. If you see a scratch, you can order a new one at shop.glowforge.com.
- Wipe both sides with a Zeiss lens wipe.
3. Put the Lens Back In
If the lens appears clean, you can put it back.
- Flip the lens tool until the “Install” arrow points up.
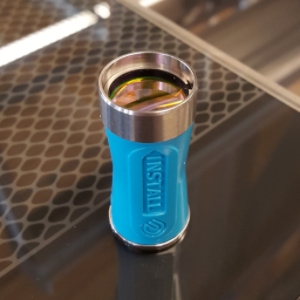
- Set the lens down on the lens tool. The open side goes away from the blue plastic, so it looks like a bowl on top of the tool.
- Slide the lens tool up into the printer head until the magnet clicks, then remove the tool.
4. Replace Printer Head
Review instructions for snapping in your printer head, then put the head back on.
5. Inspect the Head Window and the Laser Window
- Check the windows for damage. You can find one window on the left side of the printer head, and another just over the left rail. Shining a bright flashlight at an angle onto the window may help you to see more clearly.
- If you see damage, write support.
- Otherwise, wipe the window clean with a Zeiss wipe.

Once you’ve inspected and cleaned, please try another print. We included an extra piece of Proofgrade Draftboard with your materials shipment for troubleshooting. Please print the Gift of Good Measure on Proofgrade Draftboard and let us know the result. If it doesn’t print well, please let us know the date and time of your print and send photos of the front and back of the print.
Thank you!