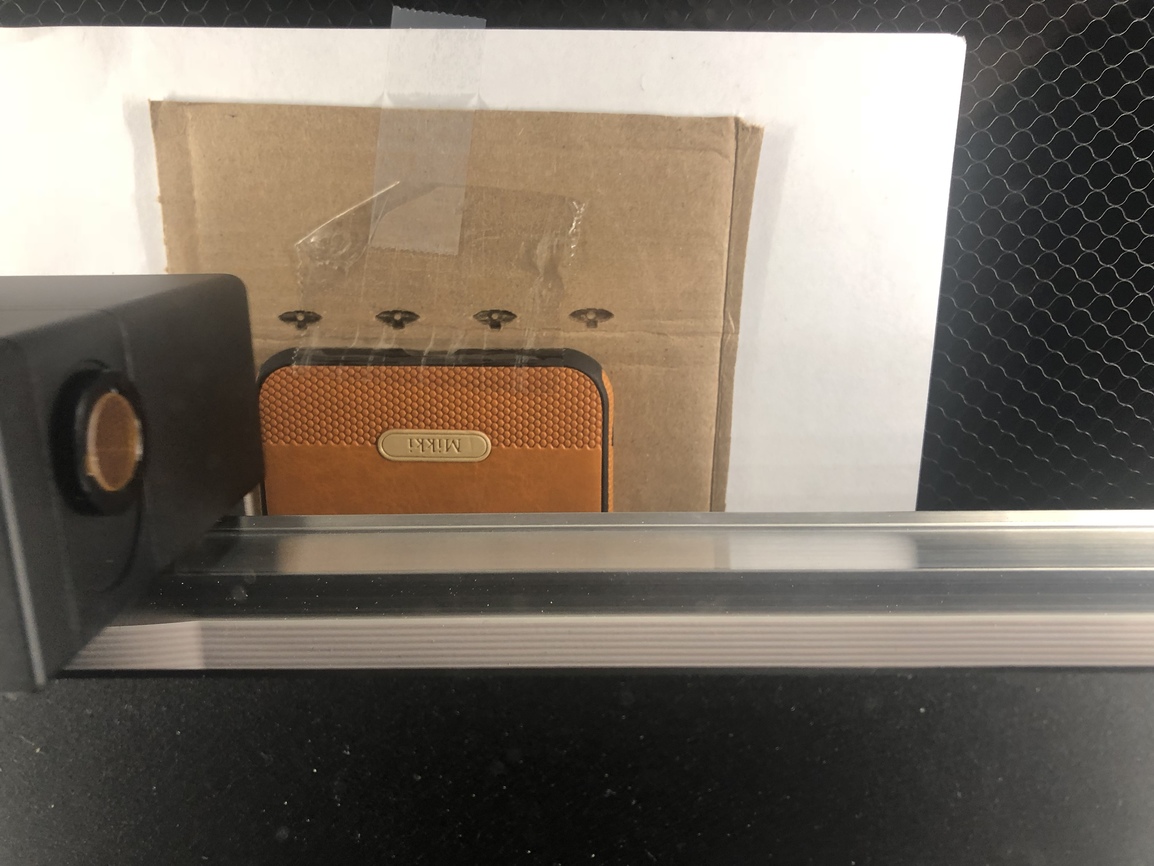
first question is: is your material thickness accurate? you have several things stacked up there.
These appear to be 2 different shots. By that, I mean, the lower picture shows paper sticking out on the “right.” The top picture doesn’t. So it looks like these were taken at two different attempts?
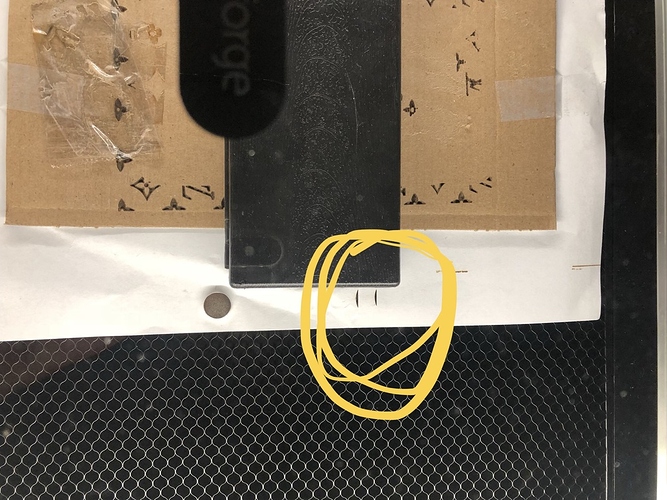
So… Where did it end up attempting to engrave anyway? Is that where the bottom pic circle is representing? If so, how thick is your material? Is that thickness entered exactly correctly?
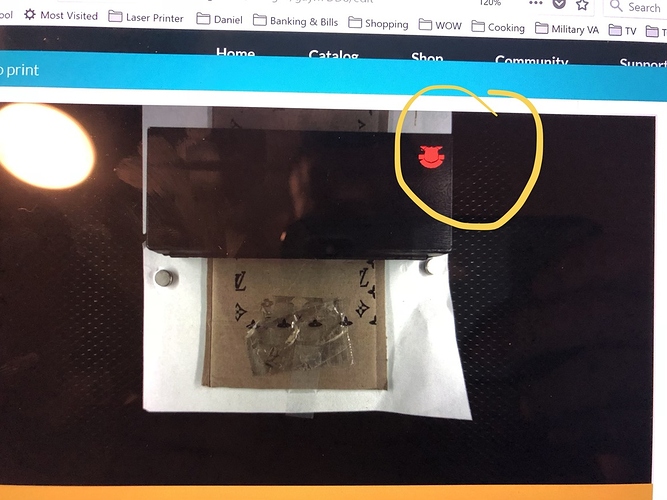
I don’t get your top pic at all… Is that a photograph of your screen or something?
That looks way too tall to be lasered with the crumb tray?
What is the height of the top of the material?
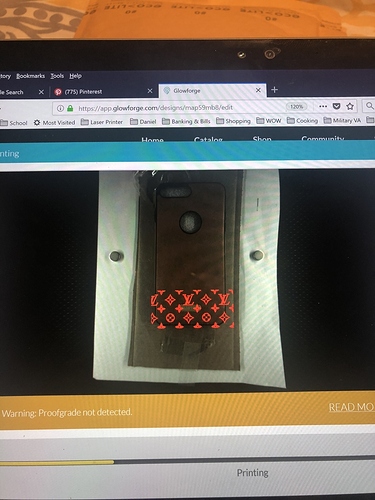
@Tom_A, the top pic has the red ‘to be’ engraved image, the bottom is the (rotated 90*) bed image showing that nothing was lasered.
Okay, hang on…I’m going to give you a step by step of what to do to engrave on that object accurately…it’s going to take some time to type up… (you might be missing a few concepts.)
Sorry for the two different photos but it was two different attempts with the same 1/4 inch way to the right as opposed to what was on the screen. The material means nothing to me as I am just in my testing phase.
Thanks Jules
The material means nothing to you, but it means plenty to the Glowforge’s camera system. What height are you entering, and how are you measuring it?
I’m also curious why you have that pile of stuff in the machine.
Step one:
- Measure the thickness of the case accurately with a pair of digital calipers.
(If it is thicker than 0.50 inches, it is too tall to engrave on the crumb tray, you will have to take the tray out and create a prop to bring the case into the correct engraving range.)
Tutorial on how to do that: here.
Step two:
- Measure the length and width of the case.
- Open any digital design software of your choosing (Inkscape/Illustrator/CorelDraw/Affinity Designer) and create a rectangle that matches the measurements of your case.
- Inside the design software, align the logo where you want it to fall on the case.
(If it is a raster or bitmap logo, you want to make sure to Embed it in the file. If it is a vector image, just drag it where you want it to be on the corner of the rectangular case outline.) - Save the file as an SVG format file. (Tutorial here.)
Step three:
- Get a sheet of cardboard or scrap plywood.
- Measure the thickness of the cardboard with the digital calipers.
- Stick it down on the bed with the Honeycomb Pins here. I wouldn’t try to use magnets to hold down something thicker than paper, and paper makes a really crappy jig.
Note: If you have to tape the cardboard down to the tray at the edges with masking tape, that also works fine…you just don’t want it to shift at all.
Step 4:
- Open the SVG file you created in the Glowforge app.
- Enter the thickness of the cardboard into the Unknown Materials button at the top of the left column in the app. (Assuming you are able to place it on top of the tray…if not, follow that first tutorial.)
- Set the Engraving to Ignore in the app.
- Set the rectangle to Cut. (Manually adjust your settings for cutting whatever material you chose as a jig material.)
- Cut the rectangle out and remove it. Do not shift the cardboard on the bed or the image on the screen.
- Drop your case into the hole created by the rectangle.
- Set the rectangle Cut to Ignore in the app. Only change it by clicking the thumbnail in the lefthand column…do not shift the image on the screen.
- Set the engrave Settings. When you do, set the focal point in the Manual settings for the Engrave to be equal to the thickness of the case. (Do not change them up at the top in the Unknown Materials button.)
- Send the Engrave to be printed.
Normally I’d show a couple of screen shots of the process, but I’ve got a job running now…that should get you started though…just don’t skip a step. 
Thank you Jules. You’re the best. [quote=“Jules, post:10, topic:29267”]
Step one:
- Measure the thickness of the case accurately with a pair of digital calipers.
(If it is thicker than 0.50 inches, it is too tall to engrave on the crumb tray, you will have to take the tray out and create a prop to bring the case into the correct engraving range.)
Tutorial on how to do that: here.
Step two:
- Measure the length and width of the case.
- Open any digital design software of your choosing (Inkscape/Illustrator/CorelDraw/Affinity Designer) and create a rectangle that matches the measurements of your case.
- Inside the design software, align the logo where you want it to fall on the case.
(If it is a raster or bitmap logo, you want to make sure to Embed it in the file. If it is a vector image, just drag it where you want it to be on the corner of the rectangular case outline.) - Save the file as an SVG format file. (Tutorial here.)
Step three:
- Get a sheet of cardboard or scrap plywood.
- Measure the thickness of the cardboard with the digital calipers.
- Stick it down on the bed with the Honeycomb Pins here. I wouldn’t try to use magnets to hold down something thicker than paper, and paper makes a really crappy jig.
Note: If you have to tape the cardboard down to the tray at the edges with masking tape, that also works fine…you just don’t want it to shift at all.
Step 4:
- Open the SVG file you created in the Glowforge app.
- Enter the thickness of the cardboard into the Unknown Materials button at the top of the left column in the app. (Assuming you are able to place it on top of the tray…if not, follow that first tutorial.)
- Set the Engraving to Ignore in the app.
- Set the rectangle to Cut. (Manually adjust your settings for cutting whatever material you chose as a jig material.)
- Cut the rectangle out and remove it. Do not shift the cardboard on the bed or the image on the screen .
- Drop your case into the hole created by the rectangle.
- Set the rectangle Cut to Ignore in the app. Only change it by clicking the thumbnail in the lefthand column…do not shift the image on the screen.
- Set the engrave Settings. When you do, set the focal point in the Manual settings for the Engrave to be equal to the thickness of the case. (Do not change them up at the top in the Unknown Materials button.)
- Send the Engrave to be printed.
Normally I’d show a couple of screen shots of the process, but I’ve got a job running now…that should get you started though…just don’t skip a step. 
[/quote]
Thank you Jules you’re the best.
I’m sorry you hit a snag. The software on your Glowforge is responsible for ensuring that the print lands on the material in the same place as the preview. Most alignment problems come from the material being closer or farther from the camera than expected. While the software is still improving, you can take these steps for the most accurate alignment results:
-
Use Proofgrade™ materials.
-
If you don’t use Proofgrade materials, use a precision set of calipers to measure your material, and enter the thickness in the “uncertified materials” dialog.
-
Use material that is not warped or tilted.
-
Place your design near the center of the bed.
-
Clean the area underneath your crumb tray, particularly the four indentations on the floor.
-
Reboot the machine. Alignment can drift over time, particularly if you bump the head of your Glowforge while removing material.
Should you finish all of these steps, and find that you have an alignment error of more than 1/4", please let us know.
I always wondered about this.
If I make a jig out of cardboard. I load my art with a bounding box.
I set master height to the cardboard height. Set inner image to ignore. Cut out the bounding box in the cardboard.
Keep the master height set to the cardboard setting. Switch cardboard cut to ignore. Change inner image to engrave and set that control to the final material height while keeping the master height to cardboard.
I wondered if I should be setting the master height to the piece height and just set the cardboard height in its control. Looks like you recommend the opposite.
No, you’re doing it correctly. You want the height that you are cutting into the jig to match the height of the jig material. That’s so you get as accurate a placement for the cut on the jig as possible. Once you have established the cut, the engraving is going to fall into the correct position relative to the cut, no matter how far off it looks on the screen, and if it is a large variance in height…it’s going to look very off.
But when you go to do the engrave, you want to focus it on the surface of the actual material, otherwise you are going to get a fuzzy or out of focus engrave.
You do need to check to make sure that the focal point is correctly set inside the Manual settings on the engrave…it might be that resetting the height of the focal point in the Unknown Materials slot will repopulate the individual settings for each operation…BUT… it might not. There have been times in the past when it didn’t if you were trying to change it after the fact like that.
It might have changed…I haven’t tested for it lately. I just always set the focal point for the individual engrave operation. And once you hard code the focal point, that value should override the cardboard setting and be retained when the file is saved. (I think…don’t quote me on that.)
I have personally never got the images to align to the precise place when printing on stuff. (In this your cell phone case. ) That said, I have created jigs to ensure the alignment is correct. I actually have a jig for iphone cases.
I would encourage you to look at a jig that you can place in your glowforge to resolved. Any changed you make make them to the file and do no move things around in your glowforge after uploading your file.
One more angle to consider because it happened to me. My 'forge sits near an eastern window and in the morning gets direct sunlight. I started into a print and saw the laser head going off into the hustings, so to speak, so I stopped the print, lowered the blinds on the window, restarted, and everything went as I set it up the first time.
dunno if my supposition about the outside light was valid, but it’s one more arrow in the quiver of ‘when stuff goes wrong, check this’.
Not related to positioning–but looked like you were using Louis Vuitton design. Unless you have a license to use their artwork, you can get in trouble for IP/copyright/trademark violation…
Not looking to sell anything, was just testing the accuracy of the machine. Many others post things they shouldn’t (not my buisness). Just a test is all.
It’s been a little while since I’ve seen any replies on this thread so I’m going to close it. If you still need help with this please either start a new thread or email support@glowforge.com.


