I made some last minute gifts for my husband’s family as we celebrate Christmas with them on New Year’s Day. Everything I made was inspired by this group and I just want to thank everyone again for their generosity, support, and creative energy. You guys are fantastic and GF is extremely fortunate to have such a wonderful customer base.
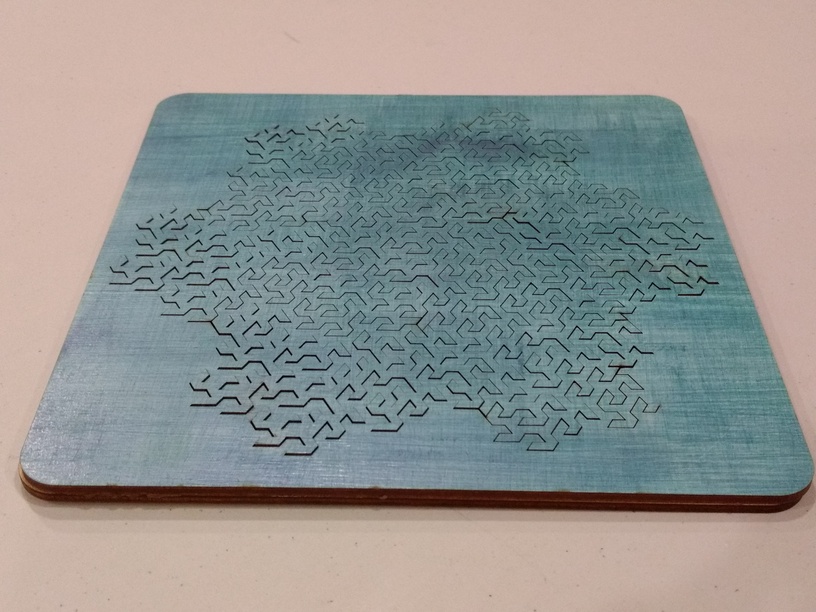
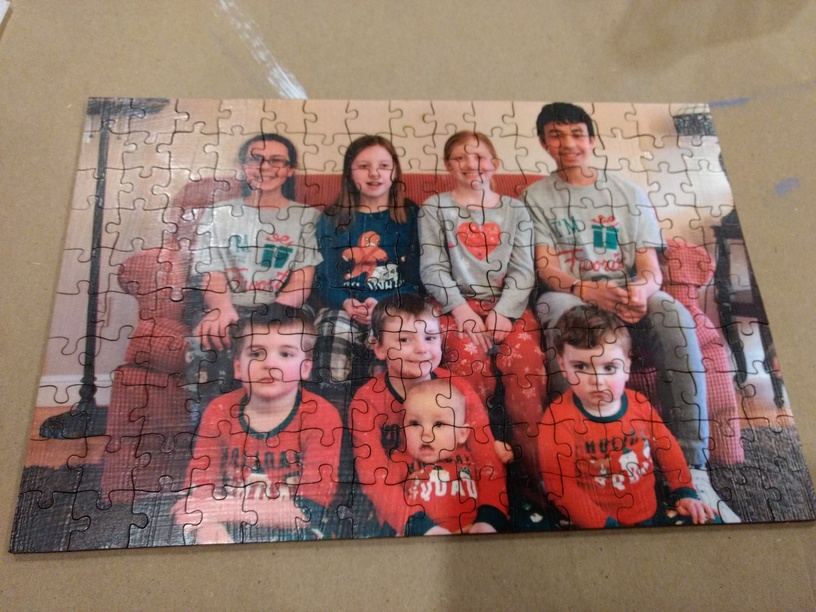
I made two puzzles for my father-in-law, who is an engineer and a big puzzle fan. I forgot to take pictures of the boxes, but the first one said “#Sorry” and the second said “#NotSorry.” Thanks specifically to @m_raynsford for the fractal puzzle design. I had a glue mishap, so some of the edge pieces wouldn’t lie flat, but all the engineers enjoyed tackling this one. They were thankful for my brush strokes which kept the puzzle challenging, but not completely frustrating. The second puzzle is my in-law’s Christmas card photo (my kids are the ones in the back wearing “I’m the favorite” t-shirts). It’s just difficult enough that it’s fun for an adult to put together in one sitting.
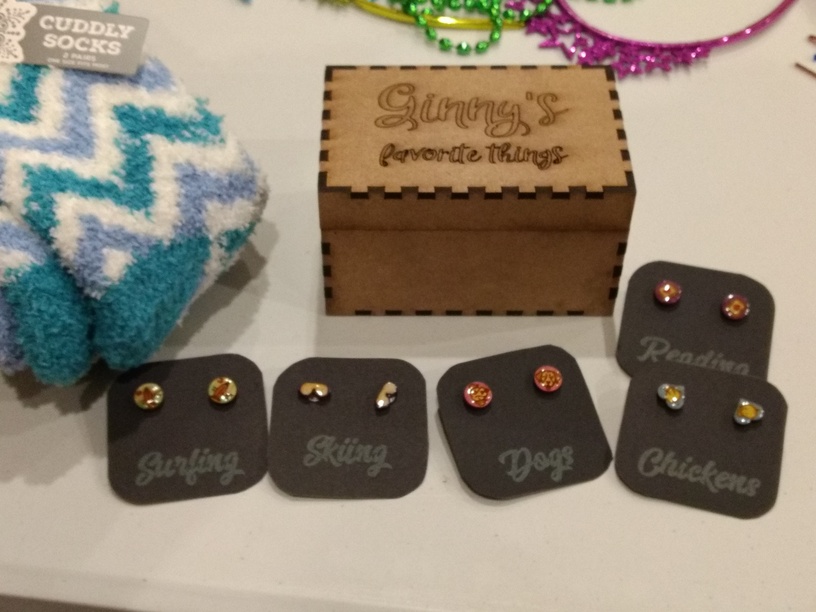
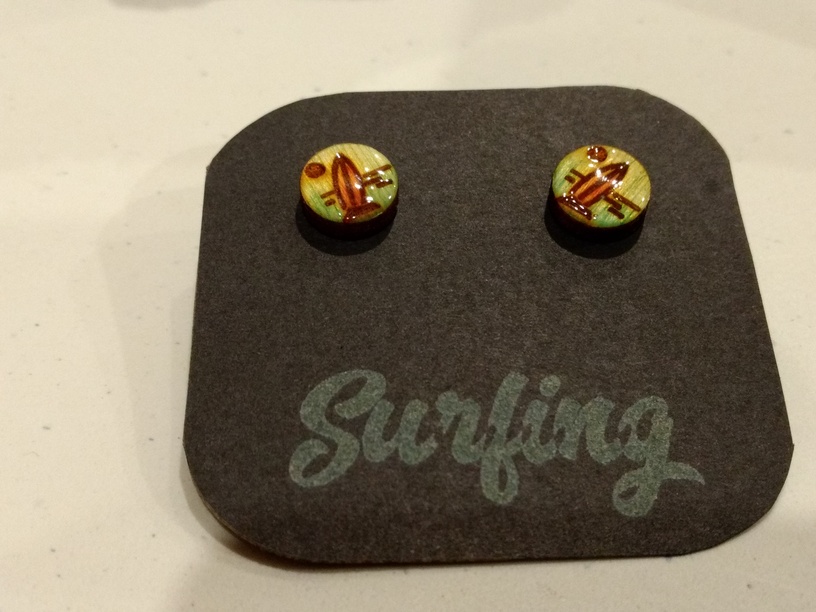
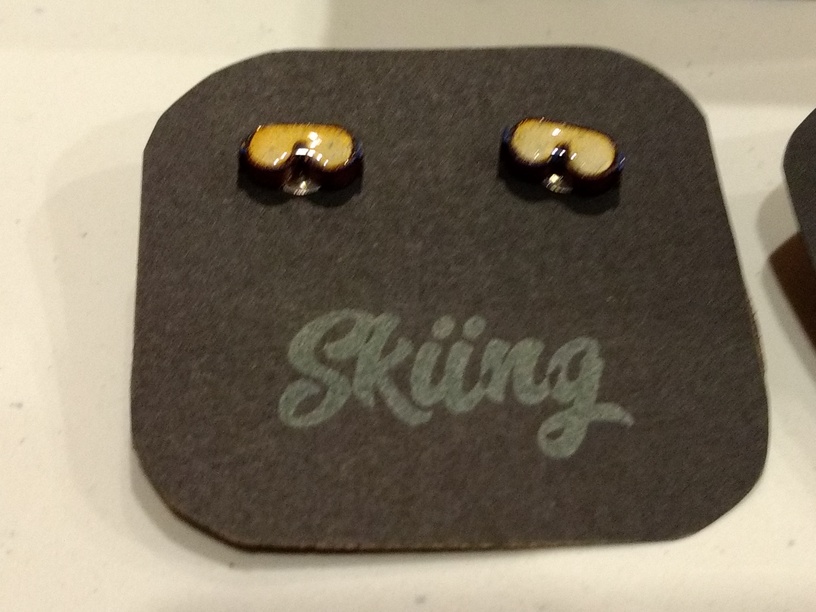
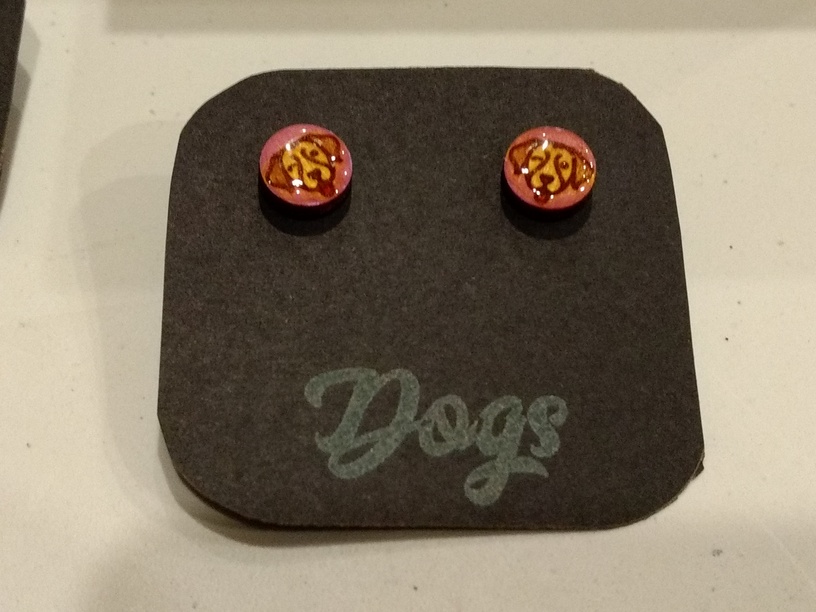
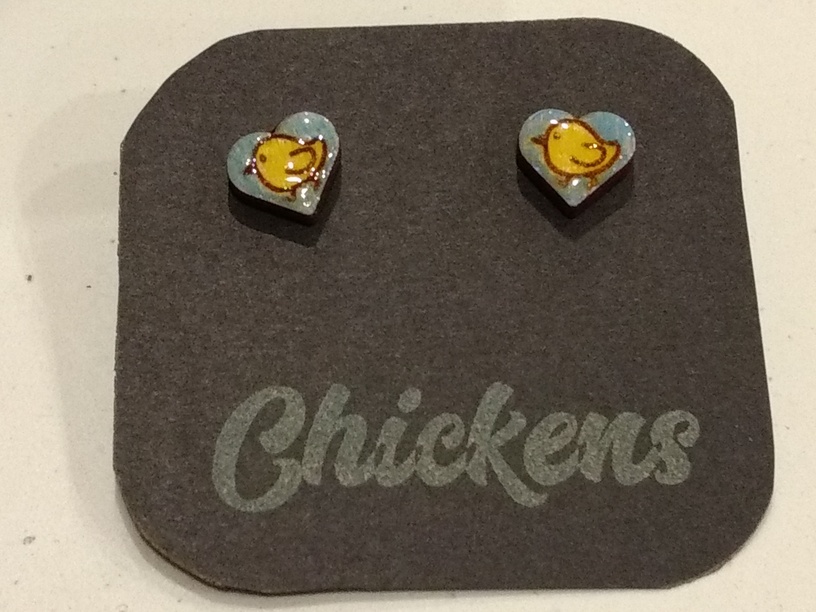
These are gifts for my 11-year old niece. I made earrings depicting some of her hobbies and placed them in a box that says, “Ginny’s favorite things.” These are inspired by the pins @Xabbess has been making (and I also learned about the Noun Project from her). Images from The Noun Project (I subscribed and it has been well worth it) . The designs are etched/cut on Baltic Birch. I then colored them by hand with colored pencils (and my reading glasses AND a magnifying glass!). They are sealed with Glossy Accents from Ranger. And, yes, I completely forgot to Weld/Unite my text before converting it. Oops. The surfing earrings are my favorite. They were actually colored with Chameleon markers and I like the watercolor look.
I used ModPodge to glue the image down to the wooden photo puzzle with mixed results. I’d use a spray adhesive moving forward, but I only had a repositionable spray adhesive.
I tried to use Krylon Satin Finish for a top coat, but it did not go well. I think because I used cardstock instead of photo paper, it soaked in and didn’t sit on top. Maybe a few more coats would have done the trick, but I was running short on time and the fumes were an issue.
I ended up finished the puzzle with ModPodge hard coat and that was perfect. So now I will remember to spray first, brush after, rather than the other way around!
Glossy Accents is the perfect finish for the earrings BUT it sinks into the etching on the wood and leaves a grooved surface on top. A few of the earrings got a second coat to try to smooth things out with mixed results. I’ll play around with that to figure it out. Also, G.A. is not waterproof, so I don’t know how well the earrings will hold up. I need to make myself a pair and just wear them for awhile to see!
Just a quick tip, if you don’t want the text to be kind of “separated” as it is, after you convert the text into outlines (if done in illustrator) go to pathfinder and merge them so it becomes all one piece!
So it will engrave without the “disconnected” look.
i don’t really like glossy, so i used matt the first time. but i think my next can will be satin (i only had matt/glossy available when i picked up that first can at michaels).
one downside. it’s REALLY smelly. it was damp outside, so i couldn’t leave it on my porch the last time. i put my two puzzles upstairs in a room with an air purifier running and it still ended up stinking up the house (damn return air vent).
Good tip. I’m actually very happy with the ModPodge hard coat, which has basically no odor (and a satin finish). Nice for winters in New England! But if the weather were nice, I’d be more apt to choose a spray-on finish for a smoother end result.
I also went with Baltic birch over the paperboard to minimize charring. The end result was really nice.
The hard coat is meant for furniture and such, so it’s not too far different than other finishes. But there are some subtle brush stokes because it’s brushed on. They mostly even out and it’s sandable. I was just scrambling to finish these on New Year’s Eve as our guests were arriving…
I’m definitely going to play around with finishes. The puzzles are just so satisfying.
i feel your pain on the brushing part. that’s part of the issue I had with the modge podge i used. but also with the liquid varnish i used on my first puzzle. even with a foam brush, i had problems. not just with brush marks, but with tiny bubbles (something that is probably 98% attributable to my lack of experience/skill with finishing so far).
Tell me about it! I am delighted that you were inspired to make the earrings. They are adorable and I love how they look enameled…something that now YOU have inspired me to try. I think my faves are the ski goggles.
I agree…the Noun Project is amazing and I’m so glad I subscribed, too. I use it a lot. Someone here on the forum mentioned it long ago, but now I’ve forgotten who to thank.
Nice work! I second the UV resin idea. The old school method was epoxy, and you have a very limited work time before it set. I used SLA resin for the mother of pearl snowflake inlay, and it was a joy. Unlimited work time so you can work at your leisure, then hit it with UV light for a super fast set.
I was introduced to it as “Bondic” which is really pricey for the quantity you get. I’ve seen liters of resin for printers for around $80.
A benefit of having a booster fan that runs when the machine is idle, I will lay smelly things inside the machine to cure.
yeah, i can see that being useful. unfortunately, the two i was talking about were 16x32 and i cut them on the universal at work. i guess i could have brought them here, put them in the machine, and run the bofa until they cured… hrm…
The finish is a seriously satisfying satin! I also just order matte finish photos from Costco and haven’t sealed those, but maybe I should…They come out pretty good as is, though, so I haven’t been too worried about it
You printed onto cardstock, so I can see how that would soak up whatever your throw on it, either way, your projects are great! I rally like the way those little earrings turned out; how big are they?
I have heard good things about that stuff. I suspect the Satin Krylon would have been fine with a glossy paper. I actually have a case of lovely glossy stock that is a cast-off from a printer. But he cut it to a weird size. I got a new laser printer for Christmas and was having trouble getting it to acknowledge the size. I finally decided to call temporary defeat since the clock was ticking and grabbed a good-quality cardstock. I was so concerned with getting the new printer to print that I didn’t even stop to think that the spray would seep in. It wasn’t until I noticed that the printed areas were getting coated, but the rest weren’t that it sank in (no pun intended!).
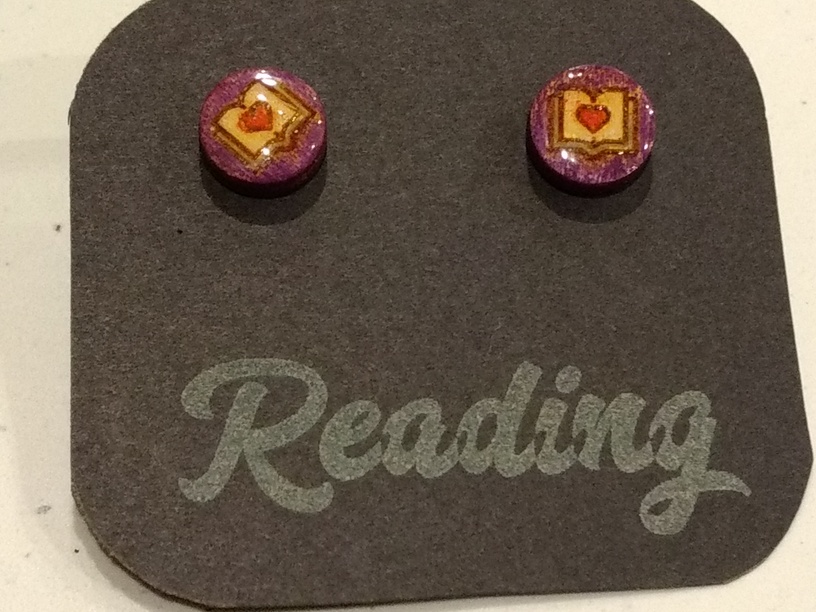
The earrings are about 0.4 inches across. Thank goodness for a brand-new box of Prismacolor pencils that were nice and sharp!


 That resin looks fun.