Lazer n00b Cardboard Show

Google Photos

Never used a laser cutter before. I’m also a bit of a miser. I also believe that playing with something like this is a good way to learn more about it. So, before getting to material that costs money, I decided to just play with cardboard. Used the forum’s search function and used:

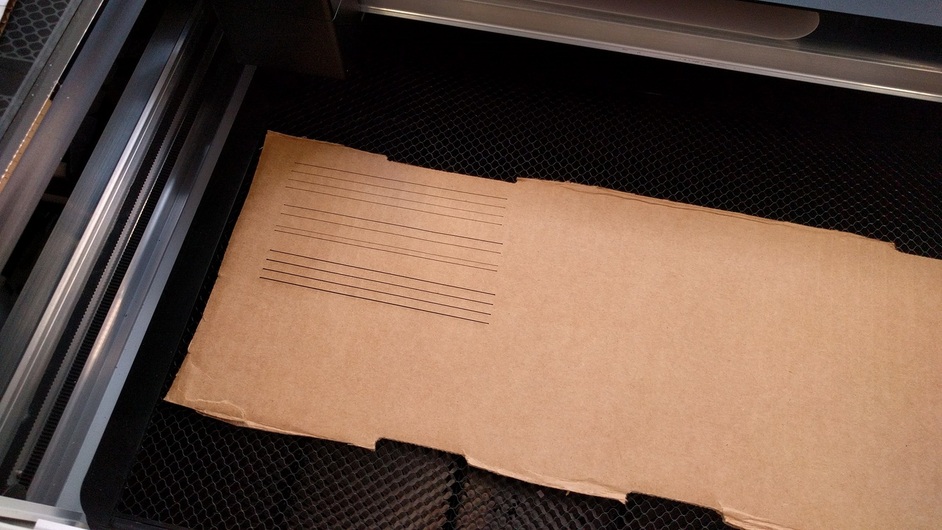
to get started. After cutting a few founders rulers, I settled on 215 speed/60 power for the cut and went with a shot in the dark for engraving with 1000 speed/15-35 for power depending on the color I wanted, wich worked great. Haven’t really settled on a score setting yet. It can be difficult if you are not scoring with the corrugation, I think.

One thing that I did not figure out right away was how to put material thickness in for non-Proofgrade material. You just click in the corner where it says:

Unknown
Unknown

If it were Proofgrade settings, it would be something like:

Medium
Cherry Plywood

Anyway, what you see here are the following:

So far this has been way easier than I expected. There have only been two bumps in the road at this point. The first was when the 'forge tried to do it’s very first calibration and the head, which was placed all the way to the right following the setup manual, tried to continue in that same direction eternally. Having been an unhealthily avid reader of the forums here, I figured I could try just moving the head directly under the camera. The machine was off and, because the setup manual specifically says to do it during setup, it was unplugged. Worked like a charm, but I’m not the only one that has had that happen.

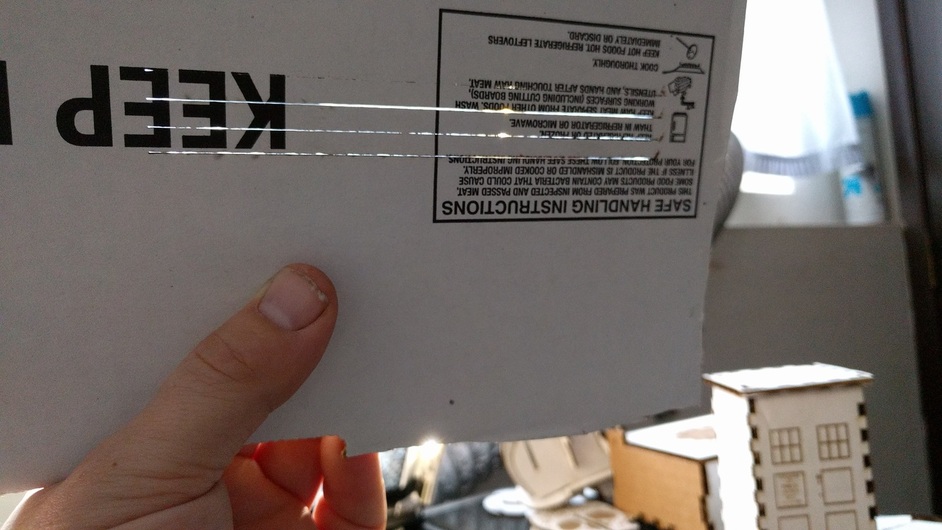
The second “bump” was all me. It did make me appreciate the warning information that the Glowforge UI provides regarding using non-Proofgrade materials, including cardboard. I was attending my machine at the time, so a lift of the lid was all that was required. Here it is:
Google Photos

I accidentally chose to “score” the decorations rather than engrave for one of the tries on the skulls. Had the power level set to 30, like I would for an engrave. Way too much for cardboard. Luckily, that was the first operation. So, I was able to rearrange things around the torched spot and not waste my precious cardboard. Tried to score it again with power set to 1 with results that were more encouraging and less um… fiery.

One more note on cardboard: it provides a large “fudge” factor for things like scaling a design to smaller than it was originally. Normally, that’s a problem for tabs and slots and stuff and wood or acrylic or whatever. There are two skulls because the first one I scaled too small, even for cardboard’s forgiving nature. I used the Glowforge’s UI to rearrange the pieces to allow me to have to scale it down less. The original is made for bigger material than I happen to be using.

43 Likes

I do 250 speed and 65 power for .15" cardboard. I like the speed a bit better. I could make everything out of cardboard and duct tape or masking tape. A lot of times it functions just well even if it looks a little shoddy. I’m getting some kraft paper and wallpaper paste and cover cardboard boxes. They work very well and hold up for a while.

Most of the times Proofgrade plywood designs will fit well for .15" cardboard.

I need to do the skull. St. Jerome and St. Teresa of Avila kept them on their desk: Memento mori.

14 Likes

21 Likes

I’ll give that a go. Faster is generally better.

Say, I wonder if the reason they list speeds and power the way they do is so they are consistent between basic and pro.

4 Likes

That’s a boatload of cool projects! :grinning:

3 Likes

I chuckled at that. :slightly_smiling_face:

Confirmed! :grinning:

3 Likes

Great! :tada::gift::sunglasses:
Cardboard is the only thing I have come close to ignighting, nothing I couldn’t snuff with my thumb.

3 Likes

Founder’s ruler in cardboard? We may have a first!

I tried one piece, but the amount of flame scared me a bit and I really didn’t like the burnt paper smell and amount of soot I got on my hands.

That hasn’t stopped me from stockpiling all my IKEA boxes, though. Someday I will have a project that needs a lot of test cuts.

4 Likes

Those look amazing! I’m going to have to do some more cardboarding.

I am using similar settings, just a tad faster because I have been cutting Amazon boxes at .1". I am wondering, though, why aren’t all settings just max speed and however much power it takes, or once you top out, max power and however slow it must go to make the cut?

2 Likes

That’s actually how I approach custom settings - for cuts I start at max power/max speed and dial the speed down until I get the cut. For engraves I start at max speed/min power and dial up power until I get good engraves.

So for cuts I solve for speed and engraves I solve for power.

But as you get into the nuances of design or materials you may want to do multiple passes (on acrylic for example so it doesn’t overheat and slag the cut to itself) or you want to play with LPI to do deeper or shallower engraves. But the speed/power rule of thumb is a good rough approach.

5 Likes

Wow, that is a lot of cutting! Glad you’re having so much fun!

1 Like

Often the power is lowered to reduce char and, in this case I think, the potential for flames. I haven’t tried that yet, though. I was just using the settings from the forum as a starting point. I’ll give it a go and post results here.

1 Like

Great write-up. It’s really helpful for me to read about what worked and what didn’t quite work as expected. Reading about the “fixes” is the best.

Thanks!

1 Like

I accidentally found settings that got rid of the sooty edges - just cut back the power a little. It leaves the cardboard mostly cut and slightly perforated, which isn’t a big deal and much better than leaving a black streak on everything I touch.

The first day I had some flaming cardboard, but nothing a damp rag didn’t fix. However, I watch all cardboard cuts - no just sitting by the laser weeding something or whatever when I have cardboard in it.

3 Likes

Yes. And never try a tight radius living hinge on cardboard. Oh the flames!

5 Likes

Here’s where I ended up with using max power:


The fastest speed that made it through this 0.165" cardboard without leaving bits stuck together was the bottom one in the pictures. That was full power and 275 speed. It did seem to leave more char, but fire didn’t seem like an even remote possibility for any of these tests. I went from 500 speed down in increments of 25, so maybe 277 would also work reliably.

6 Likes

So far I’m finding that for cardboard “Full Power” (On a Pro) at 500 speed is working well, There’s a lot of smoke, and some brief flames, but the air flow seems to put it out instantly. This is with the Amazon shipping boxes, which look like 1/8th inch. This works for anything without sharp/narrow corners, which tend to char a bit.

2 Likes

I got a pro, too. Wonder what’s up with that? Maybe different qualities in each of our cardboards?

Cardboard is pretty inconsistent. I had some cardboard cut cleanly at Full Power/500, and some cut mostly, with some parts clear and some parts had to be ripped out where there were parts not quite cut through. So next time I might try slowing down a little to see if it cuts more varieties of cardboard?

1 Like

One weird effect cutting cardboard is that because the amount of material in the path of the laser varies due to the “wiggle” of cardboard between the faces, you can end up with “dotted lines” instead of clean cuts. It’s easy to rip the dotted lines, but it is pretty amusing to see.

1 Like