Inspired by the Hahns Atelier design linked to here: Making a steampunk mask / PDF pattern / DIY free
I modified it quite a bit, and made sizes, and shape changes, and and and - so I thought I’d share.
Background
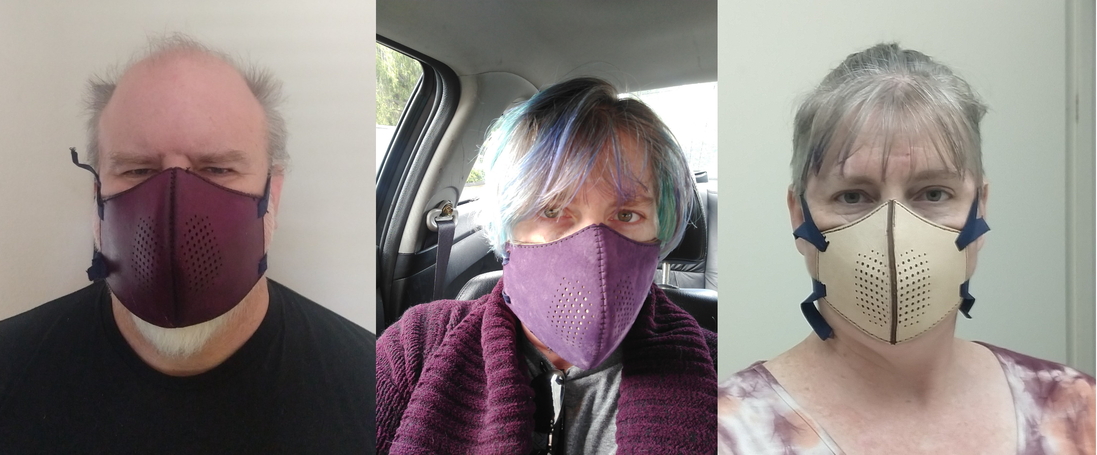
My husband and I have been wearing these for a couple months now. First I made the “small” one (center image above) which is pretty close to the design above - and not actually small, but fits a narrower face, then I made the “large” one which fits my husband better (picture on the left) - the curve over the nose is shallower which allows more width while maintaining comfort.
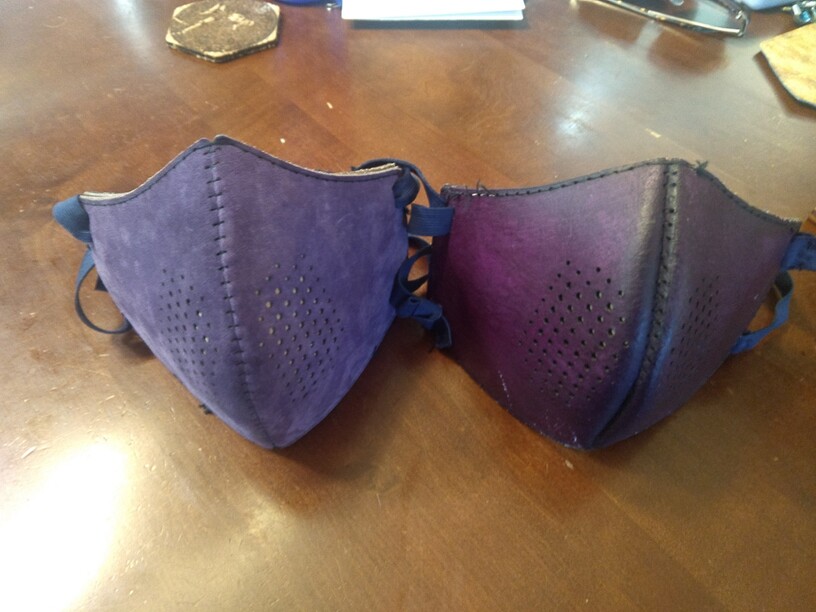
The downside of both of those is they cover the majority of your face and you lose all downward peripheral vision. Also while they create a seal pretty well around the cheeks/chin - the area around the nose is pretty open.
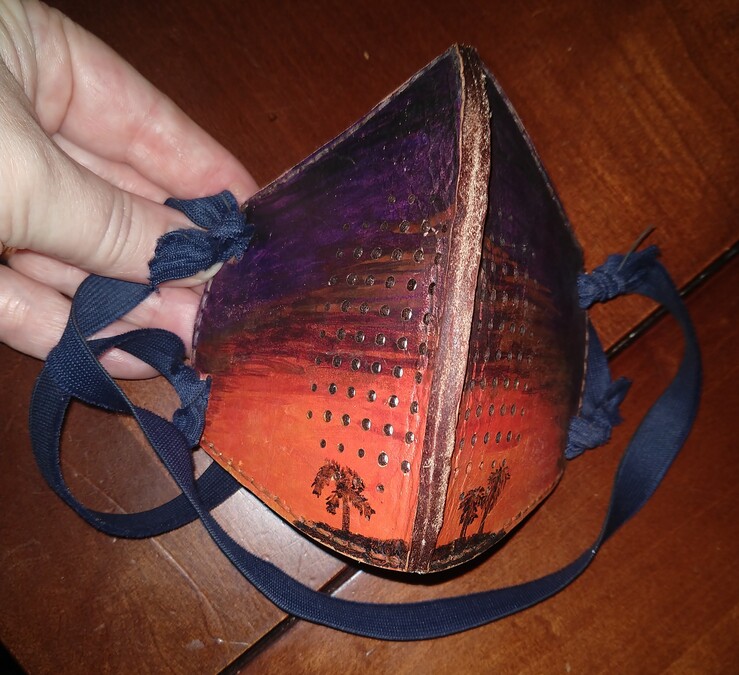
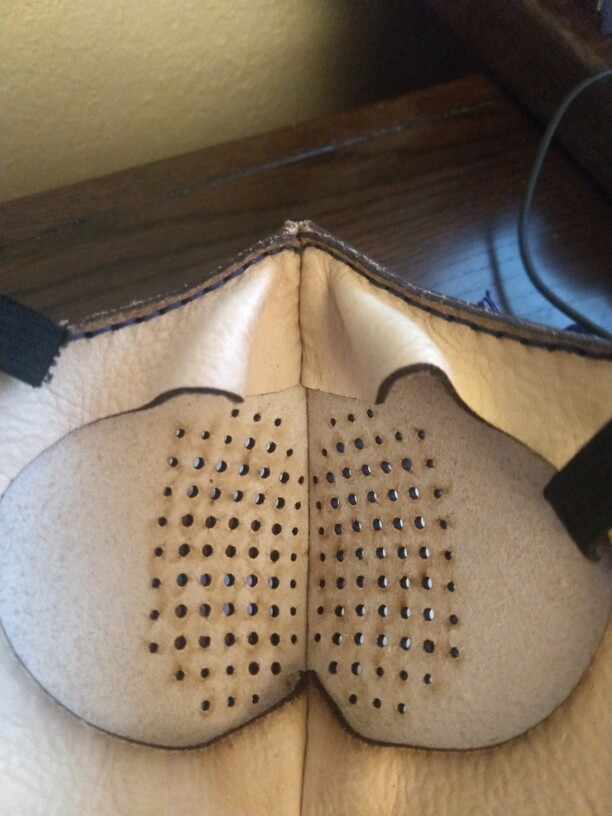
So I created the compact version (right image). In this case the large is about an inch longer than the small, but other than that they’re identical. These are designed to sit on your chin, not cover it, and there is extra leather in the edging that fills in the gaps around your nose. I am able to make a solid enough seal that my glasses don’t fog up ![]()

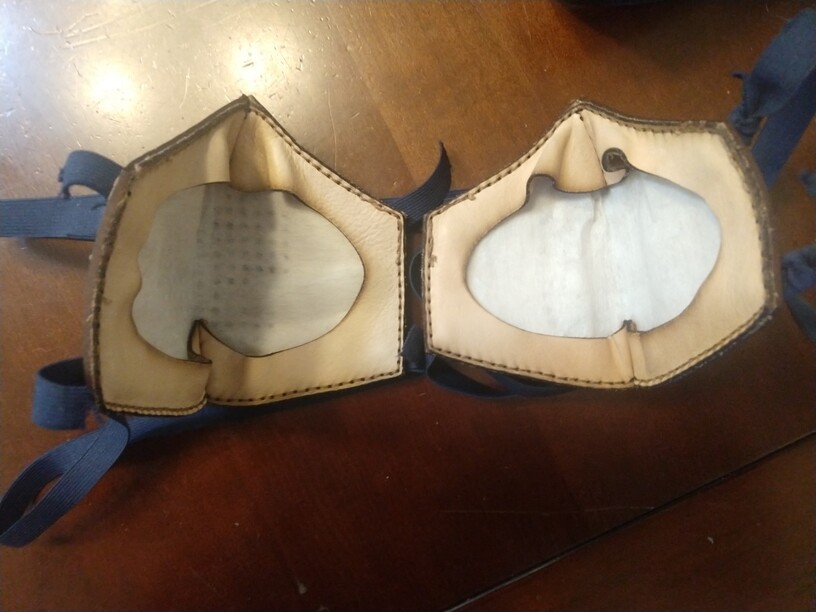
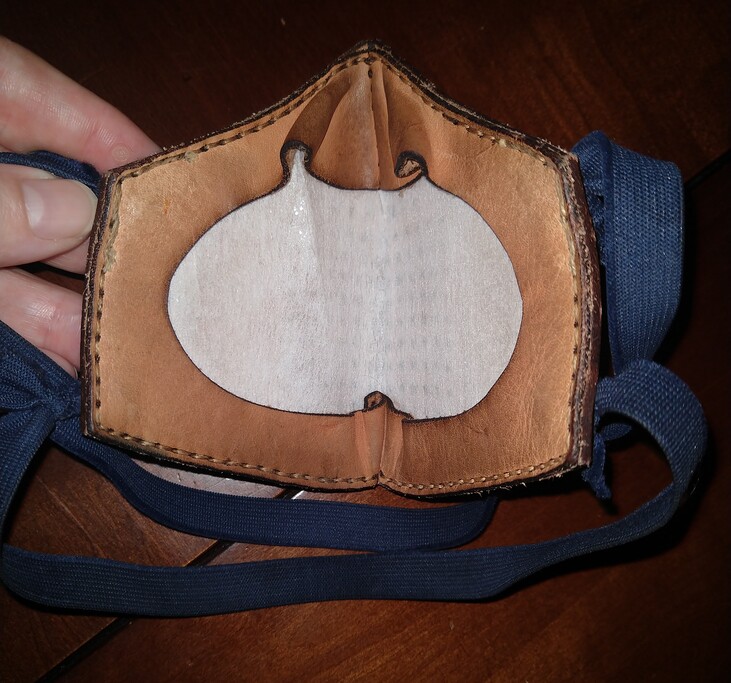
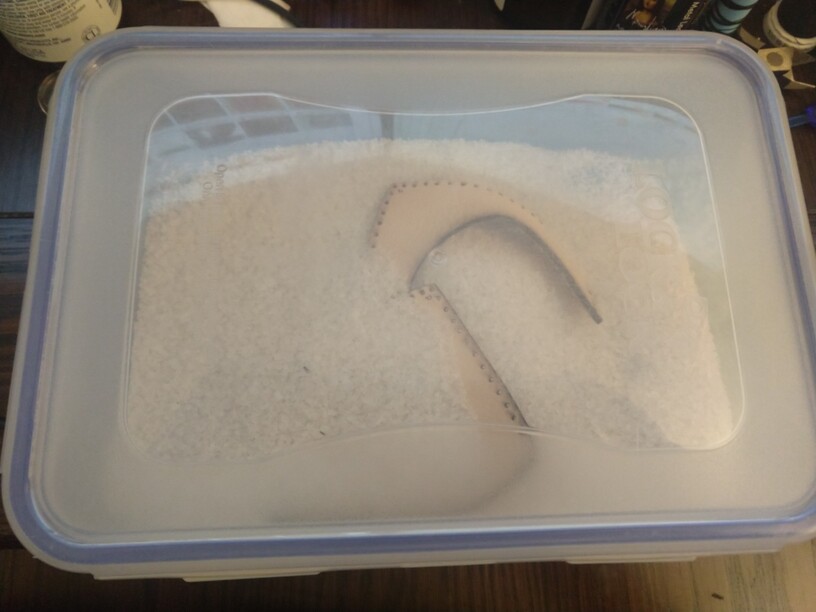
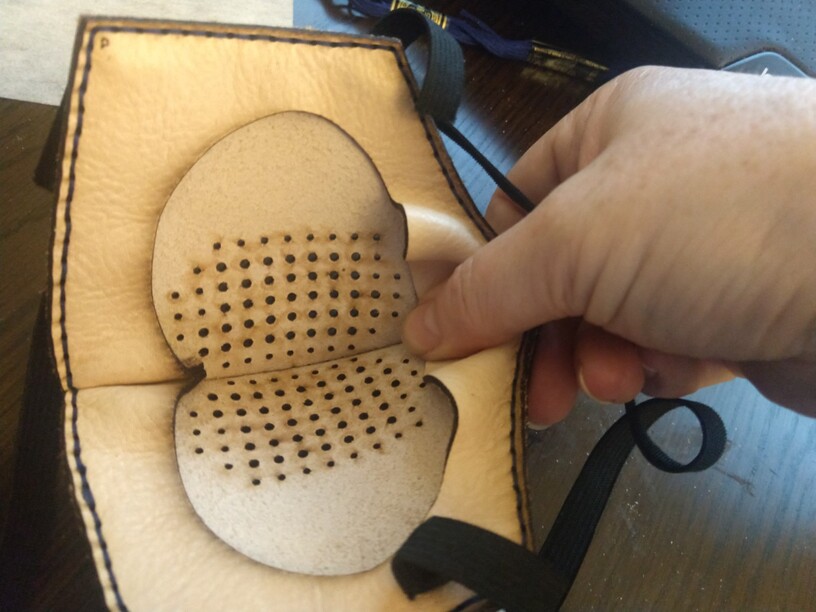
The filter is made from fusible interfacing. It was recommended as a good filter when cloth masks were first being suggested. You can easily fit two layers in, as they just tuck under the edging.
It’s sewn together with embroidery floss that’s been run through beeswax. It creates a solid seam that nothing is getting through! I’ll put links below to the specific things I’m using, but any sort of waxed thread will do it ![]()
Instructions
- You can print out the shape on paper and put it together with tape to get an idea of which one will work best for you.
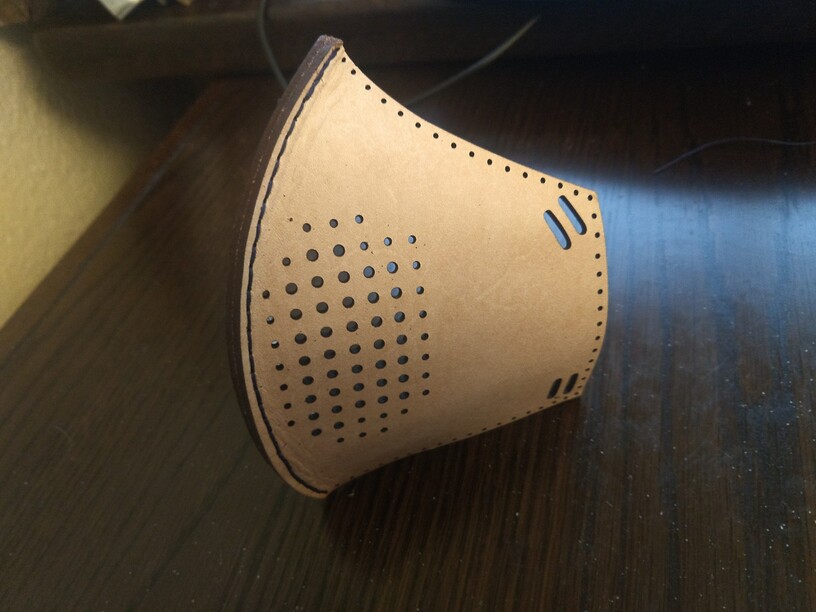
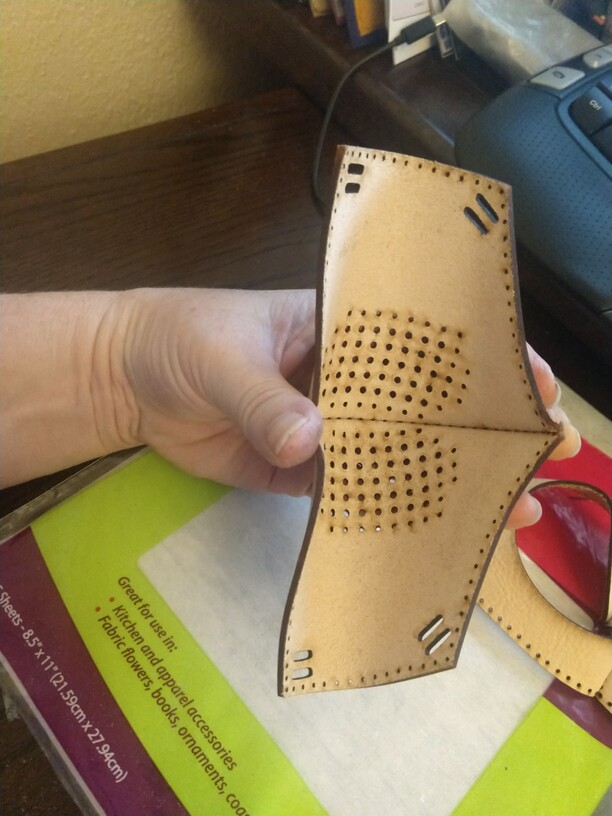
- Cut the mask portion out of stiff leather (I used PG thick)
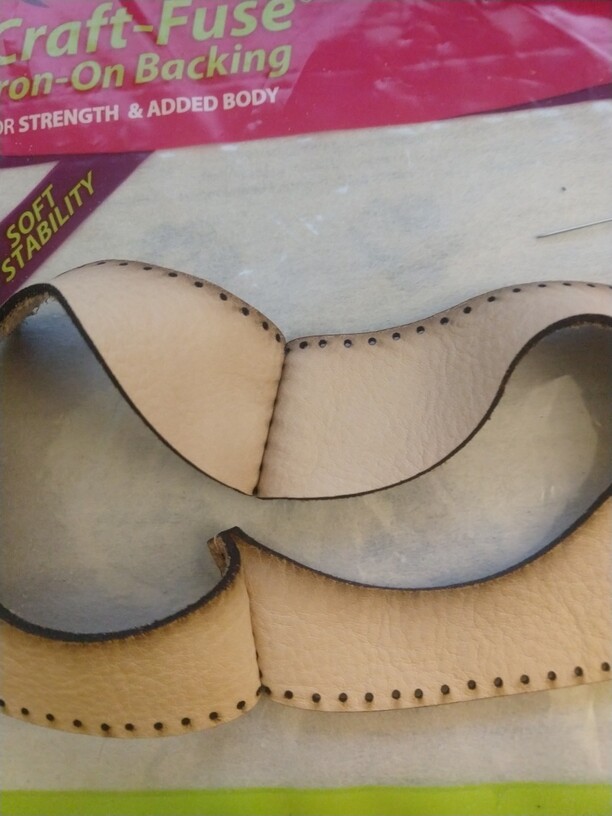
- Cut the edging portion out of soft leather (I used Tandy’s milled single shoulder)
a. With time stiff leather will soften, but you will not be able to sew this together unless you start with soft leather - I clean the edges by dumping everything in a tupperware of salt and shaking it around.
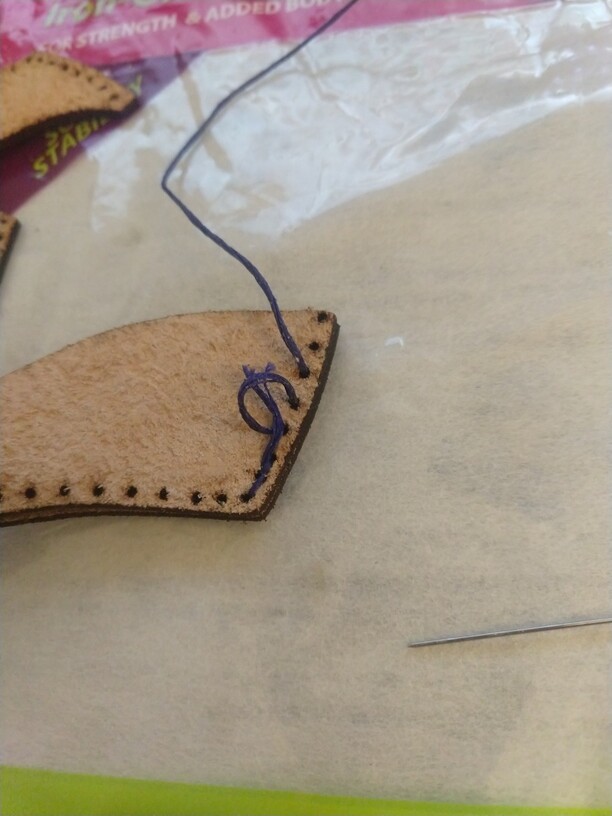
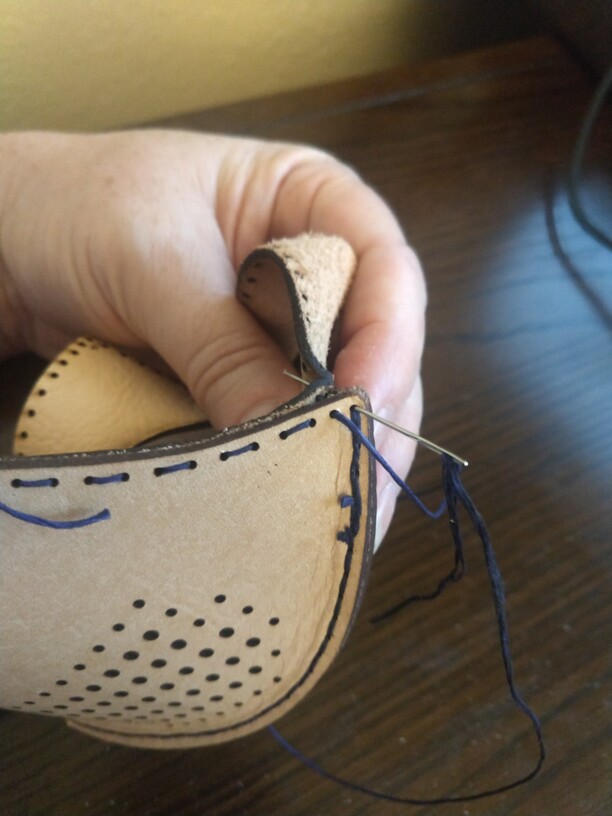
- Cut off about a yard of embroidery floss and run it through the beeswax until solidly coated, then thread your needle
- Sew the smooth sides of the edging together at the nose and chin
- Sew the rough sides of the mask together down the centerline
a. Shape the mask by curving it in your hand. When you’re done it should sit upright on its own
b. You can insert the elastic now - it is easier than inserting it later, but means you have to deal with it while you’re sewing. Your choice!
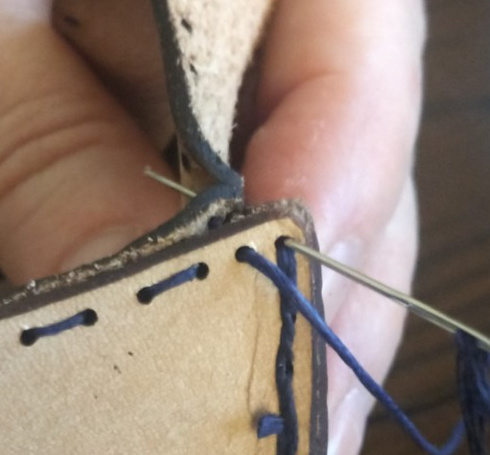
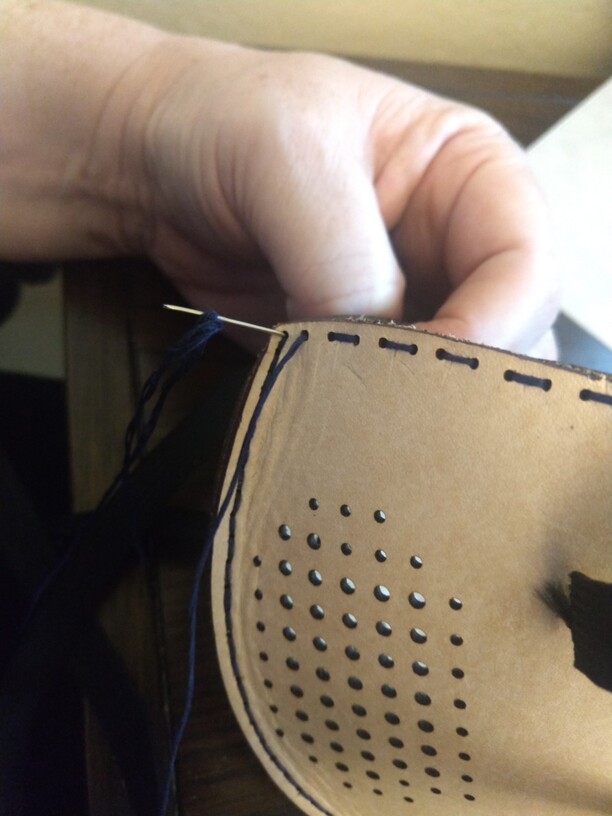
- Sew the rough side of the edging to the rough side of the mask
a. You must stitch every hole - so that your line looks continuous on both sides when you are done. Go through every hole going one direction, and then reverse and go through the same holes but with the thread on the opposite side
** This is especially important at the top of the nose and the center of the chin
b. You’ll likely run out of thread after doing one edge here - go cut another one, beeswax, thread and go
c. If you did not insert the elastic before - do it after you’ve sewn the two short edges, but before the tops and bottoms. Put the elastic in by lifting the edge - Go wash your hands - even after the salt bath, your hands are dirty
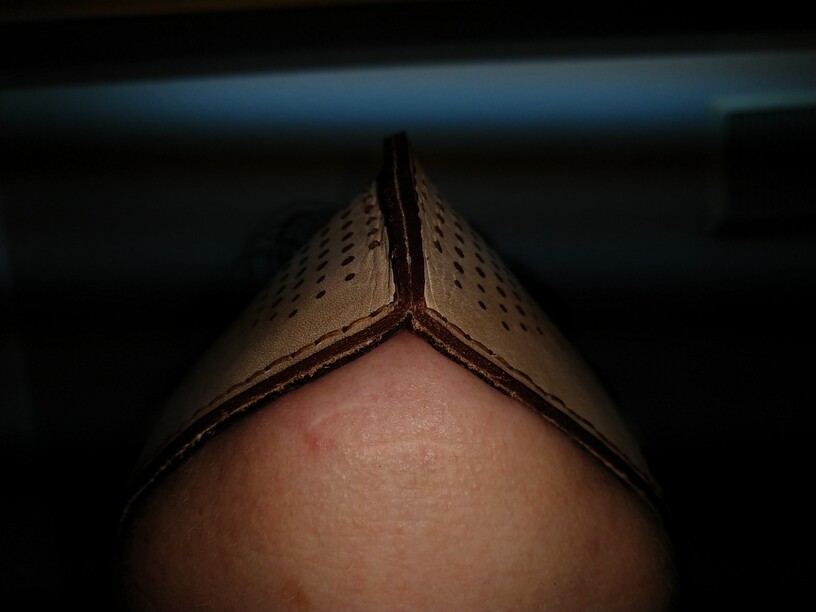
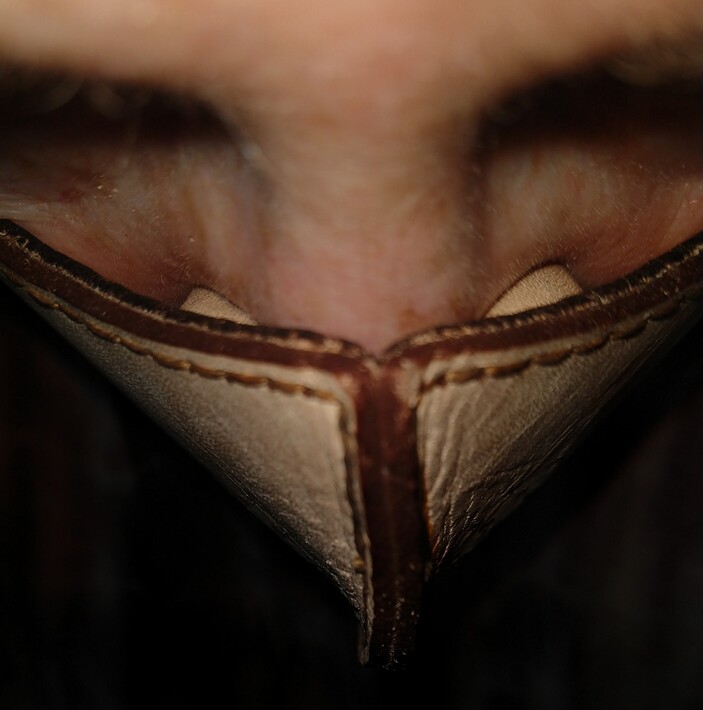
- Now set the nose. Make sure the center seams match up, and then move the leather around until you have two tubes on either side of the nose channel - use your thumb to set it.
- Insert the filter (yes, this will mess up the nose, but now you know how to put it back!).
a. Make sure there isn’t a big bump in the middle - if there is, that’ll brush against the tip of your nose and/or lips. Nobody likes that.


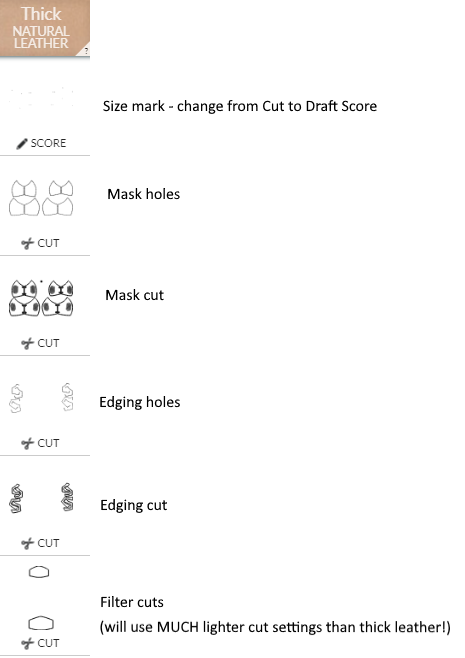
Right click and save as for pattern

When loading to the ![]() it comes up with a mask error…I didn’t use any masks, so just ignore
it comes up with a mask error…I didn’t use any masks, so just ignore
The settings all come up as cut - and in a different order than this - this is how I rearrange them
Tips and Tricks
- Expect to break needles. Have spares

- You’ll need about 2.5 times the amount of floss for the distance you are sewing - so you can estimate pretty easily how much you’ll need. I tend to sew the short sides, then the top, then the bottom. No need to try to do it all with one thread!
- Instead of tying knots in the floss I wrap about an inch of the ends through the stitches. It will trap it and not leave a bump
- When sewing the edging to the masking, whether you tie a knot or use the technique above - make sure it 's on the mask side. You don’t want anything extra rubbing against your skin!
- Before you put the mask on for the first time, work the leather at the nose until you’ve got an opening you think will fit yours. I find that the width of the pad of your thumb is often about the same size as the width of your nose - so start there!
- You will mess up the nose just taking it on or off the first few times, but it “sets” in position after a week or so.
- You will always mess up the nose changing the filter - it will go back to the set position with some fiddling.
- Change the filter if it gets damp. If still dry, I leave it in the bright sunshine to (hopefully) sterilize a bit!
Links to products I used - in case you need them:
Beeswax: Beeswax and Holder 2/Pkg. - #411464
Thread: Amazon.com
Needles: Amazon.com
Soft leather: Milled Veg-Tan Single Shoulder — Tandy Leather, Inc.
Pellon (filter): https://www.amazon.com/Pellon-721-Mediumweight-Fuse-N-Shape-Package/dp/B0857LH92Y/ref=sr_1_33
1/4" black elastic & PG thick leather