After sharing my first leather watch strap prototype in a post yesterday evening, I decided to focus on updating the design based on the lessons I learned. I wasn’t thrilled by the outcome of the first prototype, but that’s how a lot of first projects go! This next iteration took about 5 hours to make from designing to cutting templates, tooling, and finishing. I’m excited about how this one came out and there’s only one more tweak to make to the template before making lots of these beautiful watch straps! Here’s how the day went.
1. Redesigning the watch band’s design
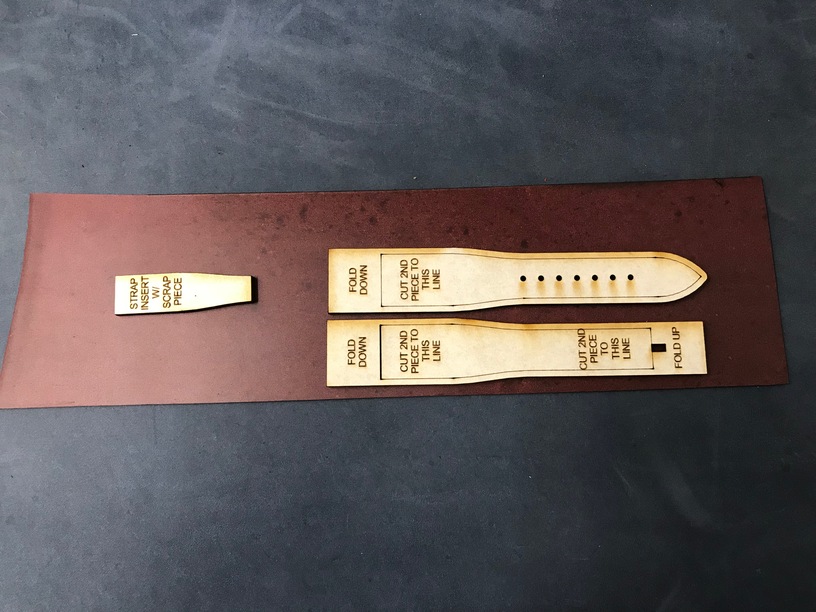
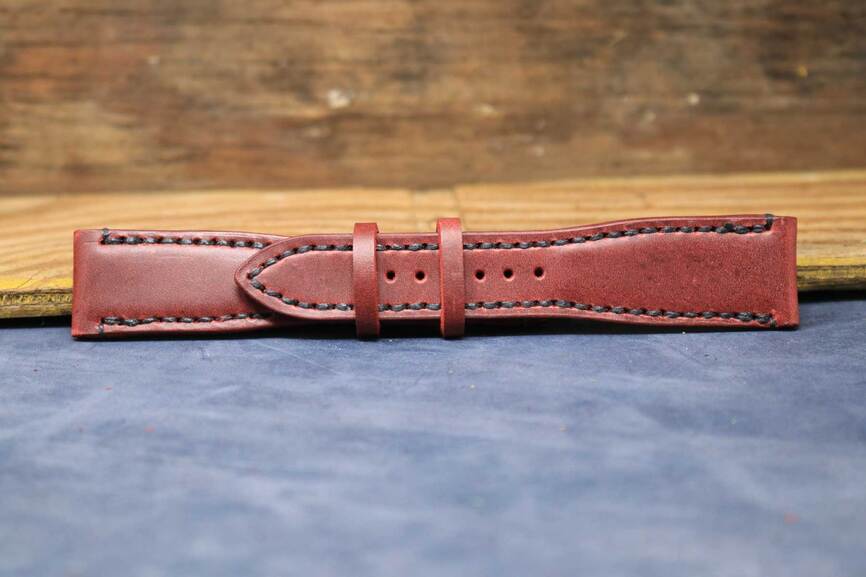
In my initial prototype, I liked the subtle curve that goes from the narrow clasp area to a wider finish at the watch connector. For this next iteration, I decided not to have one long cut that’s folded in half to create each watch strap. Instead, I cut two sides per strap and glue them together. I also decided to experiment with an insert piece that’ll add a little depth to the watch strap closer to the connector piece. Lastly, I used a thicker leather for this version.
2. Cutting, tooling, and stitching
Using the wood templates that I cut out using the Glowforge, I cut my favorite red leather, tooled, and stitched each strap all by hand.
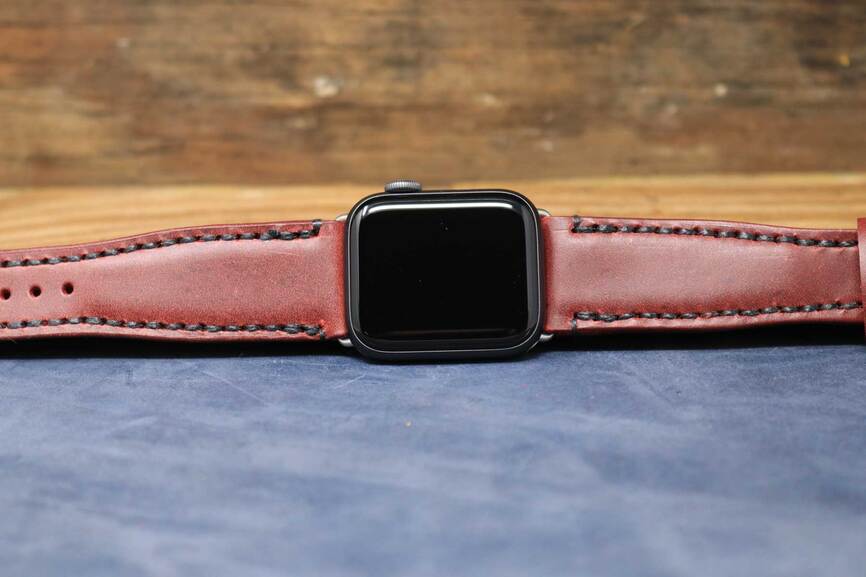
3. Attaching the accessories
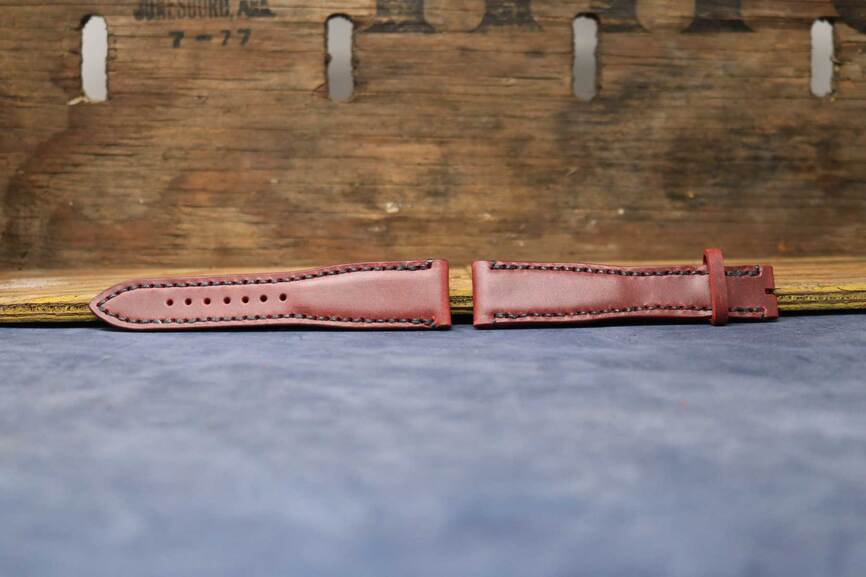
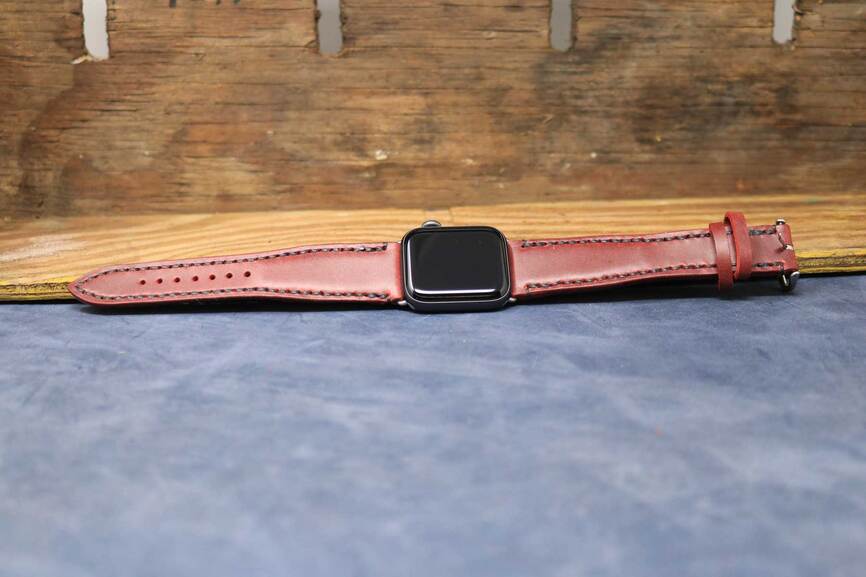
As you could see in the photographs, this prototype was made without any of the connector pieces in place. Instead, I used a stainless steel pin to hold the areas where the accessories would be disassembled and pieced onto the watch strap. This is simple to do with the apple watch connectors that only require 2 screws to be removed as well as the strap buckle that is a spring loaded pin.
Conclusion
I’m excited by how this 3rd prototype came out and there’s only one minor adjustment to this strap that I’ll be making before I’m satisfied with it as a new product to add to my collection! Let me know what you think!
I’ve been asked if I do watch bands at shows (I do a lot of different leather items), and this provides lots of inspiration (but w/out knowing size of watch they want it for, hard to guess what to stock). But first I should add wallets…
Thank you! Yes, size is definitely a tough one to figure out for watch straps. The prototype that I made here is actually to large for my wrist so I’ll be giving this one away to a lucky person willing to test it out and give me feedback . In terms of making watch straps for different types of watches, I believe there’s a universal dimension for the connector areas that range between 18mm to about 24mm unless it’s a completely custom watch. It’s also difficult to make an “exact fit” leather strap because some people like the straps a little loose around the connector while others want it to stay put against the edges. Oh the life of being a craftsman/woman!
standard men’s watches usually have lugs that are 18, 20, 22, 24mm. there are occasional exceptions at 19, 21, 23, but those are far less common. Widths are listed twice, because they often taper. So you’ll see 22/20, which is 22 at the lug and 20 at the buckle.
the lengths have some standard dimensions as well, and people who make/buy custom straps generally list them like this: 125/75 or 135/80. So the tongue length first and buckle length second.
you can measure your wrist and figure out approximately the right lengths you need.
This looks great! I really like how it came out. I have been thinking of making a band for my apple watch. Where did you get the hardware? I have been trying to find a source for the piece that is received be the watch.
Terry, the owner, is a friend. really good guy. You can use these to put NATO straps (also something you can make on the GF) on your watch. Since they come with the actual spring bars that watches use, you should be able to make a standard strap that will fit onto these as well as a NATO. comes with a spring bar tool, too.
Thank you! You can get the ones that @shop recommends, which is a very popular place to purchase accessories and other goods. Personally, I purchased my watch accessories in bulk from a manufacturer in China which makes the same attachment as the ones that Apple does (not spring loaded like the cool ones from NATO!). Good luck!
So, now that I have read this (thanks for the link), I of course have questions.
You decided to hand cut the leather using the lasercut template. Why? (Seems like discussions about edge char, and char inside lasercut holes could be reasons, but I value informed opinions and would like to read yours.)
The template shows that for this design your matched piece is narrower than the (outside facing?) piece for each half of the band. Are you rolling the edge of the wider piece? I cannot see/interpret the assembly from the pics here.
I hand cut the leather for two reasons - the first is the charring on the cuts and the second is the charring inside the laser cut holes. I can clean these charred edges and have precise cuts from the laser cutter, but the time it takes me to hand cut the leather using the templates and leather tools takes less time.
Both pieces are the same width - the inset lines are my guides for hole punching which aren’t necessary if you decide to laser cut the holes. Typically, you use a wing divider and offset a line from the edges of the leather pieces to act as a guide for your leather chisel. However, the length of the matching piece is shorter because the longer piece rolls under it to hold both the apple watch connector on one end and buckle on the other. (Wow I hope this doesn’t confuse you!)
Yes, I’ve decided to use glue in my smaller projects. It’s a typical part of the leatherworking process and helps to hold the pieces together throughout its lifetime. It also keeps the edges from separating, which helps the edges maintain a clean, sleek, and finished look after burnishing.
No, I 'm not confused at all and thank you for sharing your opinions and experience.
I just misinterpreted what I was seeing in the first picture. The difference between engraved lines and cut lines on the wooden templates wasn’t obvious, to me!
 . In terms of making watch straps for different types of watches, I believe there’s a universal dimension for the connector areas that range between 18mm to about 24mm unless it’s a completely custom watch. It’s also difficult to make an “exact fit” leather strap because some people like the straps a little loose around the connector while others want it to stay put against the edges. Oh the life of being a craftsman/woman!