Mine went from “pretty good” to “still pretty good but slightly different” ![]()
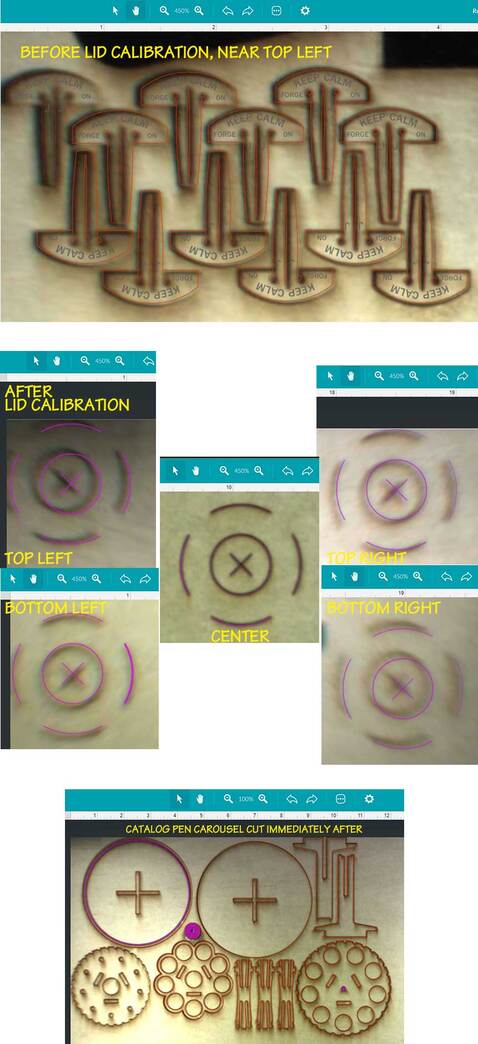
Not quite as perfect in the corners as some have reported but close enough for what I have in mind at the moment. For example: I’m confident I can put those carousel pieces back in to personalize if needed.
2 Likes
You should do it. They can roll it back for you if you don’t like it. And it might be amazing!
3 Likes
Are you, @ChristyM, and others rebooting before you run the calibration, for the freshest calibration?
They’ve had a bug in the system for a long time where the head loses something like a steps worth of position for each job it runs which results in the alignment drifting over time. There has been at least one case, maybe a couple, where someone rarely rebooted their forge, and the camera calibration was off.
And reboot after calibration? In several cases, that’s been reported to help.
6 Likes
LOL! You sound nurse2drugpusher! “It’ll make you feeeel good!” ![]()

I’m not convinced of that. Are they snapshotting every machine’s calibration? Can they really roll my machine back to yesterday if I want them to? If they tell me yes to that I’d certainly do it because there’d be no harm if it blows up.
2 Likes
They’ve done it for a couple of people already, so yes, they can!
2 Likes
rebooting after made a huge difference (more than 1/4" in one location) for me.
4 Likes
Yeah. I actually went a good week or so between alignments. I don’t have any complaints, but my alignment was already really good.
My alignment had never ever changed in the time I’ve had the unit. I recorded errors at specific points when I first got it and they remained the same for 18 months. Mainly because I am very anal with setup. It makes me question many of the anecdotal claims that unit alignments got worse or better.
I ran the calibration process with my usual anal attention to detail. Alignment accuracy got much better and almost perfect. I never move my machine so barring something working loose inside, there is no technical reason the new calibration should ever change. So go for it.
4 Likes
Just let us know about it in this thread, and we’ll gladly roll you back to your previous calibration if the results aren’t what you expect.
4 Likes
Please check my print logs. Calibration attempts unsuccessful.
I’m sorry to hear about that. I took a look at the logs from your Glowforge and I see that a new calibration was successfully applied in the last hour. Could you please provide me a few more details about the issues you’re having?
Sure. Thank you. Here is a screenshot of the test. 
Our machine went from off by 3/8" x 1/4" to off by up to 1mm depending on the distance from the camera. If our machine was already acceptably aligned I would have skipped calibration. It has however made the machine significantly more usable and for us, it was a huge win.
Now if only they could adjust the power so the laser cuts the same in the bottom right corner as it does in the top left 
2 Likes
Stupid question alert: Is there any special way you’re rebooting or are you merely saying you’re powering off your machine, letting it sit for a few seconds, and powering it back on?
I ran the calibration last weekend. Then, toward the end of the weekend, my Glowforge got caught in the “centering” cycle, and support deemed it the lid ribbon wire. Just replaced that with the one they sent me.
Here’s my question…do I need to run the calibration again? If so, is there a way to do it again without all of the engraving/scoring?
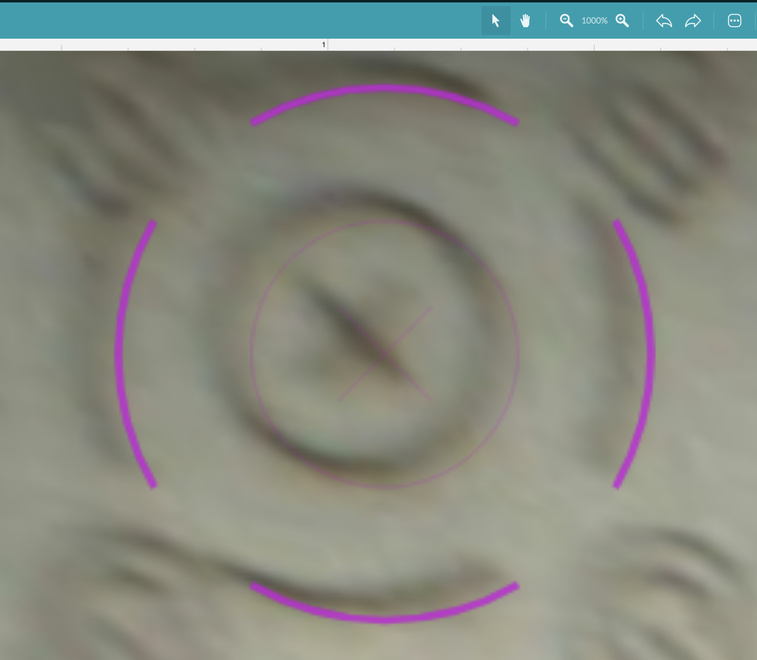
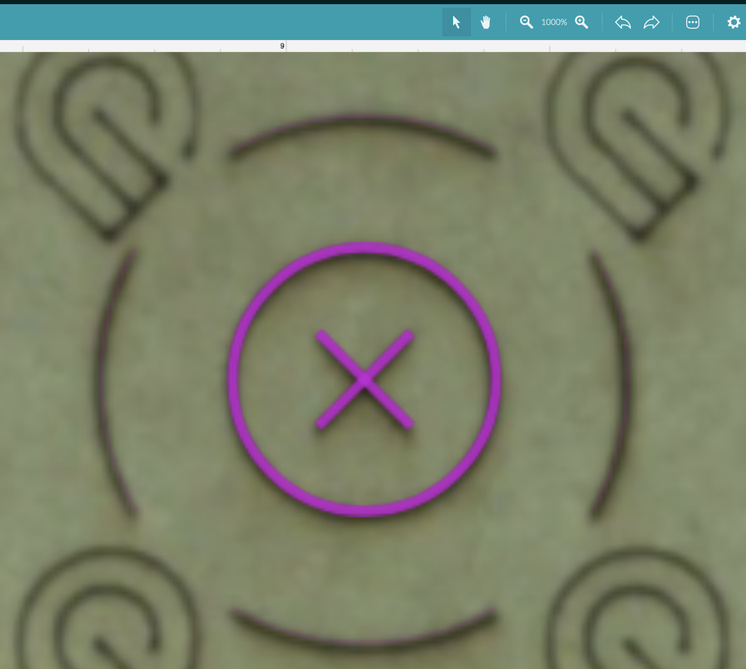
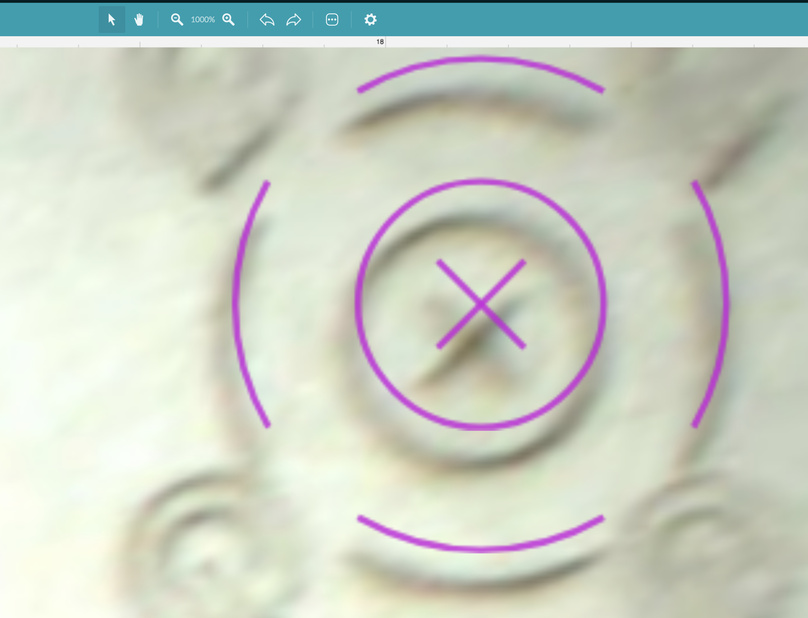
Here are some of my test sequence images:
This is top left. Is this an acceptable level of alignment? All images are zoomed at 1000%
Here is dead center:
Here is far right at the top:
Hey, thanks, @vee! That’s great to know. I’ll give it a go this weekend then.
Hi. Thanks for your reply. I tried the calibration 3 times. Each time, all goes well until I go to the last step of checking the accuracy of the camera. As before, it is fairly accurate under the camera but becomes more inaccurate the farther away I print.
just a regular power cycle with the power switch.
All the pieces of proofgrade material I have are not “exactly 12x20”, they are a little more than 12 and about 20.5" Does that mean I need to trim it to 12x20? Or does it just mean that it needs to be the same size as a piece of proofgrade material?
Essentially as long as it covers the entire laserable area of the bed you are good. Your pieces of proofgrade should work just fine.
1 Like