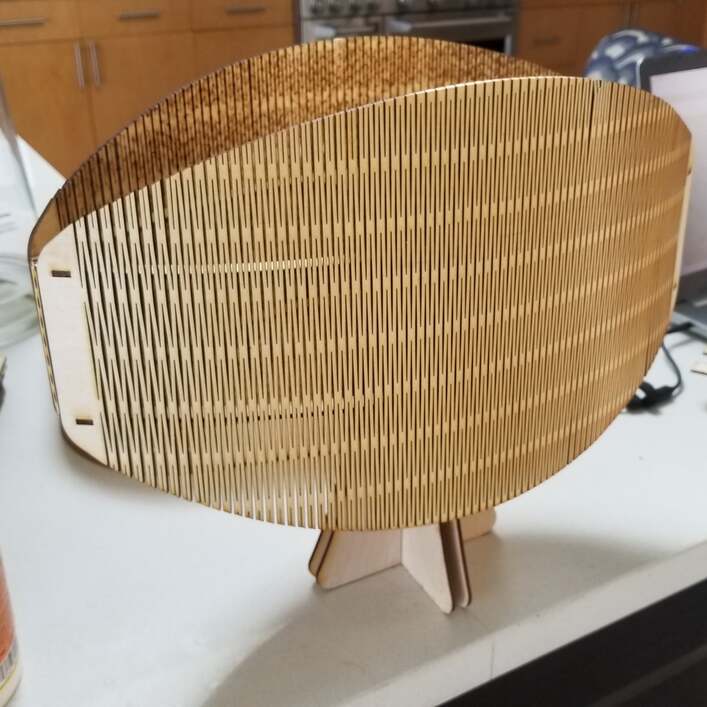
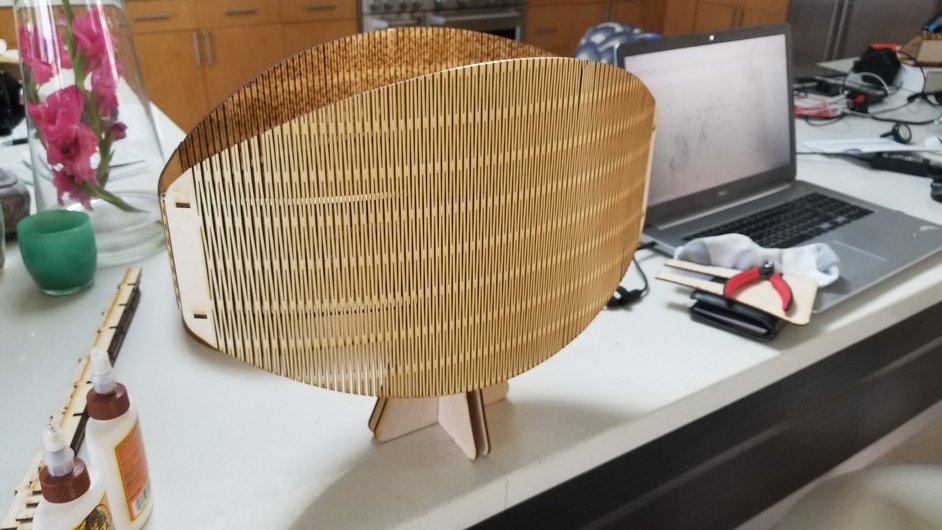
First draft. Not bad but some tweaks needed. Inspired by a recently published instructable which lacked the actual design and thus was irritating (more of an ad for amazon affiliate products). So, made this from scratch. Still need to add some leds but too hot in garage right now to dig them out.
Nice! I like that idea for light diffusion. 
3 Likes
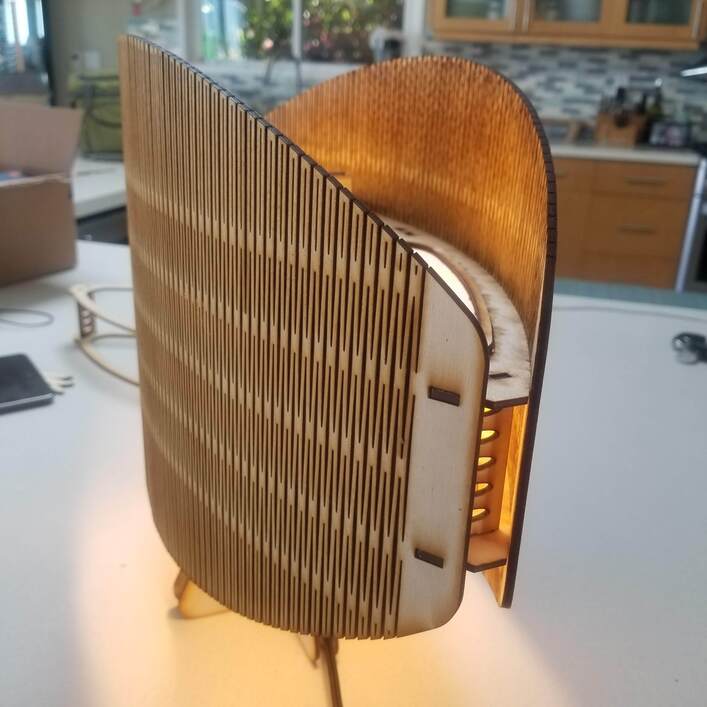
The side is both bending and being stretched. In this case, 115% of cut length. That is probably too much. Backing off a bit on rev 2.
1 Like
I look forward to seeing pics with the LEDs inside and lit up…it looks great!
2 Likes
Nice design! Lots of potential for shapes and live edge patterns.
2 Likes
Great shape! Well done!
1 Like
What a tease not having it lit up  Looking good so far, what other revisions are you thinking other than the backing down on stretching?
2 Likes
Very nice, Love the design.
1 Like
That is so cool! Please post pics when you’ve added the lighting!
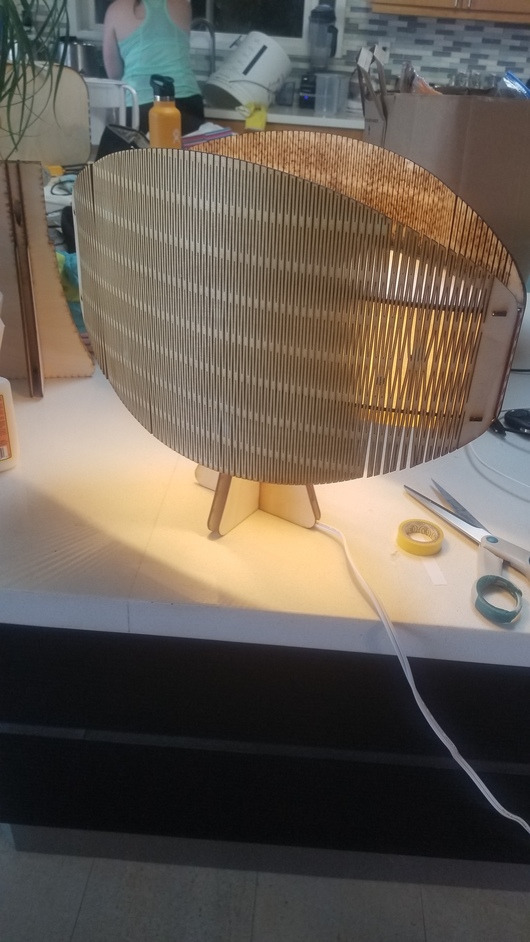
I started messing with the lighting part yesterday. In daylight, I was not happy with the results so ordered some new parts to change the led source. I left it running anyway. Last night, my wife took a look and said she liked it much better in the dark. I had to agree so I continue to tinker with the original idea as well. Thus, no results yet but I should have something to post in a few days. Cutting version 3 of the shade now.
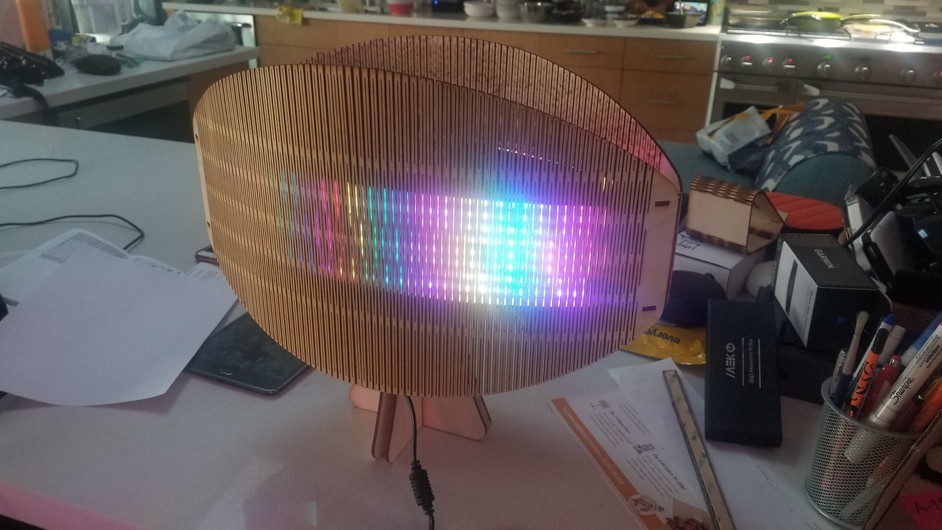
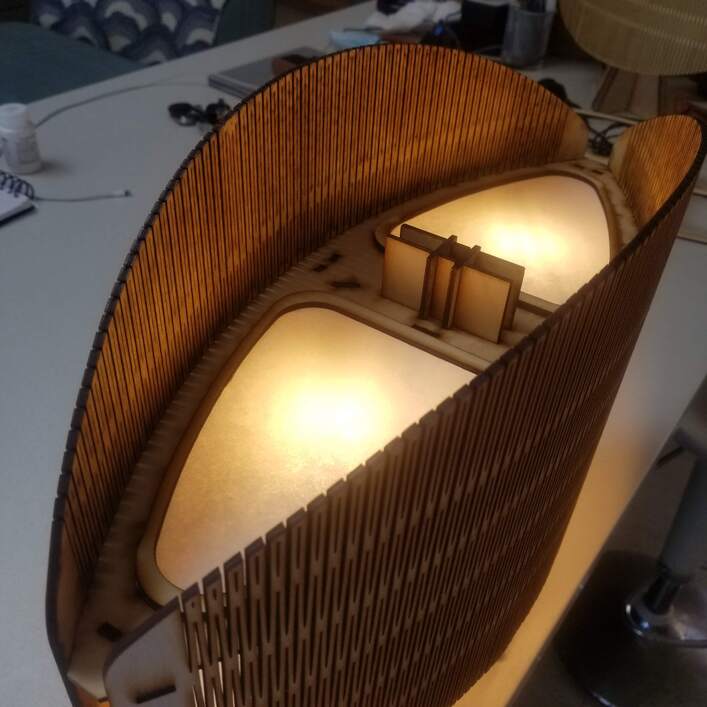
One interesting finding is that with the thin slots, one can only clearly see a part of each led in a matrix underneath. When showing any mixed color ( i.e. something other than 100% red, blue, or green), the result ends up looking multicolored vs solid. This is due to the smaller red, blue, and green elements from each LED selectively shine through the slits where they line up. This is either a feature or a bug depending on where this ends up.
1 Like
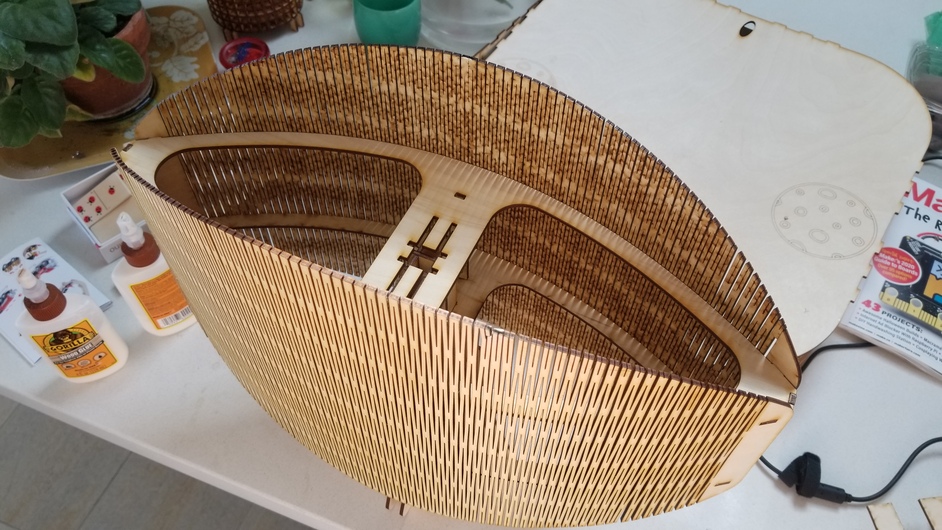
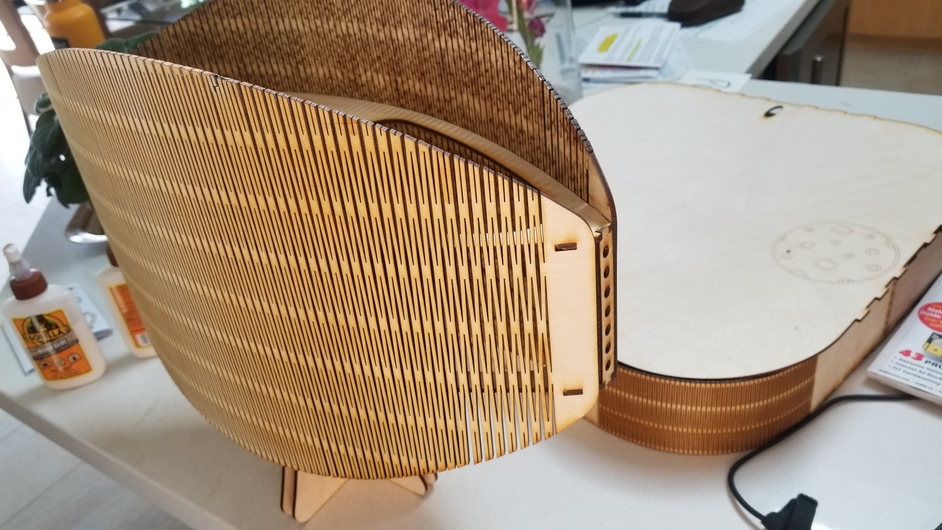
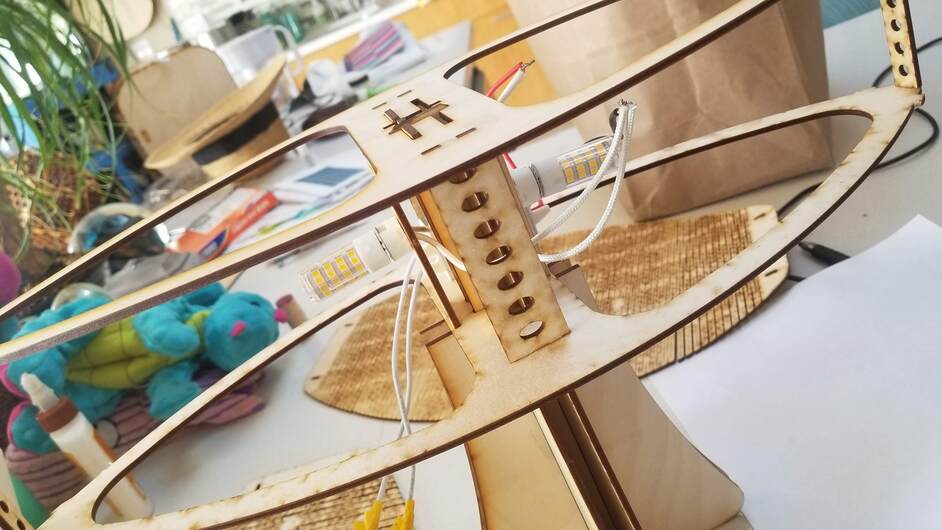
I have changed up how the living hinge is aligned with the shape of the shade. It was just a stock overlap in gen 1 which caused some ares to stretch more than others based on where the cuts hit the perimeter. I tweaked that alignment a bit in gen 2 and it did what I wanted but also showed that I needed to do more. So hoping for more consistent stretch in gen 3 which will be good for symmetry. Also tweaked the sub structure to make it easier to assemble and stronger. Also added some additional places to pass wires. Lastly, I abandoned plans for living hinge top and bottom shade parts. It does not seem they are needed ( at least not with the current led panels).
1 Like
A true engineer at heart there ![]()
Very cool!! 
That is pretty spectacular! The top picture of it lit reminds me of one of my favorite scenes in Close Encounters. Awesome!!!
1 Like
I think I am going to keep this " close encounters" version, but may change out the brain from the stock pattern generator to a custom arduino one in the future. Very few of the patterns in the stock brain are useful in this application.
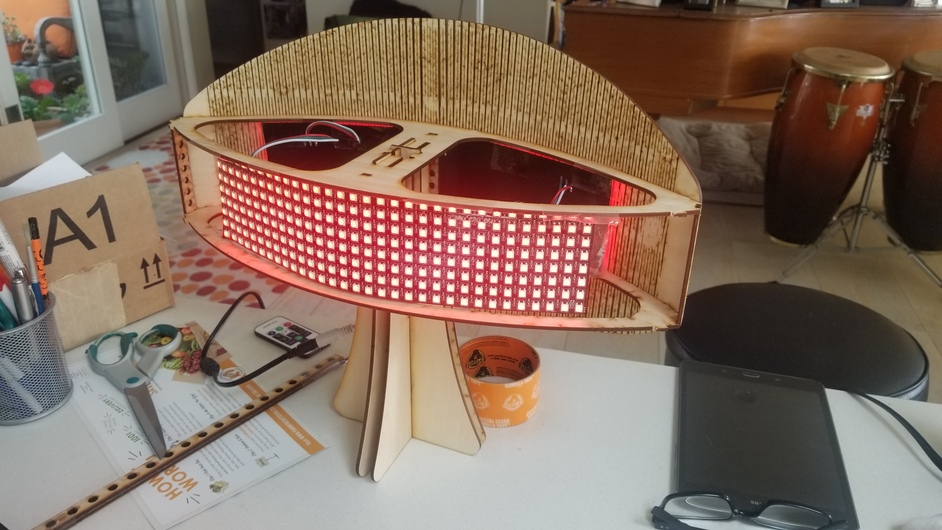
Lighting wise, I have moved on to a 2nd version that uses some simple warm yellow led bulbs for a more conventional “lamp” look. Will post photos of that tomorrow as I need to work on the diffusion a bit more.
1 Like
4 Likes
That looks amazing! I love the shape.
2 Likes
Fast forward a few months. Kept working on this and made a few lamps in the original size then made a bigger version without a stand. I finally got around to hanging it.
4 Likes
I have updated the desk lamp design a bit to make it more user friendly to build (adjusted fits and sizes) and nicer ( added diffuser panels, updated the frame to line up with the joints of the living hinge, moved the end supports inward for a better look) . I have made it available on my Etsy shop. The job takes 5 sheets of Baltic birch, and one sheet of paper for the optional diffuser.
That much living hinge makes you want to pay extra attention to getting your material flat and use your best wood for the shade as is a long cut (close to an 3/4 hour per side) on my pro Having a partial cut is likely terminal for the aesthetics.
Some glue is required but not as much as you might think, most of the joints stay together by the magic of gravity or tension in the stretched wood. Adding the lamps, and sockets will run about $20 to $25 in materials. Suggested materials are in the instructions.
Follow the link to see the listing. It provides a discount for items in my shop

8 Likes