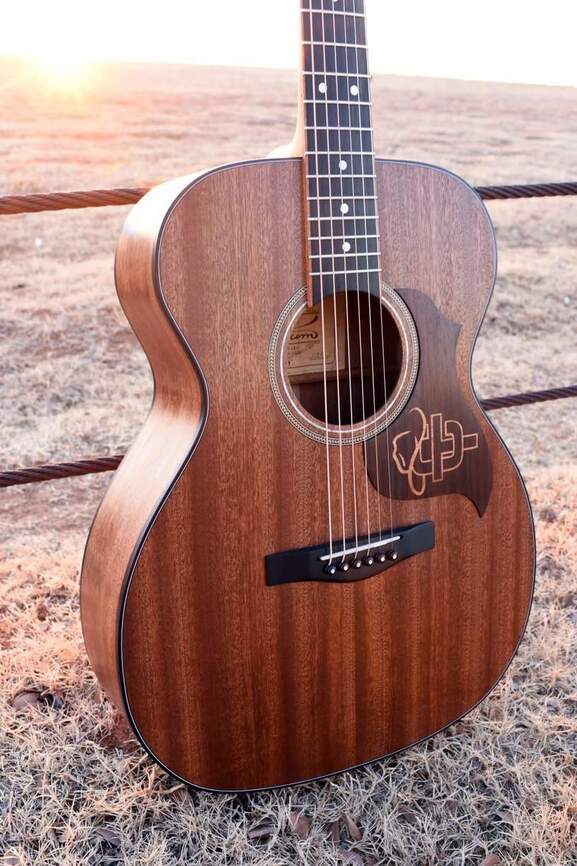
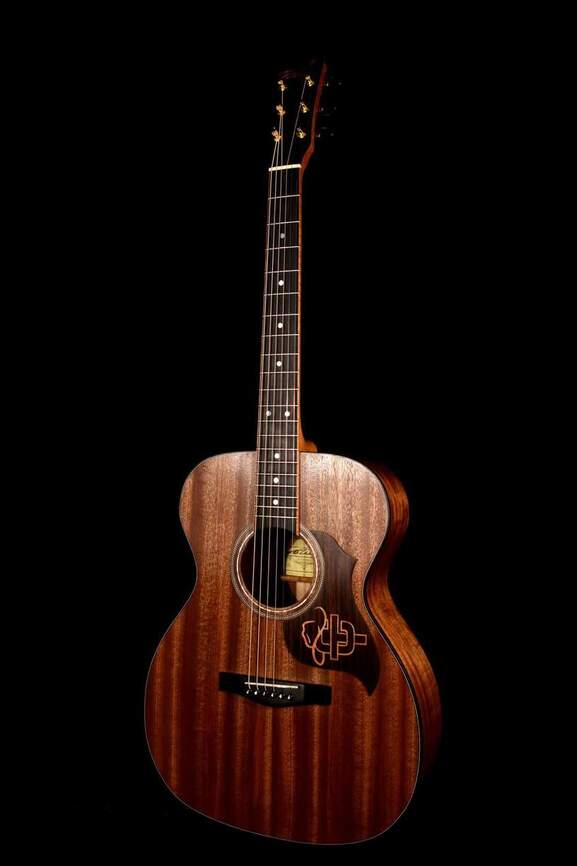
The Glowforge has surpassed my expectations on what I bought it for! Here is a handcrafted guitar with a custom, wood inlay cut on the Glowforge!!
63 Likes
Wow! Can you explain what you did here? 


6 Likes
Fantastic! The custom pick guard is so distinctive.
5 Likes
Lovely! 
5 Likes
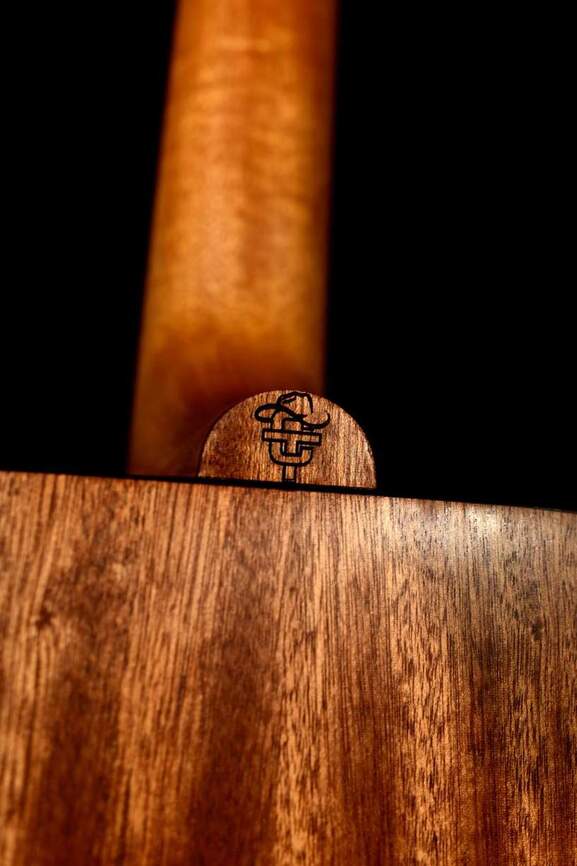
Did you laser the neck before assembly? Very nice work.
5 Likes
Yes I did. The small logo on the back was engraved and cut out of one small piece, then glued as an end cap. I later carved the neck and assembled.
4 Likes
I used Indian rosewood for the pickguard and mahagony for the logo inlay. I thinned the 8"x4" Indian rosewood down to 1/8" in my drum sander. I used Adobe illustrator to design the pickguard shape and logo design. I engraved the logo for the space the inlay would fit and then cut out the pickguard. I had scrap left over from the guitar body that was already thin enough for the inlay piece. The inlay piece was very snug but with a small rubber mallet and some gentle coaxing the inlay fit perfectly! I then flooded the inlay area with thin CA glue and let it soak in. I did this two or three times until the glue wouldn’t soak in any more. After the glue dried I ran the full pickguard through my drum sander until the desired thickness was met. I final sanded by hand to 320 and applied a thin coat of true oil for the finish. For application I used a sheet of the same 3m adhesive transfer tape that the proof grade vaneers have on them. I used the Glowforge to cut the pickguard design a hair smaller than the actual pickguard out of the adhesive tape and carefully placed it on the guitar. I hope this helps. I have plans to put a video together on the process.
12 Likes
pickguards are on my list, as is etching a telecaster body. this looks great and i’m looking forward to watching your video.
1 Like
If you’re interested in pick guards I have the link below to share. Might be a resource for someone?
4 Likes
i think that’s where i snagged the Tele pickguard pattern (it shows as a visited link). but a good reminder for me of where because I’m sure i’ll do some for other people later. i think some of the thin, two-color acrylic i have could make for interesting pickguards.
edit: now i remember the issue with their templates. when i open up the PDF in Illustrator and release all the clipping masks, the actual outline of the pickguard is an image, not a vector.
still useful, i can redraw on top of it, but kind of a bummer it wasn’t a vector line.
2 Likes
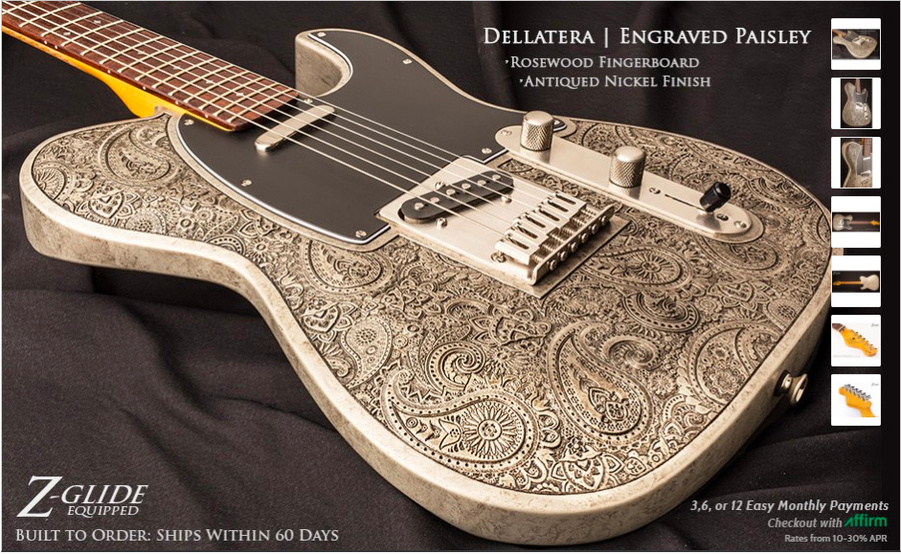
Pretty sure Dean Zelinsky is doing a lot of lasering; I know for certain his Z-glide necks are lasered. I think just about every piece on the body can be ordered with his Paisley pattern-work…
11 Likes
This is really beautiful. If you make the video, I’ll definitely watch it. I seem to spend a lot of time watching people make custom guitars on youtube… probably because I once tried to make a guitar in about 1987 and got almost nowhere at the time.
1 Like
Thank you!! I have a youtube channel called Tatum handcrafted guitars. I haven’t had time to load much content but have big plans for the future. That is if procrastination doesn’t have bigger plans!
2 Likes
Wow that’s Beautiful!!
Great resource!!! Im actually in the process of building my own version of a Tele! Thank you!
Great detail. I’d love to see more of this, please!
1 Like
I’ll try and make a complete tutorial of the process in the next few days!
1 Like
Great job! Definitely right up my alley! Have you tried any custom inlays on a fret board? I have the pro version and was going to use the pass-thru slot to do some
1 Like
I haven’t inlayed a fretboard yet but have plans to try in the near future. I need to figure out a way to make sure the accuracy is spot on.
Completely agree … something I’ve ran into as well. I did speak to support and they are working on improving accuracy via software updates.
1 Like