I worked on a project where we tried to put a diffuser over our LED light source to smooth hot spots where our camera was taking a picture. Never really worked perfectly. We eventually wound up with a combination of moving the light source to a very low angle and a lot of correcting the image in software. The moral of our story was getting close was easy enough, but a perfectly even light dispersion through mechanical means was not.
1 Like
would just adding more point light sources help this? Is the problem trying to get by with too few LEDs?
Noted.  I was just making a comparison between a reflective surface and a diffusing one. I could have stated that more clearly.
That’s a good point about abrading a reflective surface.
Seems to me that abrading the inside surface of the acrylic where the light enters would tend to diffuse it. Experimenting with the grit size would be interesting.
1 Like
EXPERIMENTS! YAY! The ample room for experimentation is the best part about all of this.
3 Likes
Soldering my LEDs tonight!
I’ll try a few things that have been suggested and see what works the best/how much of a difference it makes. Pictures along the way of course!
I just 3D printed some simple feet for it yesterday. When I tested it out I had the very pleasant side effect that I didn’t take into account. It has a great little underglow now! My original plan was to put a black felt bottom on it but if it looks good without I may just leave it open!
4 Likes
That would kind of wash the surface it sits on with light, kind of a hovering effect.
2 Likes
Ooh, a single clear acrylic pedestal stand up the middle may disappear in the glow if there is sufficient light. Would really push the floating effect. Especially if you add in a slow rotation and/or wobble around the base…
3 Likes
That is exactly the effect I got. I printed the feet in a wood filament which is really close to the color of the wood after I coated it in mineral oil. When the light was on you got a faint glow underneath and it looked like it was floating
2 Likes
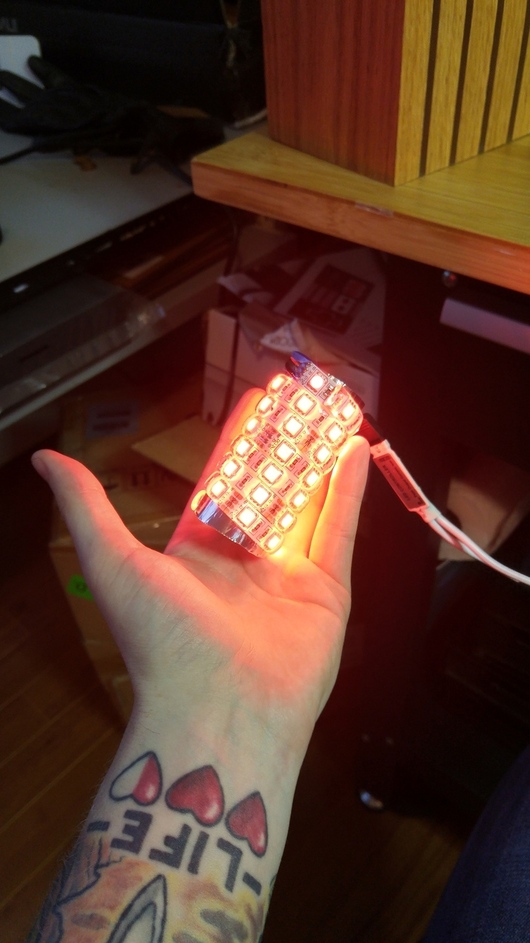
Ok Here is the image dump of what I did!
I started soldering a bunch of 3 LED strips together but got so frustrated with the process that I completely changed gears. I think this actually works nicer and the time spent was minutes instead of hours soldering all of the pieces.
This approach was a little hacky, but this idea came out of a moment of pure frustration after I accidentally burnt out one of the LEDs in my chain with the soldering iron. My best ideas come when I’m frustrated I guess!
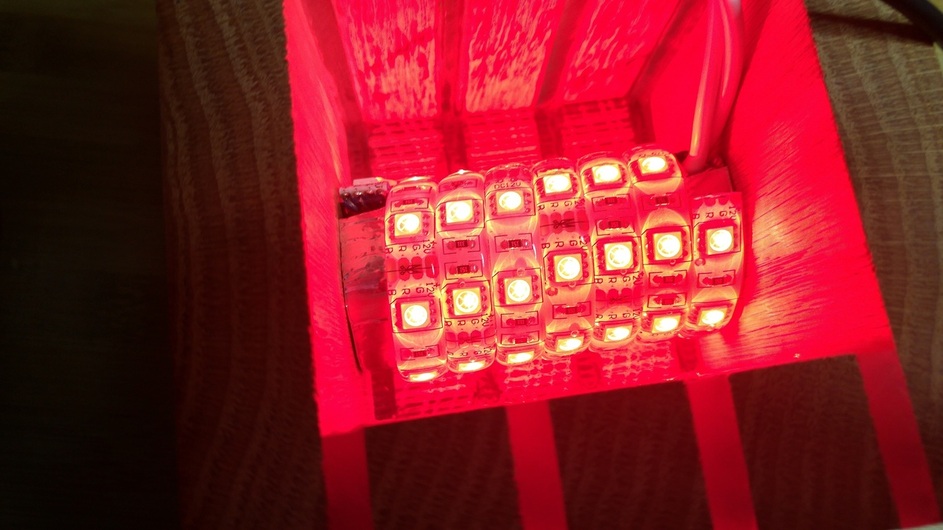
I took the tube I had from my heat shrink tubing (probably 1 1/2 inches in diameter) and cut it so it fit the inside of my cube. I then covered that in aluminum tape to make it a little sturdier and used the adhesive already on the back of the LEDs to stick it down.
I then cut little notches so the LED controller is inside the tube with the two wires for power and the IR receiver sticking out. I then glued the whole assembly into the cube, added my 3D printed feet and did a test run.
It worked better than I had anticipated and the glow is pretty much as uniform as I could ask for!
I didn’t paint the inside white like suggested mostly because I didn’t have any white paint kicking around. I plan to build another one of these so maybe I’ll try the white on that one!
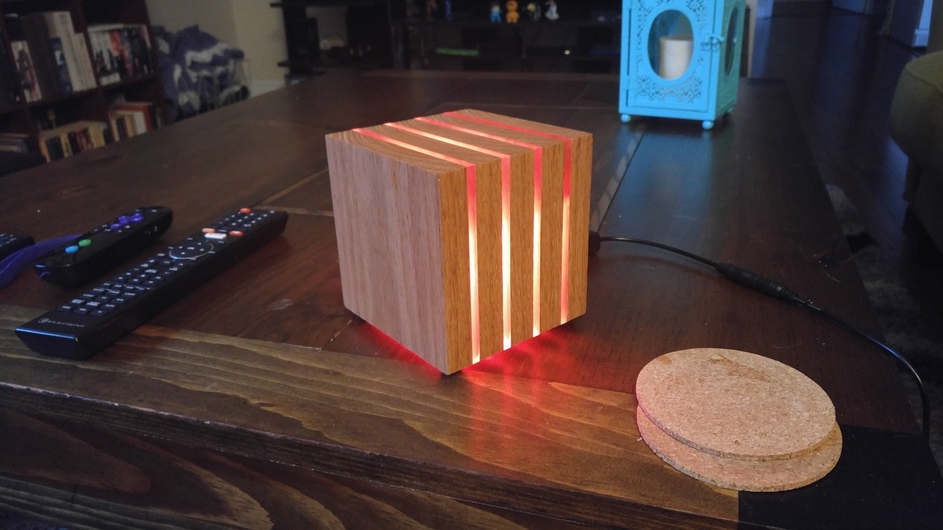
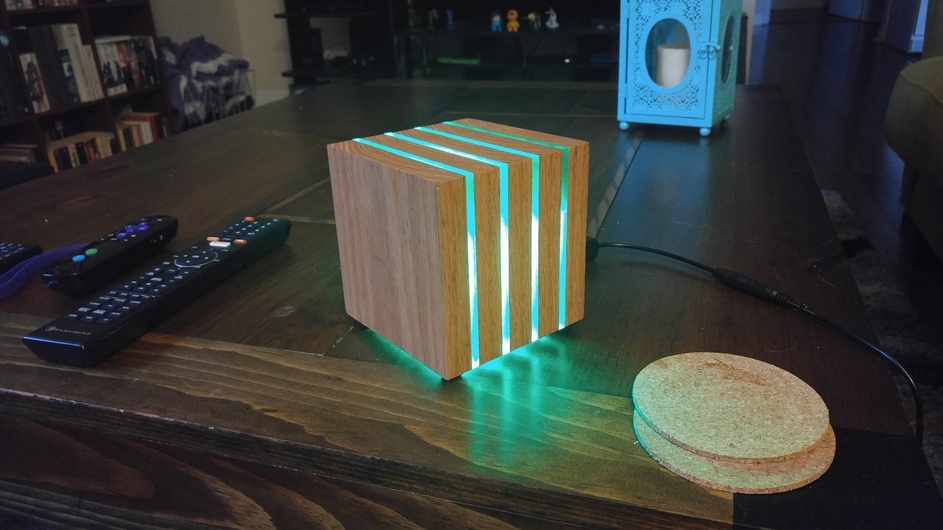
Pictures don’t do this thing justice. It turned out way better than I could have hoped! Thank you all for your input!
30 Likes
The glow underneath really does look fantastic.I particularly like that the table reflects the stripes of acrylic so it looks like they just keep going.
3 Likes
Very nice! Well done.
1 Like
Fun project! As for the LED’s, since they are generally directional, light shines out normal from the top, you really will have to experiment to get the effect you want. I’ve had some experience in designing light pipes over the years. What we found was that when the LED is placed directly against (contacting) the translucent light pipe “start” surface the result was that the pipe “end” surface was not very illuminated, even with texture at the “end” surface was only a slight improvement. When there was an air gap at the start surface the end surface seemed to be better illuminated. its as though the air itself provided some kind of filter effect (diffuser?) that improved the end surface illumination. I don’t remember if adding texture at the start surface was of benefit or detriment to the study. It could be that there is some benefit to using a turbid medium to diffuse the LED source light before it passes into the light pipe, but I don’t have any good sources for that. Any one care to chime in? I hope this was helpful to your next LED lit project.
3 Likes
I love what you did…and the simplicity of the ‘light cube’ is really appealing to me.
2 Likes
@Dunfee, did you do anything special to the acrylic to frost the edges and diffuse the light?
I sanded the whole thing with my preferred finishing sanding grit for woodworking, 320, which some people would call excessive. I noticed when I did the oil finish it made the edges look clear(ish) again so I went back and hit only the acrylic edges with 320 again.
If I was to do this project again I would use something other than just epoxy to bind it together. My roommate at the time in her infinite wisdom put the cube behind a curtain next to an open window so the moisture got to it and the wood warped forcing the whole thing apart. If I had used metal bolts I bet I could have kept the thing together much better.
1 Like