Yeah, I’d love to meet folks!
I don’t know what a good price for scrap is, but the Plasticare place sells it for $1.50 / lb, so I’m hoping to find more lucky pieces.
I’m planning on Wednesday for the trip up there. Work for you?
Yeah, I’d love to meet folks!
I don’t know what a good price for scrap is, but the Plasticare place sells it for $1.50 / lb, so I’m hoping to find more lucky pieces.
I’m planning on Wednesday for the trip up there. Work for you?
At this point, it’s likely to be just you and I at Plasticare, I dunno. It’s a long drive from up north.
But @dwardio was just asking about another meetup. What time frame?
I forgot to say ‘thank you’ re: my comics - was in a hurry to respond, so thank you very much!
How’s about between 10:30 and 11 am? It’s approximately a 30-minute drive from my place, straight up 85. Miss that lunch traffic.
Meeting one fellow laser pal is better than none  , but it’d be cool if other folks could make it.
Wednesday, closer to 11 fits my attitude better. Maybe we grab lunch somewhere?
Works for me! See you there and we can figure out lunch on the spot unless you have a place in mind over the next couple days.
Sorry, I thought about “cutting” query being unclear after the fact, but yes, I meant with a knife. i.e. is it easy to make the stamp. Thanks for answering already. 
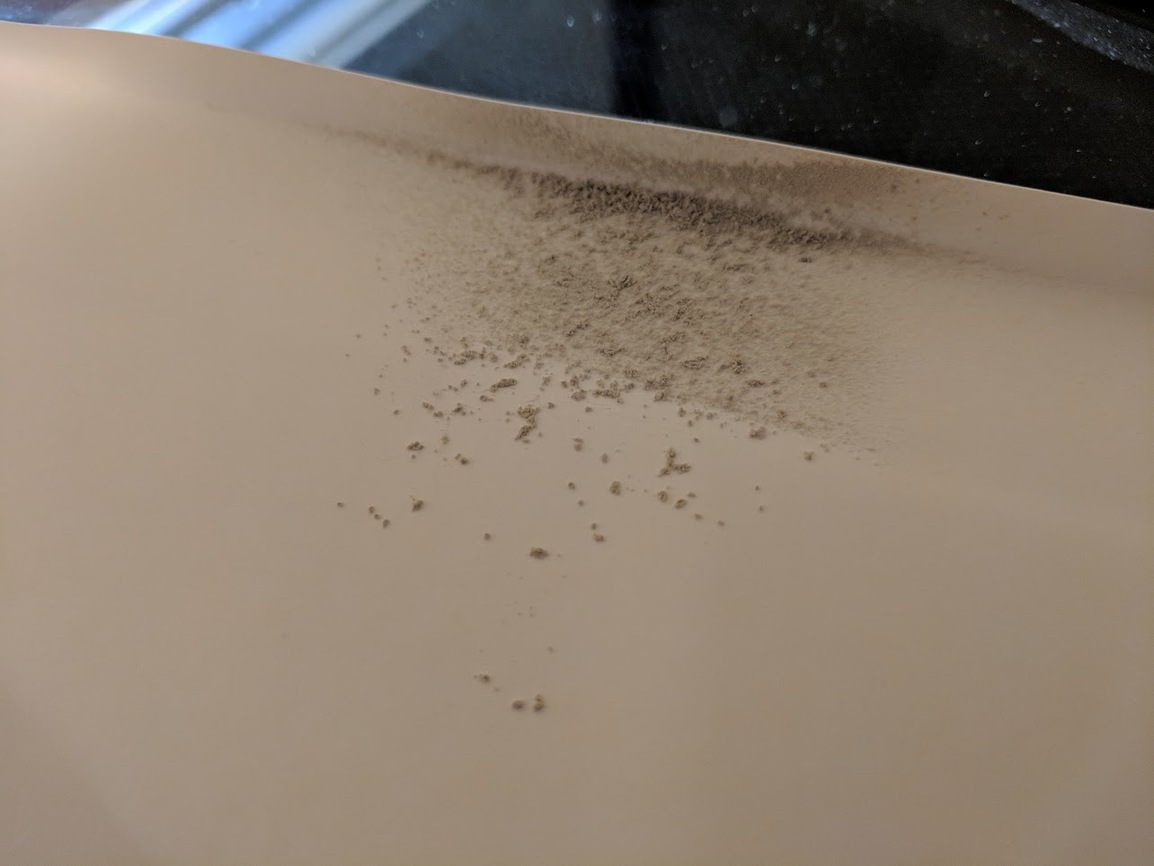
No worries If you look at the picture at the top with all the rubber dust crumbling into my hand, there’s a slight ridge around the whole stamp because i didn’t align the cut line perfectly, so I had to trim all that with the X-acto blade.
So I was trying my first rubber stamp and saw all the complaints about dust. Wanting to keep my GF clean, I thought I’d try a little different approach. I first cut out the block of rubber to the size of my stamp rather than having the GF create any more stinky rubber smell than necessary. Then I folded up a piece of cardstock into a makeshift tray. Then did the engraving. As you can see, the tray did a pretty good job of catching the dust. There wasn’t any noticeable dust by the front door (although my stamp is much smaller than the one above) …anyway, thought I’d share.
Well that’s a clever thing! 
that’s genius!
I’m not sure you can say that with a straight face.
hey hey,
I’ve made a bunch of stamps since this post and if someone finds this useful, then hooray!
Process:
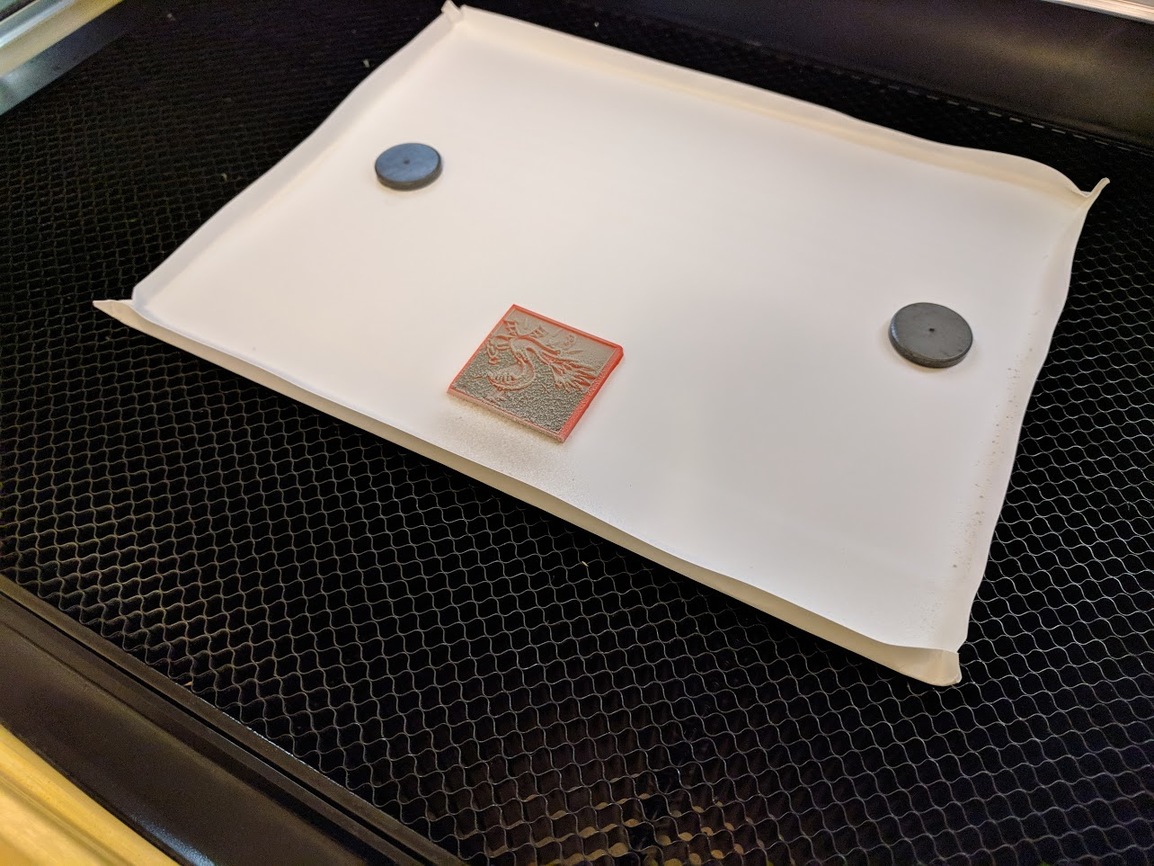
Pause it to open GF & vacuum the rubber dust – I slap down a bunch of magnets to make sure I don’t move the rubber during the vacuuming and I use the bristle-brush attachment.
then
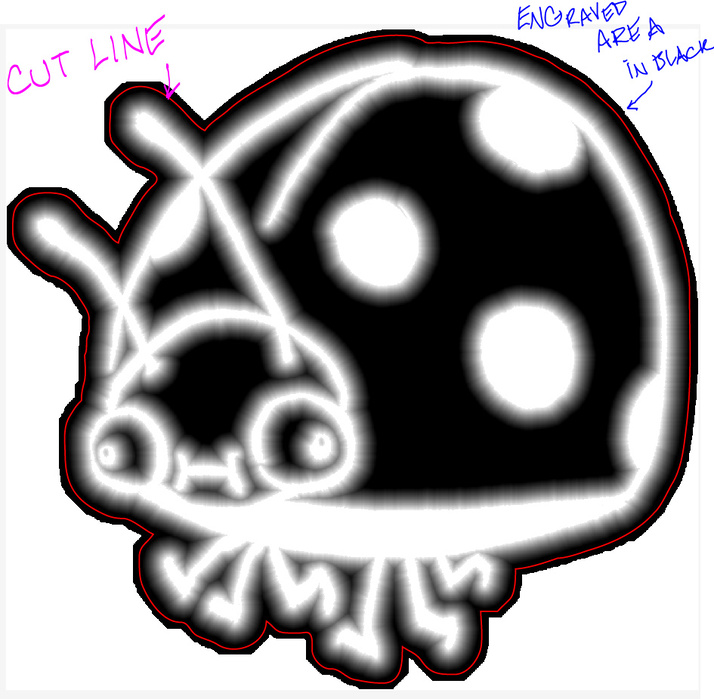
CUT
NOTE: Since I only engrave slightly beyond the design I make sure the CUT line is inside an engraved area. This way, you can ramp the speed way up(and since the dust is vacuumed up, less SCORCH MARKS happen).
When you put material on a tray, do you need to specify the material thickness to include the tray? Thanks for sharing. I will try this!
No, the top of the tray is y=0.
Yes, I included the thickness of my cardstock.
these settings worked amazing for me! thanks!
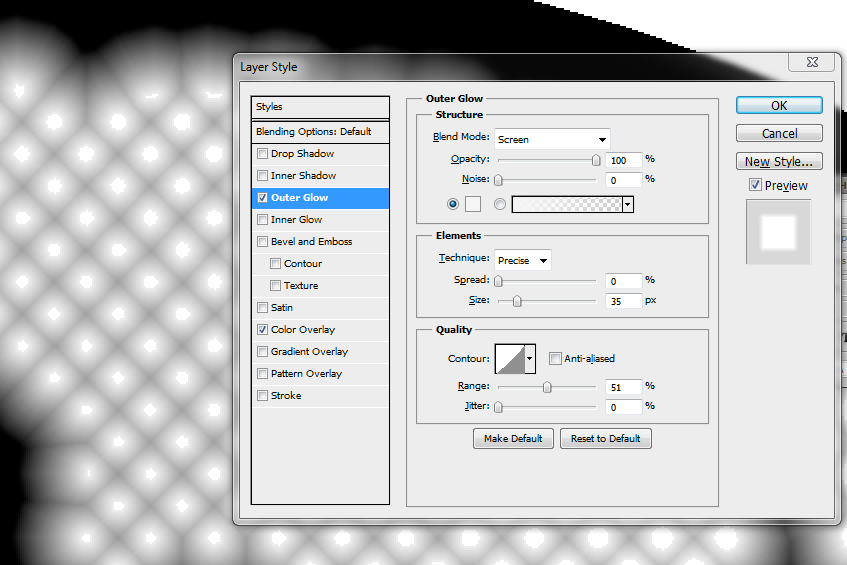
thats awesome! how do you get those ramp up lines in there??? What program do you use? Im in Adobe Illustrator CC and “outer glow” seems to be the only option, but there’s very few options when it comes to how detailed the outer glow actually is!
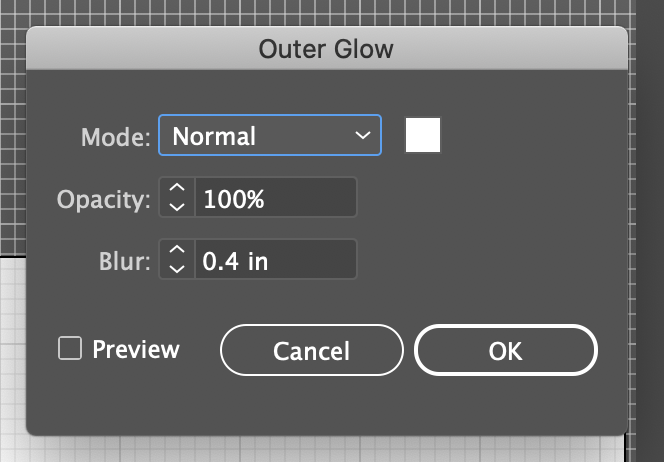
the ramp up lines are from photoshop - if you don’t have that, GIMP is the free alternative and i’m sure someone has made a tutorial about Outer Glow in GIMP.
I do my stamps at 600dpi and here’s the settings I usually use - gotta fiddle with the range & size depending on your file’s dpi
So, would I open my design file in Photoshop then? What type of file would I export/save it as in order to use in Photoshop to get those ramp up lines?
Okay, I have found the outer glow layer style window on Photoshop 2020… what a pain. Anyway, I’m there. NOW, the logo design is white, reversed, ready to go. I do the outer glow to fade the white into the black background, how do I go in and FILL the rest of the background??? Is that done in Photoshop or Illustrator? Is it just me or is this WAY more complicated than it should be…