I made this design and it didn’t cut “part 2” just engraved it. And part D which was in part 1 looks different than the instruction set - i am not sure how to fix it or who i should notify
and
and the sides
the bottom squares are supposed to be cut in holes didn’t get cut out it engraved?!???
![]() so after 2 hours of doing part 1…
so after 2 hours of doing part 1… ![]()
how does one get the holes cut out now… i’m frustrated ![]()
who am i to tell…
i lost the time and the wood … gives me no confidence
Assuming you hav not moved the material (which you shoud never do until you are happy with the print), just repeat the cut with those parts assigned the correct settings.
I did not realizing the holes aren’t there in the sides (part 1). Part 2 I was able to make circle/square proper cut outs with the tools. It just isn’t going together… ![]() wasted wood and time. Frustrating.
wasted wood and time. Frustrating.
The circle and side square are supposed to engrave and not cut. I am sorry you are frustrated with this, but the design actually is fine. Getting the hang of assembly takes a bit of practice. What material did you use?
That is my design. You might want to make sure “part 2” is cut as those two parts fit in the engraved area of the top and bottom.

I believe that one is the correct size and can be cut from anything as thickness is not critical as it is everywhere else.
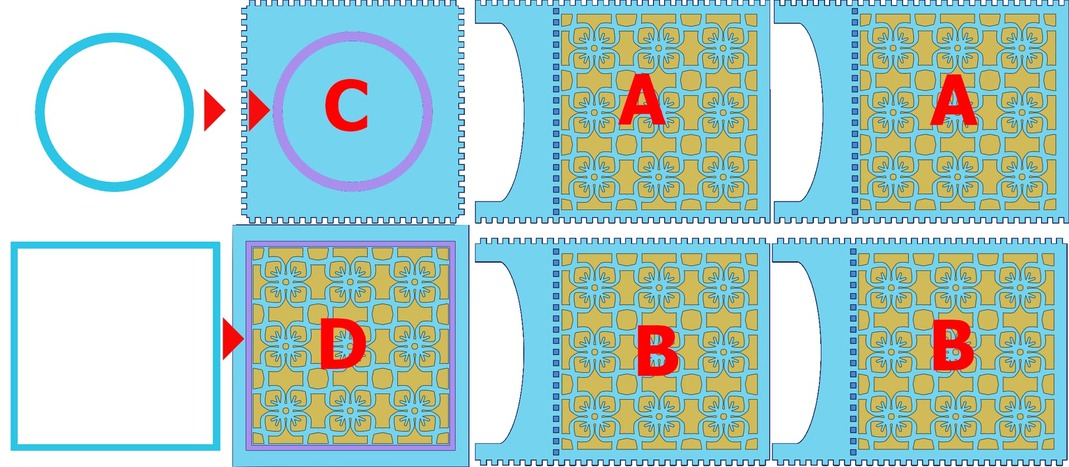
Once cut out they go into the engraved area (in purple) in parts C & D as shown. Those two places are all that get engraved.
Like so…
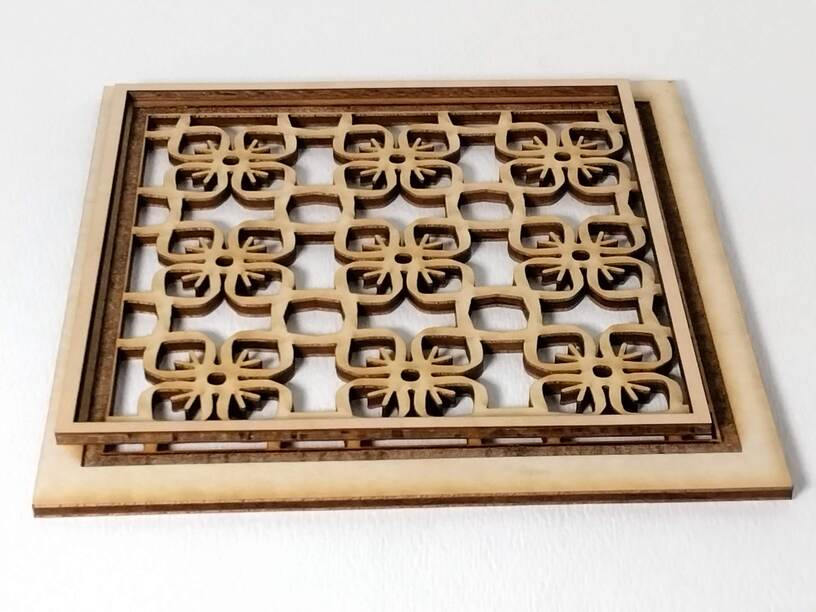
Everything else including the small holes for the fingers is set for cutting at the standard cut for Light plywood that can be maple or cherry or walnut but only the light version of any of those. The two “A” sides are the same and the two “B” sides are the same so each pair needs to be opposite each other like so…
1 Like
There were some small changes made to make the lid fit tighter so what is the design cut is correct. There is supposed to be a second sheet that is the square and circle above that you can click and download if it did not show up properly. Parts Cand D are supposed to engrave a place to fit those two pieces to sit correctly.
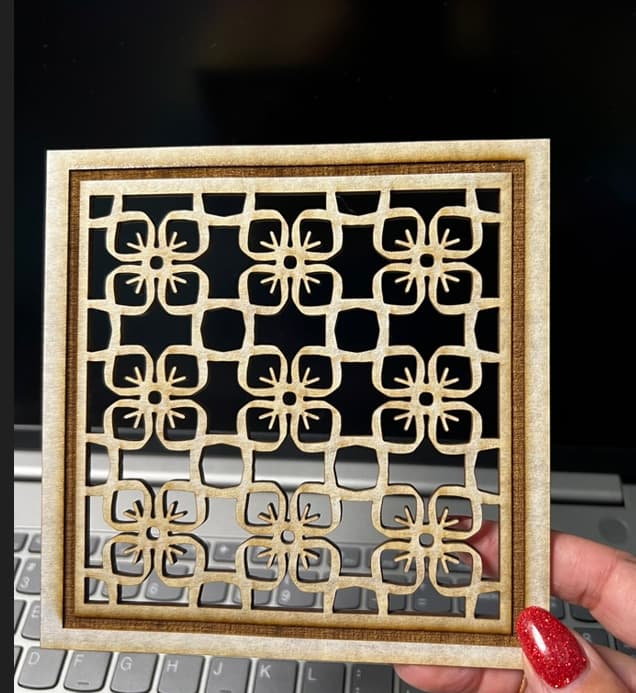
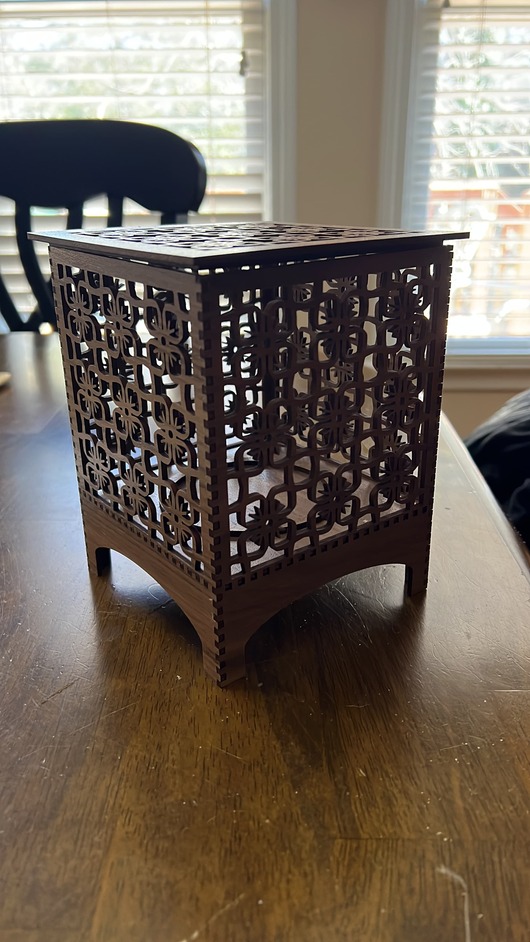
Add a 3" dia LED candle and it should look like this…
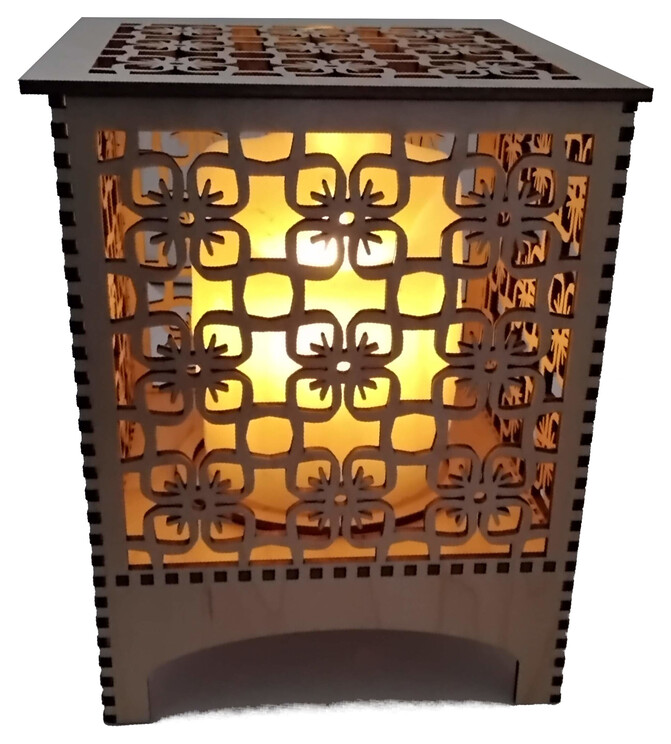
Note: it does not actually taper like that as it is an issue of the camera too close.
1 Like
The design comes up engrave by default. I’ll recut with “cut” lines.
My next issue is the square with the ridges in all sides isn’t fitting into the nubs (they aren’t holes, they are indented squares. - A &B.
The squares aren’t sitting in at all. - how do I fix that?
isnt looking like your pic. Help?
Are you using the lightProofgrade plywood rather than the regular plywood?
The part that came in engrave is correct! It is the piece I noted above that you need to cut for the pieces that fit into the engravings.
here it is again…
Right click on it and you can download it though it should have been included.
1 Like
You know when D makes, the entire square is made with an engraved spot along with the design. It doesn’t cut the design square “out” for it to “inlay” into anything
And part2’s square is smaller than D’s square.
I downloaded the design around 1p 12/16 yesterday
It is not supposed to inlay. The engrave is only to place the other piece. I was very hard to get a precise fit on the square and I rounded the bottom of the square with sandpaper on my first one and then made another which I think is the one I uploaded here. If you can download and measure it with the screen I would appreciate it and I can send the one I put here to replace the one they included, or you can measure the one you have and measure the square to cut out and change it to match by typing in the correct numbers.
It is amazing how little play there is between “tight” and “doesn’t fit”.
As I noted above, the material you make the square and circle matters less as it is not a necessary thickness, and is hidden inside.
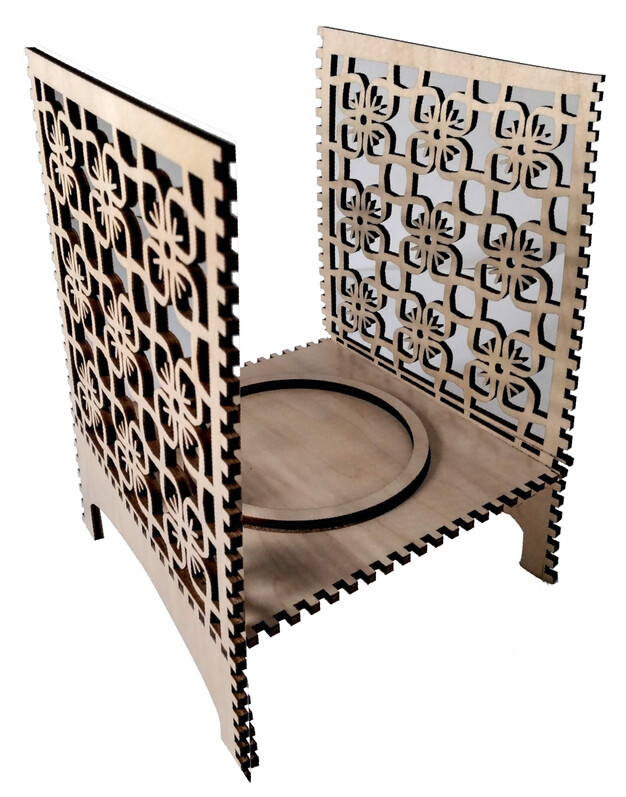
The square should fit inside and hold the lid in place and the circle at the bottom to keep the candle near the center. The candles come in a range of similar diameters so the circle is big enough to fit the largest that I saw as too small is worse than too big.
1 Like
Reading closer…
The square fingers are designed to fit into the square holes, but they are tight. In addition both "A"s have to be tight before the "B"s will fit, otherwise 3d geometry interferes, pushing them together with these…
https://www.amazon.com/IRWIN-QUICK-GRIP-1964758-One-Handed-Clamp/dp/B001DSY4QO/ref=asc_df_B001DSY4QO/?tag=hyprod-20&linkCode=df0&hvadid=312003160272&hvpos=&hvnetw=g&hvrand=17285039527969470105&hvpone=&hvptwo=&hvqmt=&hvdev=c&hvdvcmdl=&hvlocint=&hvlocphy=9012119&hvtargid=pla-437236176675&th=1
Are very handy in a great many situations and should be in every shop. instead of hammering, or squeezing in shaky hands, the clamps provide exactly the necessary force perfectly perpendicular and slow.
I have also found that rounding just a tiny bit will allow a square peg to slide into a square hole of exactly the same size even if it misses by half the size of the rounding. I did note that this is not a beginner project and you can see why as it is not as easy a project as others.
1 Like
I have redownloaded the design. i am using walnut “light” plywood.
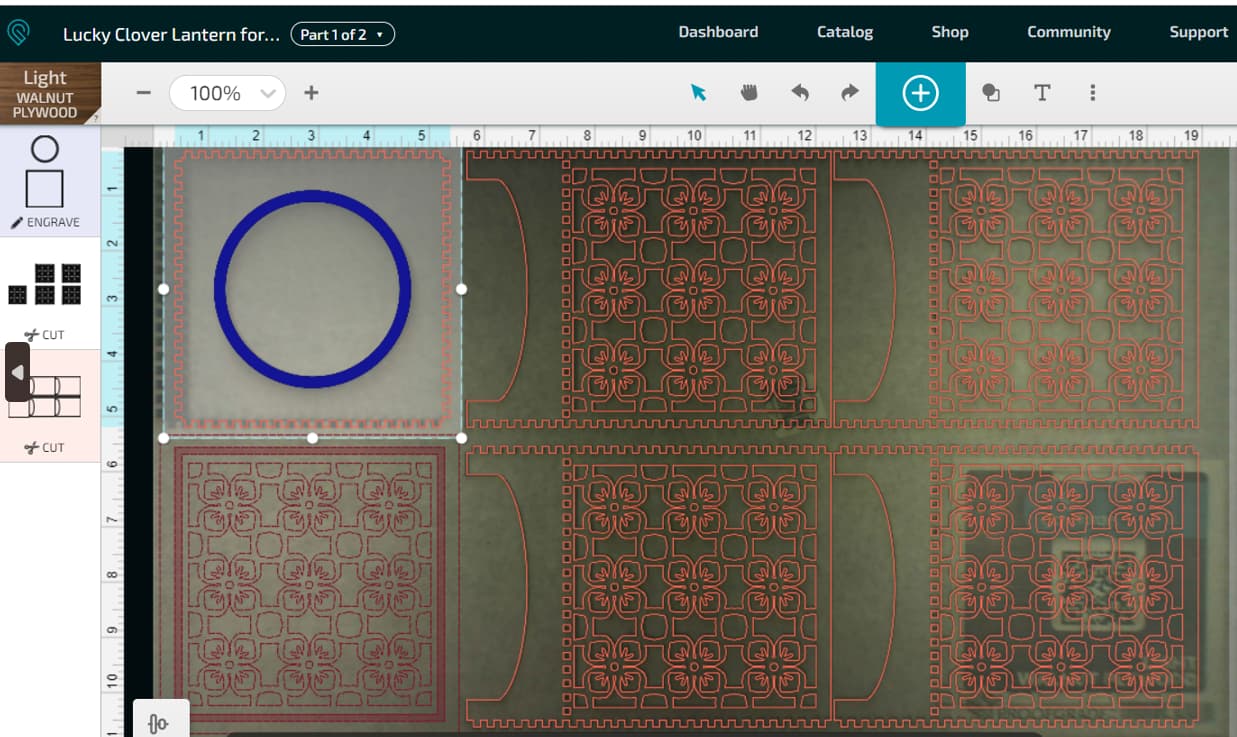
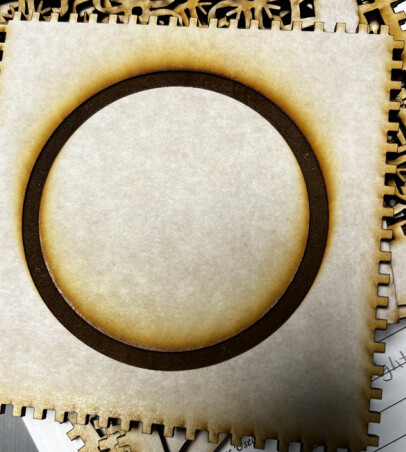
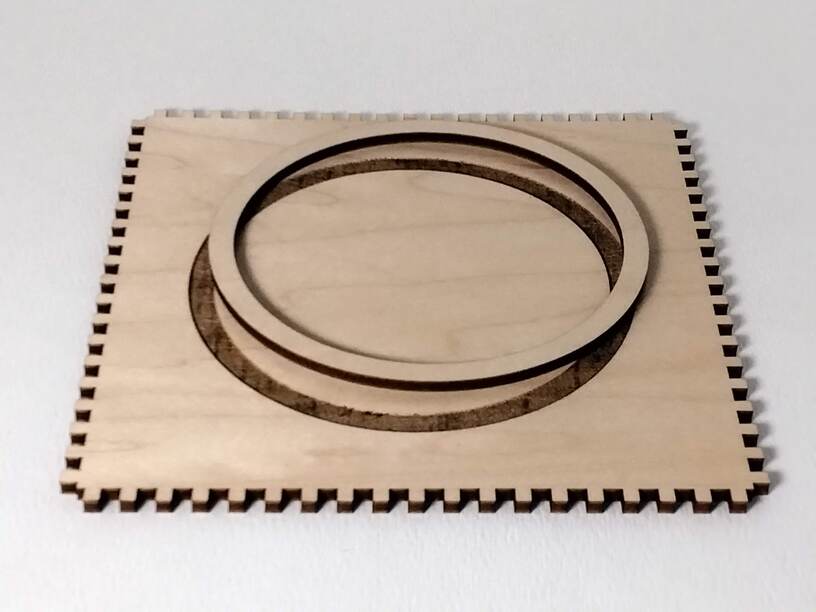
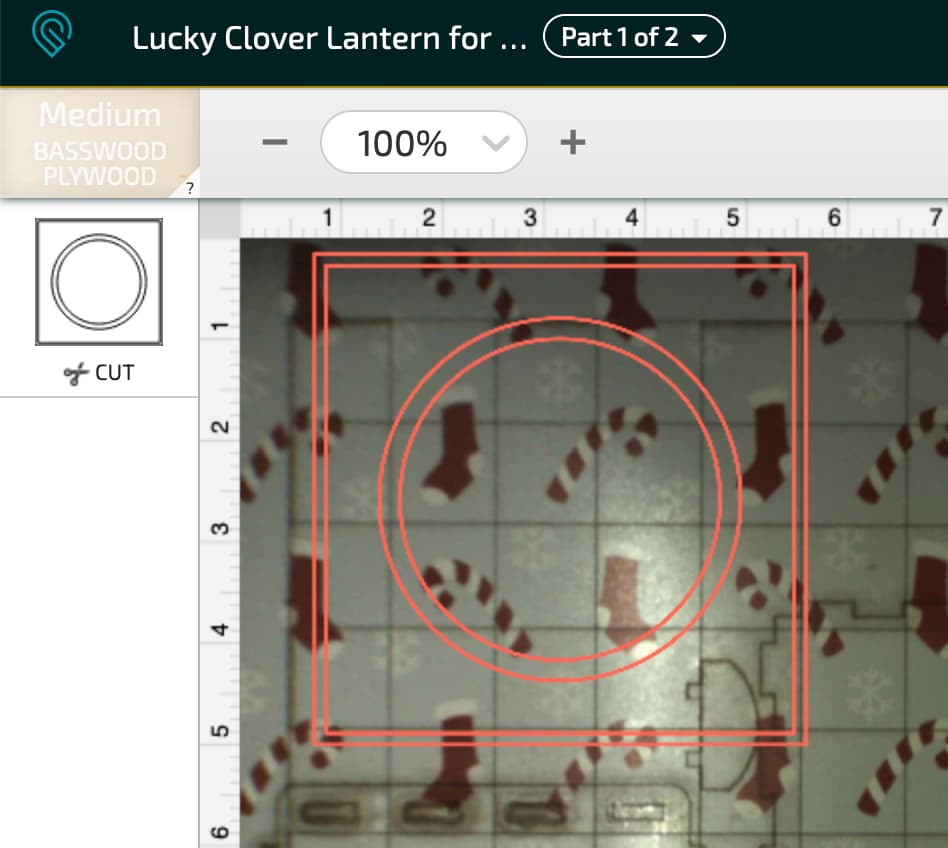
you can see it will show the size of the square/circle - but ti doesn’t “cut the circle out” just engraves it. Then it resulted in this:
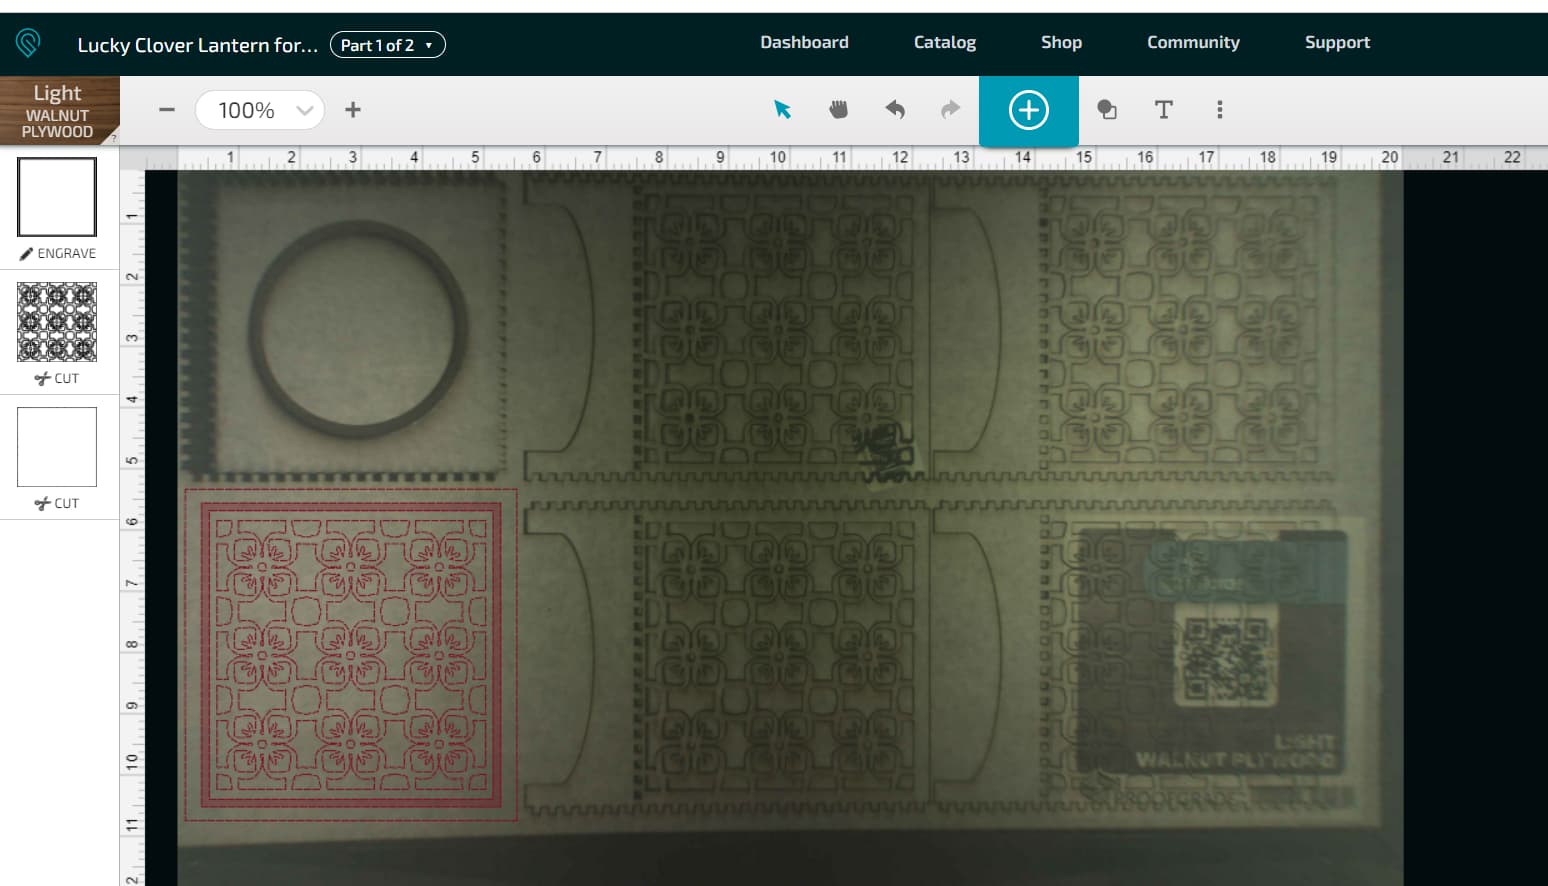
is part 1. notice that the circle/square upper left is 1 piece. the bottom left piece didn’t cut or anything i had to put it on a new piece of wood by itself.
When i did, you will see it’s 1 piece the engraving -
It didn’t separate the inner design like your instructions. From the design, it doesn’t look like it is supposed to either. given there’s only the 1 cut square line .
Then on to part 2.
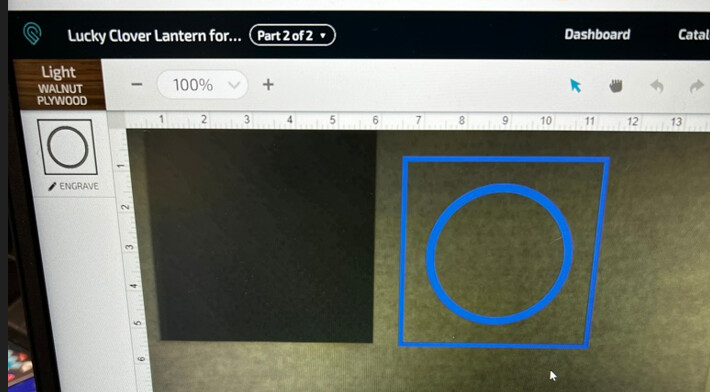
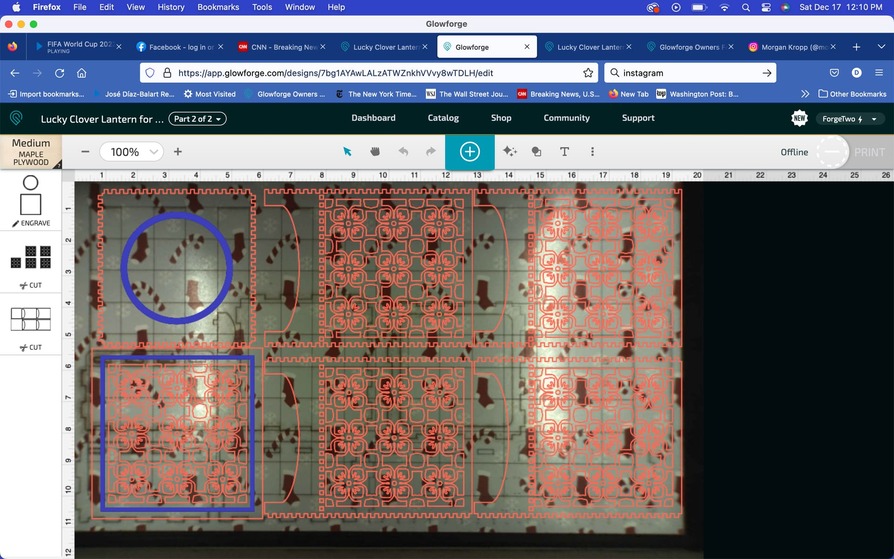
the file defaults to “all engrave” there are no “cut lines”.
Shouldn’t there be cut lines somewhere on part 2?
I didn’t know why it defaults to engrave but just change that to cut and you have the two pieces that fit in the two engraved areas of the other sheet.
1 Like
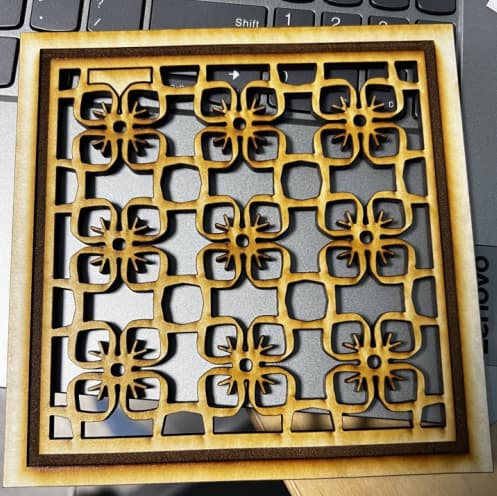
I made part 2 with the cuts. The square is literally about 3mm to large it sits inside 3 of the sides but not all 4. It went together pretty easy once I figured out the right cuts with the “new file” you uploaded yesterday…. With the exception of thin square frame.
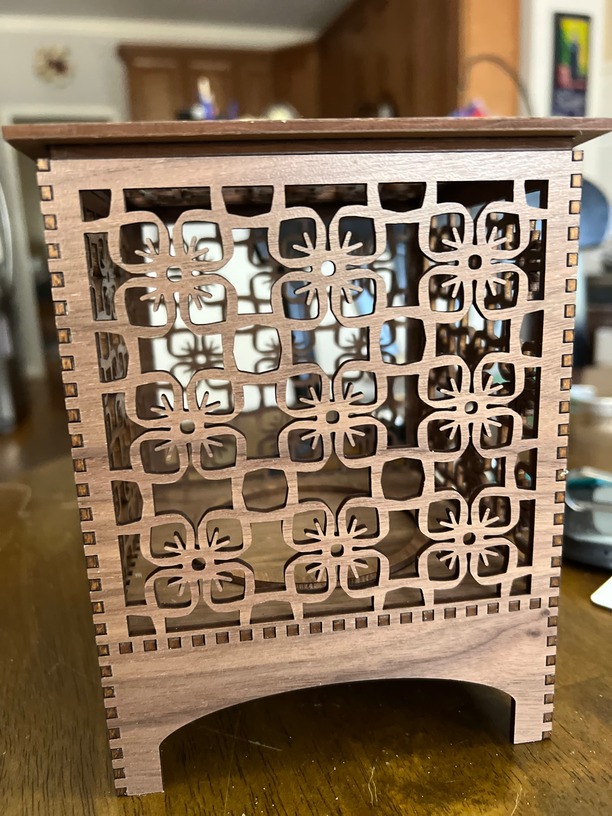
3 Likes
It looks gorgeous!
It might still need some playing with shaving the corners with even a nail file to get it to slide together.The distances should be the same in both directions. As I mentioned the tiniest overlap will stop it cold but the a rounding or slant will just make it tight. I had thought what I had passed to you as the latest but apparently not. It is certainly the part I spent the most time tweaking.
Looking this is what I get.

so it is square as cut.
1 Like
I changed the inner thin square to be smaller all around and it seemed to fix it. I didn’t try to shave the thin wood square… it’s a thought when I try it again. People that I have showed do love it.
1 Like
This topic was automatically closed 30 days after the last reply. New replies are no longer allowed.