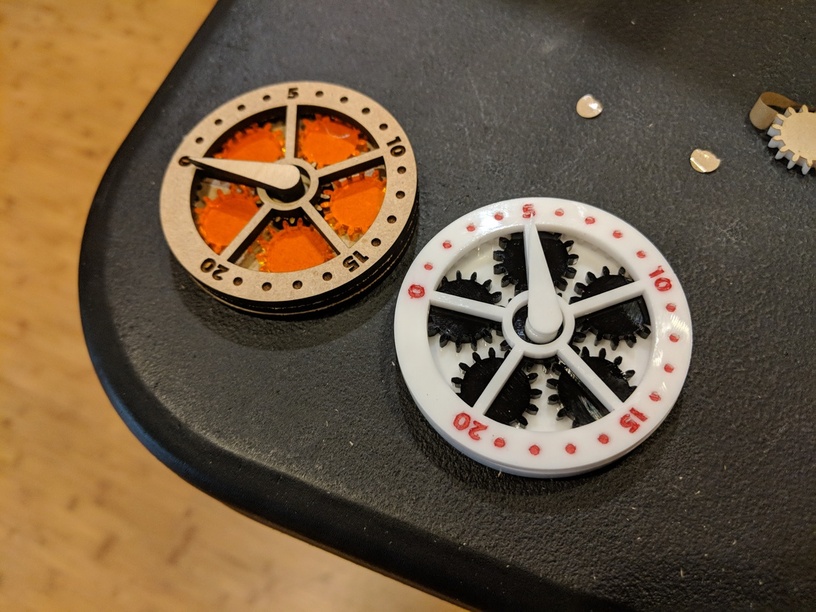
Thank you so much for your kind words, @daniemhermes! And you’re right, it’s a bit fiddly to assemble. Here’s a breakdown that I hope folks will be able to follow. I did this just in draftboard for the pictures, but the ones I made above are in Proofgrade plywood.
I used Krazy Glue to affix everything together. You could probably use a slower-drying glue especially for the rings and top piece, so you’ll be able to more easily line them up flush, but you will need something strong for the pointer assembly because it’s dealing with some lever-enhanced rotational force.
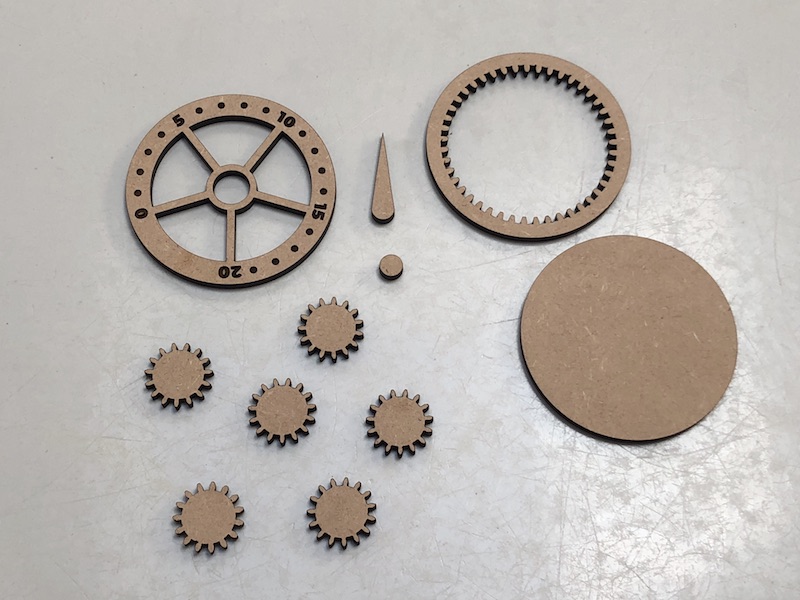
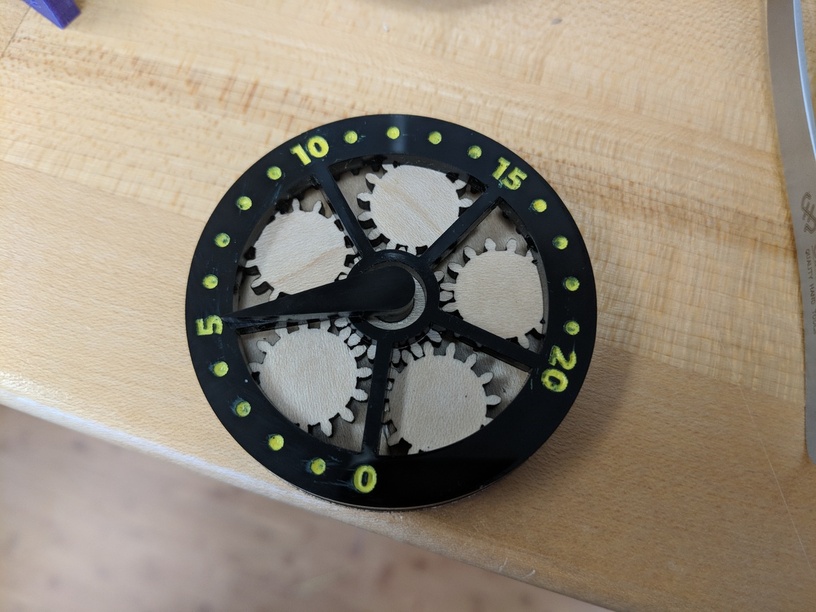
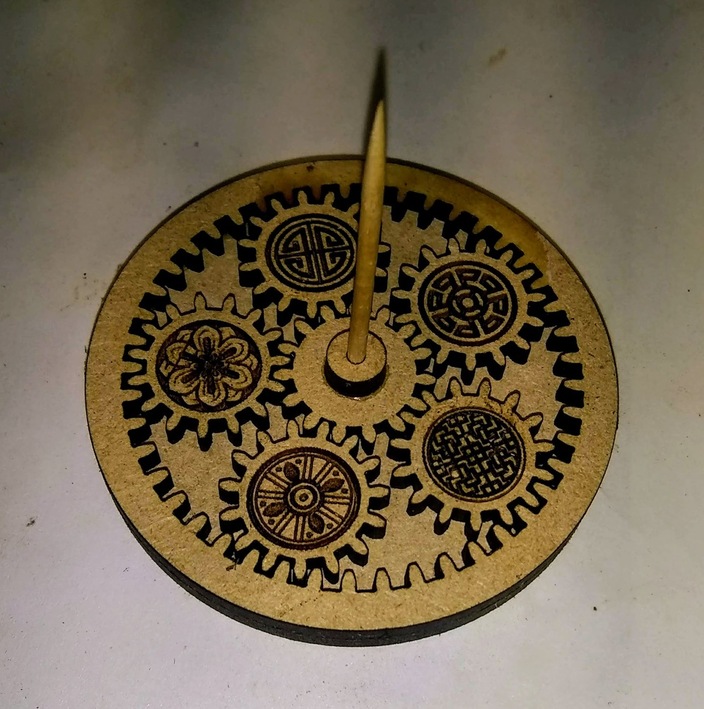
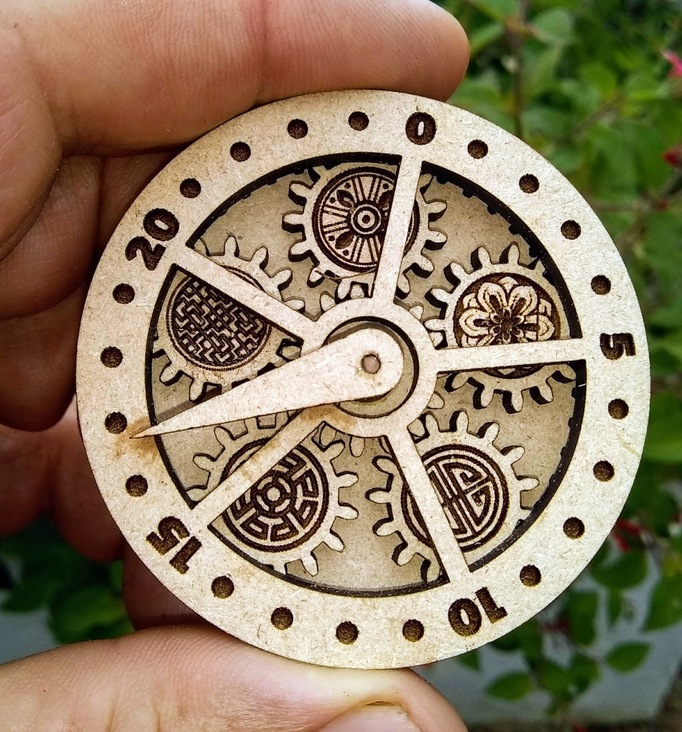
For starters, cut everything out. The six gears are exactly the same, so pick any five to be the “planets” to engrave on. You can also engrave on the big circle, then flip it over so that you have a logo or something on the back.
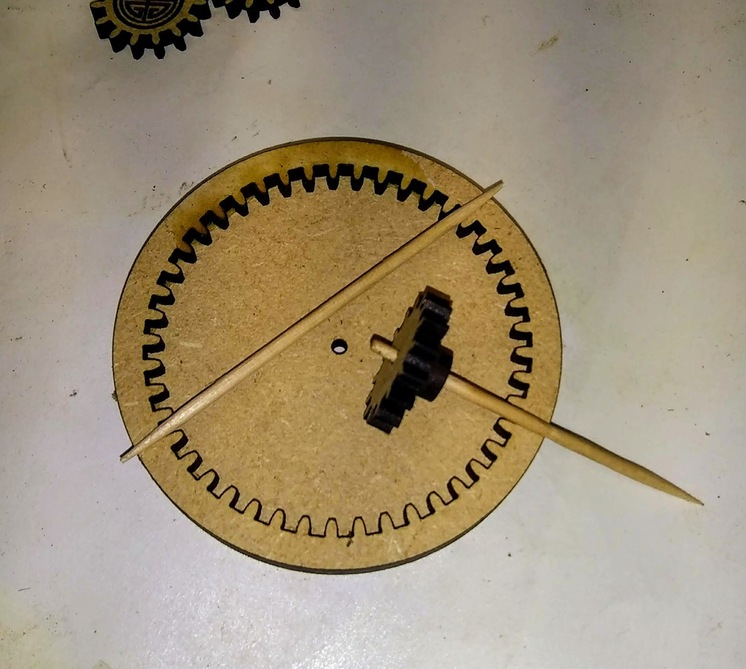
Note that the faces of the ring gear are completely covered in the final product, and the edges are burned, so if you’re doing this in two tones like my pictures it’s fine if it’s the same color as the gears, rather than whatever color you’re using for the top and back. (This is the way the file is laid out, with four gears inside the ring already.)
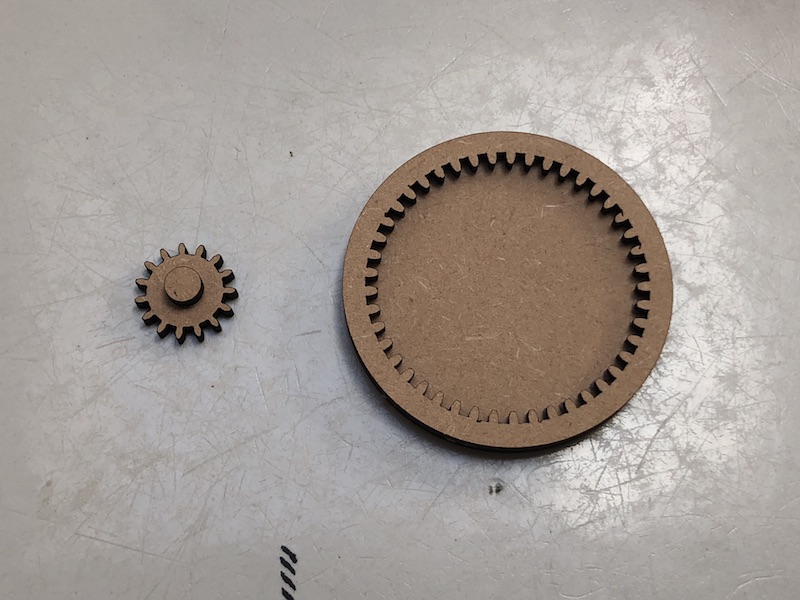
The next step is to glue the ring gear on to the backing piece, and glue the tiny circle on to the center of the middle, “sun” gear.
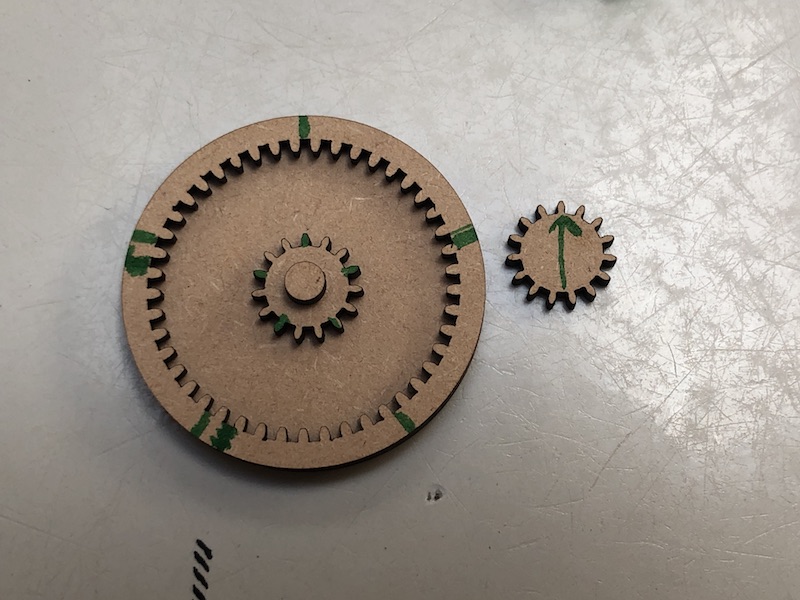
Now, fitting the gears together. The small gears each have 15 teeth, and the outer ring has 45 (this is the 2 * P + S calculation from the planetary gears formula). That means that everything nicely divides by five (the number of planets) so as you spin it the planets will rotate in sync with one another and line up every so often.
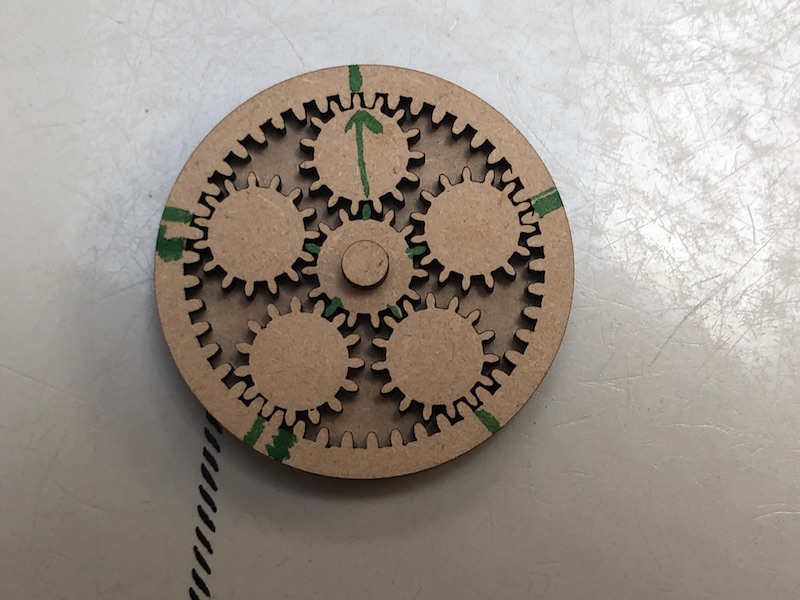
You’ll notice that the gears have a gap directly opposite a tooth. I try to imagine this as an arrow pointing from a tooth on the sun to the gap directly opposite on the ring. Because 15 / 5 is 3, you’ll be placing the planets around every third tooth of the sun, fitting into every 45 / 5 = 9th gap in the ring.
I’m just realizing now that, since the ring faces will be hidden, you can actually use a marker and draw right on top of it, which should make the assembly much easier. Just mark every 9th gap. I put mine together by eyeballing it which, as you can see from my markers, takes a bit of trial and error. (Don’t draw on the center gear, which will be visible, but it’s pretty easy to just see “every third tooth.”)
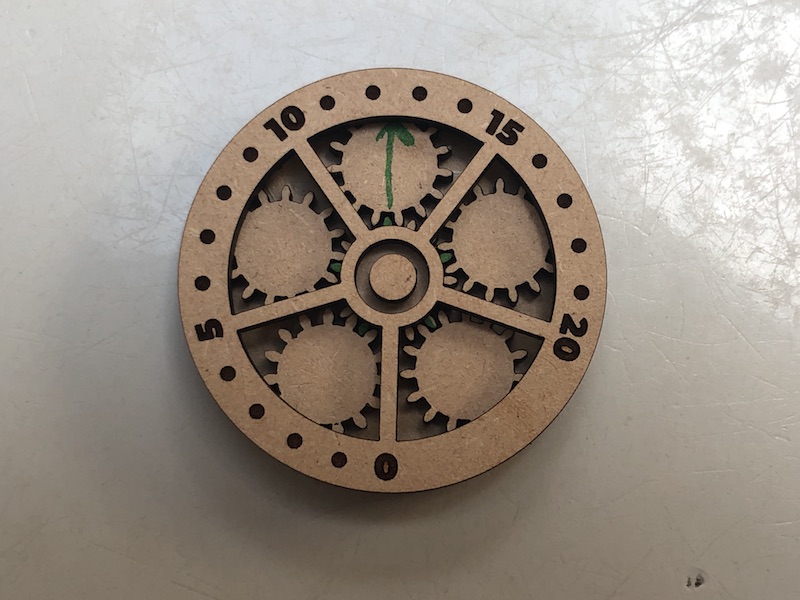
If you’ve engraved the back and want the design to line up with the front when you flip it over, make sure that your ring marks line up at this point.
Next, start putting the planets in, taking care to make sure the engravings are the right way up. Keep imagining the arrows going from the sun to the ring.
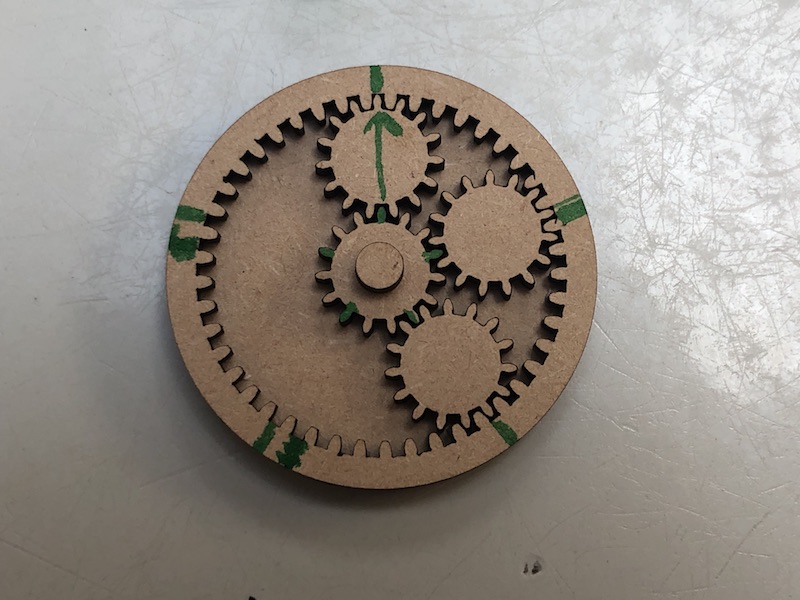
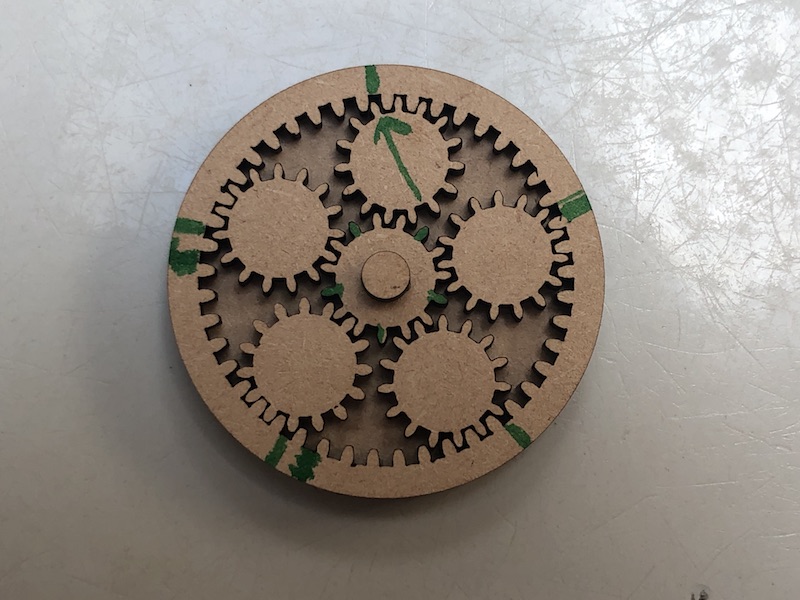
Now, gently turn the center gear back and forth, starting small, until it starts rotating smoothly. Check and make sure that it rotates all the way around, and then spin it until the planet engravings are back at their starting locations.
To put the top piece on, put the glue on the ring gear. If you put the glue on the top piece, you’ll risk gluing the gears in place (since it overhangs them to keep them in).
After that, just glue the pointer to its starting location.
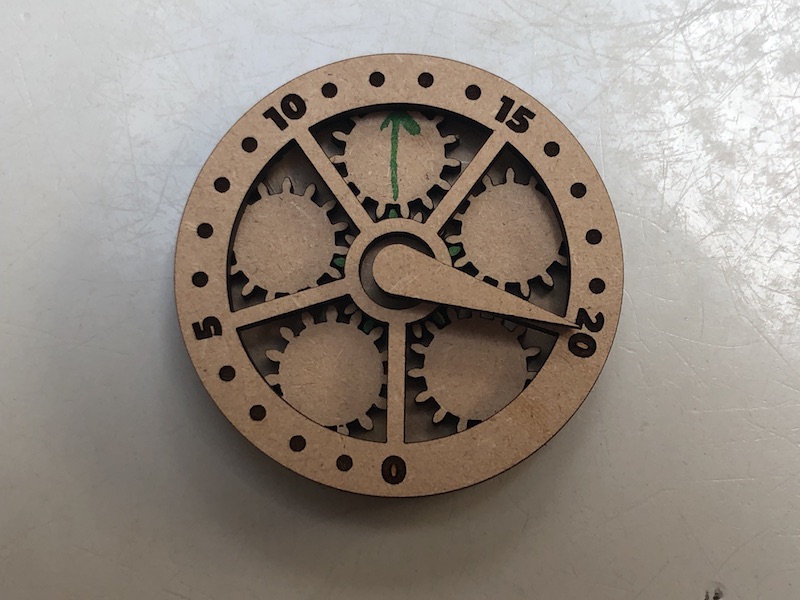
Once everything dries, it should spin around! It will likely be stiff at first but then loosen up.
Enjoy! And let me know if any of the above steps aren’t clear and I’ll provide more description.

