Backstory: We needed a new mould at work for one of our fireplace elements. Unfortunately our existing mould was out of square and our original master model lost to the mists of time.
We could get it CNC’d , but those guys are always busy and the quote was something like $800 so I thought, hey, why not see if the 'forge can earn its keep for a change.
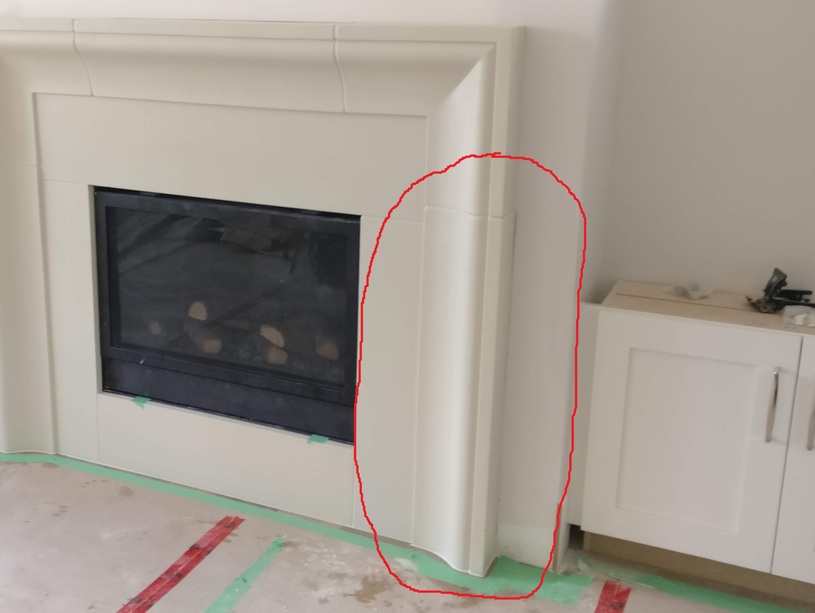
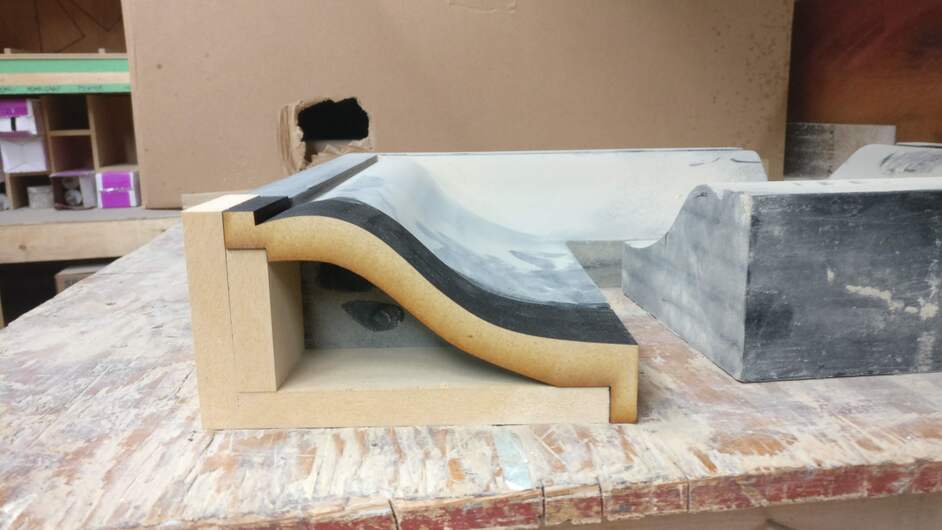
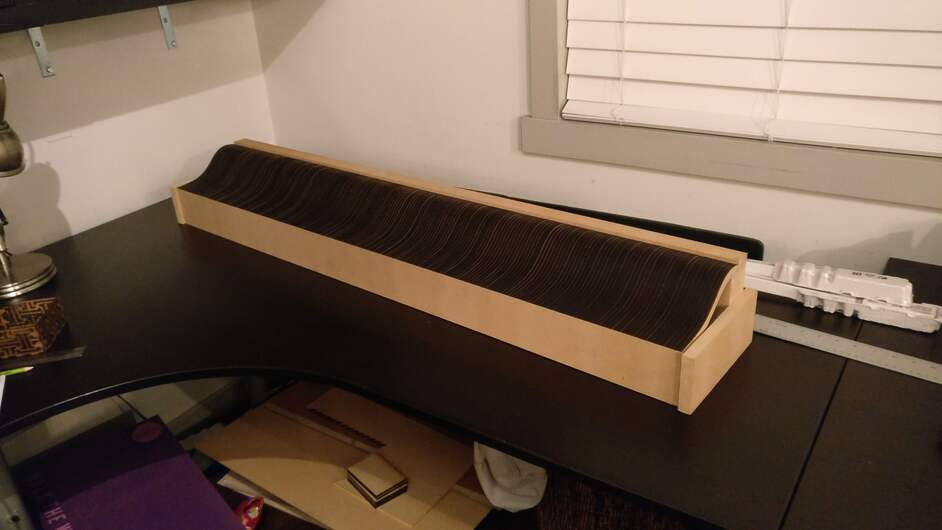
The piece we needed was 4’ long, 8" wide and 6" tall, and looks like this:
Here Goes.
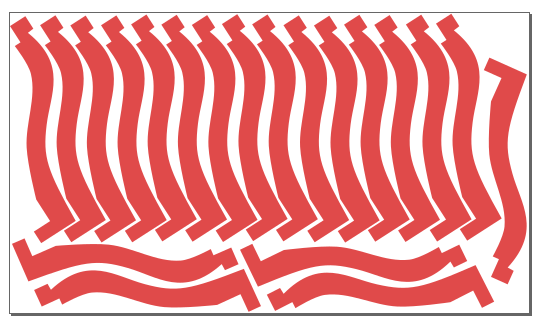
First I thought, ok, I’ll just cut out (48" x .25" strips = ) 192 pieces of the profile, glue them all to a piece of MDF, and sand it smooth. How hard could that be?
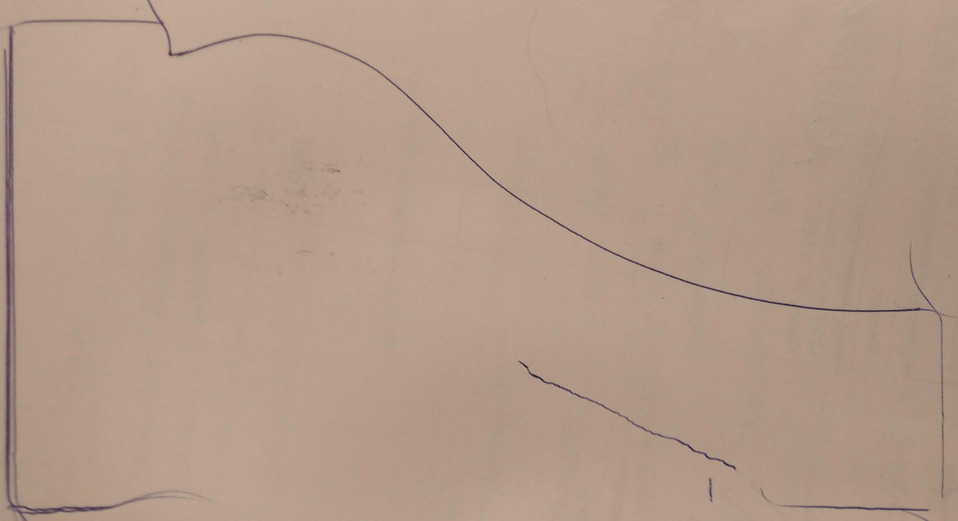
I traced it out on a piece of paper, took some measurements, fired up inkscape, and popped out this baby:
Looking good! However, I had a few concerns…
It was going to take an entire 4x8 sheet of 1/4" MDF, and take over 8 hours of continuous cutting, even with some creative packing.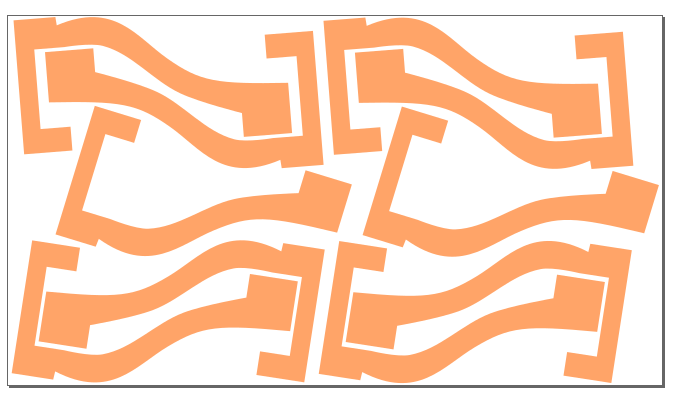
So, I redesigned it. I thought, I’ll make the back side a flat piece of MDF, then it’s a smaller profile to cut.
I made a 2" section (8 pieces), got it all glued up and lightly sanded as a test. At this point, I was pretty confident it was going to work, my material usage was a lot more efficient, but the cut was still over 6 hours.
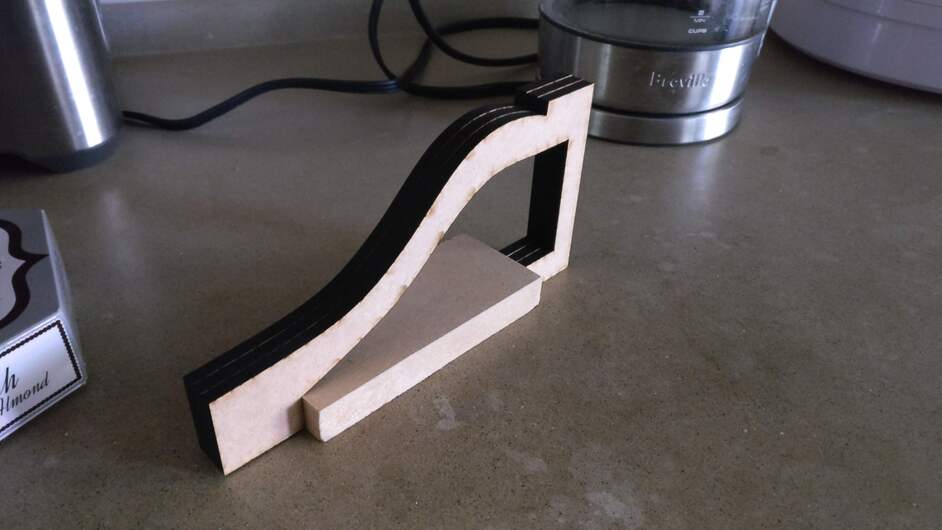
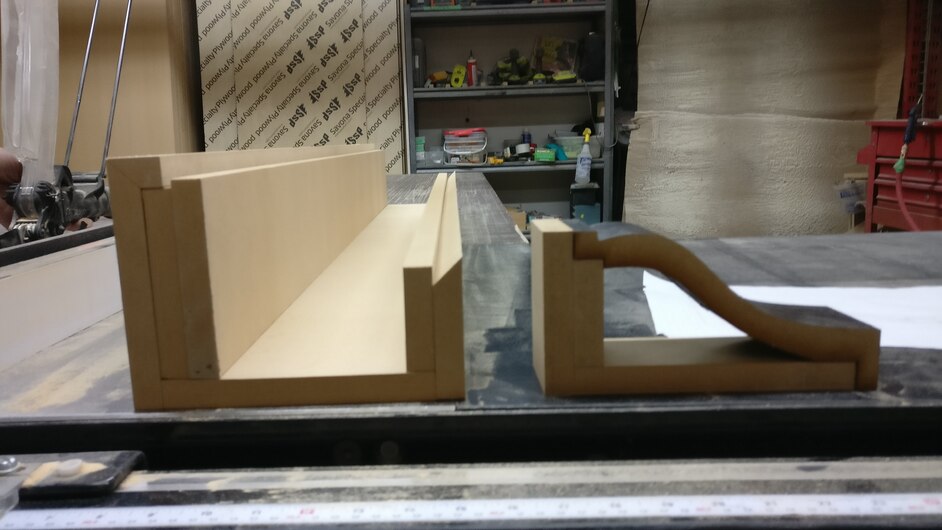
I realised now that the top section was going to be a nightmare to sand, and the front section, being flat, might as well also be a flat piece of MDF. So I built a pretty simple frame, with all the flat sections of the profile as finished face MDF to minimise sanding, and aligment notches for the laser cut pieces. Oh, yeah and this is when it went from 4" to 6" deep. Because why not.
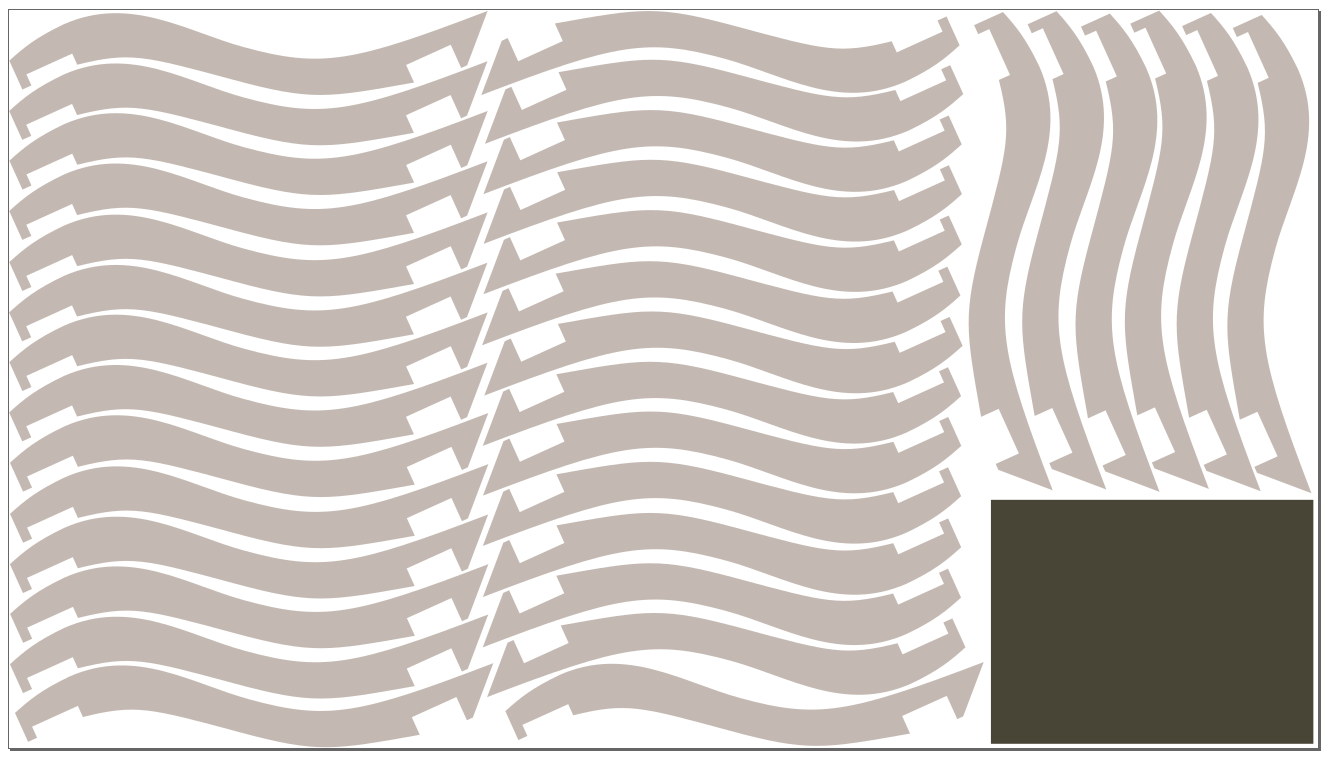
With this design, I was able to really maximise my machine output! (the little square was just so I was left with a tidy scrap). I had 34 pieces per operation, which meant I only needed to run the machine 6 times, at about 50 minutes apiece. 5 hours, over a weekend, that’s not so bad.
Taking Shape:

While I was gluing the pieces into the frame, I realised that my top section varied by 1mm from one end to the other. Dammit. Oh well, too late now, we’ll fix it in finishing.
As you can see, and can probably imagine, there are many ridges. 192 ridges. These are due to the angle of the laser cut in the 1/4" material. I wasn’t too concerned about this, I figured it would sand out.
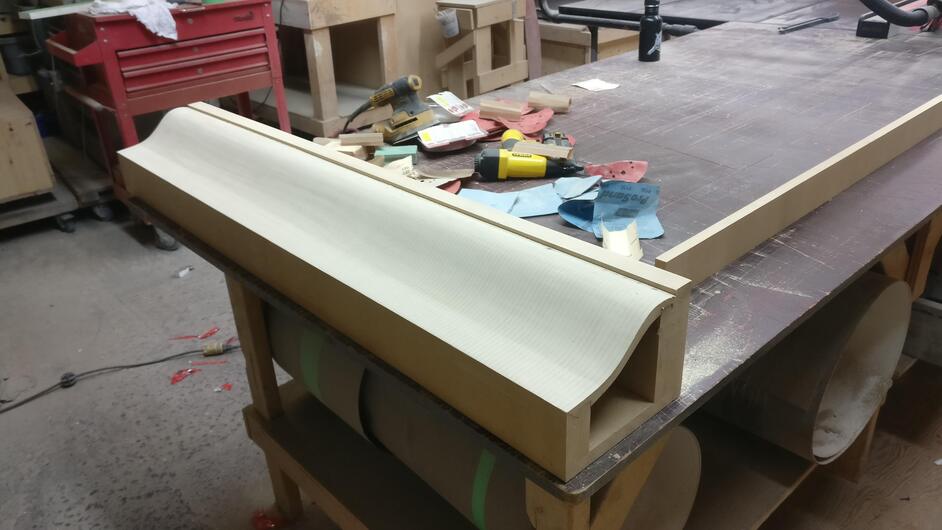
Took it to the shop, buzzed it with the orbital.
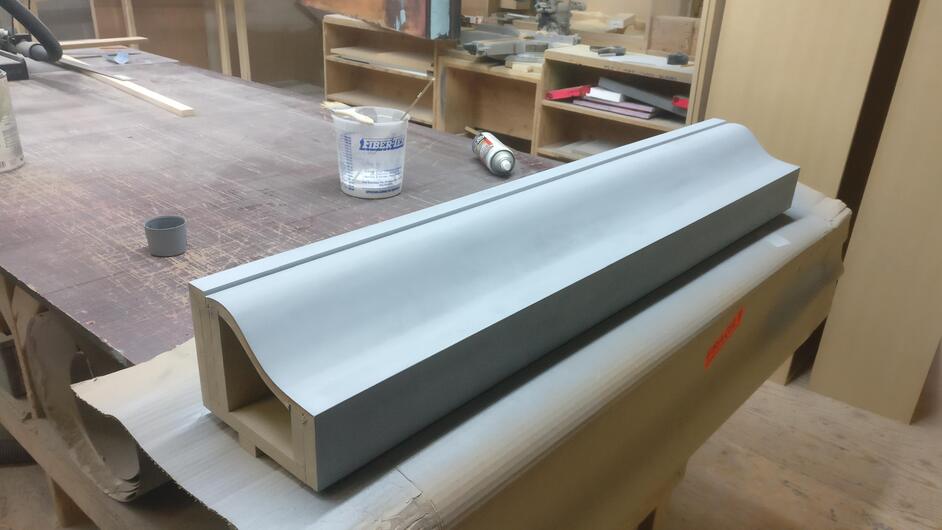
A coat of filler-primer to see what we’re missing. This was my first time using this filler primer. Usually we just use regular old spray primer. I wasn’t super impressed really. Maybe I’m missing something.
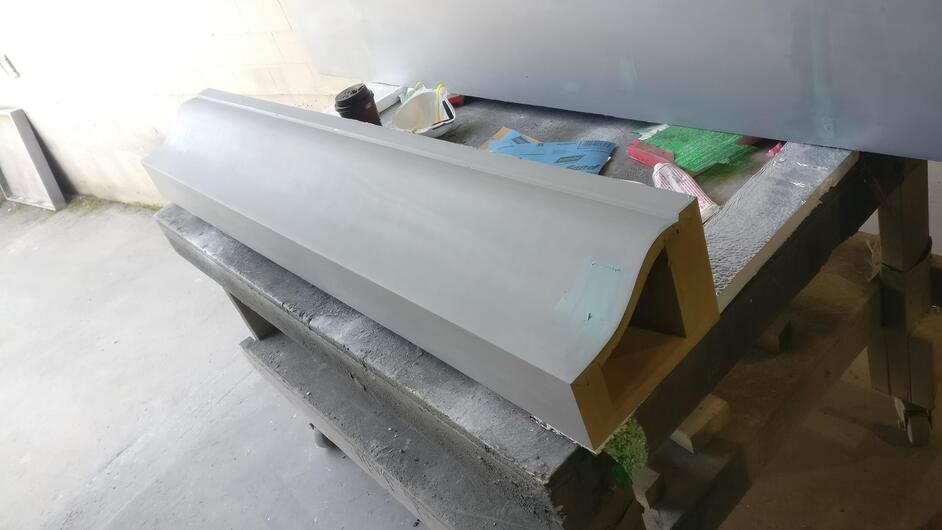
Bondo’d a few spots and sanded some more.
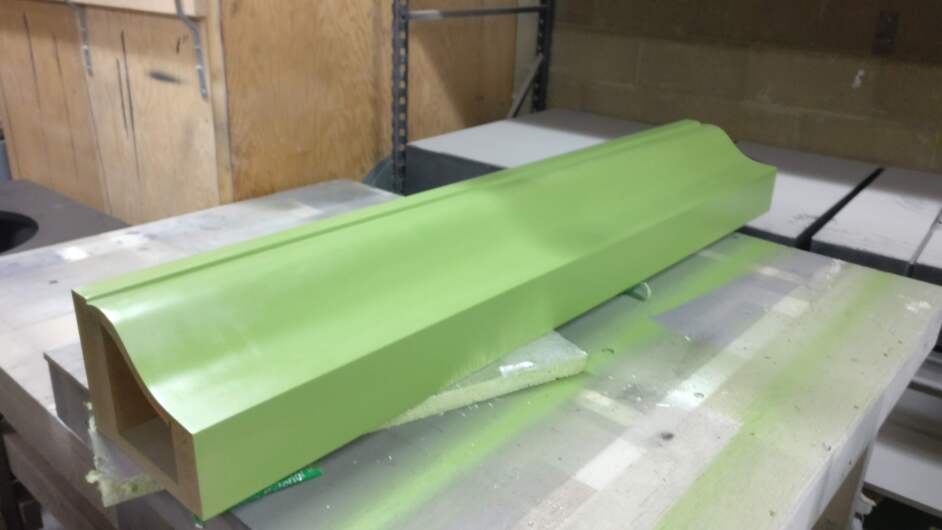
A few coats of epoxy paint and it’s off to the fiberglass man! I was going to cap off the ends but he said not to bother.
Conclusion:
I was very happy with how this turned out! For about $20 of materials, plus finishing stuff which is pretty constant regardless of how it’s made.
I had it from concept to completion in under a week, and now I know it can be done in a weekend if we really need it fast. It’s nice to not have to rely on other trades to get your stuff done!
The Bad News
As it turns out, cutting 1/4" home -depot-MDF for 6 solid hours really makes a mess of your machine. Near the end of it, the exhaust fan stopped working and the room filled up with smoke. Luckily the only connection between that room and the rest of the house is a cat flap and a sealed door.
Here’s what my fan looked like (started cleaning one blade)
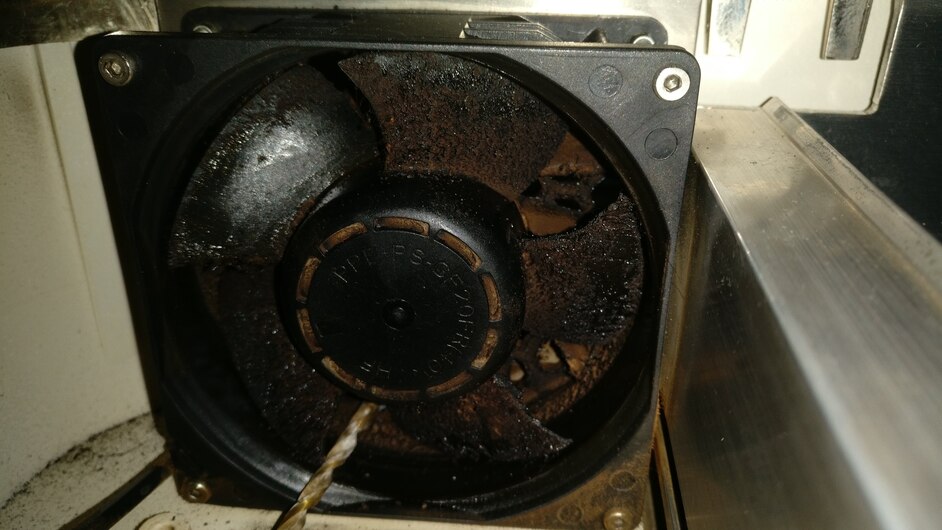
This thing is a bitch to get at. Glowforge 2.0 hardware revision idea: access door for removal and cleaning of exhaust fan. No, I wasn’t cleaning it with a drill bit, it’s just to stop it spinning.
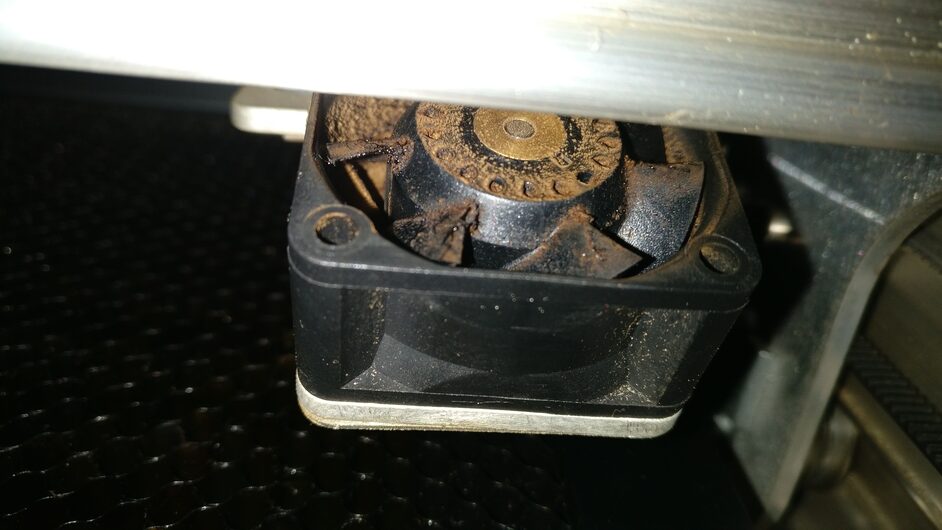
Little bit concerned about the air-assist fan too.
If anyone has any cleaning tips, let’s hear them.
Anyway, hope this helps guide and inspire! You guys are all amazing.


