Update: 12/14/2018:
Happily, the Glowforge crew has released an “easier to implement” cleaning regimen for the exhaust fan now…instructions for how to do it involve purchase of a special non-flammable degreasing spray cleanser and use of a special cleaning mode of the software…instructions here:
Written up below is the old way that I was doing it…it’s a fairly labor intensive alternative that has worked very well if you are willing to keep up with it as you go along and not let it get to the point of needing to use the spray degreaser. (I’m going to leave my old writeup here in case there are other folks who prefer to maintain as they go. But if you’re in a hurry, the method proposed by Glowforge up top is going to be a lot quicker, so you can now stop reading and just go do that.) ![]()
Before going any further…standard disclaimer…this is not a procedure sanctioned by Glowforge, and if you duplicate the instructions shown below, you’re doing it at your own risk. ![]()
I’m mentioning this up front, because although I’ve done it now a couple of times, you do have to be extremely careful and patient while doing it, and follow the instructions and warnings carefully - it is possible to create problems with the machine if you don’t. (I’m not joking.)
I’ve had my permanent machine for close to ten months now, and several months ago, the noise level on the exhaust fan increased dramatically. (Like twice as loud as usual.) It did this in the middle of a lengthy engrave, and frankly was too loud to put up with.
After futzing around for day or so, I tracked it down to junk that had gotten attached to the front of the exhaust fan blades, (due to an error with some masking material that caught fire and went flying, my bad), and the junk was causing the fan to run out of balance. Everything worked, it was just uncomfortably loud.
It’s very difficult to reach the fan, but with a lot of patience, I was able to remove the junk coating the front of the blades. The noise level dropped back down to normal, and everything has been fine since.
I decided to add regular cleaning to the front of the exhaust fan blades though, to maintain it in good working order, since I get the feeling that it’s going to require a return to the mothership to replace it.
So a week or so ago, I picked up a cheap cable camera and took a look inside. And promptly went into shock!!!..I thought the blade had broken and was missing a couple of large chunks! ![]()
The good news is…that blade isn’t broken, that is normal junk that gets deposited on the blades during heavy engraving and cutting. The bad news is…that’s normal junk that gets deposited on the blades during engraving and cutting! ![]()
I worked out a way to clean them off that was a lot easier than the first time i tried, so I’m going to share the steps below.
What you need:
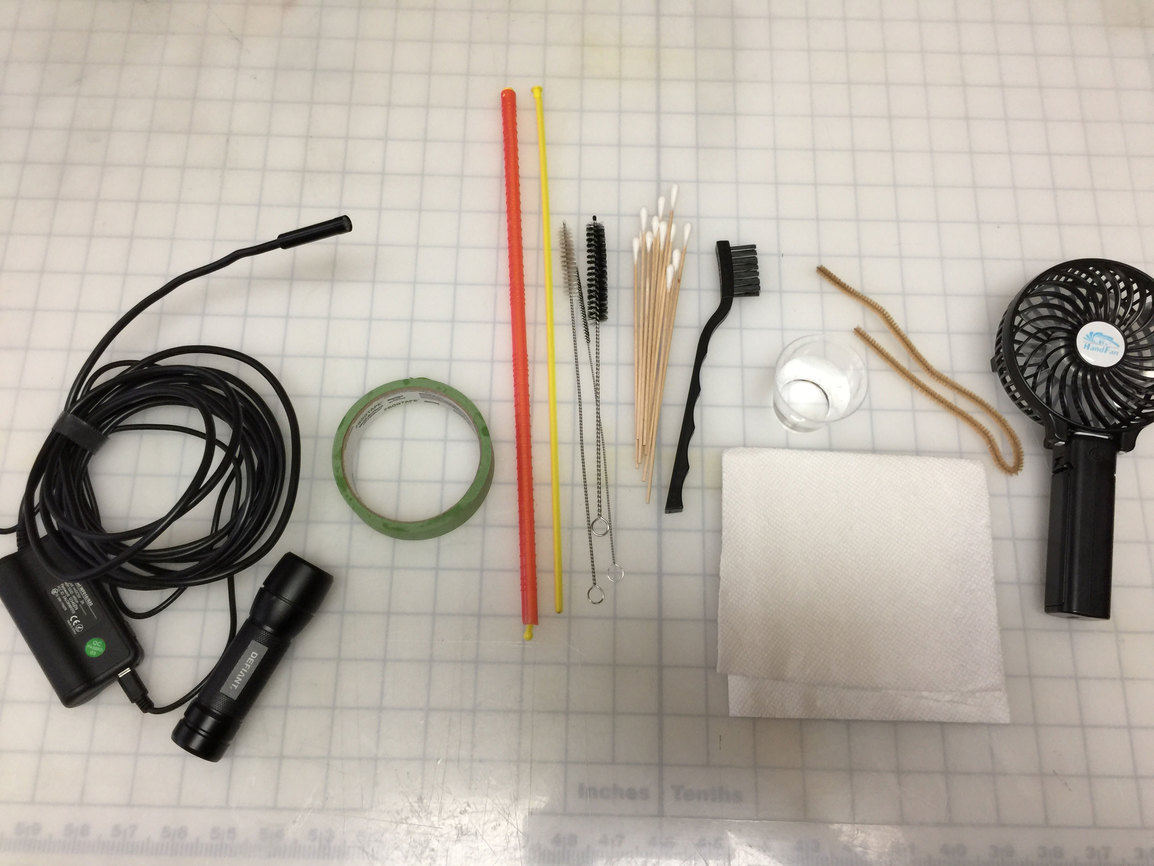
Endoscope Camera - (optional) But useful if you want to keep an eye on things in there.
Small Flashlight.
Masking Tape.
Xtra Large Bag Sealer Stick - which you will destroy for bag sealing purposes. ![]()
Bottle brushes.
Long Handled Cotton Swabs
Stiff plastic bristle brush.
Small cup with 50/50 White Distilled Vinegar and Water mixture.
Paper Towel.
Pipe Cleaner.
Small Hand Fan. (optional)
Chair.
- Turn off the machine and unplug it.
- Slowly move the gantry forward towards the front of the machine, using 2 hands.
![]() Do not pull the gantry any farther forward than it can normally reach during operation. Pulling it too far forward can stretch one of the cables under the gantry and cause hang-up problems and track jumping later. Make sure the head remains over the gridded area of the tray.
Do not pull the gantry any farther forward than it can normally reach during operation. Pulling it too far forward can stretch one of the cables under the gantry and cause hang-up problems and track jumping later. Make sure the head remains over the gridded area of the tray.
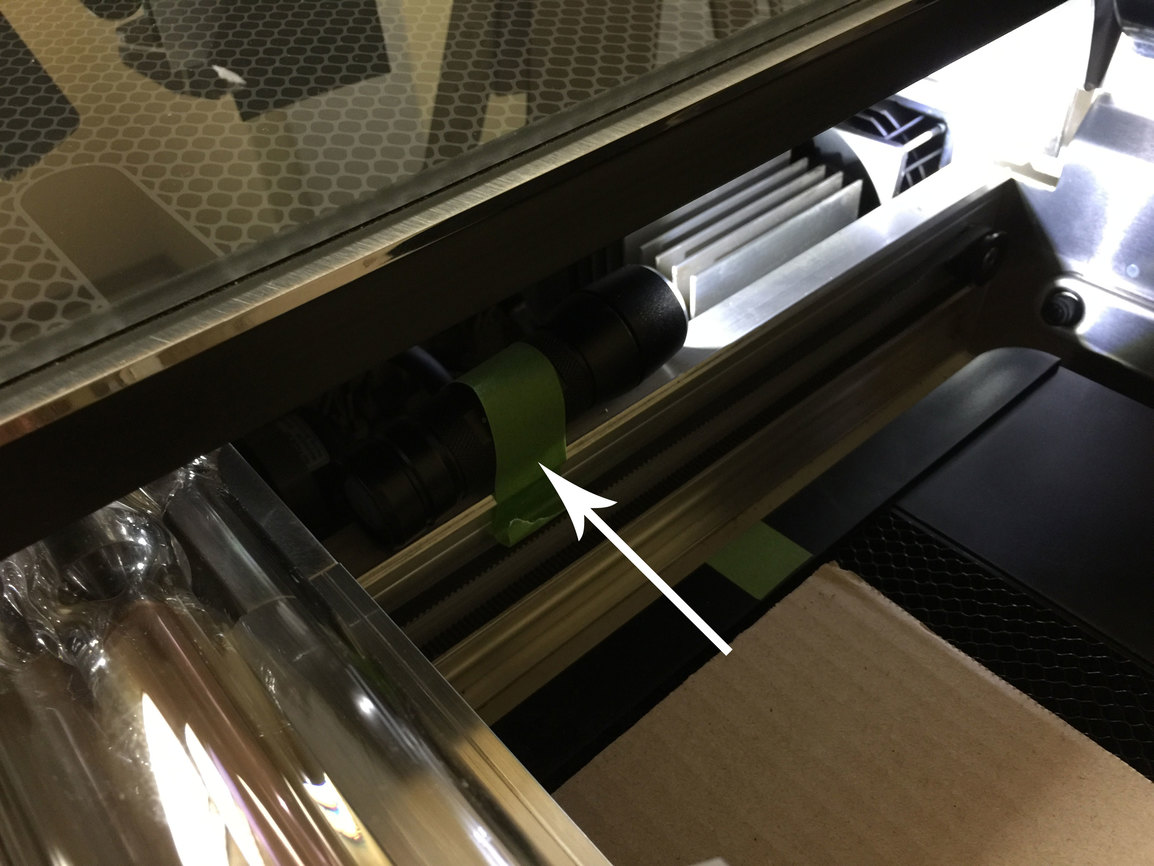
- Tape the flashlight onto the left track behind the gantry with the masking tape, to keep from knocking it off into the left side of the machine.
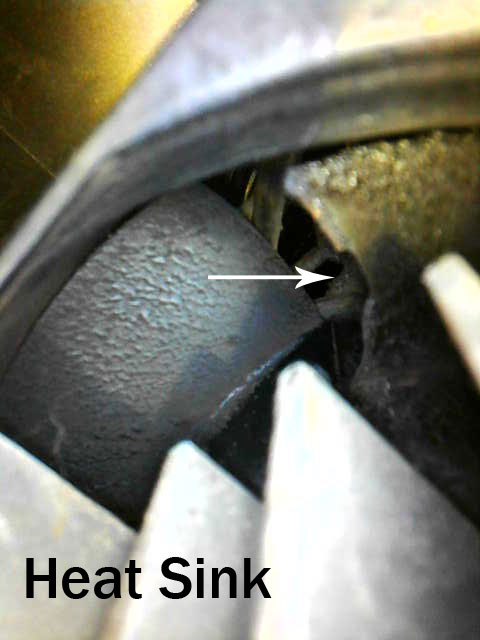
![]() Be careful where you put the tape, there are some connections right against the track inside near the heat sink. Gently feel with your fingers, locate them, and move the flashlight back a little towards the gantry before taping.
Be careful where you put the tape, there are some connections right against the track inside near the heat sink. Gently feel with your fingers, locate them, and move the flashlight back a little towards the gantry before taping.
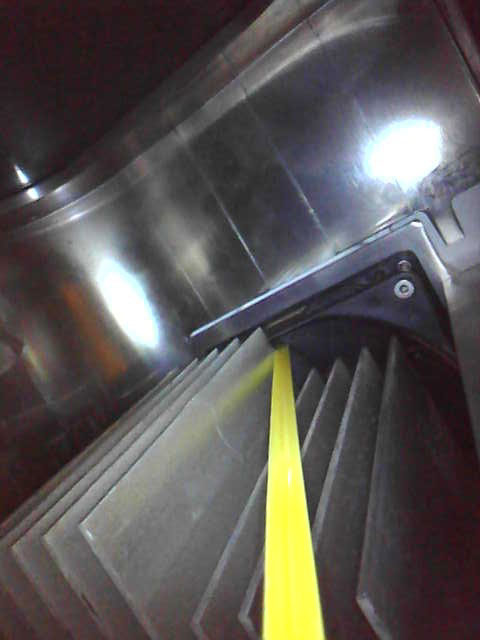
- One of the issues with cleaning the junk off of the blades is that they turn while you are trying to rub the mess off - it’s sticky and feels almost baked on in places. So I searched for a way to lock the blades into place for cleaning. You need to find a stick narrow enough to insert between two blades of the fan, and long enough that if you drop it, you don’t have to spend an hour and a half trying to fish it out without being able to see anything and without breaking anything. (Ex: Popsicle sticks are NOT good.)
I came up with this…the center plastic insert in one of these new style bag sealers is long enough and flexible enough to insert through the blades of the fan, through the fan plate behind it, and through the grid into the vent hose behind. Once it has been inserted through, the blade is fixed firmly into position, letting you rub the smut off very quickly. (Relatively speaking.)
And the plastic isn’t going to break. So I highly recommend that $10 investment. You’ll get a few extra bag sealers out of the deal to boot. ![]()
Prepare the yellow stick by cutting off the little round ball at one end with a pair of flush-cut pliers or sprue snippers, and cut away or break off the colored covering with pliers.
- This part looks scary, but it’s not hard…get down at eye level so you can see the fan blades, and just gently wiggle the cutoff end of the yellow stick between two of the blades. Wiggle it around a little more and it will slip between the blades of the fan plate, then a little more and it will probably make it through the grid too. (If you need to, back it out and re-insert it, don’t force it, you’ll bend your stick.)
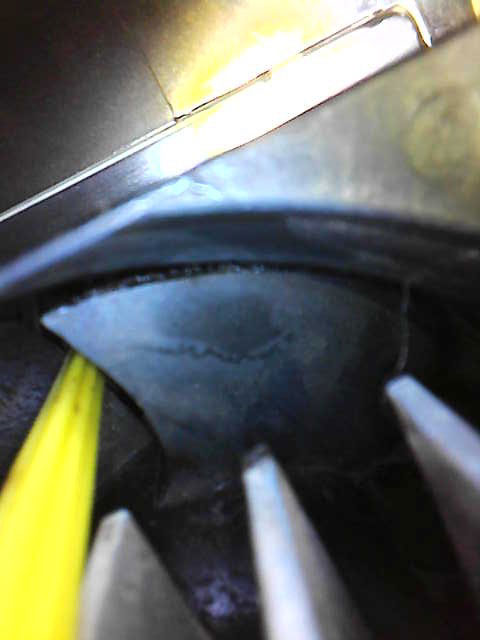
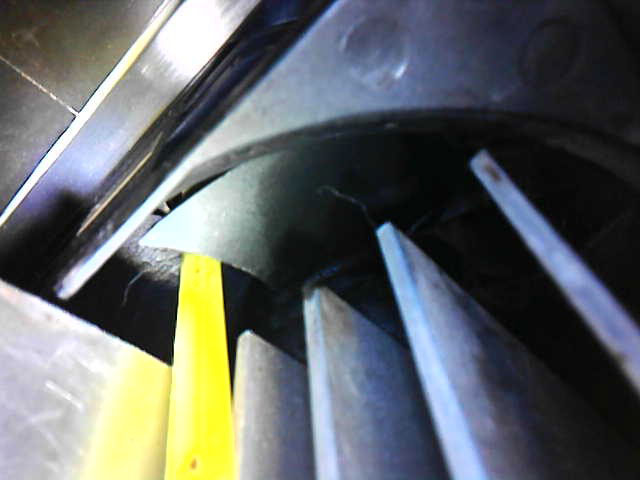
- While the blades are locked into place, you can easily reach the blade to the right of the yellow stick with a long swab to clean it. Pull up a chair, sit down and get comfortable…your back is going to hurt if you try to do this standing bent over the machine.
![]()
It goes without saying, but do not lean on the gantry or tube while you are cleaning the blades. ![]()
-
Clean the fan blade that you can reach by dipping a swab into the vinegar mixture to moisten it, drying it off a little on the paper towel so that it does not drip, and then rubbing the gunk off of the fan blade. You want the swab moist, not wet, but this mixture does clean better than Electronics Cleaner. I tried that first, and the buildup on the blades is just too thick, the Electronics Cleaner evaporates before doing any good.
-
Dip…swipe…rinse…blot…repeat. Clean off the swab as needed on the paper towel, it loads up with junk quickly, but you can rinse it off in the cup. Try to keep from getting too much liquid in the swab for the wiping part, you don’t want puddles in there.
Here’s where I discovered the blade was not actually broken…whew! Huge relief! ![]()
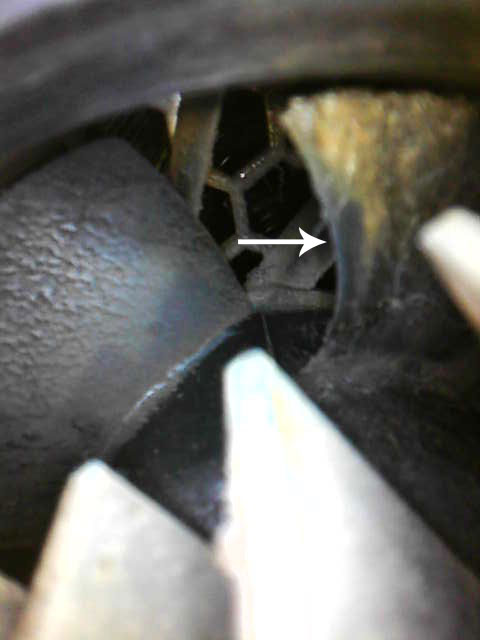
Much Better! ![]()
-
Once you have the blade cleaned to your satisfaction. carefully remove the yellow stick, use it to rotate the next blade into place, and you can clean that one. There are five blades on the exhaust fan. Cleaning them all took a couple of hours for this level of buildup. (And because I was figuring it out as I went…might be a little quicker next time.)
-
Not done yet…the buildup of resinous gunk on the fan is mainly on the front of the blades, since that is the area that gets hit with the exhaust, but there can be a buildup of ashy bits on the back of the blade edges, and the grid behind the fan. To clean those though, it’s as easy as removing the vent hose, loosening any buildup with the little brushes and a pipe cleaner, and then vacuuming out the debris. It tends to come out a lot more easily.
-
The last thing to check when you remove the flashlight is that you have completely removed the tape from both sides of the track. You can point the hand fan into the exhaust fan to dry it out if you think you might have dripped in there, and I’d recommend leaving it open overnight to completely dry out, just in case, but the vinegar does cause the solution to evaporate very quickly.
How often would this need to be done?
That’s going to depend on how heavily you use your machine, and what you are cutting with it.
Working with plywood, MDF and draftboard is going to cause more of a buildup than hardwoods and acrylics. It’s also probably going to be a lot easier to clean the buildup off if you don’t let it go for 6 months. I’ll probably try to clean it once a quarter now, to keep from having to spend so long doing it, and I consider myself a light hobby user. If you do large batches or production work, I’d consider once every other month for regular maintenance.
So why would you want to do this?
You don’t have to. I believe that replacing the fan is going to be a lot of trouble and expense, and once you start to get buildup on fan blades, it puts more strain on it and will burn it out more quickly. (Aside from it being obnoxiously loud.) Keeping it clean will keep it running longer, and it’s something I prefer to do. But you do have to be kind of careful doing it, and it’s a bit tedious, so if you’d rather not, don’t. Glowforge currently only recommends the occasional vacuum of the rear side of the fan through the vent hose port. ![]()
So anyway, that’s all folks. ![]()