Making a purse out of the scrap pile

If you ask anyone around the office, they’ll tell you that I’m pretty obsessive about material waste so when my last project left me with a bunch of awkward scrap I went looking for interesting ways to use it. This is the first of what I hope will be many ‘diving in the scrap bin’ projects.

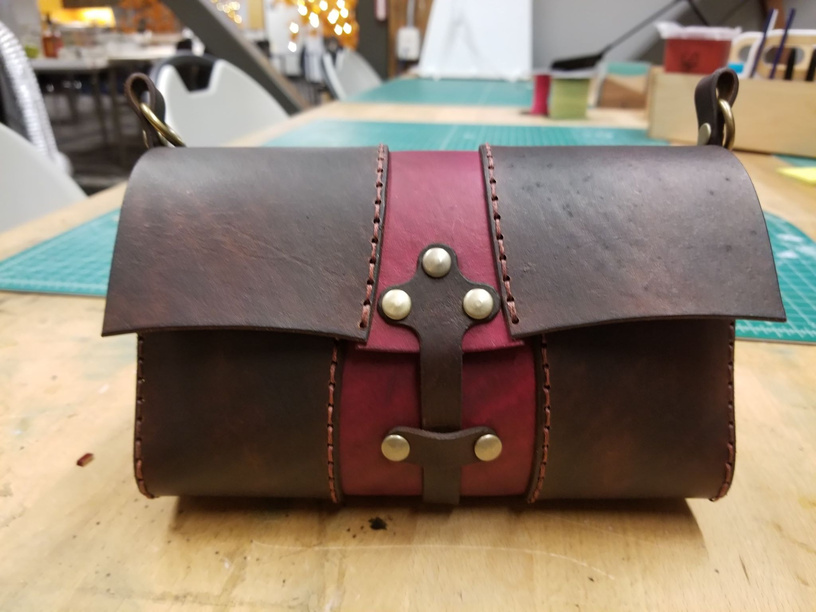
This is something of a prototype / proof of concept. Next rev I’ll move the loop closure up a little bit to make room for a button post to secure the closure strap with. It holds fairly well as is but I’d like the piece of mind that comes from a more secure closure without getting into the cumbersome world of buckles that just aren’t practical for getting in and out of the bag quickly.

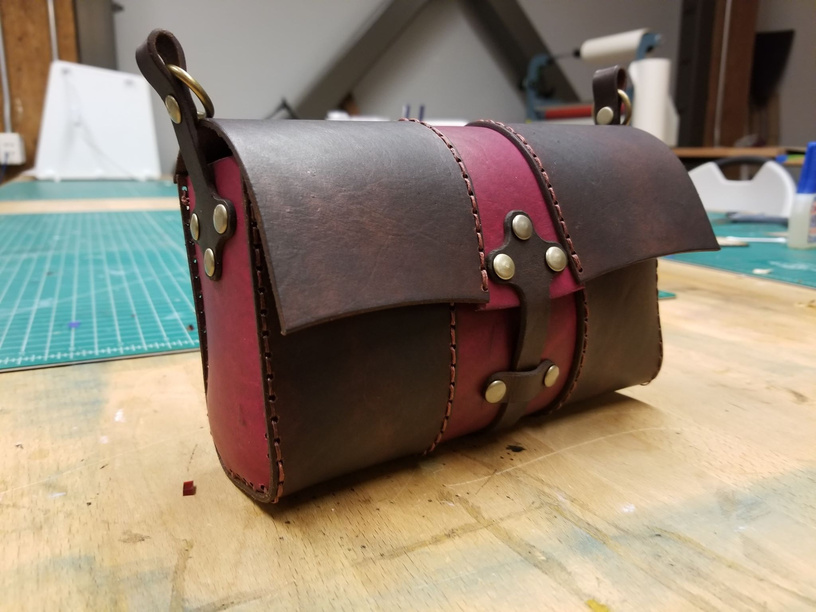
Side panels were also a little rough. The turns at the corners are a bit too sharp and it puckers a bit more than I like. I’m thinking that the next revision will use a gusset… maybe a gusset with a zig-zag stitch.

The top flap worked out fairly well but I’m still going to move the stitch line back about 1/10" because it’s just a hair too close to the material edge for me to really be happy with how it sits.

Random notes:

Total assembly time: 4.5 to 5 hours from print to finish. My target was to be a 4 hour project and having done it once, I could probably manage it in 4 hours on the next one, so I’m fairly happy with that.

Largest piece of material used: The two largest pieces are approximately 10" long and 3" wide at their widest. The center panel is about the same, narrower at the top, wider in the middle. The top flap’s largest pieces are 5" long by 3" wide and the side panels are 2" wide by 4" tall.

Material Packing: If you tried to print this on a single sheet of :proofgrade:, it would fit, with enough leather left over for a shoulder strap (which I need to get around to designing / building.)

Final Dimensions: The purse ended up a hair shy of 8" wide by 4" tall by 2" deep. It uses approximately the same amount of material as the Better Together Clutch in the catalog (of which I have made many) but has a significantly larger interior volume (and takes more than twice as long to assemble, so there’s that.)

I didn’t take many ‘in progress’ pictures for this one, I was in a bit of a hurry to get it done in a single evening (and didn’t leave the office until 11:00 at night because I got stubborn about finishing before I went home) but this was a V1 Prototype so I’ll try to take a few snaps of the process when I do the next revision if I can.

As proof of concept goes though, this turned out pretty well… which makes me hopeful that the larger scale laptop bag size version of this will turn out equally well :slight_smile:

63 Likes

Love the color combination & shape of the center panels…

Nothing wrong with making use of scrap!
(I started out by digging thru the scrap bins at McPherson’s here in Seattle, and still do at times, and lots of what I make uses the “scrap” from other projects–and so many other examples, such as Coach’s “patchwork” bags). I cringe anytime I put anything bigger than 1x1" in the bin (and thus my studio is a mess!.

1 Like

Annnnd…she did another one. (I need to hire you to spruce up my wardrobe.):smile:

2 Likes

The colors and stitching are beautiful!

1 Like

There is no such thing as a scrap bin, just smaller materials I am going to use later. Love the colors, and the front strap. A magnet may give you the security and speed you want.

6 Likes

Gotta be honest, I only opened this thread to knock it off my Unread. Wasn’t expecting something so awesome! WOW!

5 Likes

It’s beautiful!

2 Likes

Oh WOW!!! That is gorgeous!!!

1 Like

Very nice, I should be so lucky to be able to stitch work like that.

1 Like

Your scrap is nicer and bigger than my scrap :smiley:

Nicely done.

2 Likes

Wow, really nice!

2 Likes

Wow jae! :sunglasses:
Love style and the thread color contrast! I also think the closure is a great design element, but I second @tuttles2 magnet idea for function.
You need to get your stuff in the catalog!

1 Like

Put beltloops on the back and I would totally carry this as a pouch for ren faire.

2 Likes

Wow, I think you did a great job! thanks for sharing!

1 Like

Oh my goodness @jae… this is amazing. I’m a scraphound too (as folks could see from my material pile at home) but I don’t have anything like this to show for it!

2 Likes

your stitching looks great here. and very clean. did you cut the stitch holes with the GF? if you did, how did you manage to keep the char off of the thread?

2 Likes

Yes, the stitching holes were cut on the Glowforge. I’ve found two things help to keep the char off the thread. First, I use a fairly large diameter stitching hole so there isn’t as much drag on the thread (0.07 inches, yes, I’m a barbarian that uses imperial measurements.) Second, I don’t do the ‘traditional’ pull both needles through at the same time. It takes a little longer since I’m trading needles back and forth but again, it minimizes the drag as thread travels through the stitching hole.

Time and practice! A month ago the only thing I’d ever hand stitched was a wallet I made in my first few weeks at Glowforge. Also, larger stitching holes make it easier to learn :wink:

If the leather was a bit more supple, maybe… it’s a touch bigger than I’d want for a belt pouch but I tend to like my belt pouches to be narrow and deep rather than wide and shallow. I’m planning to make a more hip-belt optimized version of this but it’s a few designs down the road.

I’ve got a handful of magnetic buttons. I’m thinking you’re right, I just need to figure out how I’d want to work it into the design. We’ll see if I can get them in there on the next iteration :slight_smile:

5 Likes

i tend to be a one needle at a time stitcher, too. but mostly because i really don’t know WTF i’m doing. :slight_smile: but i will definitely keep the larger stitch hole in mind for next time.

3 Likes

I think you could go into the Designer purse business—your products are amazing!

1 Like

Right!? @jae kinda blew my mind when she said two needles at once. Maybe I should have watched more than one YouTube video. Then again, I’ve broken more than one needle pushing them through. I guess I need smaller needles. Or bigger holes.

3 Likes