I spent enough of November on the road that there is now another airport where the bar by the gate knows not only my drink order but my dinner order and TSA apologizes for running through the list of things they have to warn people not to have in their bags… (Also, that moment walking through an airport when someone called out “Hey Glowforge!” … and it turned out to be someone I’d met at a different airport.) Never let it be said that Glowforge doesn’t send me to interesting places! So, since I wasn’t going to be home for a few weeks, I decided to give myself something “interesting” to build in hotel rooms at the end of the day:
Yes, I made Linden model for me again. ![]()
While one of my last projects was about working with end bits and other smaller pieces of ![]() left over after some of the common office prints (I might be a little obsessive about the remnant left over after making a Better Together Clutch), this project was really about maximizing what I could do with a full sheet of
left over after some of the common office prints (I might be a little obsessive about the remnant left over after making a Better Together Clutch), this project was really about maximizing what I could do with a full sheet of ![]() Or 5 of them.
Or 5 of them.
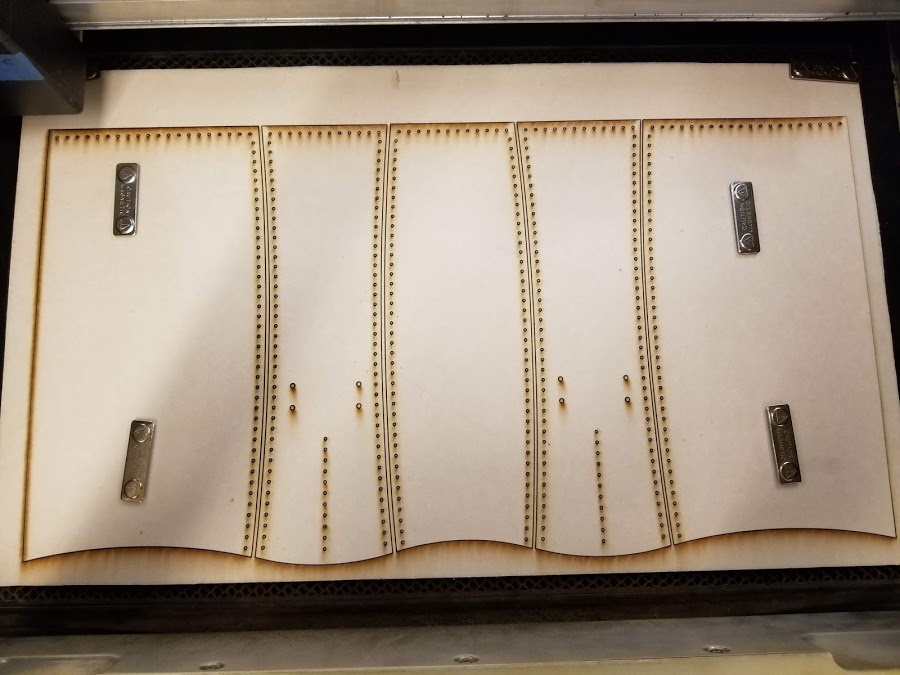
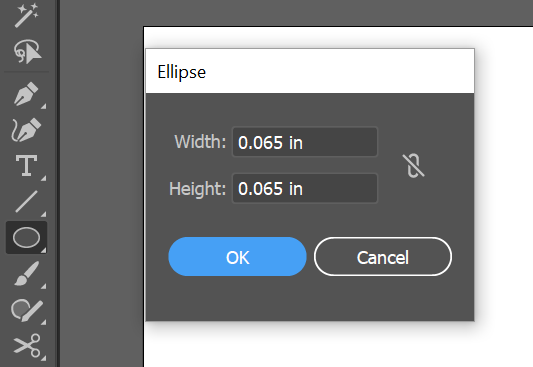
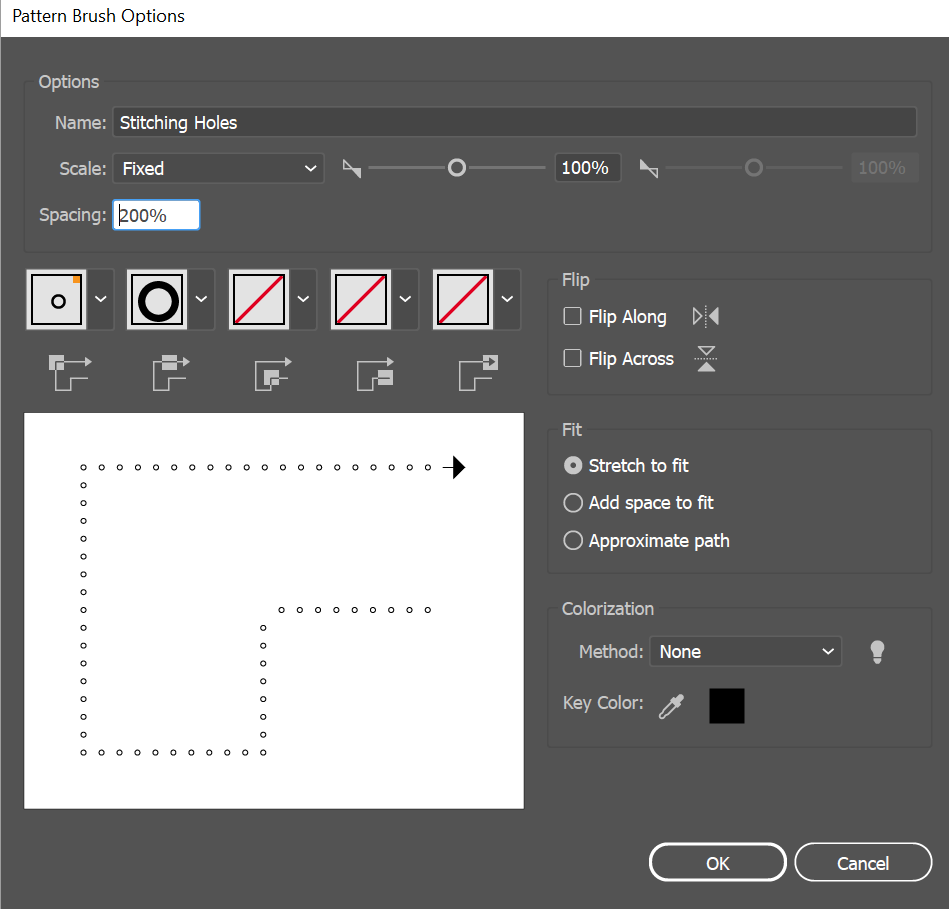
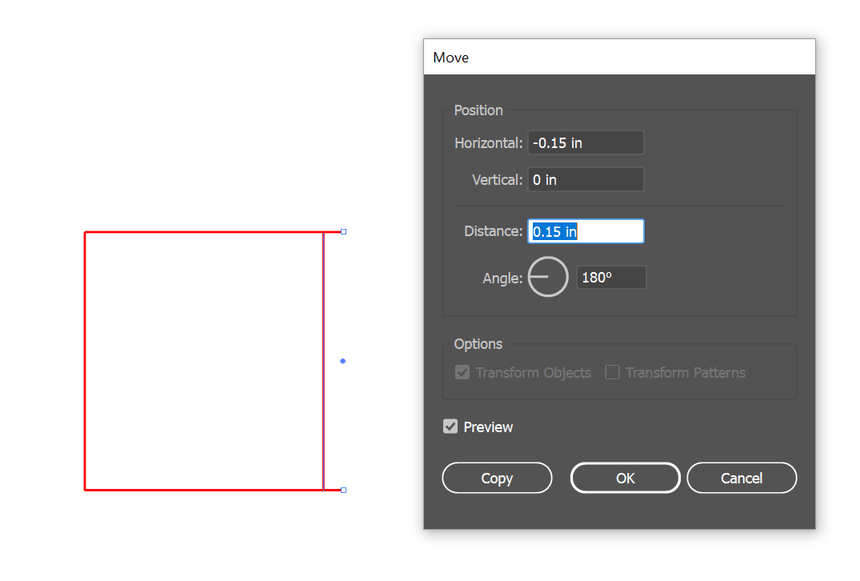
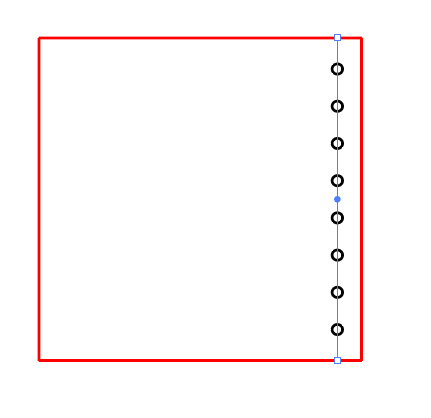
No inch of printable area left behind! You can see the insanity already… but, I had a bunch of evenings to kill so… what’s a few more stitching holes?
Lots of stitching holes.
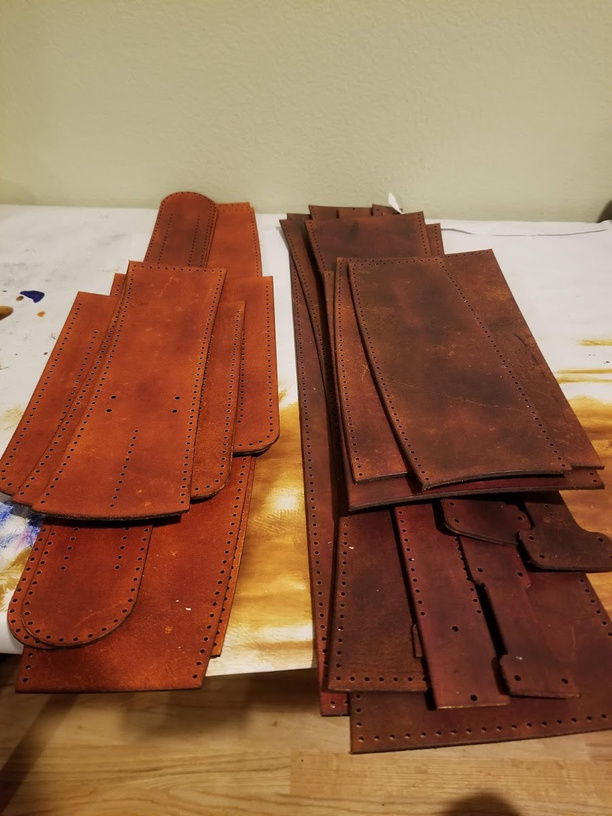
About an hour of print time left me with 27 parts…
And at this point, I hit the first snag in my brilliant plan. I had to catch a plane before I had a chance to dye any of that ![]() While I won’t say that I’ve never taken a box of dye with me on a trip to do crafting in a hotel room, I will say that I save that kind of flirting with danger for my own travel… I don’t think a line item on my expense reports titled ‘damage to hotel carpets’ would go over well (call that a hunch, I don’t want to find out!)
While I won’t say that I’ve never taken a box of dye with me on a trip to do crafting in a hotel room, I will say that I save that kind of flirting with danger for my own travel… I don’t think a line item on my expense reports titled ‘damage to hotel carpets’ would go over well (call that a hunch, I don’t want to find out!)
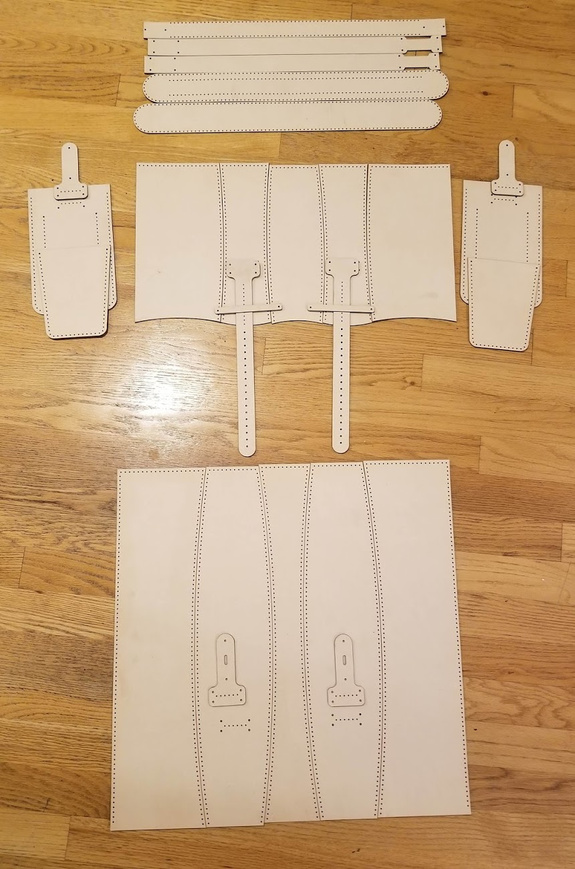
So, a week later, I spent a chunk of the weekend turning this:
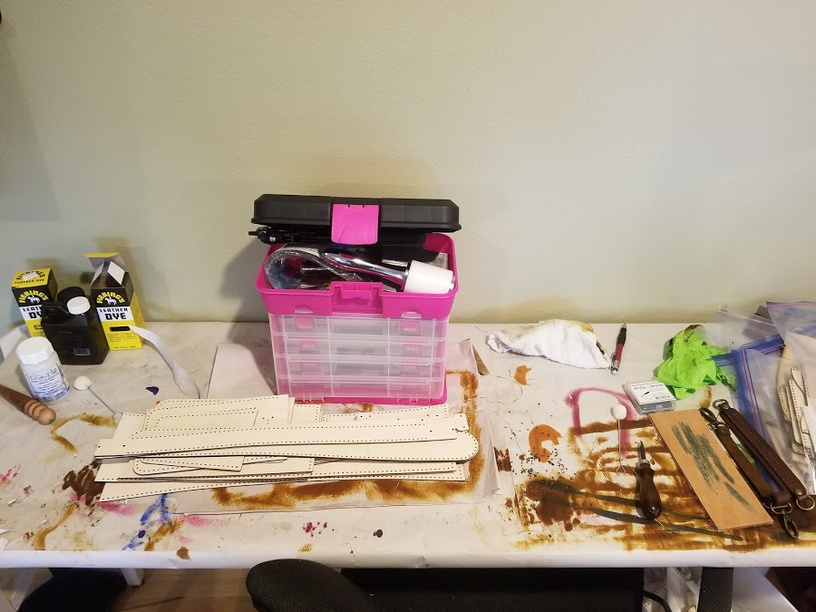
Into this:
Yes, the pink tool box is essential to proper crafting. Large workspaces, however, are not essential, which is a good thing because the only table I currently own isn’t very large.Then, after a brief break for Thanksgiving, back on the road!
When I’m designing these things, one of the things I try to think about his how long will this take to build? Is this a 10 hour project? More? Less?
I wish I’d done a bit better keeping time on it… I managed the top flap in about an evening:
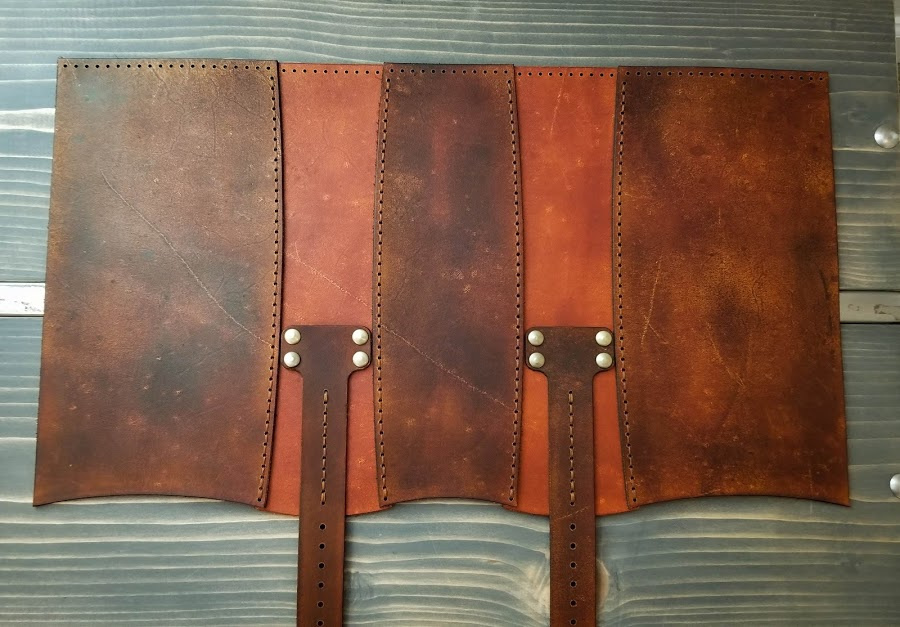
But I didn’t time it. I did time the body…
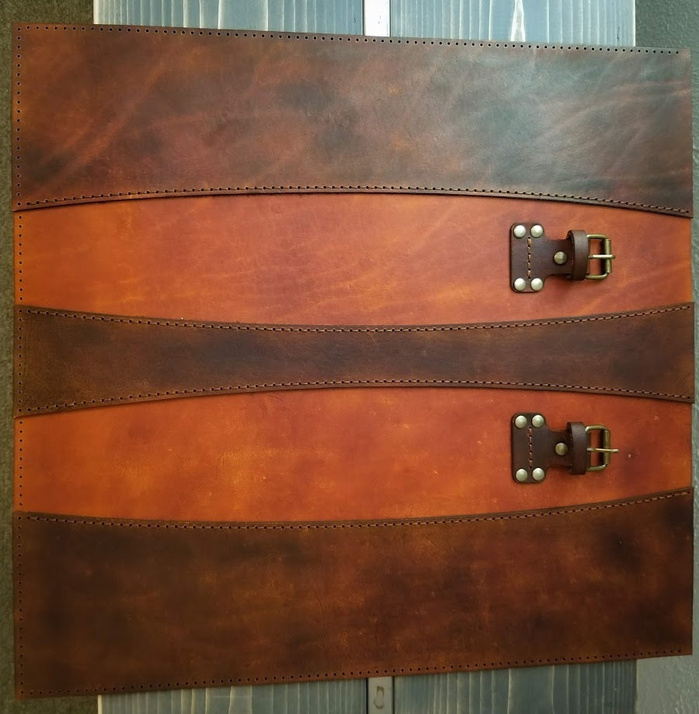
Each of those rows was about 80 stitch holes long and 35 minutes to finish. So, call it around 2.5 hours by the time you add the buckles in.
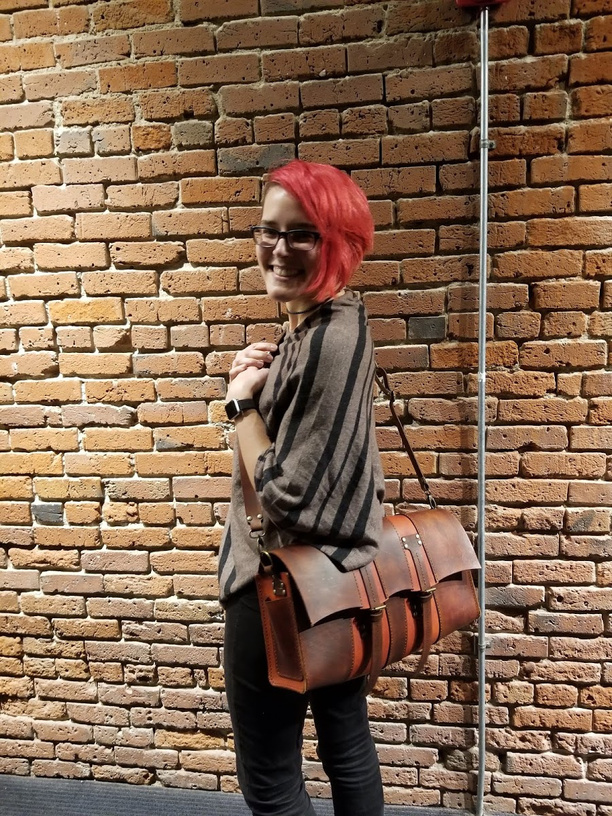
All in all, it made for a spiffy bag:
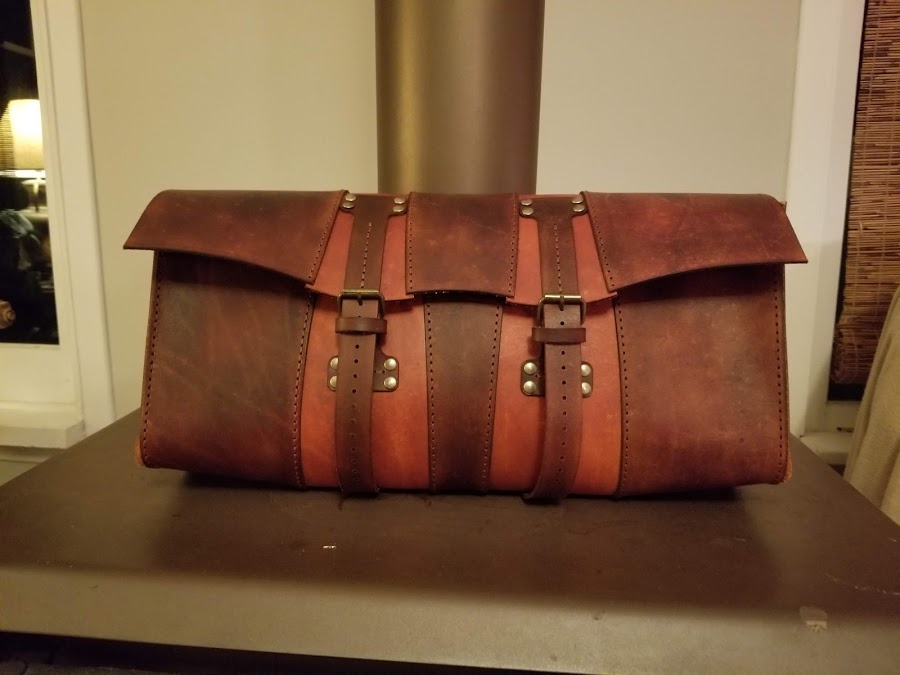
Things I learned so you don’t have to:
Pockets
I tried this thing with the pockets on the ends where I cut the sides of the pockets at a slight angle and pulled them to parallel when I stitched them in place on the idea that I’d get a reasonable pocket out of it:
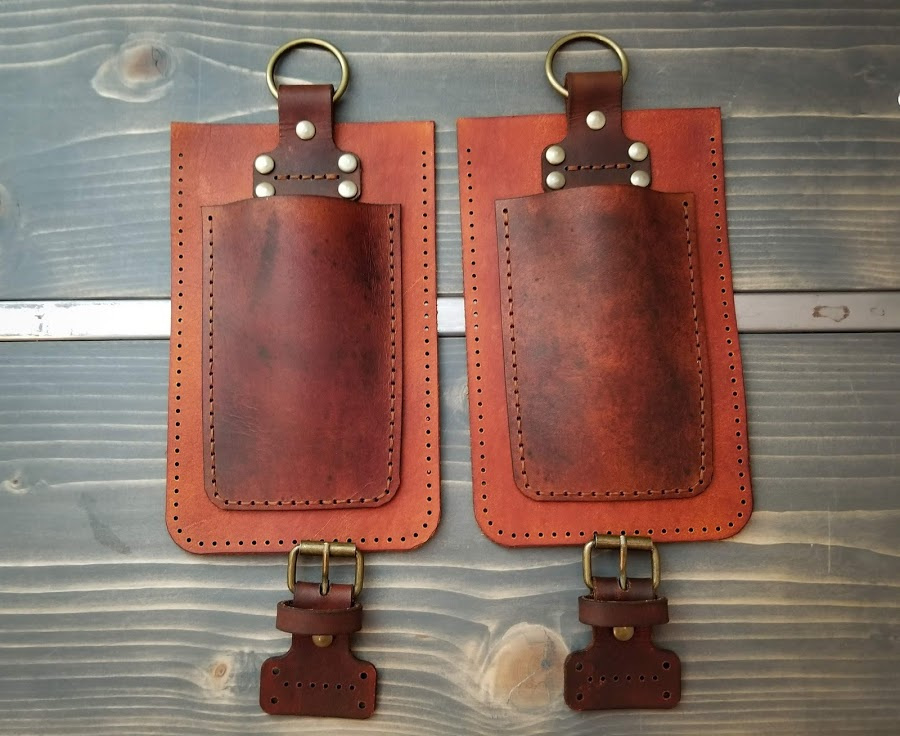
Instead, I managed to create girl pockets. They look pretty but they don’t hold much more than keychain or wallet. Next time, gussets.
No Handle: What was I thinking?!?
I did build a shoulder strap for this, but I didn’t put a handle on the top flap. One day of taking the bag to work and I’ve lost count of how often I’ve wanted to pick it up by a handle on top that isn’t there.
Attaching the ends
There are two ways to attach the ends on something like this. Does the end cap bend inward or outward?
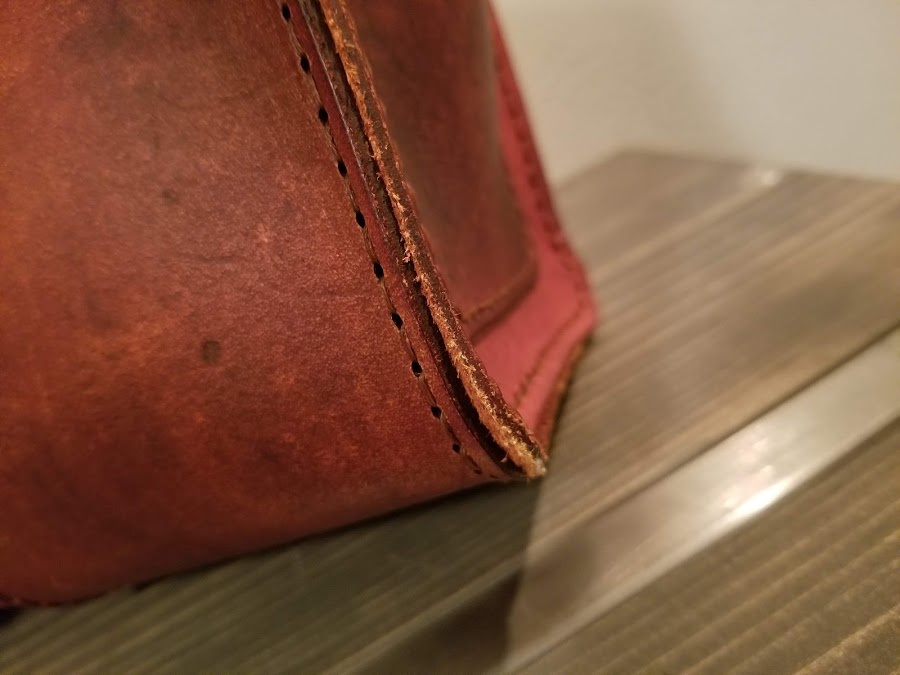
I wasn’t sure which way would work best so I went with inward. Answer: Outward would have been better for this one.
How much thread do I need?
At the end of a week of sewing I’d amassed a ton of excess thread…
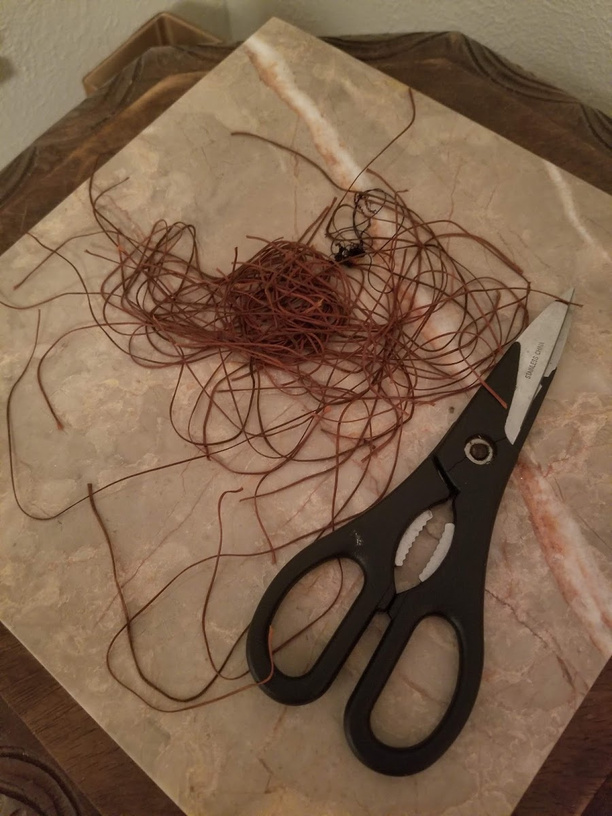
I found that 4X the length of the stitch I was placing worked well and left me with a healthy bit of excess every time. I’ve been told 3X elsewhere, I just didn’t find that to be the case for me.
And finally
If you have to spend a few weeks away from home, it’s actually possible to make your own luggage while you’re traveling! Beats the heck out of being generic black roller bag #12 when you’re standing in line to retrieve your bag from the TSA ![]()
 thick, so, 5-6 oz.