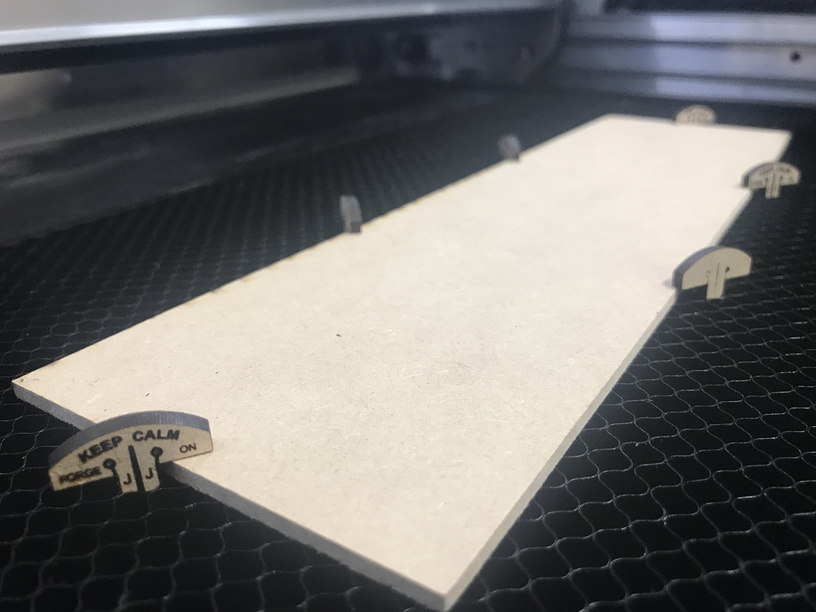
If you look at the top right corner of the map there are 3 pieces that are cut from the map and are no longer attached to the material (free to move around). These pieces are big enough to not drop into the crumb tray but are small enough to fly away due to air flow. So magnets were placed on them to prevent the pieces from flying and landing on an uncut area of the map where they will interfere with the laser when it starts cutting in that area.
You must be very careful with magnets in the Glowforge. Most folks know of the effect of moving metals in a magnetic field as that is how electric motors work. What is realized less is the effect of the laser head moving through a strong magnetic field, and especially the rapidly turning fans!
I was very late in coming to that awareness and had a terrible time as the fan would shut down when near a magnet, and I don’t know how it affected other electronics in the head. now if I can detect the field where the head will pass I do not use that magnet, and rarely use them at all.
I understand the effect of magnets in the machine. I dont understand why do you need to use them? What is the purpose of them? Sorry but Im a totally new in Glowforge (actually havent even switch it on yet. I Just read to learn the tips and ask if I have questions)
They are very handy for holding materials in place or pulling a bit of warp out of your material, but as I noted they have a severe downside.
Much better is hold-down pins that should be one of your first things to make.
I was worried about that too.
Oh, very smart. Thanks for sharing
Of course hold down pins would have been totally useless in this particular instance. Directional magnets, or those with a metal backing remove the issue with disturbing the fan and work when you need to hold something down in the center of your material ![]()
That is where adhesive mats or spray on adhesive on a backing works best. And that held down by pins. ![]()
Or buy magnets with the worst reviews on amazon. Hopefully they will be weak enough to not interfere . 
I have those and they are pretty useless for anything ![]() There is a trick that works well and that is when the very strong magnets are very small. So a neo magnet that is say a quarter inch in diameter or less will not have a tall field that can reach the head where one that is an inch in diameter or more can make a real problem. The problem with tiny magnets is that they are, well, tiny. However several with some facing up and some down about a half-inch or more apart fastened to a piece of wood or acrylic will be strong over short distances but have little effect beyond an inch or so.
There is a trick that works well and that is when the very strong magnets are very small. So a neo magnet that is say a quarter inch in diameter or less will not have a tall field that can reach the head where one that is an inch in diameter or more can make a real problem. The problem with tiny magnets is that they are, well, tiny. However several with some facing up and some down about a half-inch or more apart fastened to a piece of wood or acrylic will be strong over short distances but have little effect beyond an inch or so. ![]()
I’ve just avoided magnets altogether. For me, it would just be inviting trouble. 
It looks great! How did you prep your file. Was it a line drawing and you inverted then black for the cut?
This is a map cut from cardstock mounted on top of a full page blue card stock. I didn’t fully understand the second part of your question about inverting it.
Hi there! Can you tell me where you got the file for your map? It turned out beautiful,
I made the file my self using examples on various websites (links in my earlier posts).
Ok great! Thank you! Once again great map.
if you don’t mind sharing, what settings do you use to cut cardstock?
Thanks
We can only discuss settings for non proofgrade materials in the Beyond the Manual section of the forum. There are lots of posts there about different types of cardstock. Here is one that I find quite helpful. Somewhat Comprehensive Testing of Settings for Cutting Paper and Cardstock
thanks
