A few videos of the light show in action. Some patterns are sound activated. Not overly happy with those so a non reactive but animated pattern will be more likely.
Considering adding a paper diffuser as shown in a few of the vids.
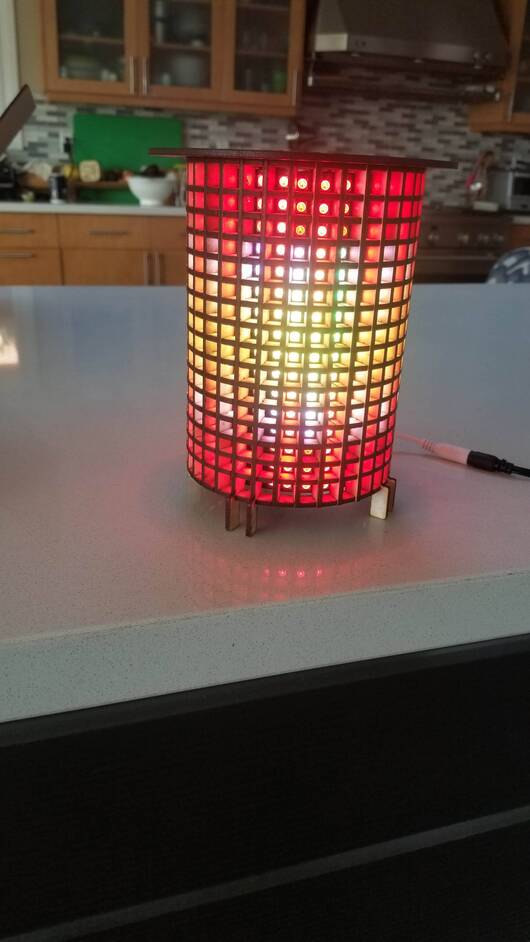
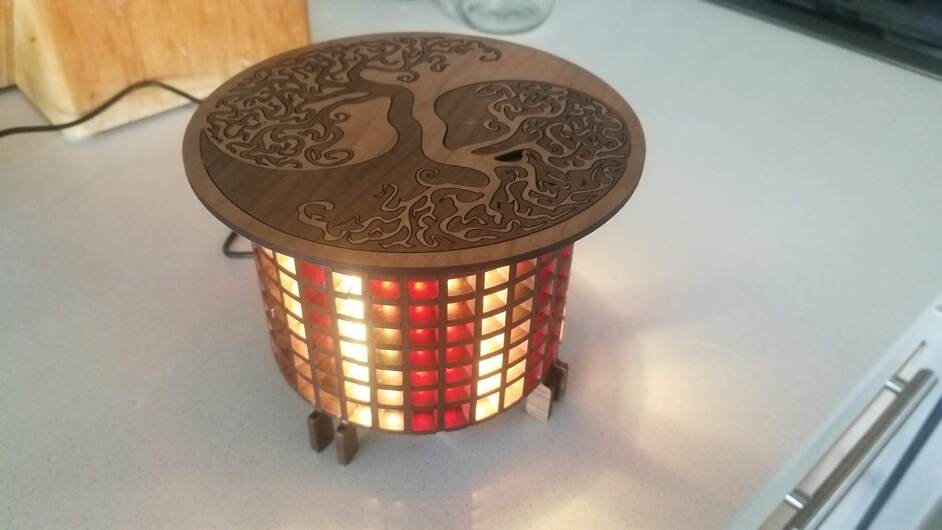
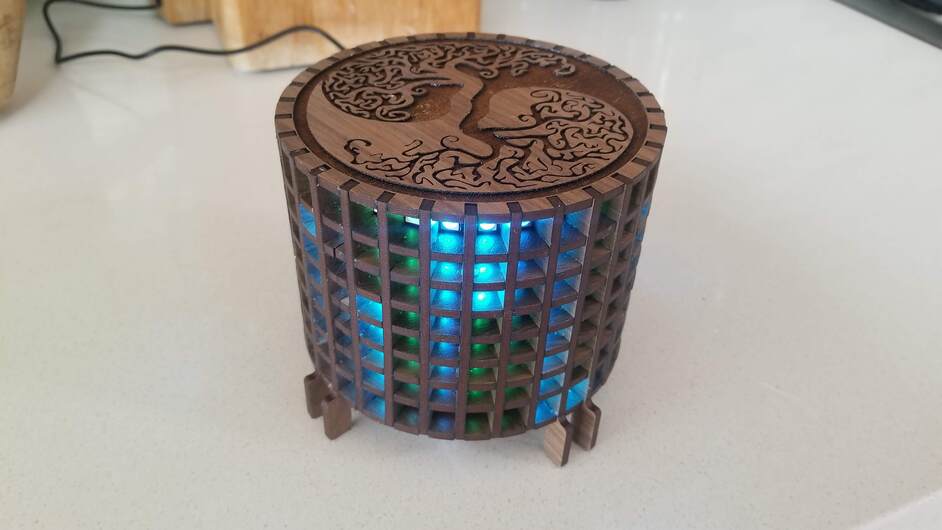
Body is birch, top is PG cherry and Walnut.
That raindrop / blue bouncing pattern is great! I think I prefer it without the paper (or, if the paper were inside the ribs instead of outside…). Looks awesome!
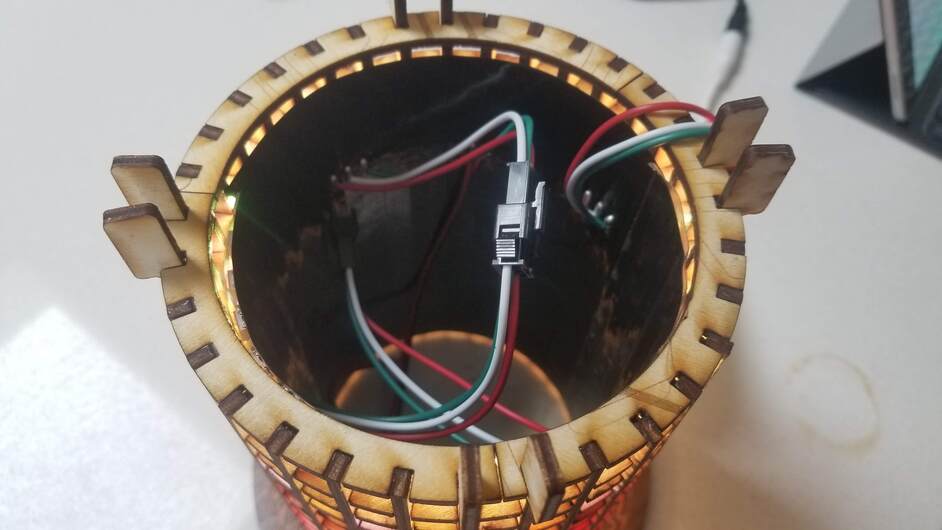
The LEDs are in a 16 x 16 matrix with a flexible backing (more like bendable really, as I would not recommend flexing these a lot). There are 2 of the 16 x 16 grids in there so 16 x 32. I taped the 2 grids together so that the LED were lined up and spaced “normally” across the seam. These matrix parts have reasonable wiring. a 3 pin connector for input and another for output. when using more than 1, that makes daisy chaining them easy. There are extra inputs for injecting more power if needed. I avoid this by not running very bright.
The ID of the wooden frame was designed to line up with the LED matrix so that each square gets one LED. It worked better than I had hoped as there is nothing but the stiffness of the LED backing and the edges of the LED components holding things in place. It did take some wiggling to get them all into position.
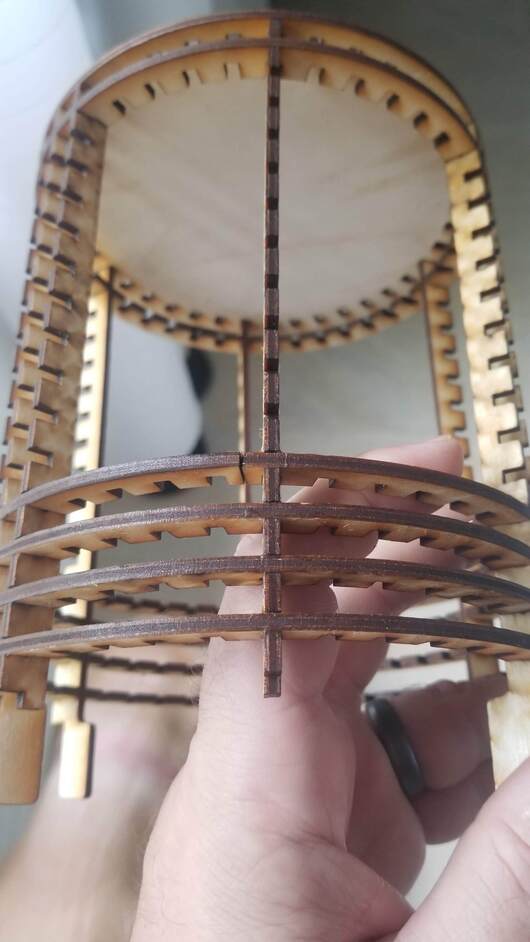
The attached image is the prototype frame I made initially. It was wrong in about every way possible which made it very hard to assemble. So, for the actual lamp, the slots on each part were reversed. (the round bits now have slots on the outside, the straight bits now have slots facing inwards).
Rather than using round rings, I split most of them into 3 parts to reduce the total wood needed to make the lamp. I was able to get this to fit within 2 sheets.
Programming LED: normally I use an arduino but that is the hard way and only recommended if you have something specific in mind and a lot of time to learn.
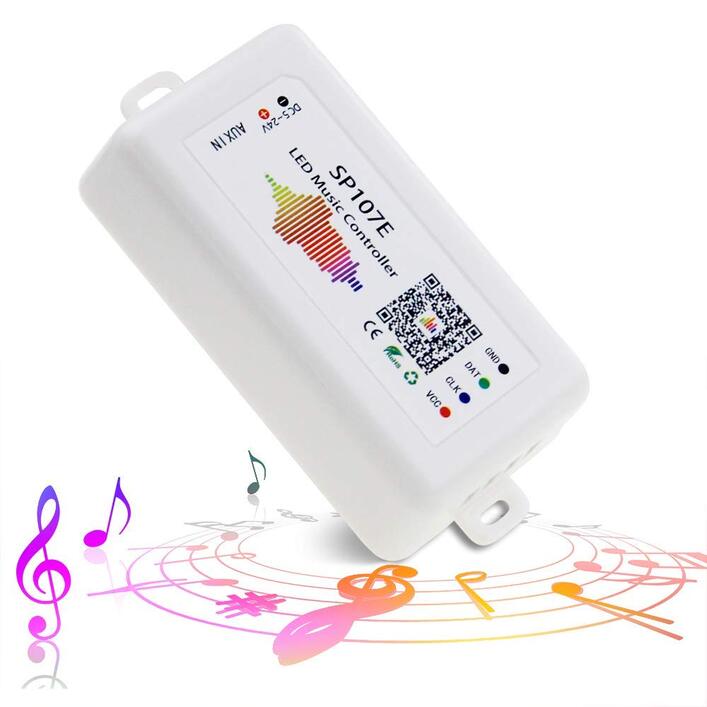
In this case, for quick demo, I used an off the shelf item I found on amazon
I can control it with an android app from my phone over Bluetooth. Not a lot of geek required. Reasonable device. It can respond to sound but I am not loving the results. There areother similar drivers that are much cheaper , do not respond to sound, and use a dedicated remote .
The key think to keep in mind is that these only work with specific types of LED strips and grids and visa versa.
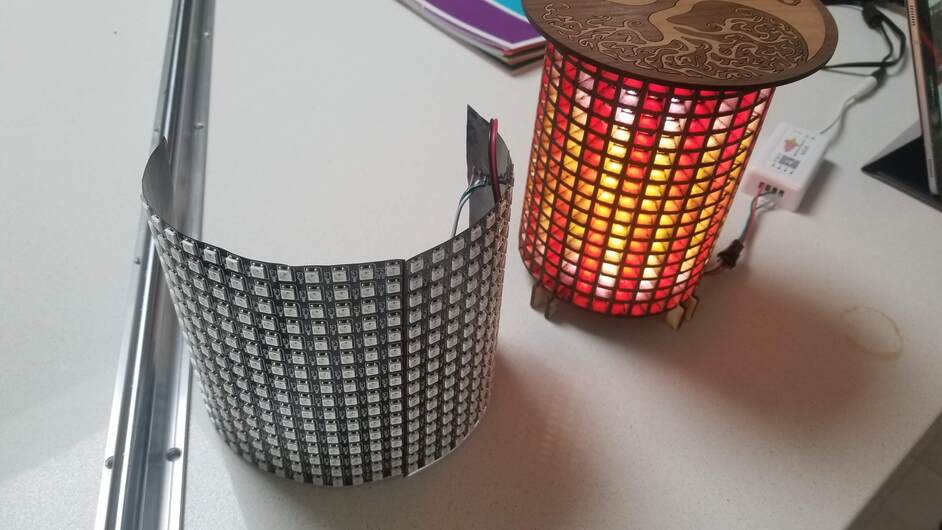
Made a shorter version with 4 of the 8 x 8 matrix as the led sources ( in place of the 2 16 x 16 grids). One sheet of proof grade vs 2 for the taller version. (fancy top aside, that was left over from some other advanture) . 2nd photo shows the top engraved as part of the single sheet. Good, but I like the bigger lid better.
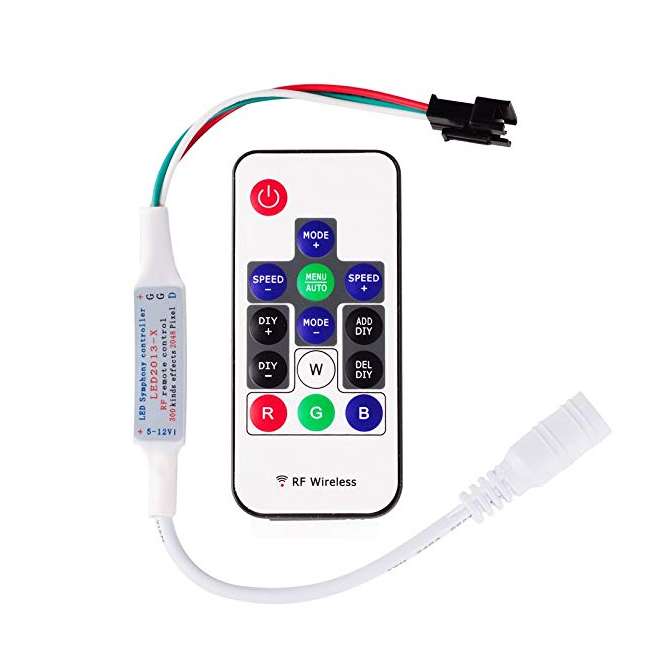
The driver I ended up using is under $11 on amazon. Already wired to attach to the matrix and has a jack for adding power at the other end. Simple as 3.14159 . No sound interaction though.
Thanks for sharing. I’ve been actually considering doing a music reactive project with fastled and arduino. I have an old in-wall bathroom heater that I want to convert to a faux heater with LEDs. For a first project it’s probably too big, but we’ll see.
I like the idea of the input jack instead of a mic on this driver. Most of the projects I’ve seen use some kind of mic and it always seems to really put the system on a delay. Having the LEDs react a second after, always looked off to me. I’ll have to look into how to set that up.