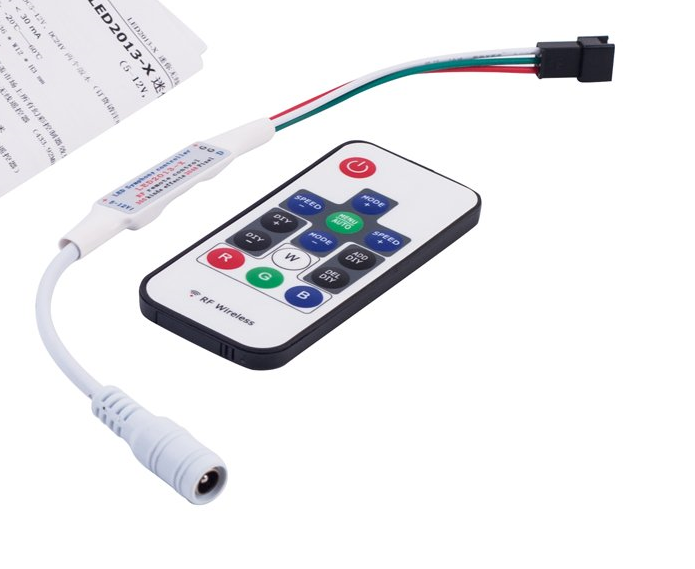
I posted about this design last spring over here. I thought I would share the plan. The suggested driver generates ~300 different colorful patterns which can be seen in these videos (despite being from a taller design) . The driver comes with a cheap remote that allows you to pick a pattern , adjust the brightness, and a few other functions. There are other drivers out there that will respond to audio. I am not a fan of these but to each, their own.
The design was nested using deepnest so that it fits on one sheet of 3 mm (1/8). I use baltic birch on this design but PG might look good as well. Feel free to add your own artwork on the round top. (upper left in the design). For the electronics, one can buy off the shelf components that plug together. No code to be written, no soldering. The remote is a bit tricky to master but doing so gives the next adult beverage a good taste. The cost adds up to less than $60 which is not bad given the result.
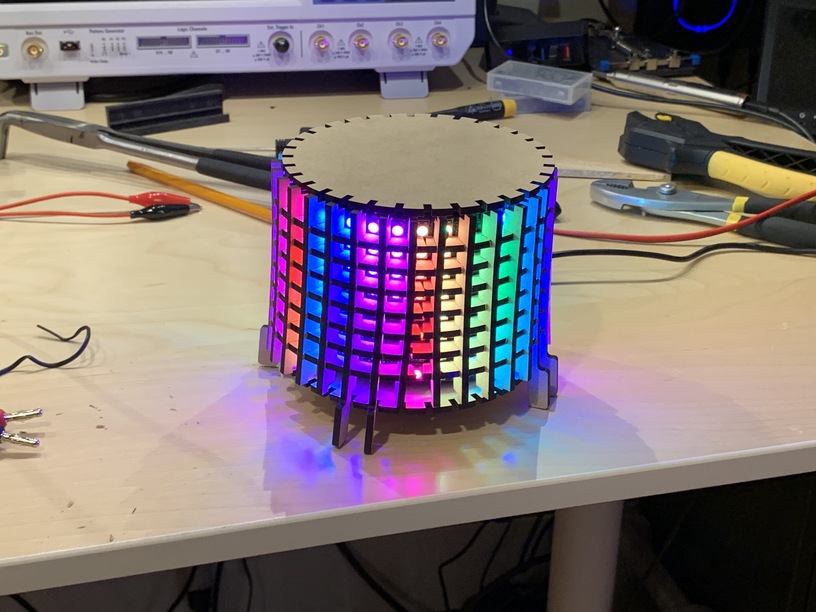
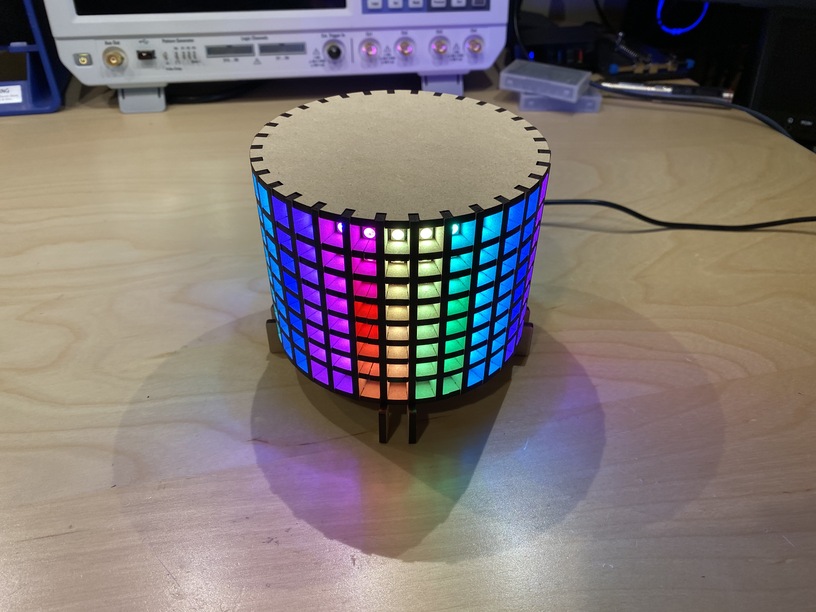
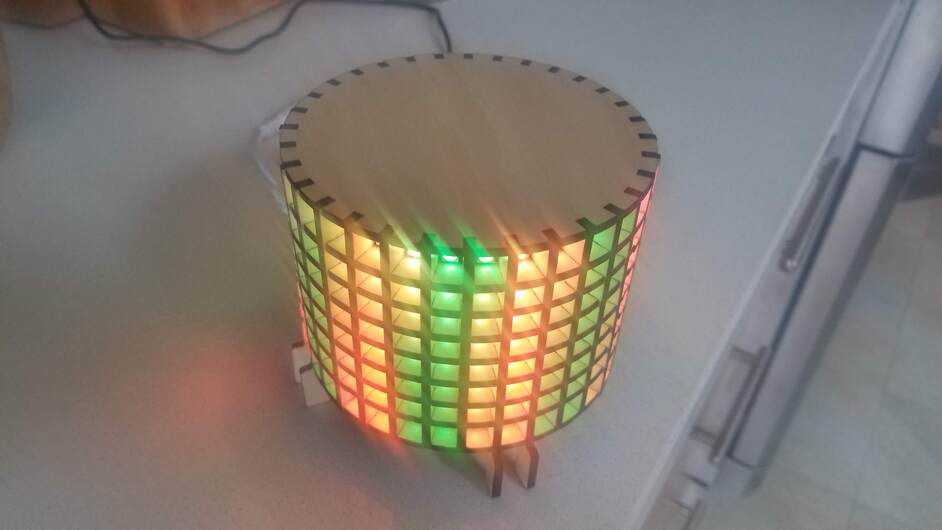
8 x 32 matrix
5 v power supply
controller with remote
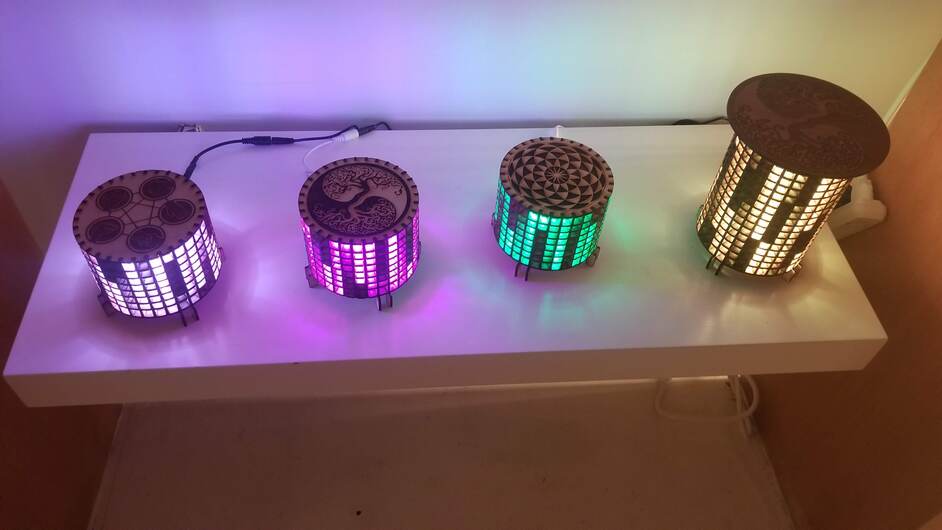
( ignore the tall one on the right, that is this design’s daddy)

Assembly is a bit tricky. I will mostly let you work that out for yourselves with these tips:
*After cutting, sort out the bits. there are straight slats, 8 straight slats/legs-with-feet, 2 complete skinny rings, a top and a bottom and a sea of partial ring segments.
- The big round bit is the top. the one very much like it but with a hole in the middle is the bottom.
- Add the rings before adding more slats. it will be near impossible if slats go on too early.
- There is an extra set of partial rings in the layout, this helps if one of them does not cut cleanly.
partial rings were used to conserve wood. using entire rings would make assembly easier but would make for much wood being used. - The legs with feet work in pairs, pay attention to getting them evenly spaced around the lantern. ( or go abstract and asymmetrical, it is your lamp)
to start:
- locate one of the slats/ legs-with-feet, and the 2 skinny rings.
- glue one of the 2 skinny rings to the leg at the 2nd slot from each end.
- you may need to use other legs or slats to keep the rings parallel and square to the leg being glued.
- let that set/dry a bit.
After that, work to get the rest of it done in one session so things can be wiggled:
- sort out the partial rings by size. there are 3 sizes. one of each size makes a ring.
- work with one of the partial ring piles at a time. move the other piles to where they are not easy to reach.
- glue all of the partial ring sections of one size of partial ring onto the leg you started with ( there will be one extra piece). use a slot in the middle of the partial ring section but use the same slot for each section.
- add another leg-with-feet at the appropriate location away from the first one ( remember they work in pairs so either right next to the first one or leave 6 empty spaces).
- add all the other slats for that section ( with and without feet, depending on location)
- add the top and bottom last.
When the glue is dry, finish to your liking. I leave mine naked.
Wiring:
The wires are not overly robust so take some care not to yank upon them unkindly.
observe the back of your led matrix. There is an input connection, a power line ( 2 wires in the middle) and an output connection. The driver will plug into the input. the other end of the driver will plug into the power supply. You can ignore the output and power connections. you may want to apply electrical tape to the tip of each of the power line wires to prevent them from touching (touching of the metal tips will short out the lamp, causing it not to work or worse). Plug all of that together, power it up and observe the pretty lights. remove power, and disconnect all the stuff you just connected. you may need to use the remote to turn it “on”.
Roll up the matrix into a tube that will fit within the bottom opening. Stuff the matrix into the lantern. Let it relax to the inner diameter of the lamp and then starting with one edge, push align the leds into one of the vertical columns of the lamp. Then working towards the other end of the matrix, tug and wiggle until the leds find their homes with the grid formed by the slats and rings. It may take a bit of work but it should all line up and stay in place with no need for other attachment means when complete.
Fish the input lead out of the mess and attach the driver and power supply. Put batteries in the remote ( or remove bit of plastic that is preventing the battery from working ( if present) . Plug it in and marvel at how cool it looks.
Note: adjust the brightness down before doing much else, 255 leds will be bright enough to hunt vampires but may also get hot or cause the power supply/ wires to get warm ( and if your power supply is not strong, it may cause the voltage to dip enough that the driver brain will become confused and the patterns less than fun/ functional). To adjust the brightness, push one of the 3 buttons at the bottom of the remote ( red , blue , or green) to get a solid color coming out of the matrix. Then use the left arrow (speed -) to reduce the brightness. I will leave it to you to figure out how to use the remote to adjust the output of the driver to match the number of LEDs in the lantern. It is not obvious so retrieve the instructions from the trashcan and enjoy the challenge of deciphering engineering speak that appears to have been translated at least 4 times before arriving at English.