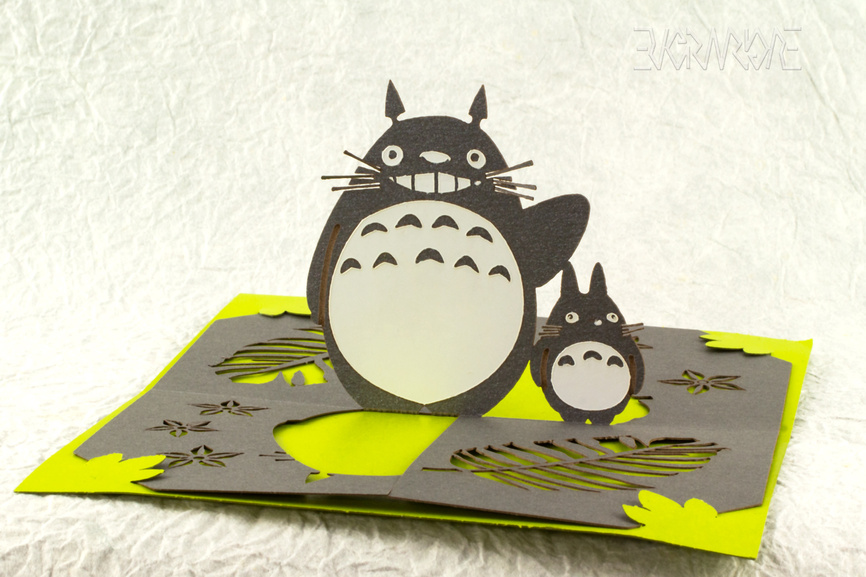
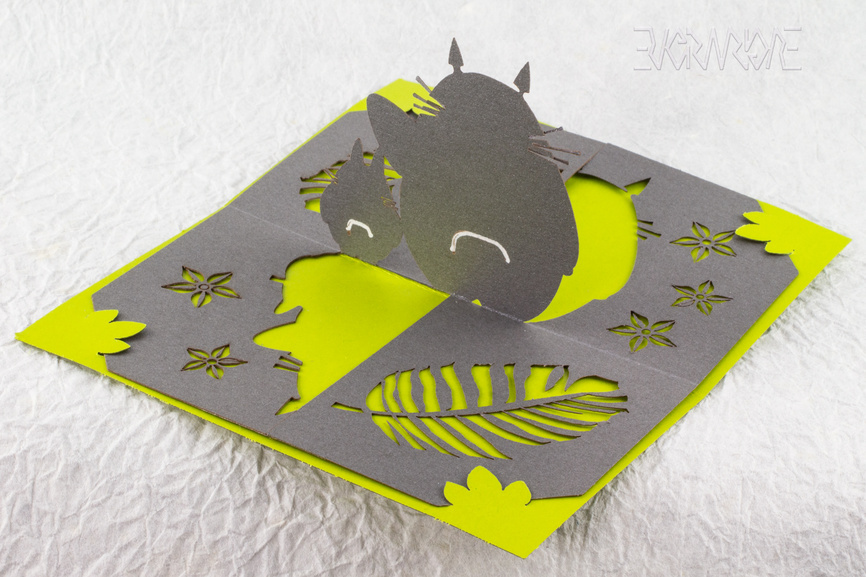
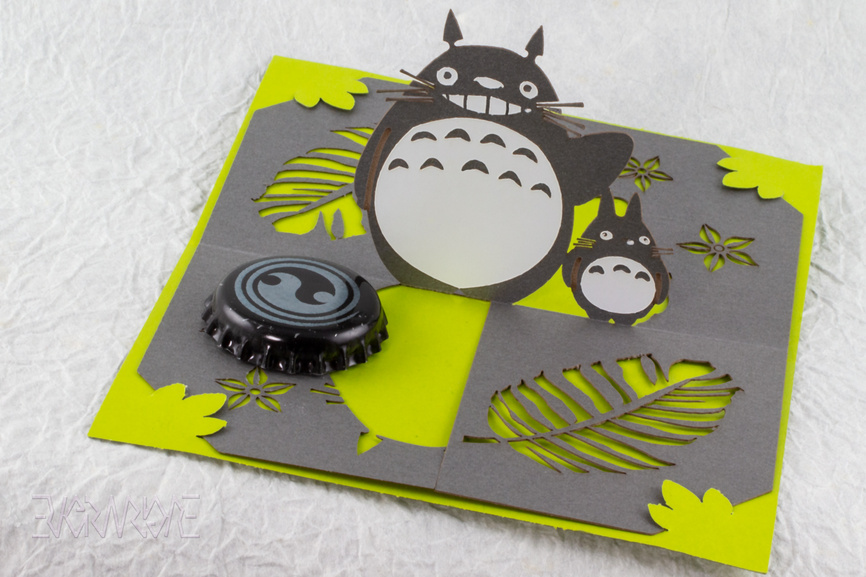
Although I don’t normally do a lot with other people’s characters or designs, some of Hayao Miyazake’s movies have a special place in my heart. I know they do for many others, too. So, I did this for some upcoming birthdays.
I sketched my Totoro (Totoros?) in Procreate on the iPad, with a still from the movie as a reference. I used the sketch as a reference to make a vector version in Inkscape. I created the ferns the same way. I designed the flowers directly in Inkscape.
Engraving wasn’t providing enough contrast, even when dusting with chalk. So, the white on the fronts are polyester sticker stock where I just cut the sticker layer and weeded it. I filled in the tail engraves with a white gel pen.
You make such great paper art, really inspirational!! I mostly do wintercroft paper masks when working with paper. Do you have a recommendation on how to avoid burn marks on the backside when cutting?
There are a few things you can do about the residue on the reverse. As @caribis2 suggests, dialing in your settings is a good start. I try to get the power and speed adjusted so that it just cuts through the paper.
Work hold-down helps, too. I mostly use a Seklema mat. Since the paper is stuck down to that, any laser energy that gets through the paper goes into the mat rather than reflecting or spreading onto the reverse.
A less expensive option to the Seklema mat is making your own with a piece of MDF/Draftboard and some temporary adhesive. I like the kind that is used to hold t-shirts down while screen printing them. You have to let it dry and, stick and remove an old t-shirt to it once or twice to adjust the adhesion.
Just having a backing layer (like a piece of card stock) can help. You have to watch the cutting carefully because an un-attached backing can make it easier to start a fire.
A lot of the stock I use has a smooth finish (like claycoat) and, I can mostly wipe off any residue with a paper/shop towel.
I have seen some other people report that they use a little chlorine/laundry bleach on a cotton swab to “remove” (bleach) the residue. Mostly, I can get the approaches above to work for me and, would worry about the bleach changing the archival life of the finished pieces. That might be an option for something already made and/or with a short intended life.
Let us know if you find any other good approaches!
Good point. I forgot about that. I used a homemade sticky mat using a repositionable spray adhesive and a piece of draftboard or plywood. It certainly absorbed some of the energy.
I’m not sure I understand what you are after here. Are you trying to understand how the card works mechanically? It works the same as explained for the flower twisted-crest card:
As far as lasering, there are 4 layers/operations:
Engrave – some additional definition for separating the arms from the bodies.
Score – the valley fold half of the central score line.
Cut – everything you see cut all the way through the paper.
Sticker – all of the white areas.
After running operations 1-3, I attached a roughly square piece of polyester sticker without rubbing it down much, closed the machine, ran operation 4, which was set to cut through just the sticker. Then, I weeded the extra sticker with the help of a craft knife and, rubbed the rest down well.
Twist, washi tape – just like the flower crest – done.
The backing is a separate piece of stock into which I cut tabs to hold the main card.
I had some weird thing where some of my cuts separated out into separate operations, despite being the same color (and stroke). So, any screenshot would probably just be confusing.