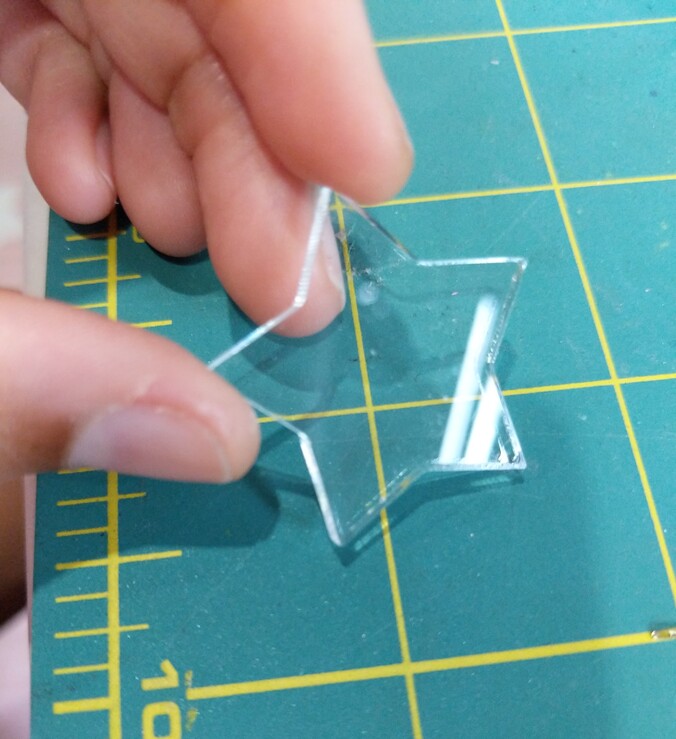
Hi, while cutting with my Glowforge, I’m experiencing an issue where the edges melt and have these wavy imprinted edges on the inside of the cuts. I’ve experienced this with the proofgrade clear acrylic I got with the glowforge on the clear settings the machine identifies with the camera. I’ve tried lowering the power, slowing and quickening the speed with no success. Is this a machine problem? Thank you!! You can see in the lower right of the star what I mean.
FYI the image you posted is only visible to people who are on Facebook AND members of whatever the group is you posted it in.
There’s always a little of that in laser cutting acrylic, even the bigger industrial machines don’t produce a perfectly flat edge. The pic is a little blurry so it’s hard to tell exactly how bad it is but initial impression is that it looks pretty normal. You can try checking all your tracks and belts are free of debris.
2 Likes
I’m a little confused about this, I uploaded directly to the glowforge forum from my phone, it’s not linked from anywhere else so I’m not sure why you’re having this problem unfortunately
I’m having the problem a little worse with non proofgrade acrylic, I’m not sure if you can see the problem easier here.
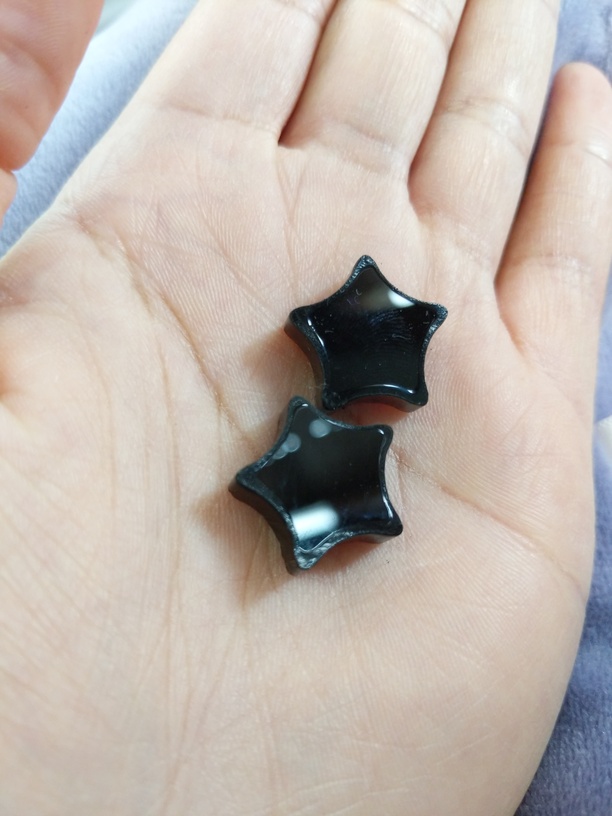
Since it’s non proofgrade, I figured I would have issues but I’m having this with the proofgrade material as well. Is something like this a normal occurance? I just got the machine around 2 weeks ago so I’m still learning what’s normal and such
Oh those melty edges look like your power settings are too high. Try reducing power or increasing speed. Are you using masking?
2 Likes
Yes, I’ve been keeping on the paper masking the sheets come with but this happens on both sides. The clear acrylic was the proof 1/8" with the glowforge medium clear acrylic settings. The black acrylic is 1/4", I’ve tried the proofgrade thick settings, 110/Full, 115/Full, 115/100, 115/90, 300/100, and 300/Full with no success so far. When I reduce the power, because of the thickness, it doesn’t cut all the way through if I increase the speed. At lower speed and lower power, it cuts through but the melt still occurs. Is this a matter of continuing to trial and error?
Yes I’m afraid so, true for any non-PG material. Search the forum for “testing”. There have been a lot of different testing methods and files shared. That should save you some time.
You can also try running multiple passes to get all the way through tho it really shouldn’t be necessary on 1/8" and 1/4" acrylics.
Oh something else to consider - does your non-PG have plastic or paper masking? The plastic type sometimes makes a melty mess.
1 Like
I see, okay, thank you very much for your help!
And everything has paper masking!
1 Like
Just for giggles, try a test cut with no masking and a sheet of copy paper under the acrylic.
I’ve unfortunately tried without masking as well and had more melting than without , especially while engraving
Sorry to hear that, definitely sounds like too much power. Acrylic holds heat, pretty when it works but kinda a pain when it doesn’t want to.
2 Likes
With materials that melt, you are going to have “size of design” related issues to deal with as well. Those little stars are small. The material is dark so it is retaining heat, and that’s why it’s melting the underside so badly. Thicker acrylic is going to show the effects worse.
(I don’t like working with acrylics for that reason…they’re very fiddly.)
For those earrings…try a very fast speed/full power for the first cut…then WAIT for about 5 minutes without touching anything and run a second pass at even higher speed and full power to finish the cut. You need to let the acrylic cool in between the cuts to reduce the effects. (Experiment a little.)
Dark colors are not going to melt the same as clear or light colors. It will be close, but if you are picky about your edges, you’re going to need to tweak settings.
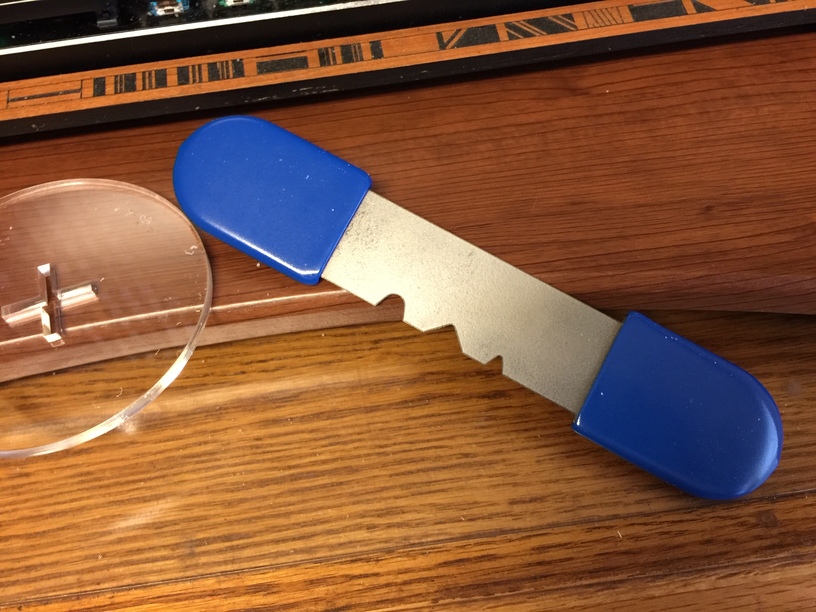
I believe a lot of folks have done a heat gun edge smoothing to get rid of the wavy ridges on the edges…but I’ve never had success with it. (Too impatient i guess.) There is an acrylic edge smoothing knife that works surprisingly well to pick up the tiny lines of redeposited acrylic on the edges if you absolutely have to have smooth results…
This is a picture of it…I don’t remember where I got it, but it works very well. (Probably one of the plastic sellers like Johnson Plastics or some such.)
7 Likes
I’ll keep testing it out, thank you, I appreciate all your comments!
1 Like
This is EXTREMELY helpful, thank you so much for writing that all out. I’m working on small acrylic jewelry so that’s a lot to think about I didn’t consider regarding small the specific colors. I will definitely try out 1st and 2nd passes with a break in-between to see if that helps with some of the melting problems. I’ve seen that tool before but wasn’t sure if it was right for me but it seems like it is so I’ll definitely give it a try. Thank you so much!
2 Likes
Just wanted to say that I tried the heat gun out on one of my pieces and it worked wonderfully in smoothing out my edges, thanks so much again!
3 Likes
Excellent! I might have to dig that back out and try it again. 
1 Like
Thanks for the answer @Jules. I’m going to close this thread - if the problem reoccurs, go ahead and post a new topic. Thanks for letting us know about this.
1 Like