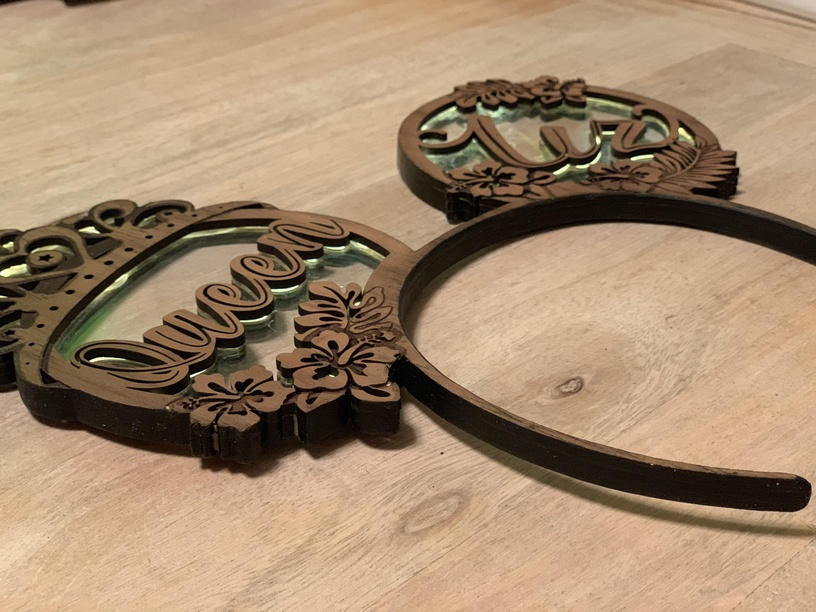
When I was figuring out what to get my good friend for Christmas, I remembered that she had been wanting to make or obtain a pair of custom mouse ears to wear during her frequent trips to Disneyland. I decided to take a stab at it with my glowforge since I was feeling confident after the success of a project I had just finished. This project turned into quite a challenge and I made a ton of mistakes, but I think it turned out okay. Apparently some people say “Perfection is the enemy of good” and that definitely turned out to be the case here because the more I tinkered with it to try and get something just the way I wanted it, the more I would inadvertently mess something up.
UV Curing Adhesive (to secure the wiring/LEDs, and battery contacts because I couldn’t think another way to fasten them to the wood except for maybe tiny nails/screws that I wasn’t sure might even exist)
I spent at least a week tinkering with the design, as I decided it should incorporate some lighting for dramatic effect and that required thinking a lot harder about how to include space for LEDs, wiring, batteries, and a power switch without it getting too bulky. I also decided to go ahead and include the headband portion in the design and cut it as one piece since a test headband I cut out on Proofgrade Medium Maple Plywood seemed to have enough flexibility + strength to slip on and off my head. I didn’t want to have to figure out a way to affix each ear to a store-bought headband and risk detracting from the bespoke quality of the ears as a whole.
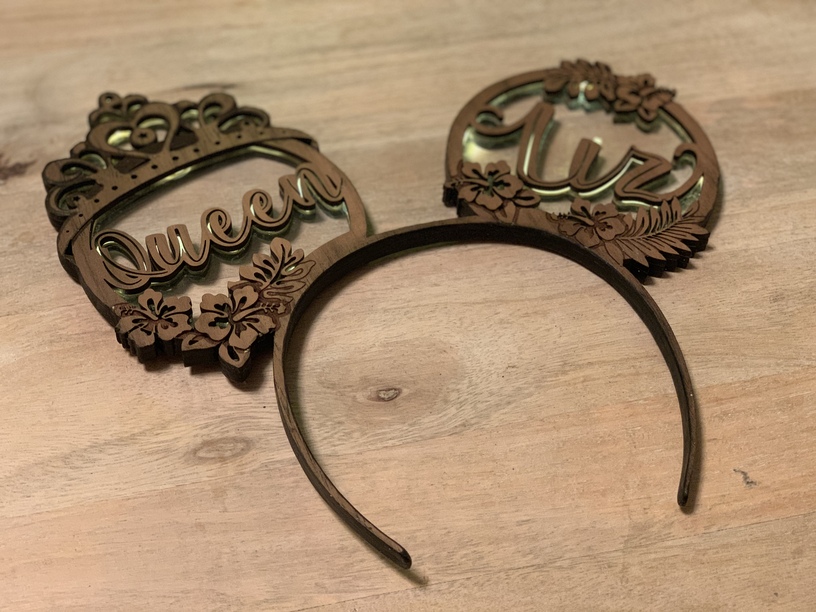
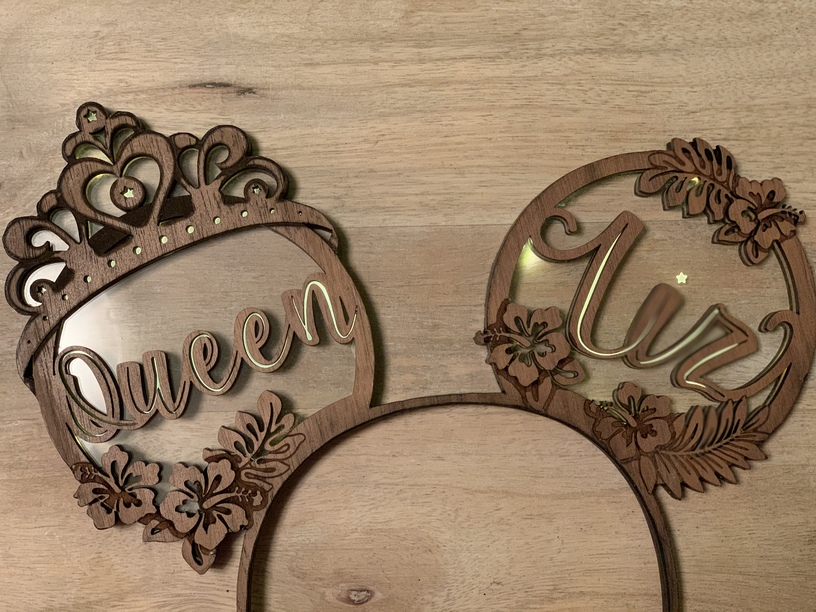
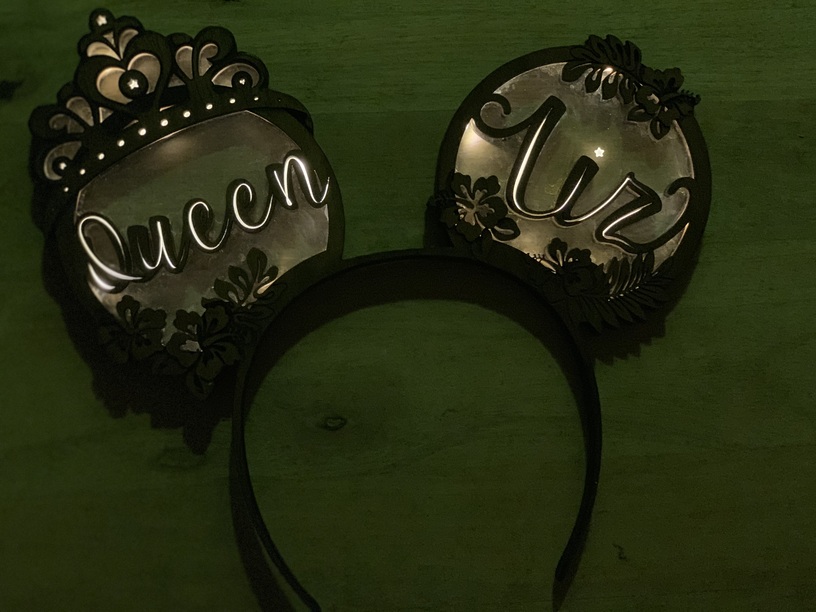
I ended up cutting the main parts of the design out of Proofgrade Medium Walnut Plywood, and using Proofgrade (Beta) Medium Clear Acrylic for the edge-lit design inside the ears. I disected some coin-cell powered fairy lights and reassembled them inside the middle layer for the lighting.
Having never done an edge-lit acrylic project before, I was hoping that the edge lighting would be able to bounce around inside the acrylic until it hit the engraved areas that would bounce the light out the front, similar to how fiber optics work. That way I would be able to just use minimal acrylic in the areas where I wanted light, and some areas to give the light a path to bounce around to each engraved area. Through testing I learned that acrylic doesn’t have any magical light-bouncing properties and the light pretty much just travels through in a straight line, stopping at the next edge it encounters, even casting shadows when the engrave is too deep. That meant I had to do large acrylic sections just to illuminate a few small parts of the design and include several more leds casting light in different directions to keep the whole thing bright enough to be worth the trouble. The acrylic is hard to clean because of where it sits, and scratches pretty easily, so if I were going to do this again I would probably just include a hollow channel to run some EL (electroluminesecent) wire through for the lighted areas instead of trying to edge-light acrylic.
Missteps:
Acrylic is hard to clean and scrached easily (maybe I could apply a glass coating to make that less of an issue)
Not having enough material (Proofgrade Walnut Plywood) to keep testing and iterating the design to get it just right
Struggling with gluing the layers together and getting glue all over the edges due to the thin/intricate cut out areas. Had to reglue some parts that separated later on.
Not getting perfect alignment in some areas when gluing the layers together since they were flexible
Having to sand the edges more to try and correct for the misaligned parts and then needing to use stain and varnish to make them dark again to keep the laser-cut look.
Getting impatient with the varnish and trying to use wax instead, which turned out to be hard to smooth out in some of the more delicate areas.
For Next Time:
Try another lighting method that will let me skip the acrylic.
Figure out the best way to bond the wood layers while keeping them aligned (I sanded the finish on the PG Plywood and then used wood glue and left it sandwiched between two boards with a couple of vices to apply pressure)
Tweak the headband design to ensure plenty of strength near the flexible portion (while somehow keeping it flexible…)
Get the ears a bit more to the sides with a larger gap in the middle (I kept the gap small because the fairy light wire that was going to run through it inside of the headband only had so much space between each LED, cutting a bulb out and soldering to make a larger gap would have been better for the design, and I had to solder for the switch and battery compartments anyway.)
Please feel free to give me advice on what you would have done differently. I definitely would like to learn how to improve for the next time.
Thanks! That means a lot coming from one of the craftiest people on the board ^_^. If they don’t snap in half the first time she tries to put them on then it will have been worth it for sure.
That’s the only thing I’d change - make the headband out of 2 or 3 thin almost circles glued together with a thin strip of spring steel sandwiched in between. That would make it less likely to break the headband.
You could steal the spring steel from a pair of cheap earmuffs that you tear apart.
Whooooaaaaa, I don’t care how you feel about it, this turned out pretty good in my book!
Really, though, I feel the same about a lot of the stuff I do. Art is pain! I think your friend is going to love it, unless they’re like a really really close friend, then they might be like my best friend and shut it down because they know you can do better (stupid Chad…). I can’t wait to see your next iteration if this is where you started.
If you keep the masking on, this helps, you could always score around where you’re eventually going to place the front and back walnut pieces so it’s not a problem when wanting to remove the masking later.
Ordering a bunch of draftboard helps in this regard. Acrylic isn’t too expensive, but yeah, having to use your more expensive PG stuff in your designing phase really kills costs.
That’s a really good idea. I’ll have to play around with that when I get some more materials. I really didn’t consider that I would need to worry about adding extra support because I made this other pair of ears during the prototyping phase and they work really well, with a secure fit and without feeling fragile.
I’m not sure if it’s due to a difference between the PG Maple Plywood I used for the prototype and the PG Walnut Plywood I used in the final pair, or if gluing the three layers together had a negative impact on the integrity, or if its just because they are heavier that they “feel” more fragile near the bendy parts. I have no way to test them to be sure because I made them to fit a slightly smaller head, so I guess we will just have to wait and see.
It’s also possible that another plywood would do better (one that has layers with alternating grain direction) versus PG Plywood that has MDF core, I think. Then again, that type of plywood might be more rigid as well, which would make for a less forgiving headband.
The masking on (with scoring) until the end is a great idea. There’s no reason the masking that stays behind the walnut parts needs to ever come off. It would even give me another point of reference to make sure things are aligned perfectly while gluing the layers together!
Ordering more draft board is definitely going to be a priority for my next supply purchase. I don’t know why I left it out of my last one.
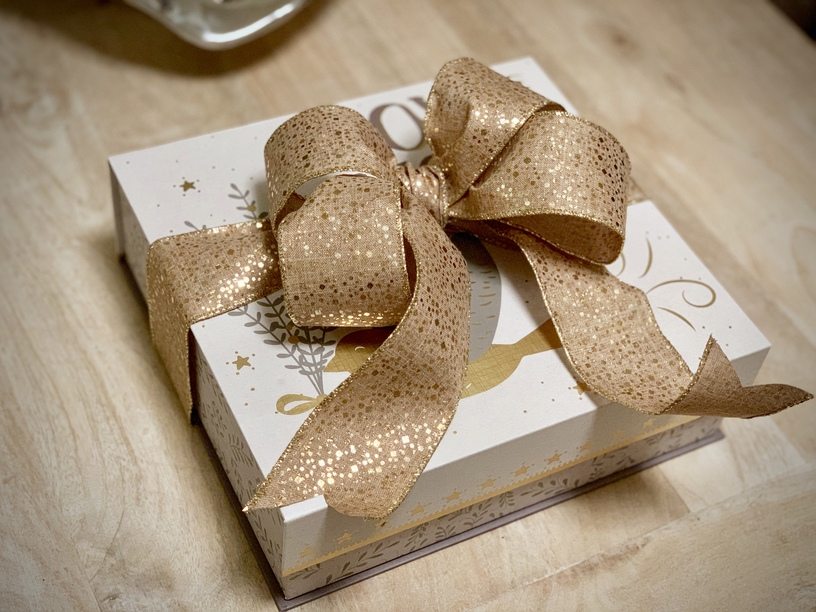
Just Wow! You have definitely brought the concept of a presentation box to the next level!
On looking you used an existing box the great level beyond would be to make a special wood presentation box.
The weakness of a headband cut into a curve was the first technical thing I considered as well, building it from three layers alone definitely helps particularly that the middle layer is acrylic with different properties. However, I would try and use a plywood that was many layers of wood (like Baltic Birch especially aircraft grade with 5 layers) Also by cutting the at different angles to the grain would also add strength.
Going a step beyond if it was acrylic cut out long and bent (300 degrees in a toaster oven) it could be much deeper and tabs at the bottom of the ears to fasten them together and then veneer applied after the bending would be very strong.
They make a fab matched set! Maybe she’ll take you along on the next Disney run and you can drum up some business from the other Disney guests. (Everyone who sees them is gonna be so jealous!)
Wow. That is stunning. Nice write up. It is so helpful and encouraging to see posts that treat all the different aspects of a project. And then to see it through to the gift wrap. Thanks so much.
I prototype in cardboard for just about any project. I am especially on the lookout for some of the thinner cardboard that is closer to medium Proofgrade thickness. But for something like this, a thicker cardboard is ok for general use.
I will have to look into Baltic Birch plywood. I initially didn’t consider it because raw it looks kind of boring, and I still had a pile of PG material from my preorder voucher supply purchase. A quick google image search just now shows that you can get some really striking results on Baltic Birch with the right stains though so it looks like it’s finally time to familiarize myself with the local lumber suppliers.
I did initially want to make a presentation box on the GF as well, but I was running low on supplies near the end of this project, and I wasn’t sure whatever I came up with would be as fun and festive as these boxes I found at HomeGoods. I also know myself too well and I would have wanted to trick out the box with fancy lighting as well (maybe mood-light the interior with a pressure-switch to turn it on when you open the lid), so I decided to quit while I was ahead, this time…