Minibox

I end up with a lot of mostly unusable scrap because I mostly make round things.

So, in the name of learning new things, I decided to see if I could use those scraps to test things. Enter… the minibox!


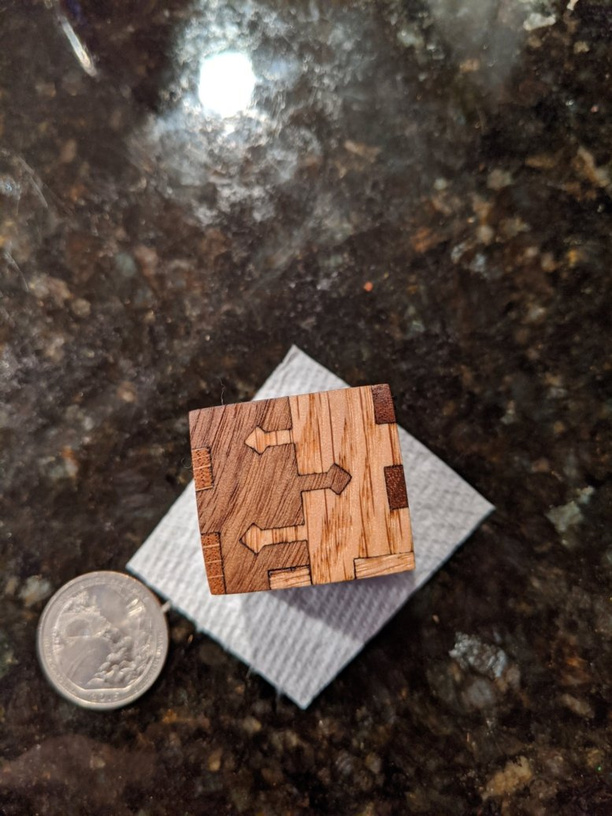
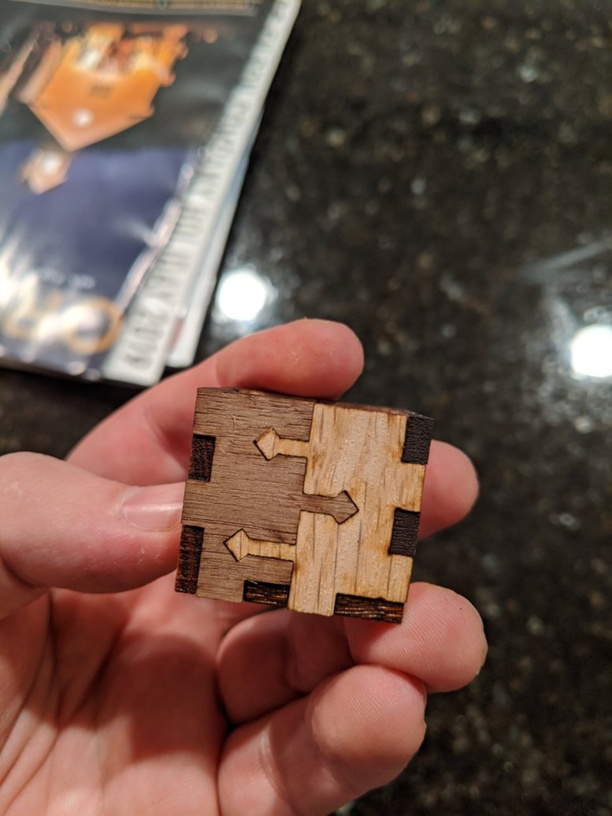
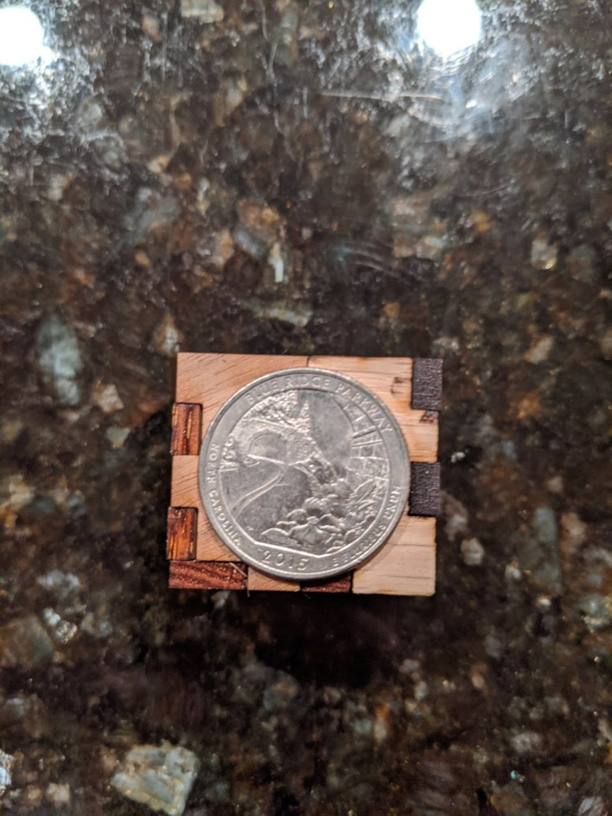
It’s small. 24mm interior. Which meant the first thing I was testing was the limits of the laser and the strength of the wood. Which I combined with trying to make it entirely pressure fit. Because of course I did.

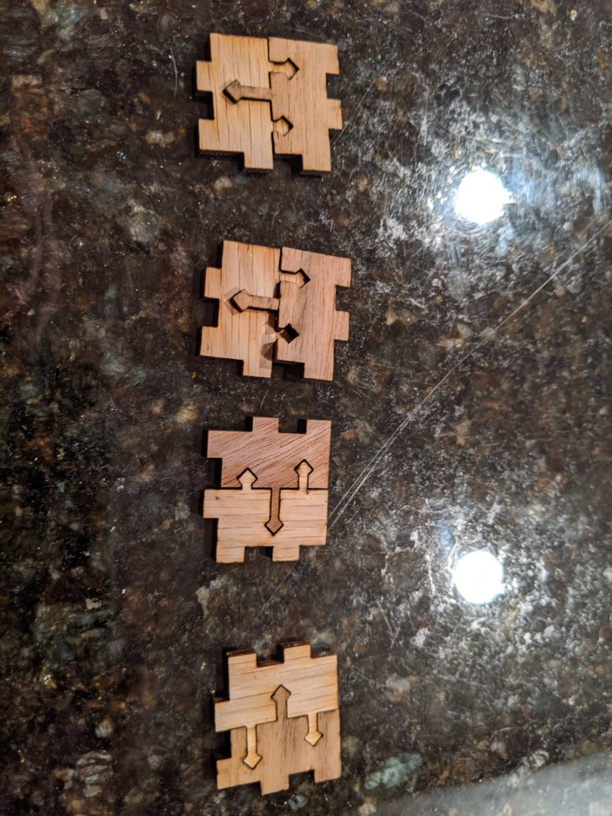
This led to some interesting problems and balancing acts. Like how to adjust for kerf for the outside curves, the inside curves, and not overadjust for the places where two outside curves would be running into eachother for the pressfit.

The planar join was fairly easy. I’ve made myself a spreadsheet of woods with max/min kerfs.

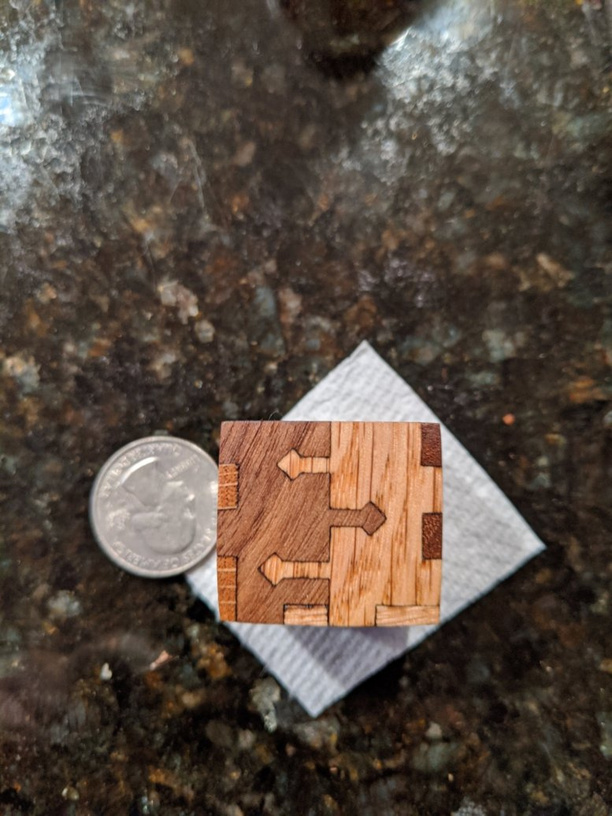
I did a standard flip on one side so the two slopes met up and you get a good edge inside and outside.

But that means the kerf on one half of a side’s joins is the minimum kerf for that wood, and the other half is the maximum for a second wood. And they slope opposite directions. Which led to some testing, and breaking.

Cracked a couple before I got one that would work. Oak likes to crack along the grain when pushed sideways. Full disclosure, this is actually the second attempt at a minibox, the first resulted in…

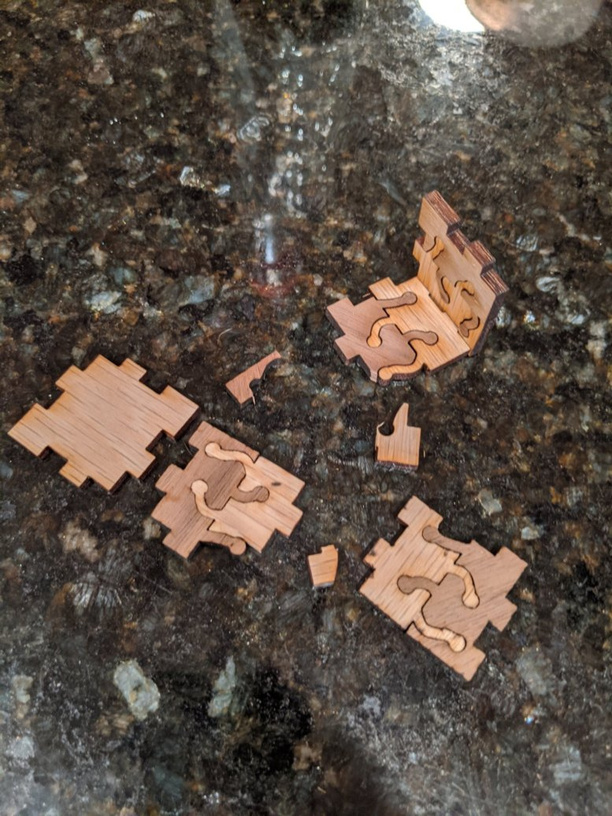
But I learned a fair bit from it. Changed my kerf adjustment method, simplified my planar join so I wasn’t dealing with QUITE as many variables.

The corners on this box are SUPER tight, because I wasnted to use one kerf correction for each piece, not try to fiddle with variable ones.

But, overall, a really successful experiment. Learned a bunch, improved my skills, tested a planar join, and didn’t use any wood that I would have for something else! Will definitely be making more of these to test methods.

41 Likes

Did you try inverting the pieces? The kerf is not vertical, so you can cut one piece “upright” and the mating piece “inverted”…

(edit) unless that’s what you mean by this:

3 Likes

Whoa, nice! And tiny! :slight_smile:

3 Likes

I could do that, and I likely will on my next one. On this it started to get to be too much to keep track of because that means multiple inverts since the walnut would invert to fit with the oak, but then the entire side would have to invert to mate with the bottom, but then the NEXT side would have to NOT invert so it would be inverted in relation to the first…

Excellent.

Try aligning the grain with the skinny fingers, they’ll be far stronger.

5 Likes

I love scrap days :slight_smile: testing out new things and making my garbage more compact.

1 Like

That’s what she said. Sry been re watching the office :stuck_out_tongue_winking_eye:

That’s a beautiful quarter storage box - mine usually just sit in my pocket, but you do you!

No seriously, beautiful.

If you haven’t run across @evansd2’s post on Planar butt jointing techniques you should read it - I’m bettin’ you’d get way more out of it than I do cuz you’re already there :slight_smile:

4 Likes

Yeah, if I was making it for anything more than testing ideas I would! Since it was literally out of the corners of scraps, I alligned when I could but they kind of randomly rotate with how i had to turn the wood.

2 Likes

Oh I definitely should give credit to @evansd2 for the basic idea in the first place. He’s far more skilled at it than I, though I ganked his pretty sine wave idea for a decorative project a ways back. And every time I see one of his box posts I go, “Gaaaah I need to make more boxessss”

2 Likes

Right? WHen I started making this I was like, “Damnit, I coulda been using more of the wood I’ve been tossing or burning in the Solo to make S’mores!”

Live and learn.

1 Like

Very cool! You should make square things more often.

2 Likes

What a great use for all of the small scrap pieces that I have. :grin:

2 Likes

Wonderful! Wish I could channel @evansd2 so well…

4 Likes

Great experiment!

1 Like

Adorables!

1 Like

Great piece and write up.

1 Like