THERE ARE PICTURES DOWN BELOW! Don’t run away because of all the dumb text ![]()
I’ve recently completed a study of various inlay-esque plane jointing techniques, where two pieces of wood butt up against each other edge-to-edge in the same plane. As with my finger joint roundup, I had a few rules I set up at first to keep the scope manageable.
- No more than two species of wood involved.
- No “islands”. All wood needed to be firmly attached to its “side” of the joint
- Light, constant kerf correction (0.005"), in many examples it could be tighter, but these are proofs of concept, so I didn’t chase thousandths in order to preserve my sanity and save time. This is important because of the various materials involved – it would have required lots of trial and error to get them exactly right.
- Always flip one side so that they mate with one piece face up, the other face down. This (for most designs) requires doing a horizontal flip of one side before cutting, to make it a mirror image. This makes for a better low-kerf fit.
A few notes on materials and process:
- All woods are nominal 1/8" (3mm). In reality the woods are different thicknesses. This results in a LOT of sanding to get it right. Do yourself a favor and try to start with materials that are all the same thickness.
- All woods have been sanded up to 600 grit.
- All woods are sealed with feed-n-wax (basically an oil/wax mix)
- All cuts were masked. This really reduces the necessary cleanup.
- All joints are glued with titebond. It’s a bear to get good coverage inside the resulting edges, but worth the effort.
I started this whole journey with a simple greek key. These are fairly trivial to make, especially in the traditional rectangular/constant width style.
Greek Key
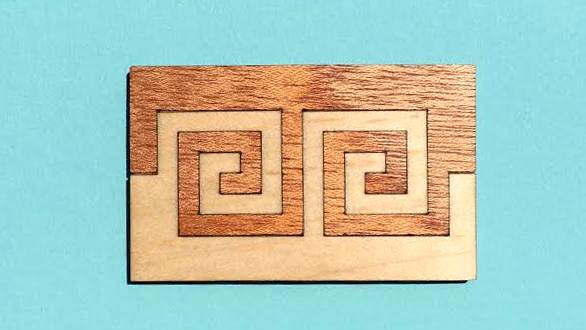
Maple/Mystery wood from scrap bin at Rockler [Cherry? Mahogany? Light weight and cuts quickly]
I wanted something more organic, and settled on a swirl design that takes its cues from a dual layer of interlocking greek keys. Curves are naturally better performers with inlay projects because they generally avoid corner overburn. You’ll see that wherever possible from here on I use (small radius) curves almost everywhere for that very reason.
Counter Swirls

Maple/Padauk
Expanding on the curve idea, I designed a wave that nested nicely.
Wave Curls
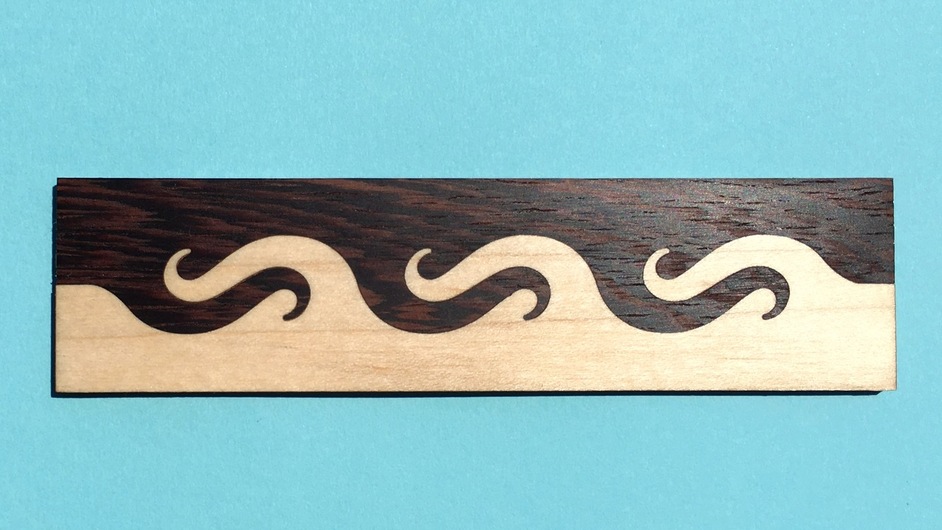
Maple/Wenge
It was a short jump to rotating it and making hexagonal variant of the joint.
Hex Curls
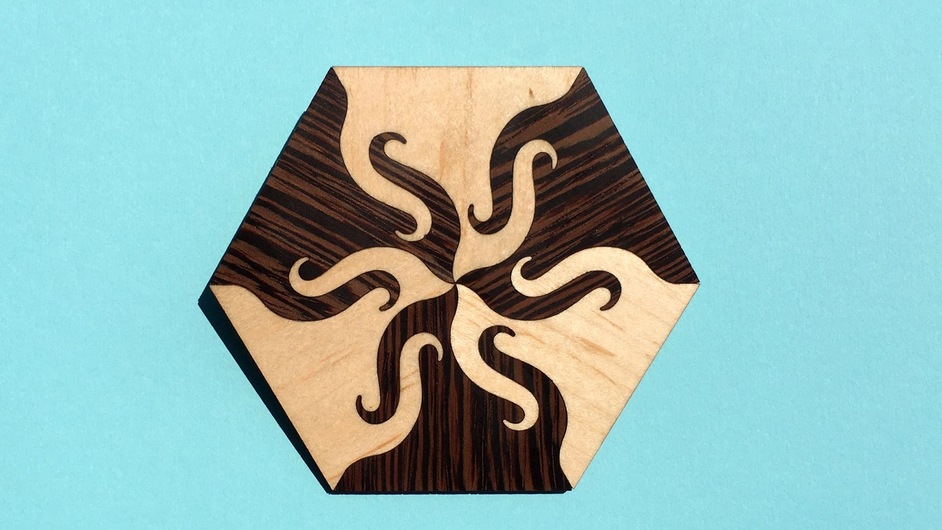
Maple/Wenge
And then, another short jump to mirror it and get this:
Moustache Curls
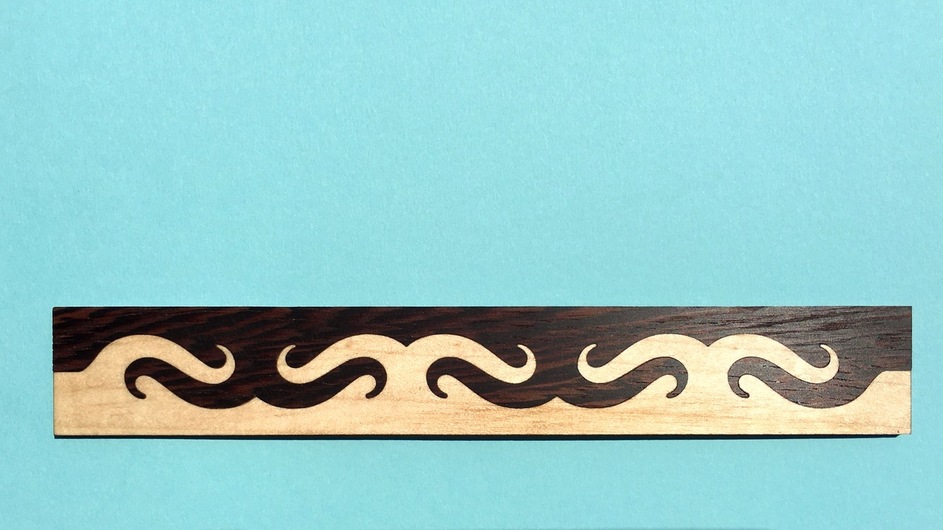
Maple/Wenge
I changed direction and went back to my geometric roots, but took some curviness with me, and ended up with this deco-esque design.
5-1/2 Sigma

Maple/Mystery wood from scrap bin at Rockler [Cherry? Mahogany? Light weight and cuts quickly]
Then I took the curve idea and made this interpretation of a sine wave. The fingers are 0.10" (2.5mm) thick.
Shockwave
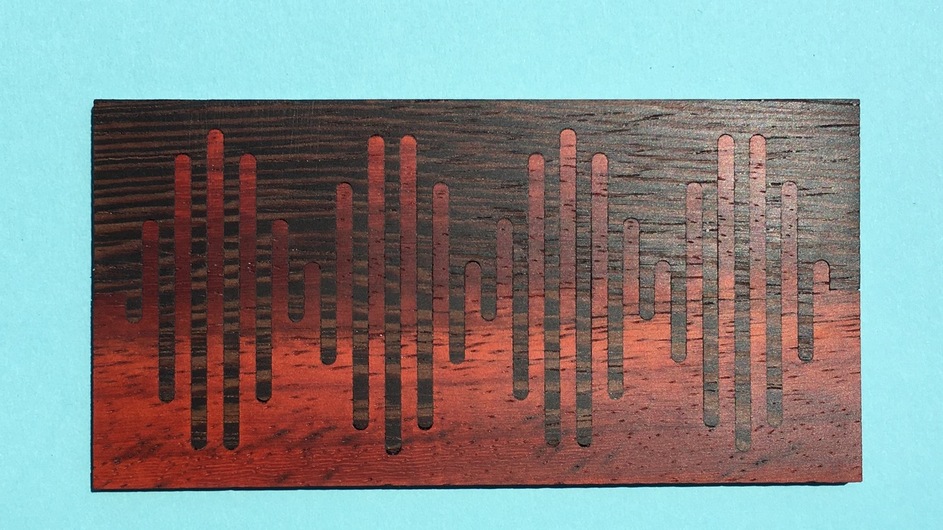
Wenge/Padauk
That previous photo just doesn’t catch the joy of this piece. The padauk has great figuring and flashes bright red lines. Here’s a bonus picture at the correct angle. [ignore my laser fingers] Note the reflected red at the top and lower mid. It’s gorgeous in person.
Shockwave detail/true color
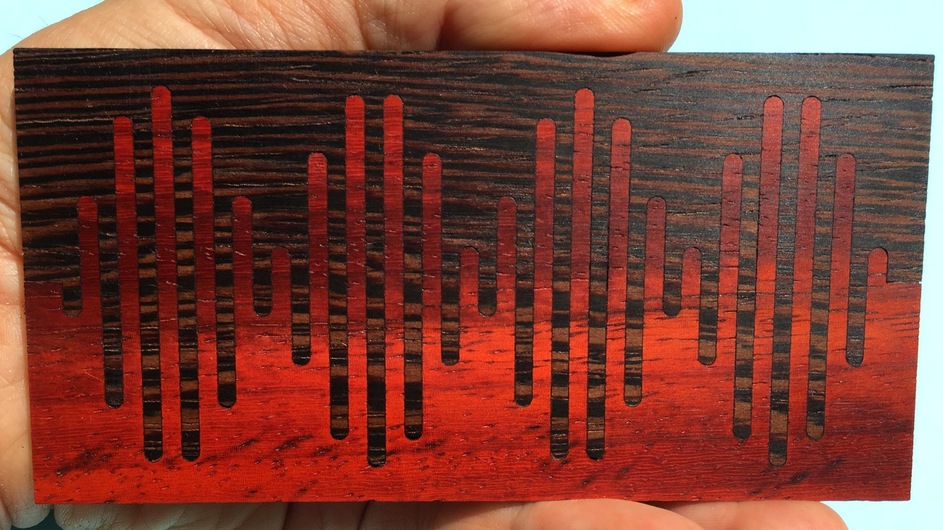
Wenge/Padauk
From here, I decided to expand away from geometric patterns and try something with a real-world analog. These guys were born. If I were to do it again, I’d want to do it at about 1.5x scale, it’s very difficult to avoid overburn and loss of detail at this scale (0.75" [19mm] tall owls)
The Parliament
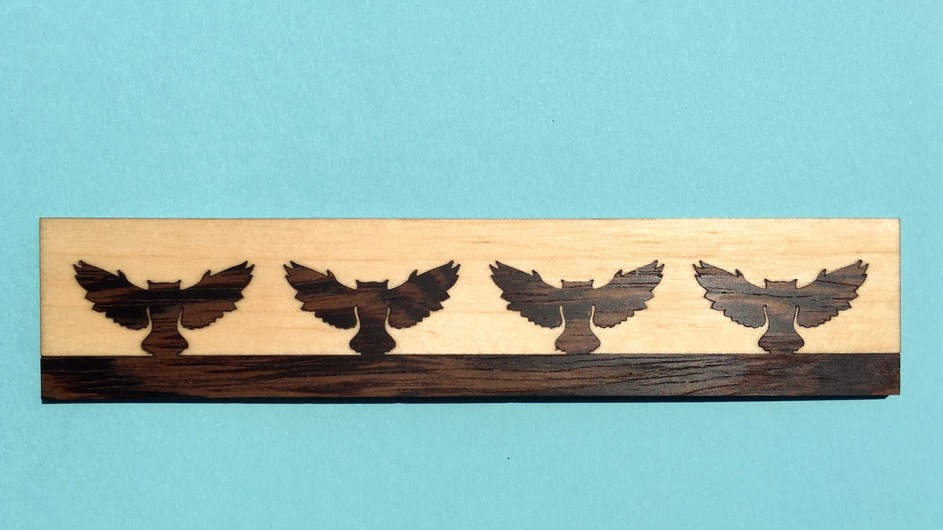
Maple/Wenge
And then to just get away from symmetry altogether – you can use literally any shapes you want as your “puzzle pieces”. Note the overburn in the maple, I didn’t bother to edit the font outlines, again, sanity.
Words
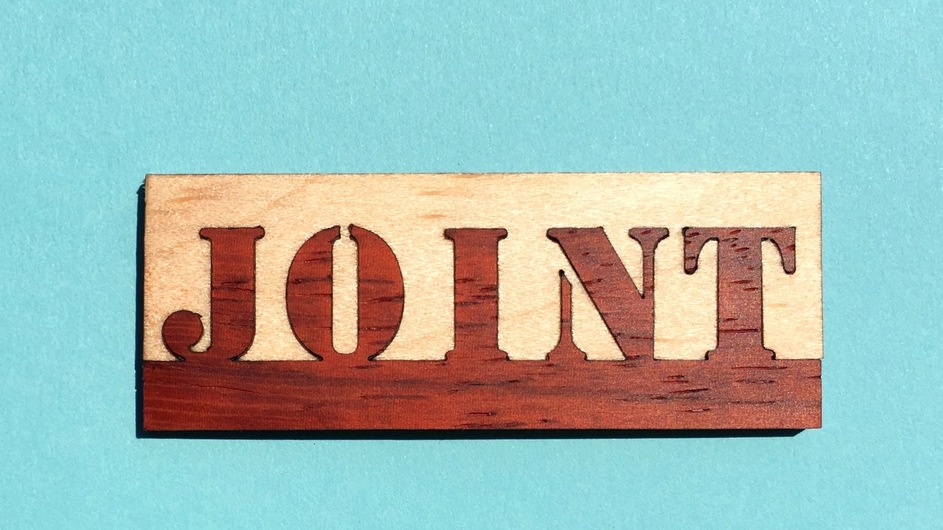
Maple/Padauk.
You might be asking “What’s this good for?” Well, first, it allows for precise alignment of two planar pieces. Second, it can be used to bring some flash to an otherwise staid design. I’ve only begun to scratch the surface, but I do have an example of using these techniques on a real project. I made a smaller-sized dice tray for game night, and used this sort of planar jointing to make it really stand out.
Swirl Box three-quarters
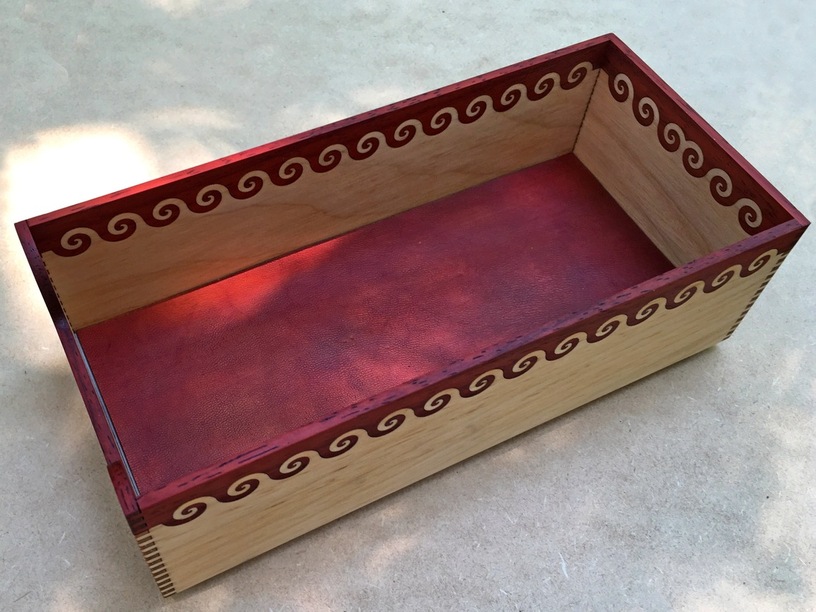
Maple/Padauk/Sheepskin - 4" wide, 8.75" long, 2.5" tall (100 x 222 x 64mm) [exterior]
Swirl Box long
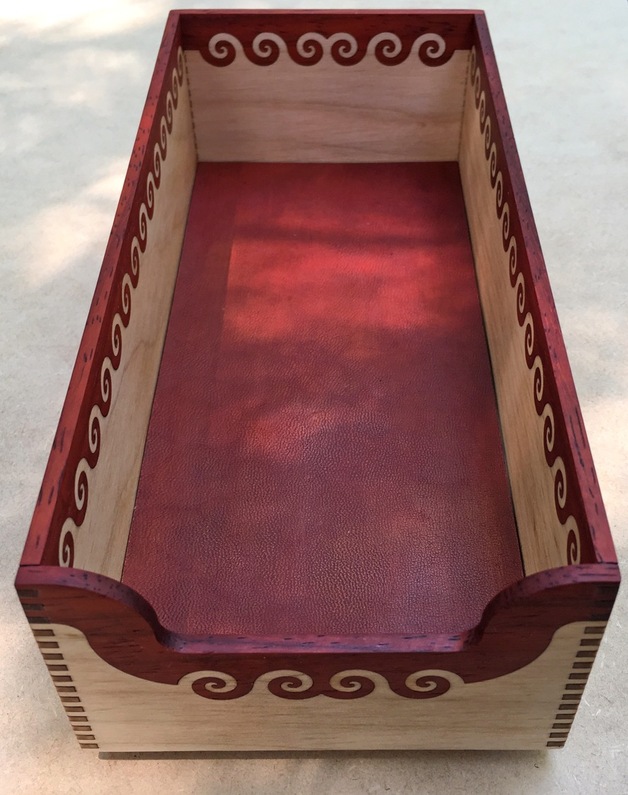
Maple/Padauk/Sheepskin
Swirl Box closeup broadside
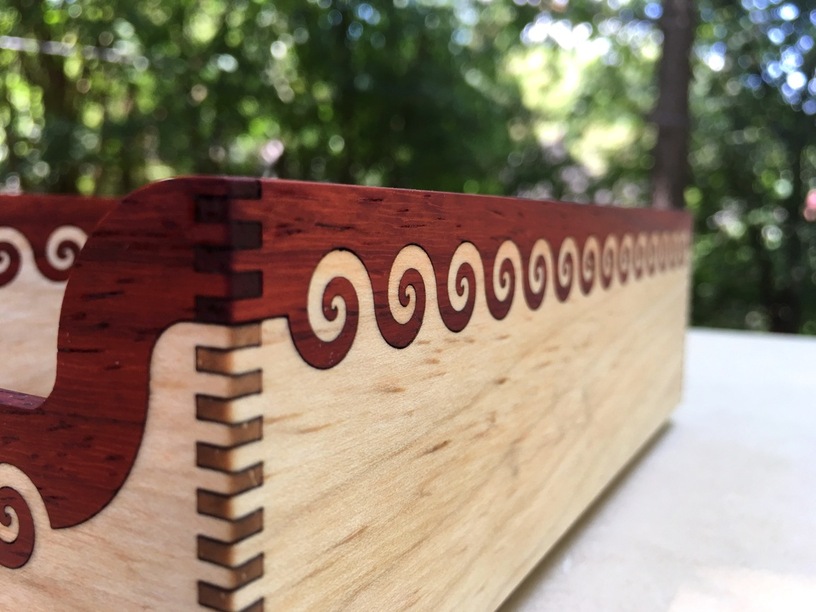
Maple/Padauk
Swirl Box full frontal
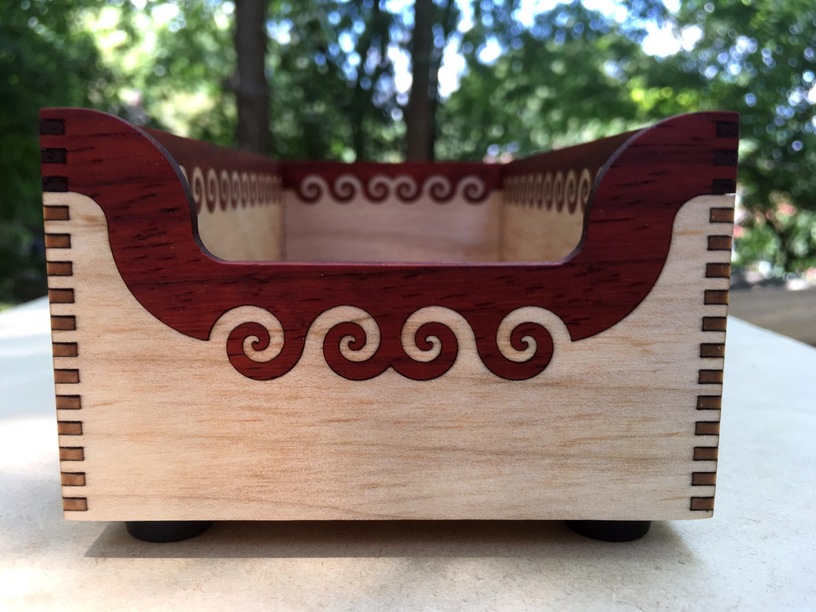
Maple/Padauk/screw-in rubber feet


