Misalignment After Print

So I know there has been a ton on misalignments but has there been an answer or fix yet?

But also, there issue I am having seems to be after my initial print, the print area or camera bed image seems to scaled down quite a bit and the images are misaligned on there.

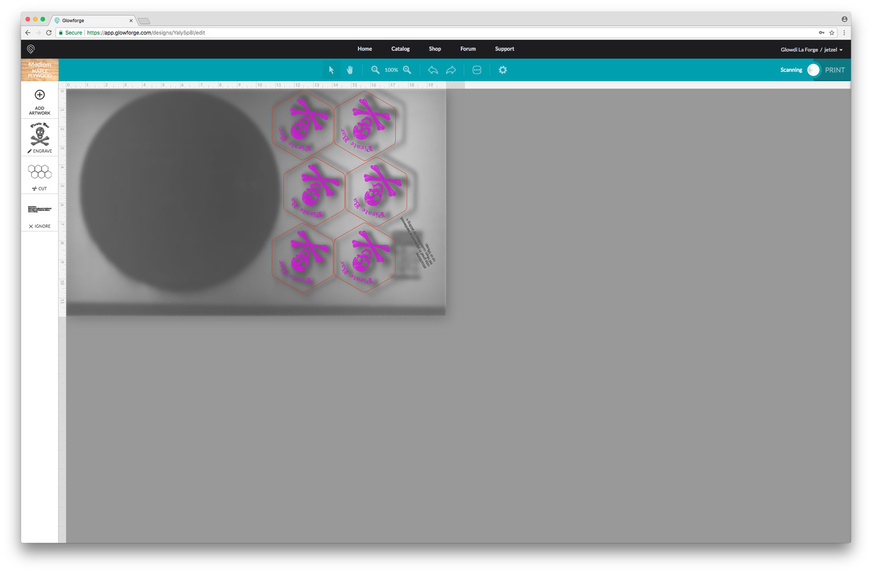
Once this happens, it seems you cannot use enlarge or any other options to move or resize the bed image. It says its at 100% as well.

For whatever reason though, as you can see in the image, on my graphic is the words “Pirate Bar” and the last “r” is missing on both middle coasters. Which is another issue at hand. I know as I copied them they took a second to show all the letters as I pasted them, but I waited until I saw everything before moving it into place. But once I started the print, I didn’t know those letters being missing.

So anyway, I wanted to try to add those r letters again. But since the bed image was scaled, I went back to the main app page and selected the coasters again and re-added my pirate graphic… but this time aligning and removing everything but the “r.”


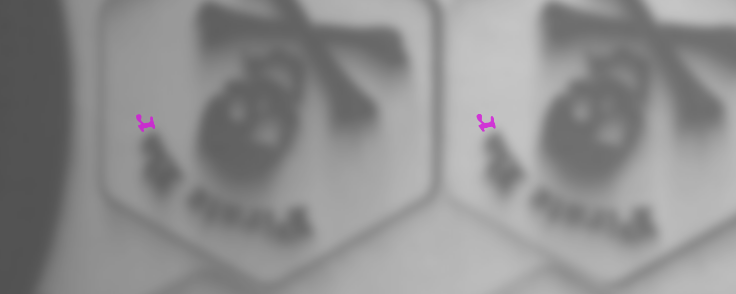
(On another note, why does the bed image go out of focus? I don’t see a reason for this to be needed.)

As you can see, the Rs are aligned correctly, but when I printed, they were way off.

33 PM

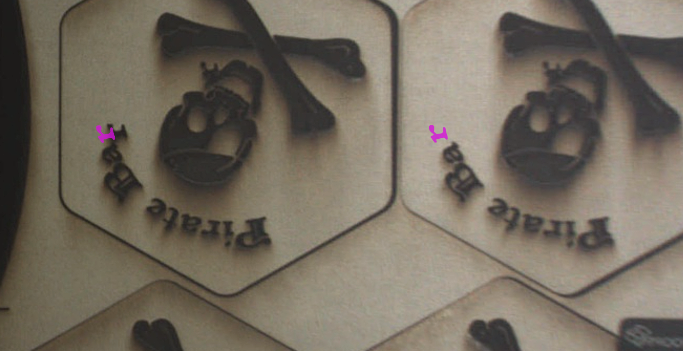
On the left you can see the “r” graphic still aligned correctly but the print was not. I cancelled the print before it could print on the right side, that way I could move the “r” more to try to offset this.


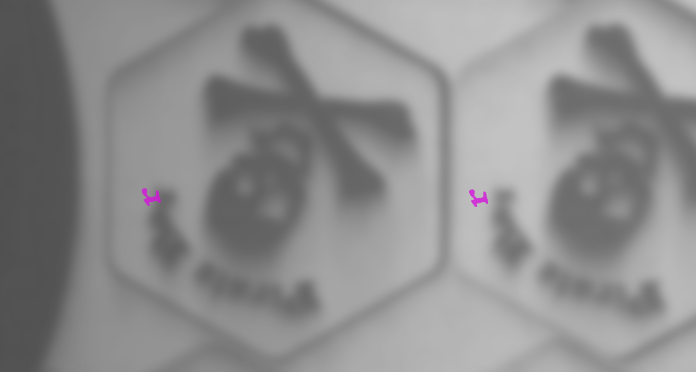
Again the bed image is out of focus, but on the right you can see how far I offset the “r” and yet it still printed in the same position as it did before I moved it.

I guess my mine issue or concern here is should I have completely closed my browser before trying to print again because just going back to the main app page wasn’t good enough to reset the misalignment? It did re-calibrate before I tried reprinting though.

Does this bed image scaling issue happen to anyone else once their print is down?

And what’s with the image being out of focus?

1 Like

Several things to distinguish here:

  1. When the image is grey and unclear, you might need to click on the gear in the top bar and then refresh the bed image. Most of the time it does it on its own, but sometimes you can speed it up. The grey, blurred image will be present when the Glowforge is off or when the lid isn’t shut, along with some other situations.

  2. The design for layout will have some degree of offset after you print in relation to the bed image with the design as it has been cut and engraved. It varies and is an issue to contend with.

  3. If you have moved any design elements with the selection tool and copied and pasted, resized or whatever after you have loaded the design, after the print and then going back to the design catalog and reloaded, it will be a challenge to reposition everything correctly, especially if it is a bigger design with several components. YOu may have rescaled the pirate image without realizing it, even a fraction.

  4. You missed the “r” in the copy and paste for the first go around, so decided to add. That’s a great challenge that might be a bit much, especially doing it in multiple ocassions. Get your overlay design set correctly and make sure all your text is combined (not broken apart into individual letters) after you convert the text to a path. Sometimes you break them apart unwittingly when you click on them a few times in rapid succession in Inkscape at least.

  5. Complex drawings are best done in the design program in a 20x12 art board so that you can best reposition after a messed up print. You might try to recreate the hex coaster design so that you can lay out the engraving and text directly on the design you can upload. Use the Stars and Polygon tool in Inkscape to create the hexagon.

I’m sorry that your print didn’t turn out the way you wanted. Keep asking and posting when you need help.

7 Likes

Thanks for your reply… but

  1. Yes I know about the refresh image option (why that is the only option under the gear icon I don’t know, more to come I guess?) but I was more curious as to why the need to do the out of focus in the first place.

  2. I realize this as well, but as I said, i did position (and scale) right over the bed image so any offset prints would be millimeters at best… this was far more than that.

  3. Again… I positioned and scaled right over the bed image… if that works for the initial alignment, like for avoiding past cut outs of the same sheet, I don’t see how this wouldn’t work for what I was trying to do. And I did have the other first engravings still on the bed, untouched, unmoved… I used those to match scale. And I didn’t miss the “r…” it was there when I pasted… it removed itself at some point. Yes, I guess I should have double checked everything before I clicked the glowing button. And yes, changing text to a path is something else I should have done.

  4. I use illustrator for all my SVGs.

The answer comes in three parts.

  1. The camera alignment may currently be off by up to 1/4 inch.
  2. If it’s off by more than that, contact support.
  3. A future software update will fix it for everyone. No ETA is available.
2 Likes

The out of focus bed image is an indication that the image needs to be or is being updated. It happens when you lift the lid and it happens at the end of a print. When you open the lid they assume you are changing something inside so the image goes blurry waiting for you to close it so it can provide you with the current view. At the end of a print the image is no longer valid because you have already cut or engraved something new.

If the image freezes with a blurry image then you might have to manually retake it using the gear icon.

2 Likes

you are pretty much SOL for things like this with the camera right now.

Best(maybe only?) way to get things on to there seems to be to remake your image with the r as a different colour, tell the GF to cut the outline only on a piece of cardboard or such, then place your pre-cut pieces in those holes without moving the cardboard at all (or the glowforge turning off, or app crashing) and run just the r engrave.

2 Likes

was the “r” added after the initial printjob?

It was there initially… but it got removed on only 2 of the coasters… and not by me… so I added it after the print to only try to engrave those Rs by themselves.

the only way you could line up an error like that is:

  1. keep the original print - then choose ignore
  2. lined up the new print next to the old one = lined up the “r” exactly where you want it next to the “Ba” which is ignored.

it should look way off but when it prints it will print on the correct offset location.

1 Like

same method you can use to align to print the back of an object if you want back to back print like a coin.

by deleting the last print job or loosing it - you don’t have a frame of reference to add the new one.

This is basically what I did… but I had to “loose” the initial print after it was done because of the scaling issue and nothing was working.

But I did not touch anything in or around the GF… all wood, coasters. parts, etc stayed where they were printed. I aligned based on that just as you said with the “Ba” and “r” and actually the whole skull and just removed the rest before I printed the 2nd time.

So I’ve actually done what you are looking to do. It’s not fun, it’s not easy, and it’s not super quick.

  • Step 1: Recognize what needs to be corrected. make changes as necessary to your file
  • Step 2: Put masking (or extra masking) on your piece. (Make sure you can at least sort of see your piece underneath)
  • Step 3: Do your best to align visually in the GFUI
  • Step 3 (Preferred): If possible, move your piece to the center of the bed (actually makes things a bit easier)
  • Step 4: Ignore all other jobs and run a score at 1 power and 500 speed. This should give a faint outline that should NOT go through your masking.
  • Step 5: Note how your piece or artwork needs to be adjusted, you can move either the physical piece on the bed and NOT touch the artwork, or move the artwork and NOT touch the physical piece.
  • Step 6: Repeat steps 3-5 until you are lined up (Important Note: REPLACE MASKING IF YOU DO THIS A NUMBER OF TIMES)

These steps assume that while the camera might be misaligned with your artwork, the software will print in the exact same place each time.

4 Likes

I do like your mask and score approach… I will remember this if I need to do this again… hopefully I wont… but you never know.

I’m so sorry your print didn’t come out right and for the delay in my reply.

I’ll look into why your print dropped the "r"s. I’m so sorry that happened. In the meantime, there are some helpful suggestions on how to finish your print, including a great one by @julybighouse.

Regarding the out of focus bed image, @rpegg gave a great answer. Also, if you set up your design alignment while the bed image is out of focus, you’ll find that your print alignment is further off than it would be if you set up your design while the bed image is in focus.

Like @chris1 said, we are working to improve our alignment, but we expect you may find that your prints are currently off by up to 1/4 inch or so. If you find your prints on Proofgrade materials using Proofgrade settings are off by more than this, please let me know and I’ll look into it.

Finally, to address the size of the bed image in your browser, can you do the following:
Go to https://www.whatismybrowser.com/
Click the link underneath "Share my system info with tech support"
Copy the highlighted link
Reply to this, and paste in the link provided
This will help us understand the circumstances around the issue so we can work on it for you.

1 Like

Thanks @jaz here is the browser info: whatismybrowser.com/w/B8Q7HJM

Funny thing just happened… So I had just finished one project and was about to do another one. I switched out the material and closed the lid but the app apparently didn’t detect the PG material… so I did a refresh on the bed image. It did find the material the 2nd time. And yes, I know I can just select it as well.

Anyway, at some point before it didn’t detect the material, before I knew it didn’t detect it, as the old material was still selected, I had adjusted the cut settings. After the new material was selected, I forgot the change the cut settings again… oops.

After the lengthy engrave process and hearing the GF make the cut, I had hoped to see a finished project… but it was just the engrave. Err well on closer inspection I could see a very faint cut mark. lol… cant help but laugh as I thought I wouldn’t be in this situation again, but here I am.

So yes, @julybighouse did have a good idea with the re-masking to find the alignment… I will be giving this a try. I’ll let you guys know how it goes.

Thanks for providing that information. I’ll continue to look into this.

This is pretty much my procedure with any print, I don’t trust the ± 1/4" nonsense.

I’ve found any sharp corners give a bit of burn through on the masking though (proofgrade and HD masking tape).

I did in fact use @julybighouse’s idea on remasking the area and using a light cut mark for aligning… and it worked out pretty well… of course the lines can get confusing after so many tries… I had to add more tape just to see the new lines! But in the end, as I said, it worked out and I was able to cut pretty close to where it should have.

So thanks again for the suggestion!

2 Likes