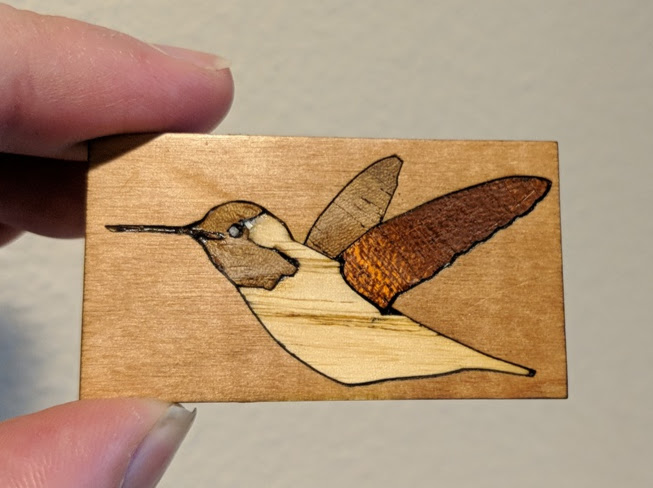
I decided to try some more wood inlay stuff this weekend and did this little test piece
I took a picture of a humming bird feeding put it in inkscape traced it out separating the areas I wanted different woods then I trace the whole thing as well. I etched the shape into some scrap plywood and then cut the pieces out of different wood veneers I got in a random pack from amazon. Then I superglued the pieces in and sanded it finished it with some wipe on poly.
I also tried putting some mother of pearl flakes into the eye of the bird but the hole was really too small and I ended up with some random pieces stuck to the head instead. I think it came out pretty good as an experiment and learned a fair bit from doing it getting the power setting right on the veneers was tricky my first couple of attempts it basically blasted right through and burnt away most of the material then I used way too little power and didn’t cut through but I got there in the end.
I bought one of those veneer packs and everything was REALLY warped and wavy. I’ll have to find some way to really flatten it back out, or plenty of glue to hold it flat to a backer.
I was lucky in the pack I got as it was all pretty flat. I did have some issue as the stuff is so light the fan in the Glowforge picks it up and shifts the sheet around but some painters tape sticking it down to the crumb tray fixed that.
One of the things I want to build when I get my machine is a leaf drying press. You could probably build something similar if it’s worth it to you. Two large pieces, some long screws, and wing nuts to tighten everything down in between. Enough time in there ought to help.
Yeah, That should certainly help. I’ve seen this design before, but I haven’t thought about this in quite a long time. This could really work, I just need to get some longer bolts.
For others who want to build something like this, here is a simple explanation of the device:
Two FLAT pieces about 12" x 12" (or whatever dimensions you want)
Drill a hole in each corner (about 1" x 1" in from each corner) large enough for the bolt to fit through
Thread the bolt through the holes in both flat pieces and put a wingnut on it, above the second flat piece
Put the item to flatten between the two flat pieces and then tighten down the wingnuts by hand, leave for awhile.
Do you dampen the veneer before you clamp it up, or is this warping a purely mechanical change, do you think ?
Wondering if the warp is due to variation in the water content, or bad storage !