In a previous thread, it was pointed out to me that the glowforge can’t properly vector shades of grey when in vector, they must be rastorized. Which is a major pain for what we do in my high-school graphics class, but I’m trying to make it work.
I’m very used to how my Trotec works and I’m trying to wrap my head around this now. We’re using Corel Draw and I’m trying to do is have a student design a vector, with shades of grey and add a cut line.
Dsiclaimer: I’m awfully rusty with Corel, so this may not be entirely helpful.
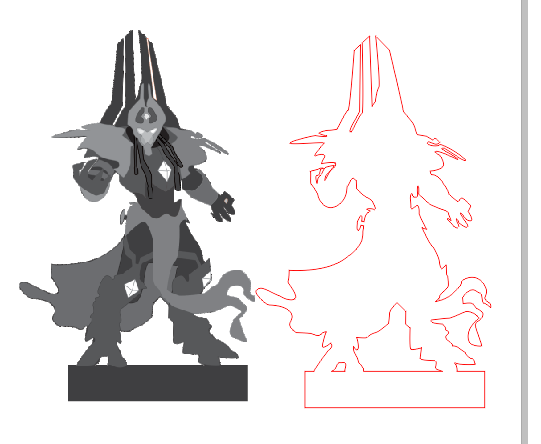
If your path is being generated automatically by Corel when you rasterize, it’s probably a clipping path. The cut line doesn’t need to be defined as a clipping path, just a regular path.
Do you have the ability to specify the resolution on your rasterized images in Corel? That result looks awfully pixelated. What resolution did you use to create it? (I shoot for 300 dpi on objects rasterized in Illustrator - it’s more than needed for print.)
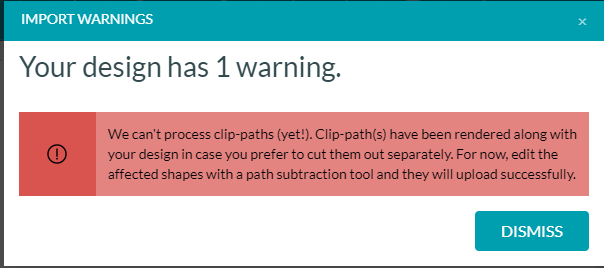
I’m walking out the door so can’t help with getting the PDF to work, but was wondering if you tried ignoring the warning message and asked the UI to process it anyway? Often times the UI gives the warning, but it works fine anyway. One thing I’ve discovered is that the UI doesn’t seem to like when you erase part of the rastor when saving as a PDF and interprets it as having a clip path when there really isn’t one. I think the UI tries to interpret the missing parts and fills in the missing/erased areas. Also, if you want more defined engraving, you might want to up the contrast of you image. I think you’ll lose some of the detail in the legs and clothing,
@kittski brings up a good point. In this case, the UI has thrown a Warning, not an Error, indicating that it’s up to you whether you proceed or not. You’ll need to pay close attention to the design in the UI, but in many cases it will work fine. Another common warning is about text – I sometimes leave notes and comments in my files as font-based text, knowing they will throw a warning at load-time. I just hit Dismiss and continue.
Errors on the other hand, will stop the GFUI dead in its tracks. Those must be dealt with in the design before proceeding.
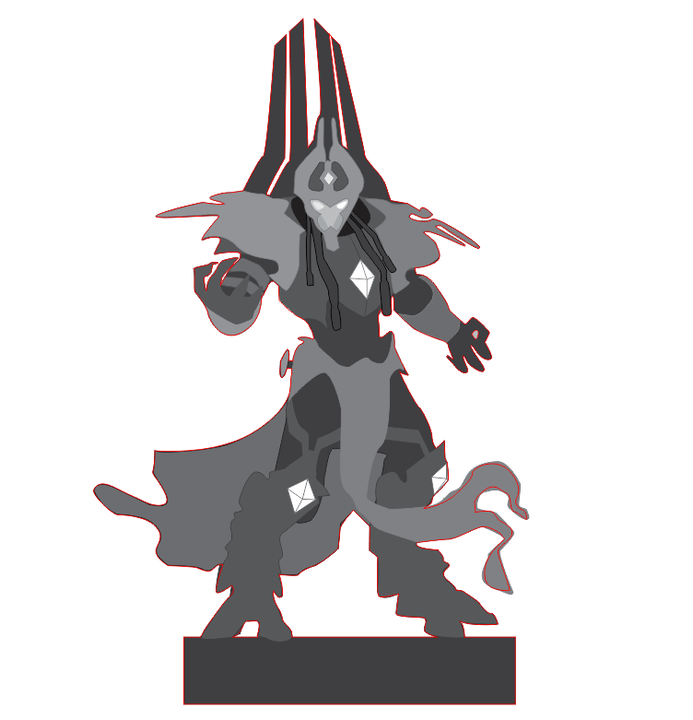
what I did was take the kids design, copy it, rasterize it in corel then I took the original design outline and just placed it over top the bmp and exported as PDF…
Ya, the 1st time I tried this technique, the “warning” came up, I ignore it and it worked. Then I tried it again with a different file and it would show the engrave but not the cut option…
I’m trying it a 3rd time (grrrrrr) and I’ll let you all know what it does
So…this time it “worked”, it found the cutline and the engraving. My problem is that I didn’t do anything differently (I think). SO I’ll have to keep trying until I can get a reliable workflow that works everytime.
Or, glowforge could just write the UI to do vector greyscale engraving…
I get that almost all the time using Corel. At one point I was going to try and figure out how to stop it, but it does not cause any problems (noticeable at any rate).
There are several ways to make an outline. Shape Boundary is the easiest.
Sometimes the shaping tool looks messy or does not want to work correctly.
If so, make a copy of item.
Bit map the copy.
Do a shape boundary on the bit map result (high quality, clip-art, whatever).
Toss the result and paste the made outline over the origin figure with a separate color for cutting.
(Seems like you did a version of this, so on to the step below)
OR just turn off (dismiss) the alert and go.
It has never changed anything that is about to happen on any of my designs, so not sure if it use to be a valid alert but does not matter now, or if it never did matter to begin with.
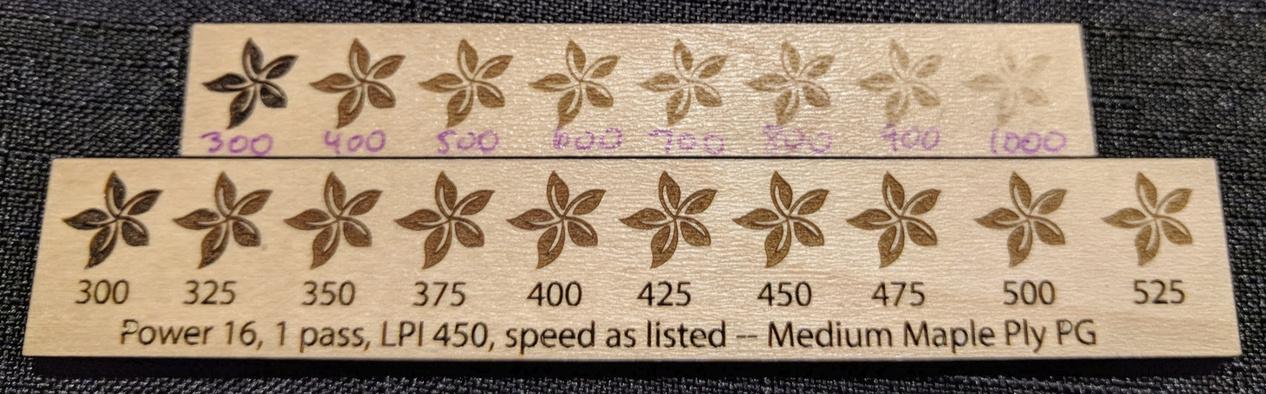
You can engrave greyscale vector fills, but it will take some setup work.
What I do is fiddle with settings and find a few speed/power combinations that give me noticeably different results, then map those to the various colors in my design.
For example here are some vector engrave tests on PG maple plywood.
It would be great if GF treated grey vectors different from other colours and set the power level from the grey value. So they all come under one tab with the min and max power on it.
It would be great if GF treated grey vectors different from other colours and set the power level from the grey value. So they all come under one tab with the min and max power on it.
It depends if your clipping mask is actually clipping anything. If it is, you’re going to get a result you’re not expecting. If it’s clipping nothing, your print will be fine.
@robgriesbeck Thank you so much for the feedback. I’ve shared it with the team.
Rather than exporting it as a PDF, I believe saving the file as an SVG will give you a better result. However, it sounds like you’ve solved this for now. Please post a new topic if you run into the issue again.