Moving Crate

I need to move my Glowforge but have long-since gotten rid of the box it came in.

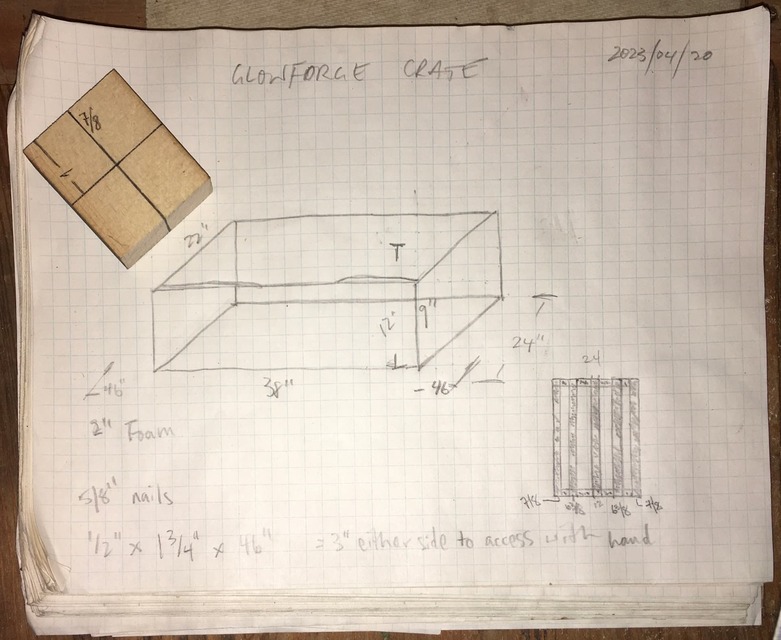
Here are plans and pictures of the crate I built. Sorry to my Canadian compatriots; this is in imperial not metric. Sometimes it’s just easier to work with the dimensions you get at the lumber yard.

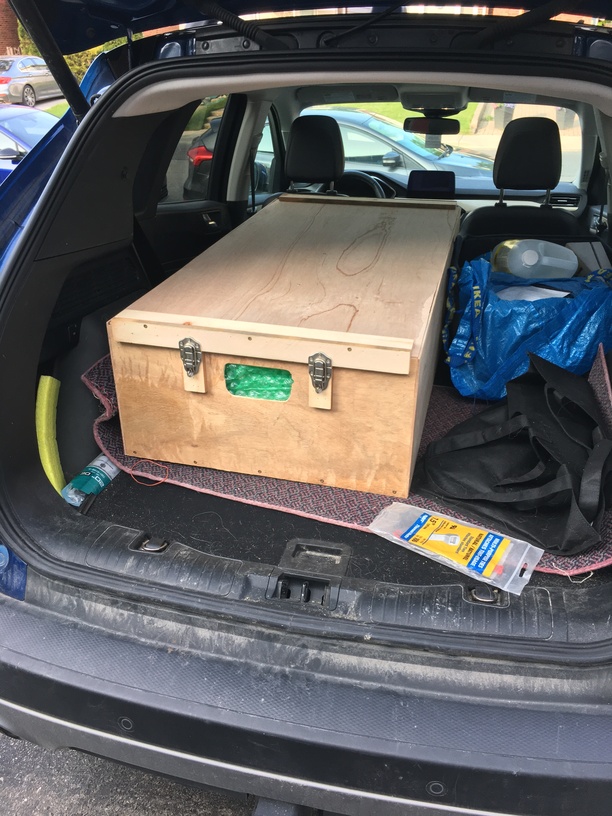
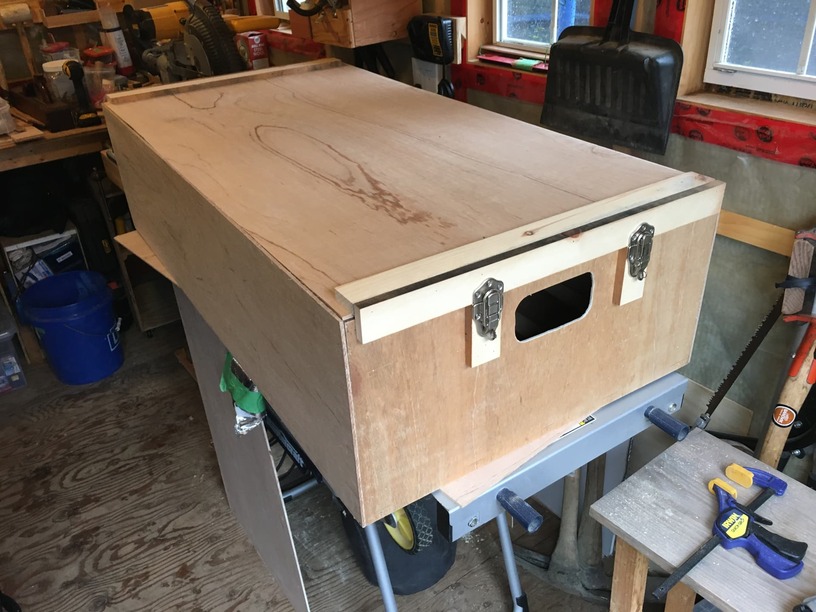
Here’s the finished crate.


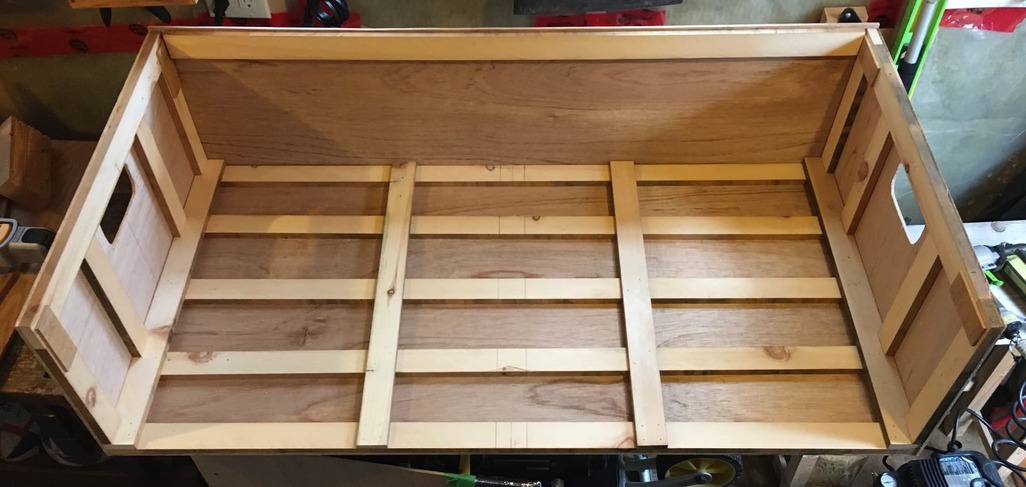
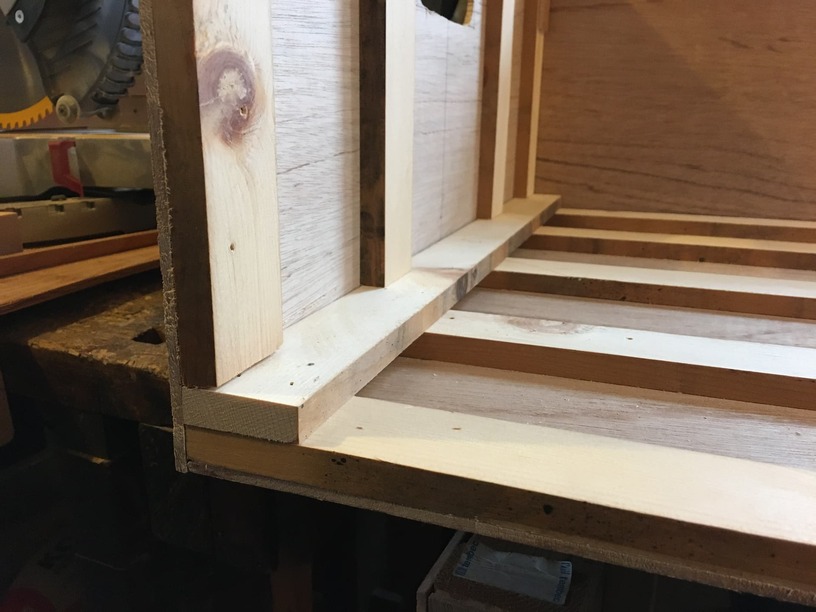
I used 1/8" plywood for the bottom, sides, and top. I wanted it light but sturdy when braced. I ripped 2" x 1 3/4" strapping and then made story sticks to make the measurements consistent.
I used a brad nailer to fasten everything as I built, then reinforced the stress points at the end and bottom with counter-sunk screws.

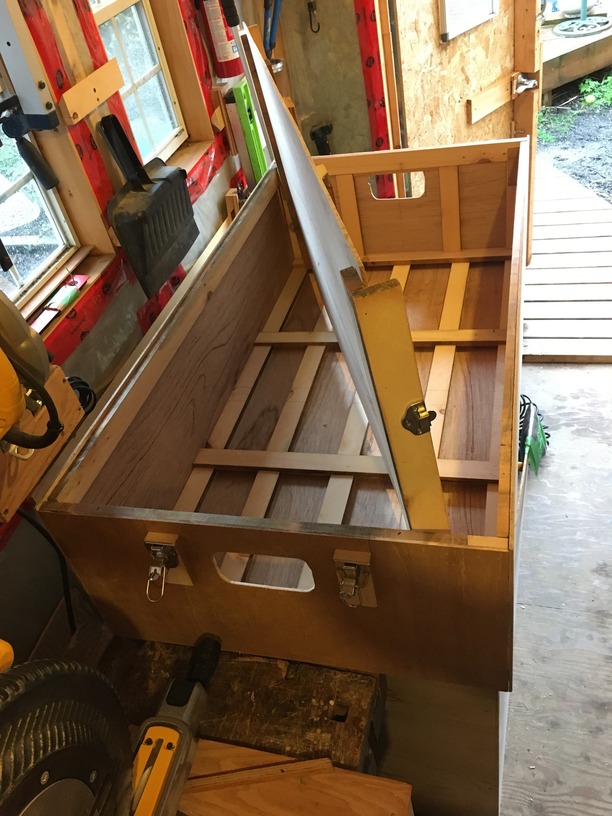
I wanted to make sure to leave room on either end to fit hands for lifting in and out. The front and back clearance is minimal.

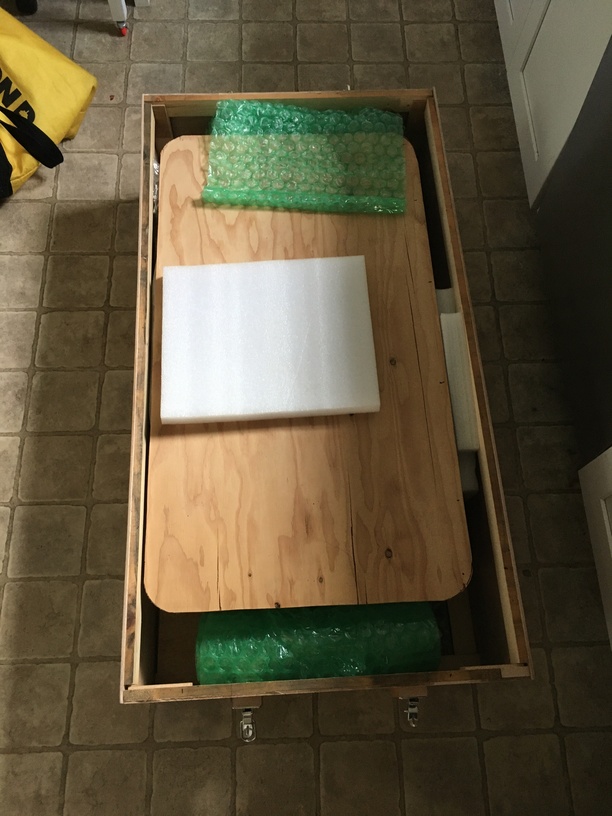
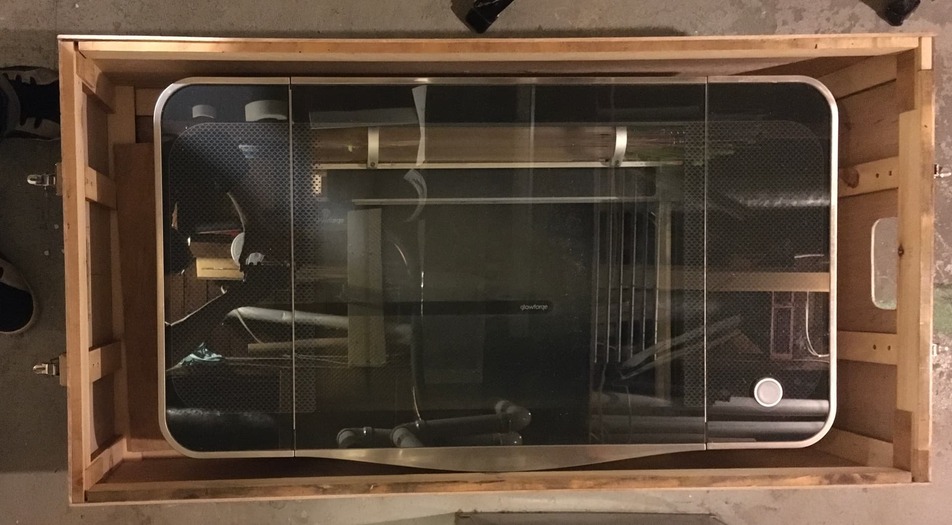
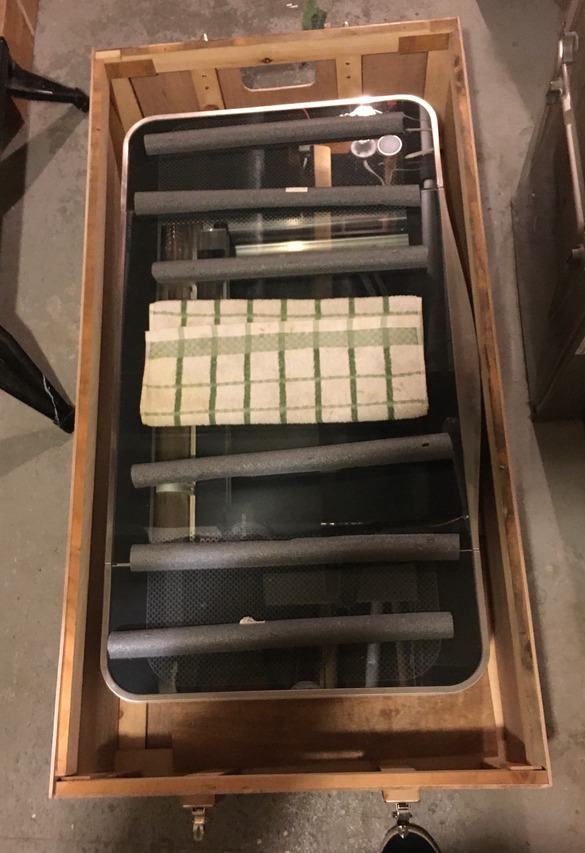
There is a floating floor over the lap-jointed floor strapping. I cut up flat pool noodles and laid them between the strapping and a false floor, which was another piece of 1/8" plywood. The Glowforge sits on the false floor so shocks are dampened.


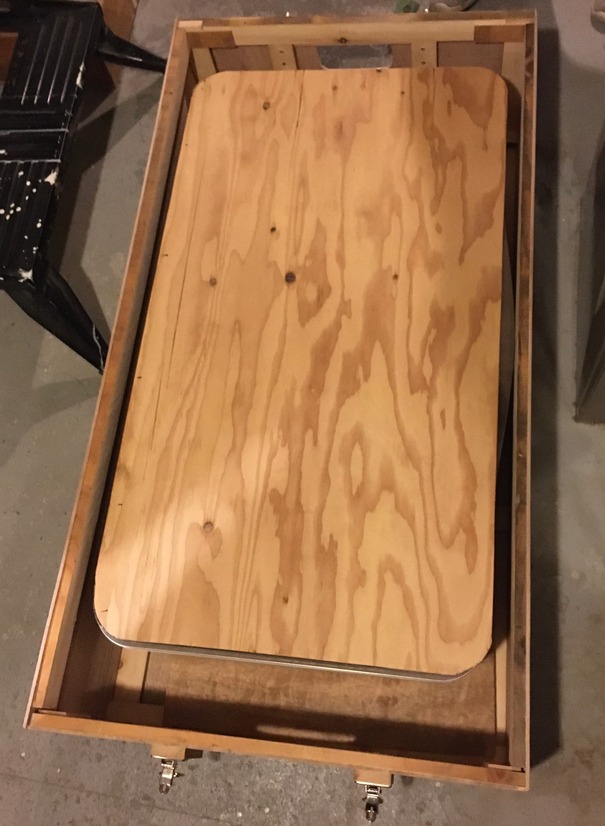
I also have some pipe insulation cut in half across the top and a 1/8" piece of plywood there too. The idea is to dampen or distribute shocks and prevent the glass from shattering.

I figure I’ll use foam or something like the original packing pieces to dampen the ends. The lid has clasps so it’ll stay on.


There are carry holes on either end. I probably could have added clasps at the sides to reinforce, but I needed it done, not perfect.

I think I still have the orange pieces for the insides, and if not I have the manual and unboxing pictures so I’ll have some reference to brace the innards.

See also: moving a glowforge cross country

[Update 2023-05-24] the move went well. I probably should have had two hand holes at either end to make it easier to carry but this still did the trick. I used bubble wrap at either end and some firm foam back and front and just hoped it would be ok. Next up: unboxing and setting back up to see if it worked.


27 Likes

Your box is stronger (and heavier) than the cardboard box it comes in but the foam (both inside and out) is at least as important as the cardboard. The orange bits are critical as even moving it in your own vehicle could cause serious damage. I have the old box as a shelf in a corner, and it is a pain to store but it represents a great deal of thoughtful engineering, and hard experience and I would not move it down the street without being properly packed.

13 Likes

That’s an amazing looking box…built like a tank. I just moved my own Glowforge, but I still had my old box and the ‘orange bits’ that @rbtdanforth is referring to. I will agree with him about those…to keep the gantry and all the loose components inside from moving around. Looks like lots of pool noodles might help with that. Nice job!

9 Likes

You might want to add some cushioning between the box and the GF. While the wood sides will protect from intrusion, it won’t do much for shock absorption.

Before you put the GF in the crate, put it in a plastic bag. Then get some low-expansion insulating foam aerosol cans from the big box store. You can spray it in between the bag & the box and it will expand to fill the gaps. If you want, you can line the box with a plastic bag so the foam doesn’t stick to the wood.

9 Likes

What I forgot to mention was that I do — as a few have rightly pointed out here — intend to pack the crate with insulation and foam. Lots of foam.

6 Likes

Nice looking crate! (And once you have the foam in there, that’s really going to be awesome!)

I would never have thought of using those cans for this purpose, thank you for sharing that idea!

7 Likes

With the cost of everything being astronomical—- I do believe you are ready to make caskets.

Great box!!

Happy to report that after unboxing, setting back up, connecting to the wifi and running the first small job in the new location, everything works just fine!

These are dog tags with the new address on the obverse (with a toonie for scale).

I think the only two changes I would make are

  1. make two handles on each end, or a wider opening to help prevent pitching while carrying; and,
  2. clasps without the locking loop, which was unnecessary and a little dangerous.

Otherwise, I’m happy with the outcome of this crate build.

6 Likes

Thanks for the follow-up, and I’m glad it worked out for you!

1 Like

Yaaay!!

2 Likes

Good job! Glad it made the trip safely and that you’re back up and running!

1 Like