Making your own creates an opportunity to go wide and have the cameras wide apart and getting much more depth. Then to put that into something like Meshlab could get you a grayscale result that as a relief carving could be quite spectacular
I love the result of the pinhole cameras but would love to see the possible next steps as well.
That’s the problem exactly. The material the pinholes are using now are .05mm thick metal. I am sure the can make that cut but I am just too chicken to try. Certain plastics like Delrin or Garolite may work but I just don’t think they could hold up or be opaque at that thickness. Thickness counts because the thicker the material, the narrower the angle of courage will be. You can compensate by moving the pinhole further away but you’ll get darker by the inverse square law. You can compensate for that by extended exposure time, but it will be so long as to be impractical. You could also keep the same projection distance but have a much smaller image. But as you saw in my 35mm camera, smaller negatives result in softer and grainier pictures. So, at the end of the day we’re stuck with thin sheet metal as the optimal material. If there are brave souls in the community who have cut metal with their Glowforges, please chime in. I am terrified by the notion.
But I am a big fan of janky images so one day I will try to make pinholes with some kind of acrylic. It still won’t be thin enough and it might be super fragile, but some image will appear and it might be fun just to see what kind of image it will be. Cheers.
It really is. Each time I develop a roll of film, my heart pounds in expectation as I pull it out of the tank. Will I get usable images? Was there a light leak? Were my calculations correct? How did that new part work? So many questions and anxieties, but everything gets answered when I hold the negative up to the light and see the images for the first time. That moment is trully rewarding.
For me the stereo application of pinhole photography was that next step. It does indeed feel more immersive so I look forward to traveling with this camera. Other steps that I am personally interested in would be a pinhole movie camera. Given the exposure times such a camera could only create something like stop motion animation but still worth trying, at least for me.
Another step is the other side of this camera, namely the stereoscope to view the stereo image cards this camera produces. Something @OldFrog is already helping me with!
I also plan to take these cameras on studio/portrait shoots. I love ballet and I’ve dabbled somewhat in dance photography so it will be an interesting challenge to take images of movements that occur in a fraction of a second with a camera that can only take images in seconds or indeed minutes!
As for objects made with images, photogrammetry is something my company is working on as well, so taking a number of exposures and generating an .stl file to 3D print is an interesting step. I’d need to make 50 cameras or just shoot still subjects, but yeah, sky’s the limit.
BTW, I found it quite easy to view the stereo pairs at the end of your original post just by looking at them on my screen and relaxing my eyes to cause the two images to fuse. No stereo viewer or VR headset needed.
That would be an advantage of going with relief vs full .stl as the relief only needs 2 images to judge distance where the full 3d would need fifty to see what is happening around all the corners. A regular pinhole camera with a large film capacity could manage stop motion if there was more than ten minutes between shots. That is one thing I find interesting with Civil War portraits everyone has a weird look on their face until you realize they could not move for the time of exposure.
Hi @dehne1 , thank you and thanks for visiting my other camera too!
Ah yes! That is called the parallel method and it’s impressive that you can do that. It is perhaps the most challenging ways to view stereo images without a viewer since it takes extraordinary will (I find) to resist focusing on the paper. Kudos!
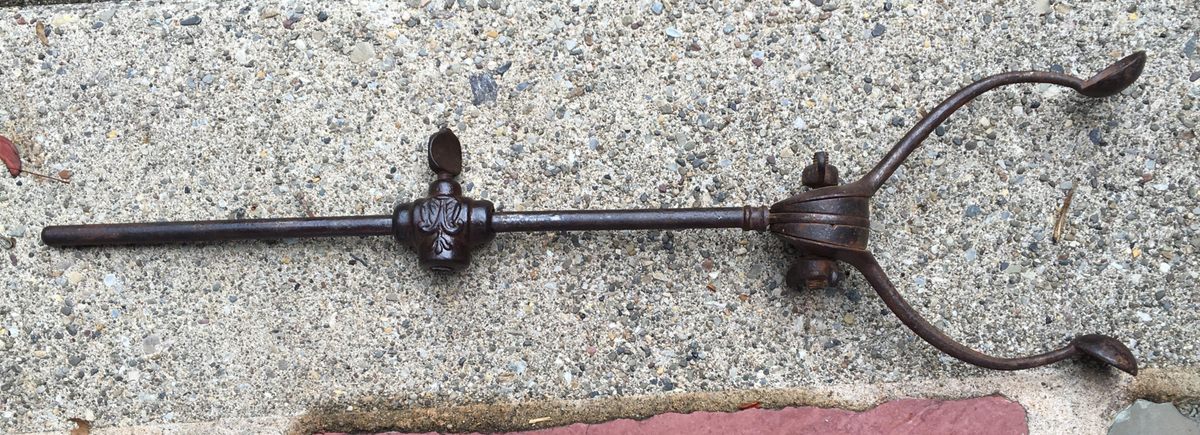
Indeed, I once visited a photo studio that had equipment from the 19th century and among the collection were a bunch of stands with prongs sticking out of them.
The owner told me they were used to hold the head still during long exposures. By long we’re talking about only a few seconds but that’s enough to get a blurry head. I wanted to try it so I sat down and the stand was set behind me and the prongs were clamped down just behind my ears. It was tight and plenty uncomfortable but I might try to get my hands on one so I can take pinhole portraits.
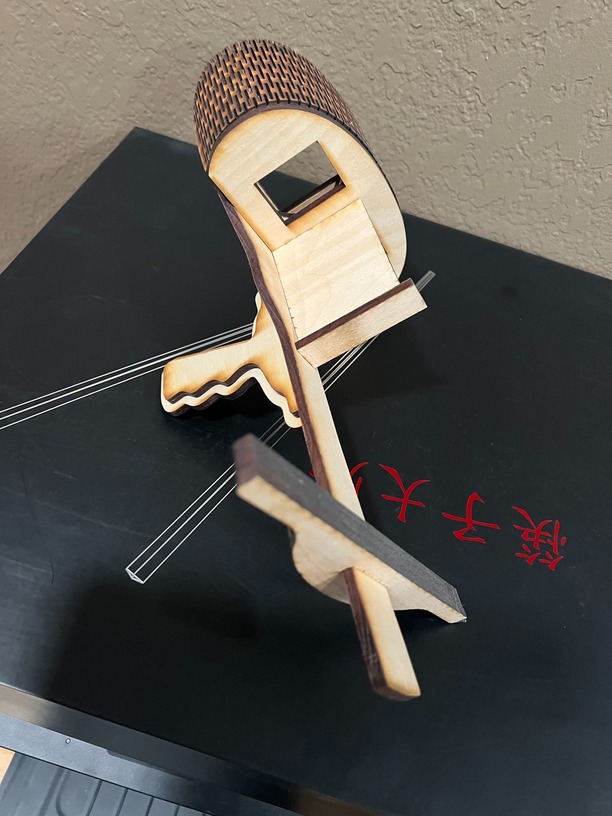
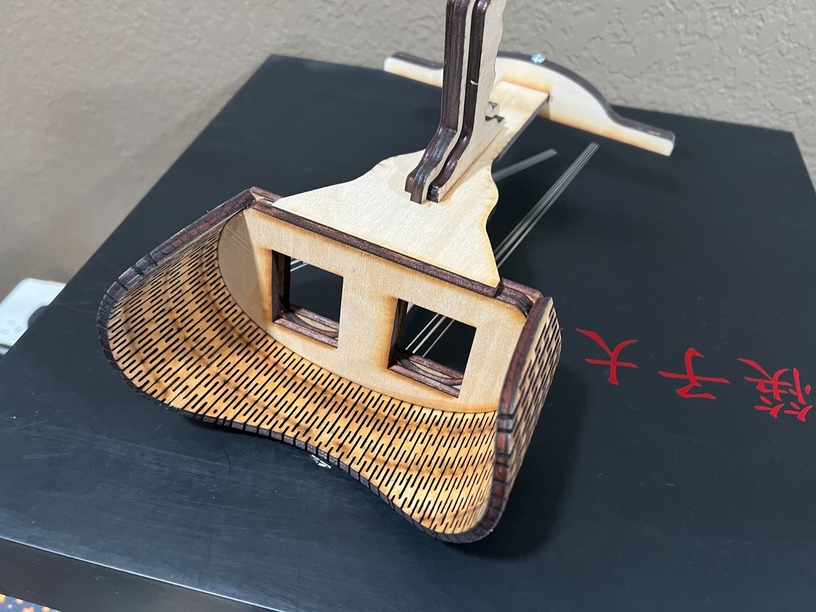
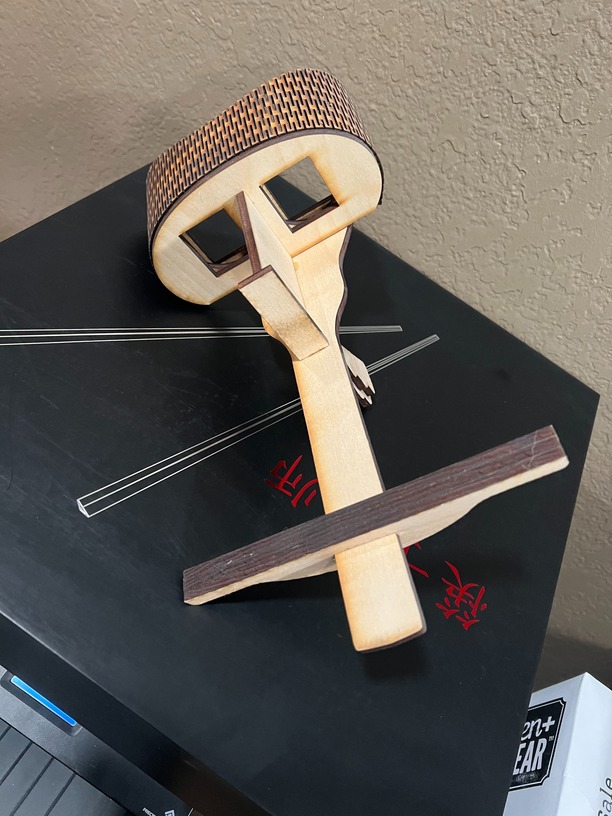
Wow, @Bmundy ! Very cool. I like how you evoked the design of the Keystone viewer and used the living hinge technique to get those nice curves on the face piece. I have a design for a viewer that uses a pistol grip as yours but went with a rectangular face. I still haven’t built it yet but I’ll do a write up once I do. How will you do the card holder hardware? I’m thinking of doing it with stiff wire or metal rod and making a jig to bend it to shape so I can get consistent results. Thanks for sharing!