How was your Worldwide Pinhole Photography Day? I am a day late but I am posting two projects on pinhole photography. The first was a 35mm film format pinhole camera. This is my second, a 120 film stereo pinhole camera. My company makes immersive content (like VR) so I’ve wanted to connect my pinhole interests to my work for a long time.
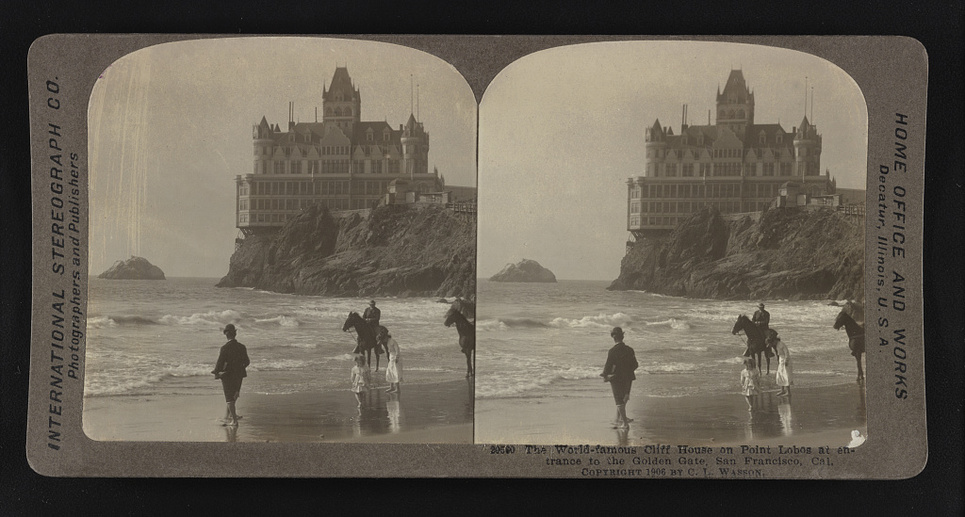
The concept of stereo cameras are as old as photography itself. The desire to see things in three dimensions seems to be an innate human obsession. Many of you may be familiar with stereoscopic viewers from the late 19th to early 20th century. Almost all of you have looked at 3D images from a View-Master. As a child, I remember they sold View-Master discs at every tourist souvenir shop around the globe. Virtual Reality is only the current step in a long history of 3D image making and appreciation. Now, with the power of
I won’t get into too much about how stereo images work. Wikipedia is your friend. The fundamental concept is that you need two lenses to mimic the way your eyes and our brain interpret depth. 120 film is an ideal format for this since a frame is about 60mm x 60mm and there is a gap of a few millimeters between each frame. Since the average human inter-pupillary distance (distance between your eyes) is about 63mm (yes, yes, lots of debate on this - just let me call it 63mm for the purpose of this write up), that’s two frames for one stereo image. You can even contact print them and use them in a stereo viewer as is.
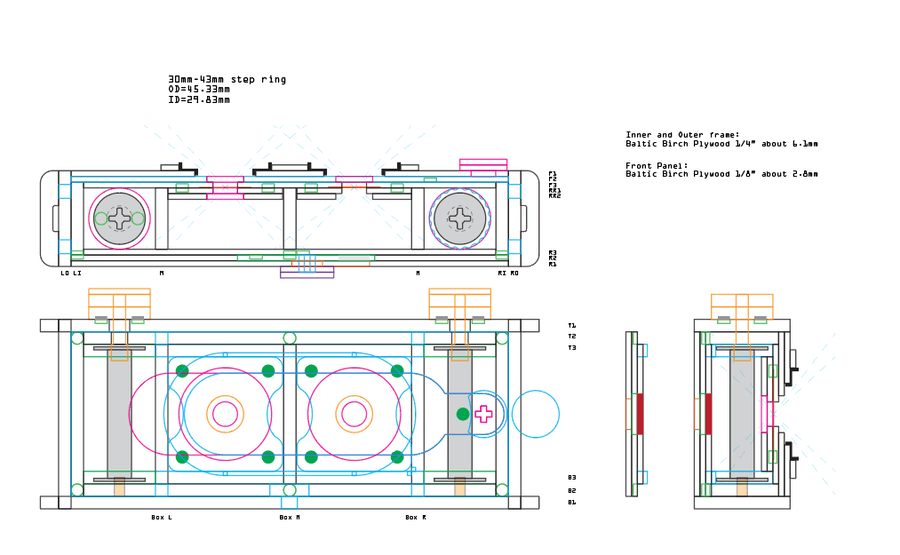
The design is actually quite basic. I’ve made 120 film cameras before (eg. my 6 x6 Pinhole and my 6 x 17 Panoramic Pinhole) so the transport method, the focal distance, the pinhole diameter, were all easy to adapt. The only difference is that instead of one pinhole, there are two. Because the exposure must be the same for both negatives, I cannot use the lens cap on/off method of exposure. I would need a shutter. Good thing I already designed one for the 6 x 17 Panoramic Pinhole camera. Things get a little tricky when you double up, especially if you want to keep things compact - which I do. This led to some (read: many) errors that were fixed in iterative steps.
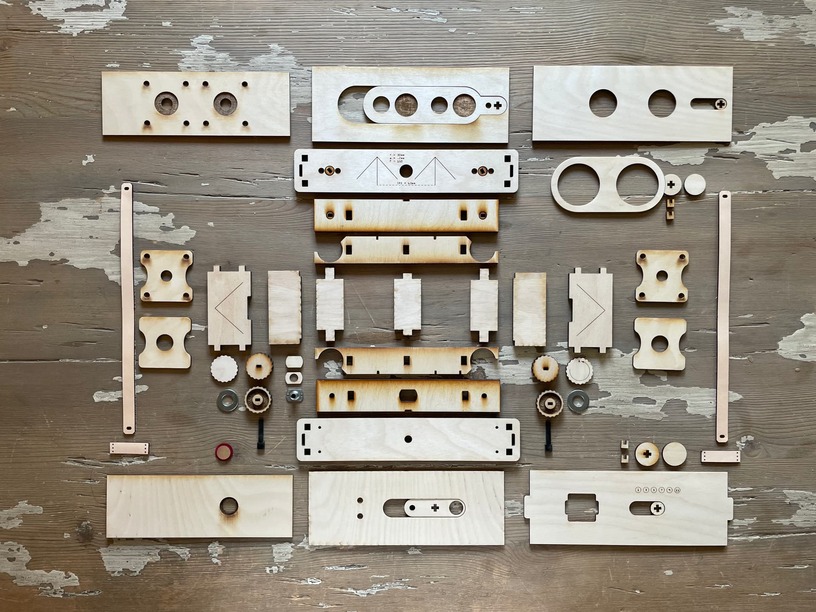
Build time was about a week. I’m getting faster at these cameras since I know most of the fabrication hiccups by now (and I have piles of plywood mistakes to prove it).
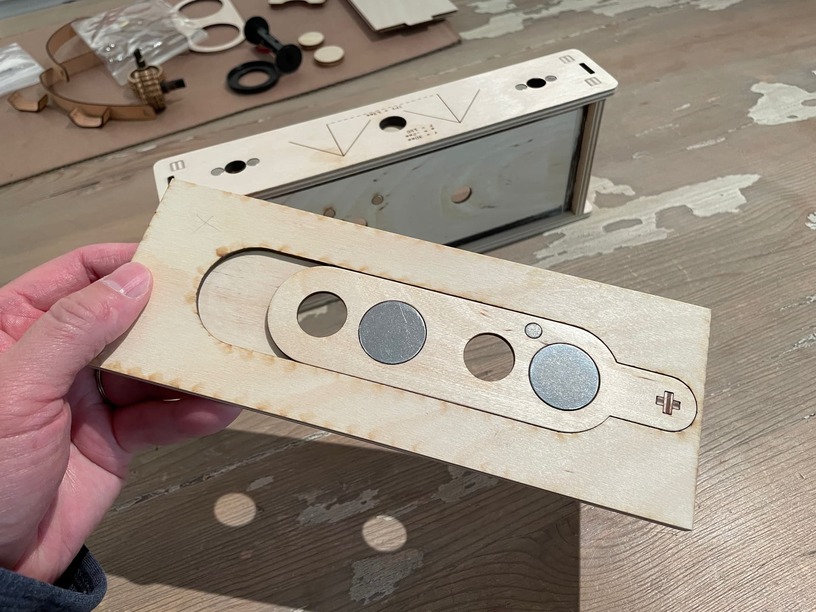
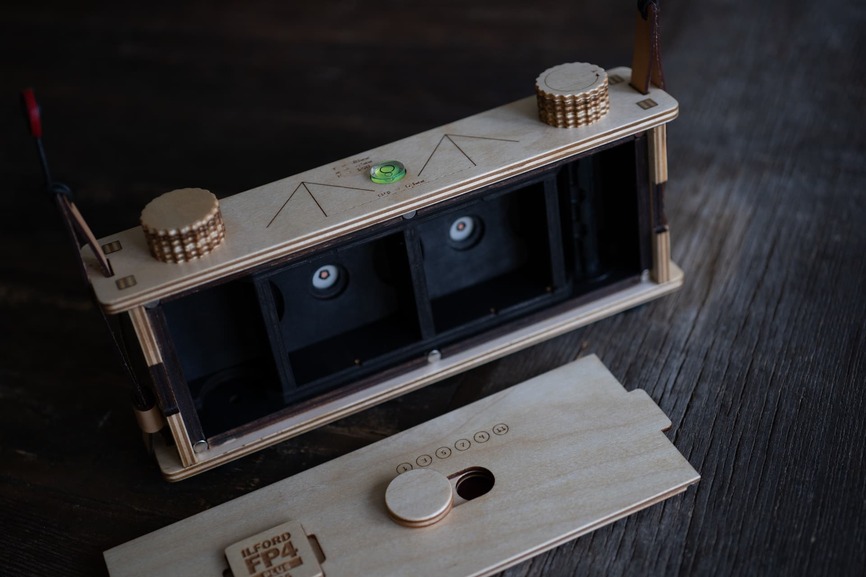
Just before I finished the front side assembly, It dawned on me that a single sheet of 1/8” plywood might not make a very lightproof shutter. I put a very powerful LED flashlight against it and sure enough it glowed. Of course, I’ll probably never be in a situation that bright, but even a tiny fraction of light over time with fog the film. So I scrapped the original shutter piece and printed a new one. This version had two engraved circles to place 1inch diameter stainless steel blanks I had. Surely this is overkill, but I saw it on my shelf and went with it.
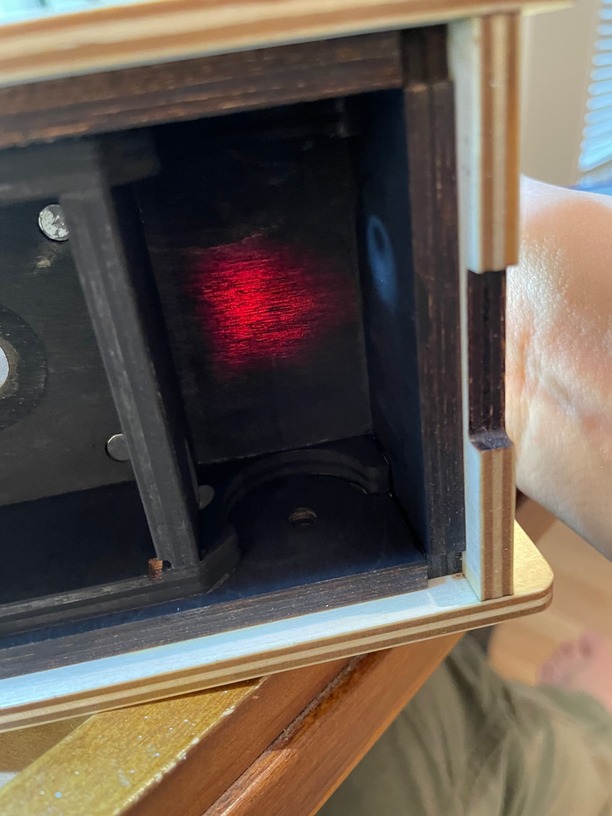
Once it was all built up, I blackened the interior with India ink (as I’ve done on all of my cameras) and did the LED flashlight test around the entire body and noticed that the exterior slot for the shutter slide allows light to pass through when closed. This was because in the closed position, only one layer of 1/8” plywood was protecting the inside of the camera. Yikes! How did I miss that before?! In the future, I might make the shutter knob a longer piece so that it covers the slide slot at all times, but for now, I’m already glued up. Point of no return.
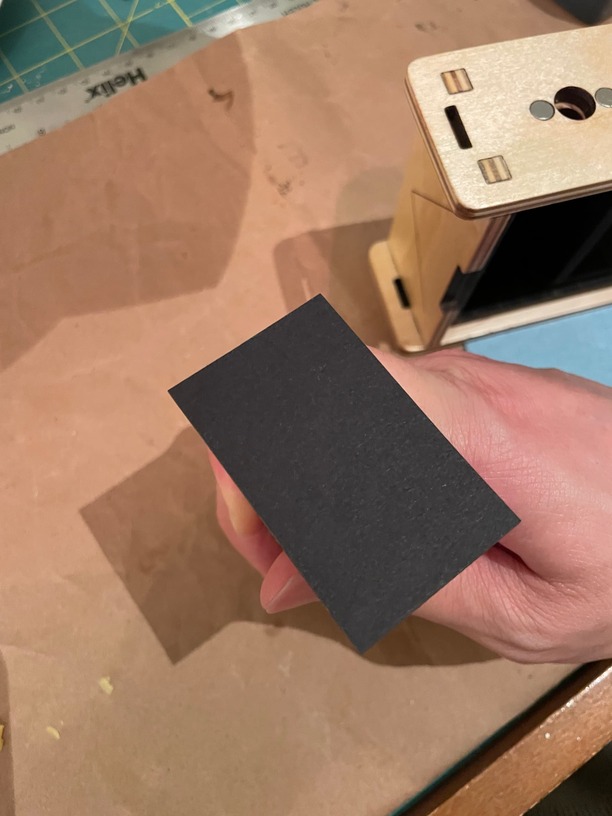

The solution was to put a layer of black cardstock in the area. I printed two but one was more than enough to block the light. This works so well that in the future I won’t use those silly stainless steel blanks in the shutter. I’ll just put a layer of this cardstock on the back of the shutter instead. I’ll also have to retrofit all of my shuttered cameras with this fix ![]() .
.
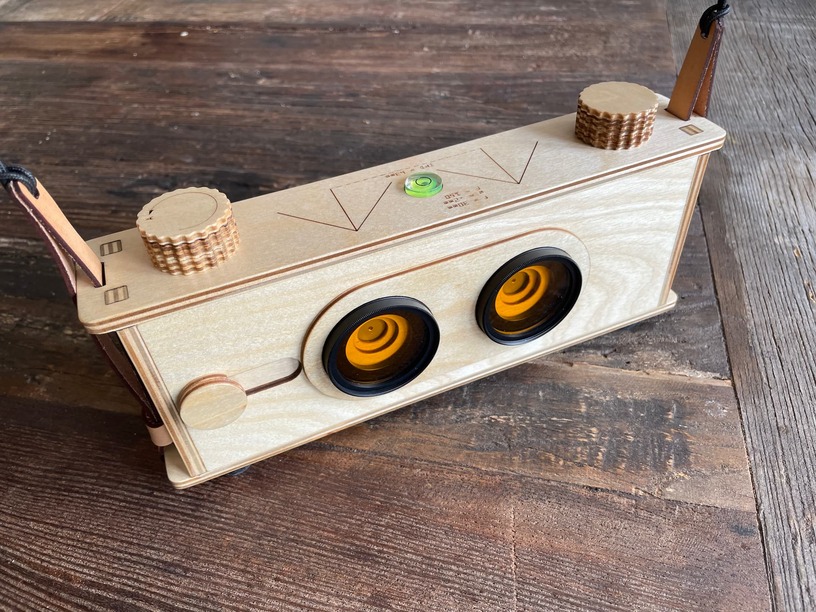
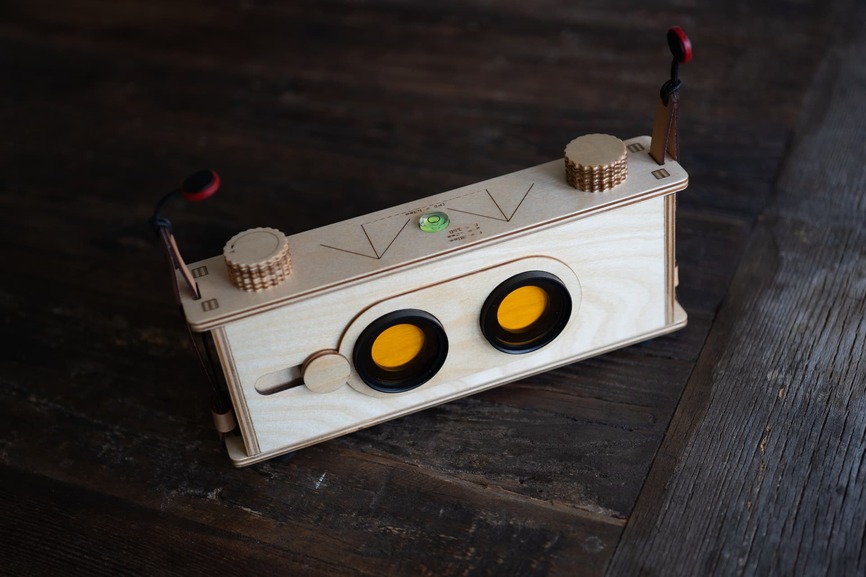
And here it is. It’s quite compact for a 120 film stereo camera and lighter than any steel and glass version. I do feel like my designs are evolving with each build. I’m using deep yellow filters to help increase the contrast to get that three dimensional “pop.”
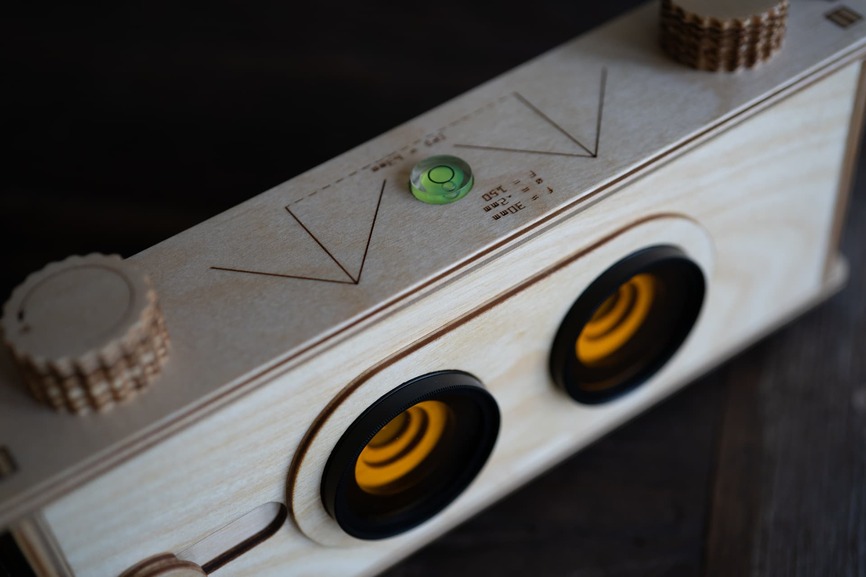
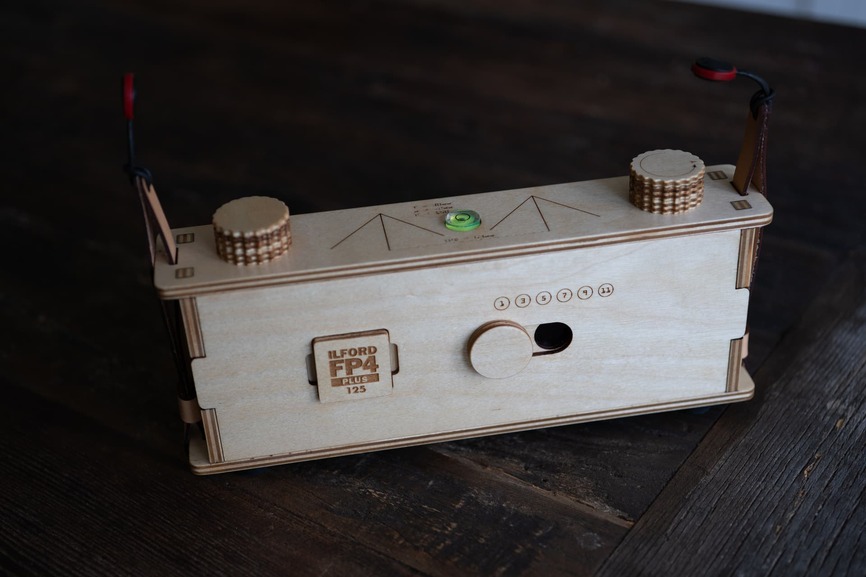
The back uses the film type tag I made for the 35mm camera. Since the camera uses two frames for one stereoscopic exposure, I engraved the numbers 1-3-5-7-9-11 above the exposure index window to remind myself where I need to advance the film for each exposure pair.
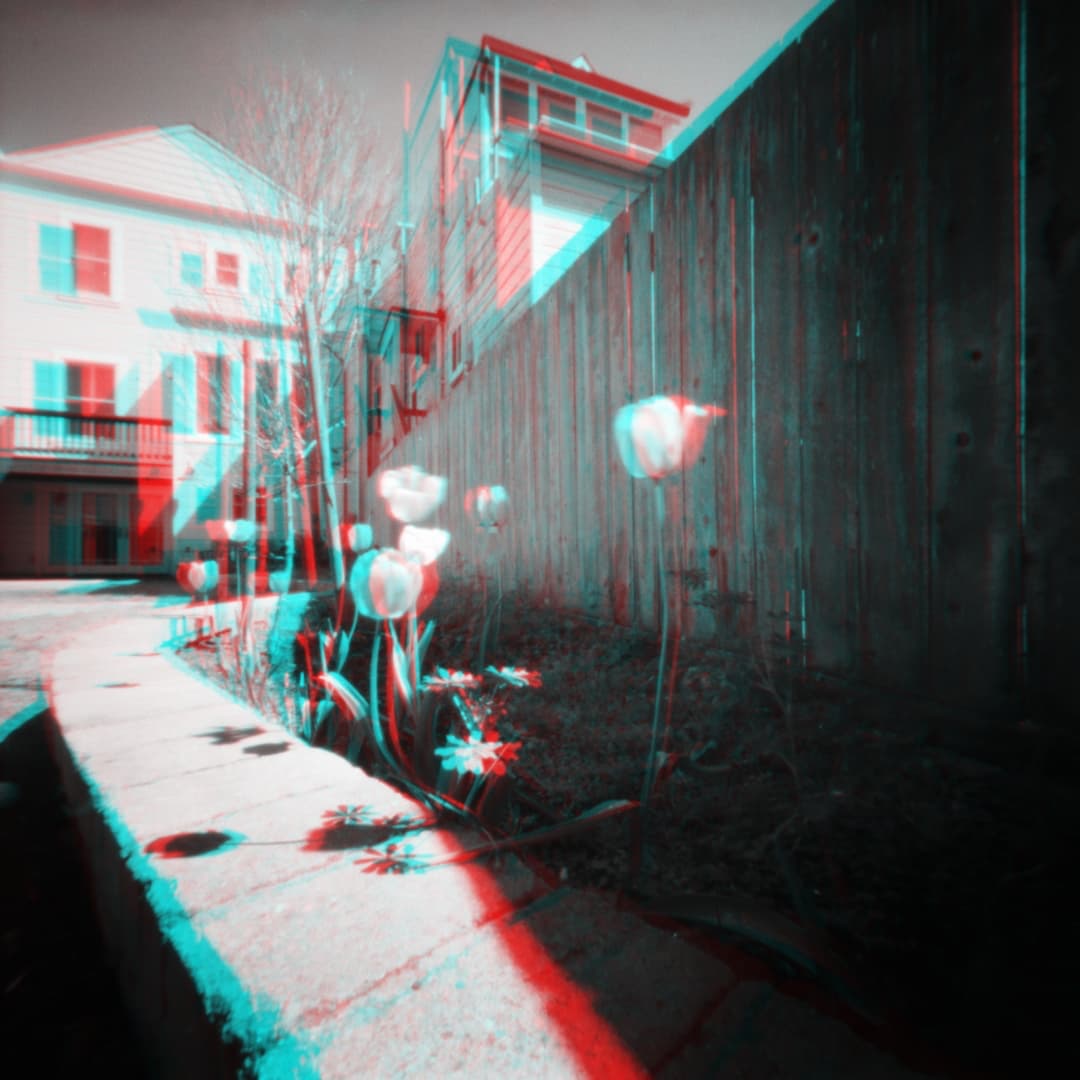
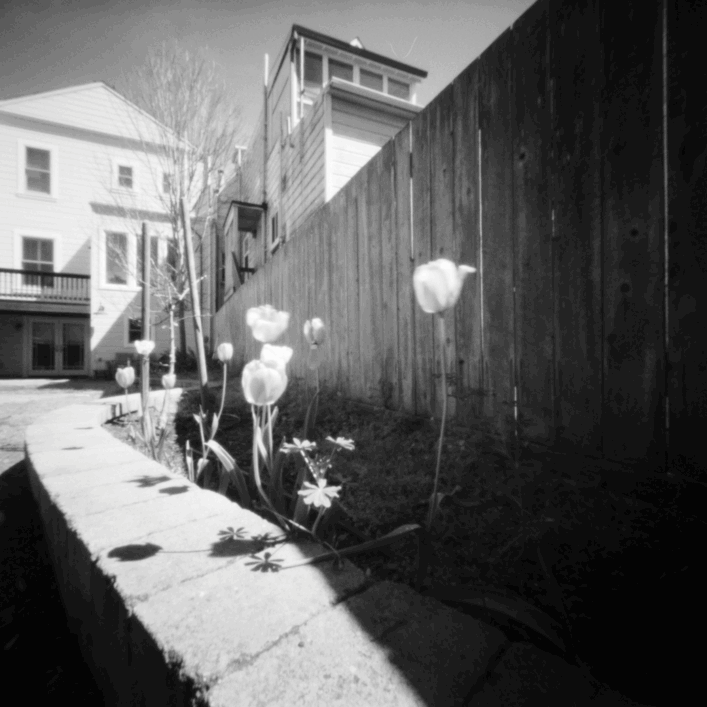
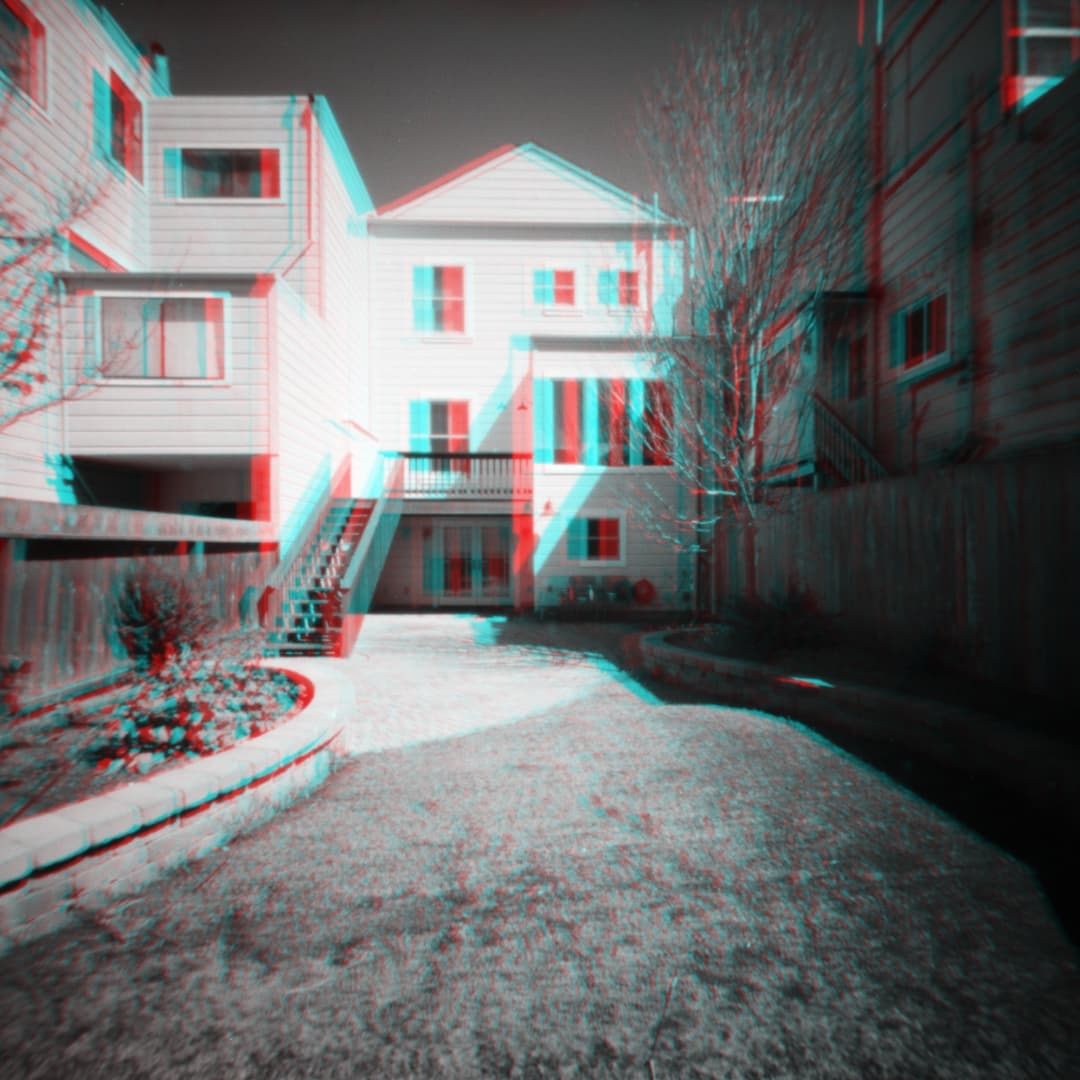
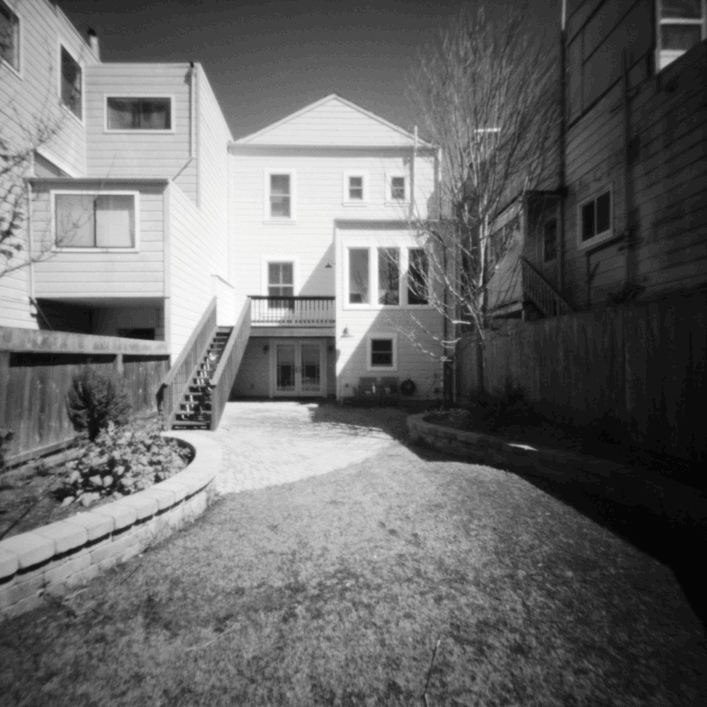
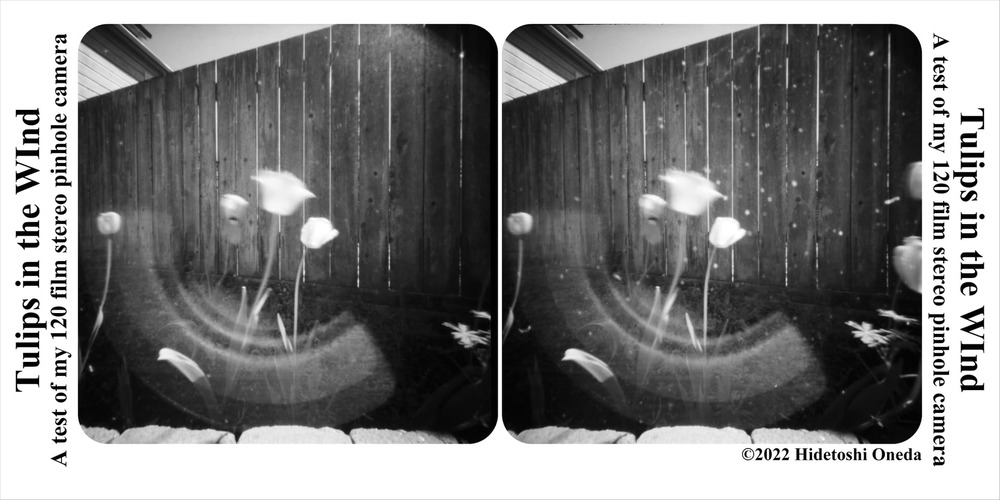
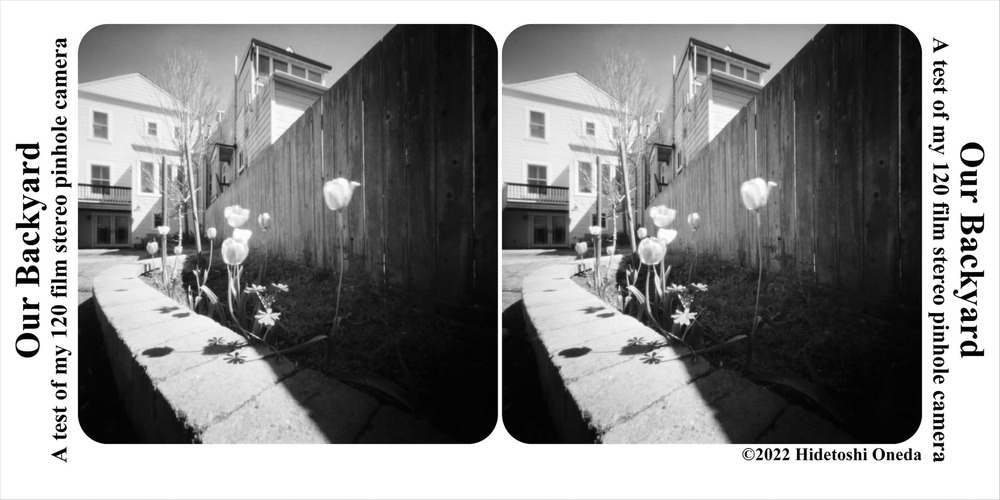
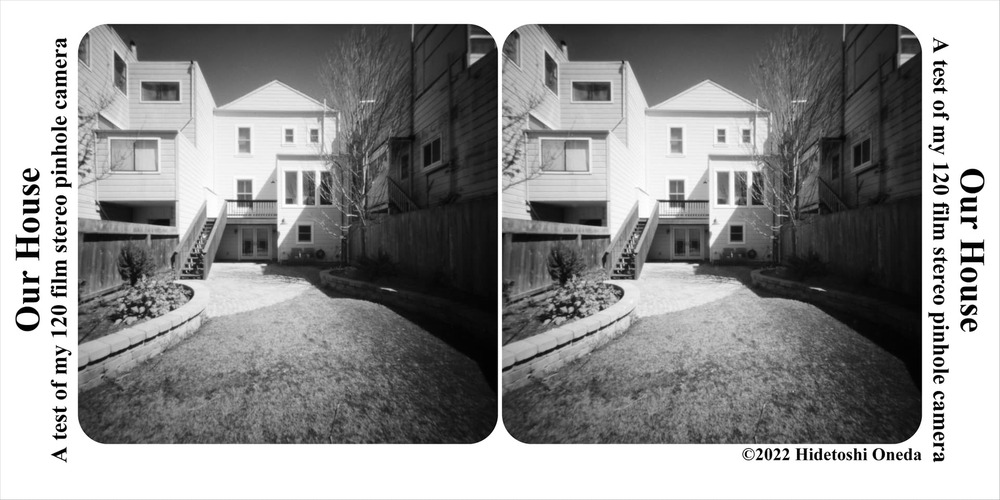
Here are some sample images of my backyard (yet again). I have two versions of each image. One requires anaglyph glasses - you know, those red and blue glasses that were popularized in the 50’s? I use them for my VR work so I had them handy. The other type is an animated gif that flashes between the left and right images. It’s a bit annoying, yes.
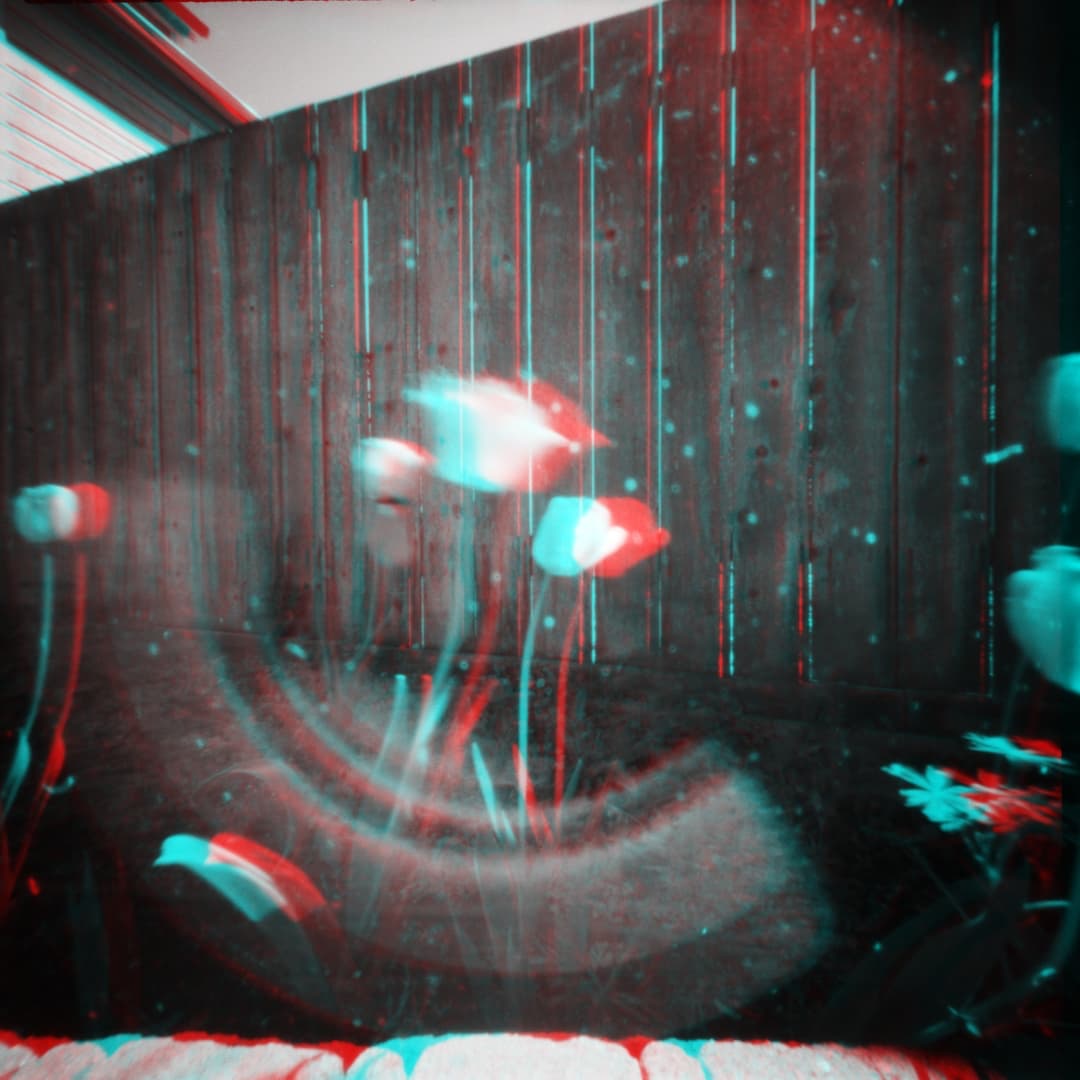

If you have a stereo viewer, either an antique one or one you made yourself, you can print the images as cards. They are the classic 7" x 3.5" size card. These were made using the excellent freeware, Stereo Photo Maker. The website looks like it’s from 1997, but it is up to date and constantly being revised.
The images even work in a VR headset. If you have an Oculus (now Meta) Quest or some other VR device you can see them on YouTube with this link. It’s possible to watch as is but it won’t be 3D.
I must mention and thank community member Stephen, AKA @OldFrog who has encouraged me to finish this design and gave me some wonderful insight. Thank you Stephen!
And thank you all for your time! I’ll see you in the next one. Cheers!