I saw a huge one sculpted to look like a dragon once. Pretty sure that is optimal.
4 Likes
Absolutely. I’ve built a few more and each one benefits from the previous ones.
I’m trying to decide if I’ll do a mortarless one - I figured out the math that’s required to trim the firebricks in complex trapezoidal shapes - pulling the sides inward at the correct angles so each fits tightly to its mate and the same for the top & bottom.
I’ve also got some thoughts about putting in quartz lights as well as a gas-fired ribbon burner to make it easier to use.
Yeah, there’s one over in NY that was built that way before I built mine (he used a different design). I just put the dragon gargoyle on the peak of my oven’s roof so it looks like he’s smoking when the oven is fired.
3 Likes
That’s a very elegant pin hole camera! I made a crude one over 50 years ago in which I literally used a pin to poke a hole in a small piece of aluminum foil, which I glued onto the front of my home made box camera. I used 620 B&W roll film , and the “shutter” was a wood plug that fit into the front of the camera. The effective f-number is simply the distance from the “lens” to the image plane divided by the diameter of the pin hole. Once you know that and the film speed, you can use a standard photography light meter to determine the exposure time. The resolution of the image is limited by the size of the pin hole, but as your sample photos demonstrate, such a simple camera can produce terrific images!
4 Likes
Thanks! And thank you for sharing your own pinhole adventures. Will you take it up again? Do you still have it? I’d love to see it!
Awesomeness
6 Likes
Great addition to the camera! If I recall correctly, my longest successful pinhole shot (high school photography class) was 45 minutes.
3 Likes
Somewhere around 60 some years ago my parents had purchased a refrigerator and a few other things that came in huge cardboard boxes and a couple with wood supports that I was able to build a two-story “fort”. As it was Arizona there was not much moisture, but since you entered the upper box from below, it was quite dark so I put in some pinholes and so could watch the image on the other side of the box. That was my pinhole experience ![]()
4 Likes
Wow! That’s magical! Thanks for sharing!
1 Like
Wow! That’s long! My longest do far was 15 minutes. Question: what do you do doing those really long exposures? Can’t really walk away and come back later (unless it was in your backyard or something like that). I’ve heard about people bringing books. What is your favorite thing to do during a long exposure?
2 Likes
I would draw in my sketchbook during exposures. I made my camera way too big, to fit 11x14 sheets, and it was not particularly sturdy as it was made from a cardboard box and gaffers tape. I had been inspired by learning about the F64 club, and wanted to try for an extreme depth of field… and then went and took my photos under a bridge where the horizon was only 30 ft away 
The camera fell apart pretty quickly, I only ever produced a handful of successful prints.
3 Likes
Unfortunately I don’t still have the pin hole camera from years ago when I had a dark room in my basement. Of course there were no smart phones or digital cameras at the time, and I never thought to take a photo of the pin hole camera. After seeing your beautiful pin hole camera, I’m mulling over whether to make another one. However, since I don’t have a dark room, I would go direct to digital using a camera or iPhone to capture the image off a ground glass screen. Not sure how well it would work, but it would be fun to play around with it.
On a related photo subject, I used the Glowforge to make a couple different versions of a slide copier/digitizer. Some versions could accommodate both a digital camera (I tried several cameras) and iPhones. The results were pretty good with all of them, and my Sony RX100 with 20.1 MP images were comparable to those with my iPhone 7 plus. Minimum focus distance on all the cameras and the iPhone meant that the slide image area didn’t fill the frame of the phone or camera, so the resulting images had to be cropped. Macro settings didn’t seem to help much. One advantage all of them was that I could focus on the center of the slide image to set the exposure. Also, when using the iPhone, the digital photos showed up in “Photos” on my iMac soon after, and I could quickly crop and enhance them. For my light source, I pointed the copier at my iMac screen where I had a big blank white rectangle on the screen. Overall, results were surprisingly good and better than results from a slide digitizer I had bought on Amazon. Anyway it was a fun project, and I copied many hundreds of slides- which I’ve now discarded. Of course, many of the original slide images weren’t great, but had sentimental value, and some Kodachromes dated back to the 1940’s.
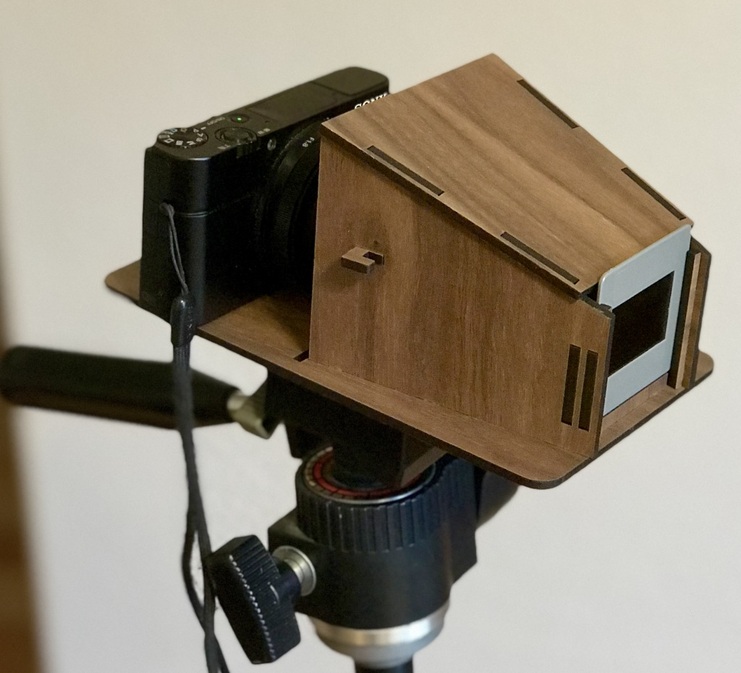
Sony RX100 copier

iPhone version
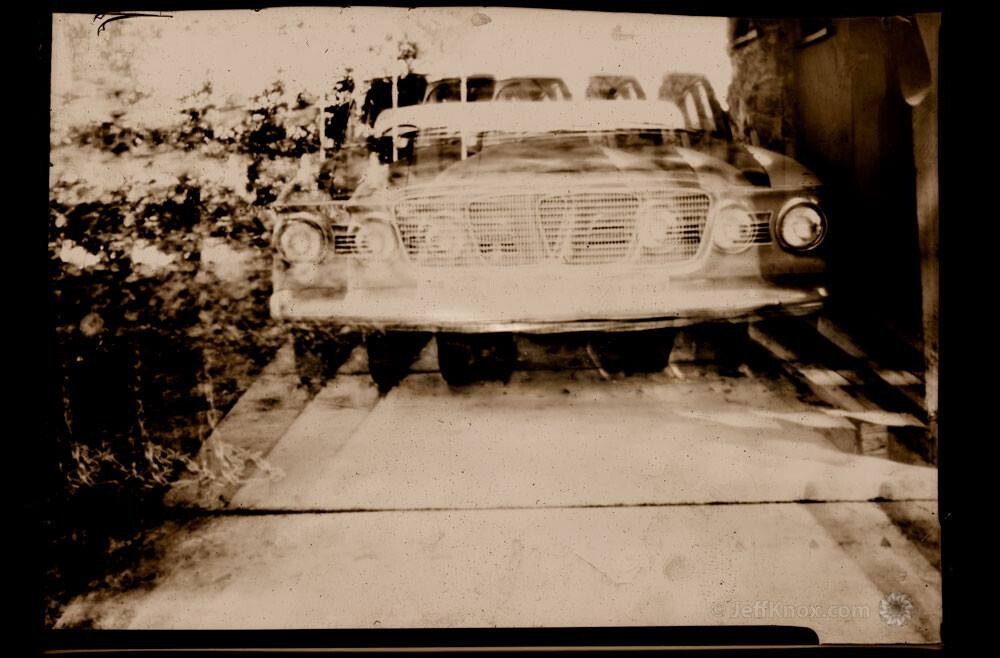
Captured with iPhone 7 plus- from a project from almost 50 years ago.

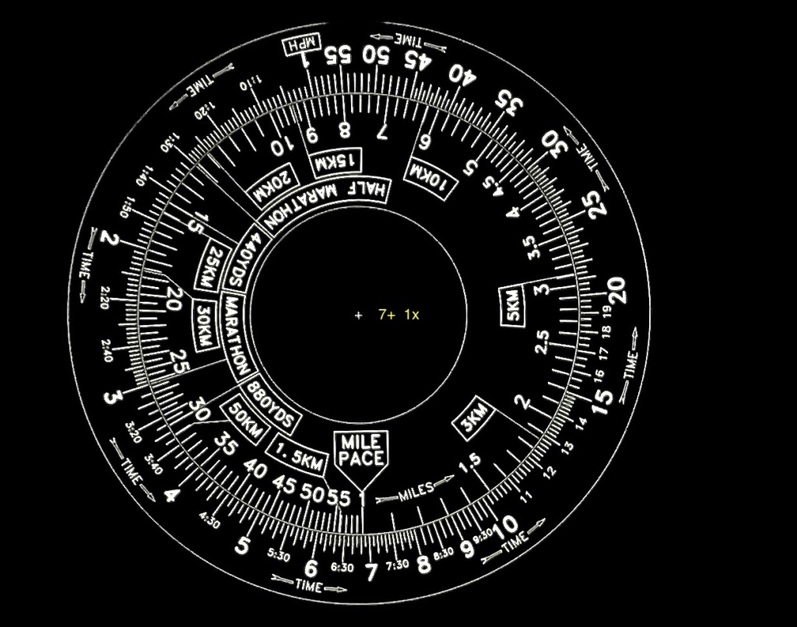
Updated version of old pace computer project- made on my Glowforge
19 Likes
Okay, I have never seen a time/speed/distance calculator just for runners before just now. Even though I don’t run it is inspiring as the concept could be applied to any paced activity.
2 Likes
I think you rediscovered the “camera obscura”. My understanding is that a couple hundred years ago, artists would make a very small hole in one wall of a darkened room and trace the image of the scene outside that was projected onto the opposite wall. Great way to create a realistic image if you didn’t have much artistic talent?!
4 Likes
It was used very much in Renaissance times. I understand there is/was a building in the Vatican with a small hole that would enable them to trace the sun and moon very accurately to time the various holidays.
The finest artists at that time also were trying to get a handle on perspective, and while we have less respect for “camera real”, they did not have cameras, and getting 3d on a 2d image was a great challenge.
4 Likes
Mama, don’t take my Kodachrome away!
2 Likes
Sweet!
Amazing stuff. I’ve got slides from the 60’s and while the Kodachrome ones are still as colorful as the day they were taken, the Ektachrome slides are quite faded (bluish). Too bad they discontinued it.
2 Likes
OH MY GOOD GRIEF - THIS IS SO AMAZING 


1 Like
Very nice camera and a great video. Pinholes are a lot of fun. Thanks for the writeup and build photos.
The math behind the diameter is fascinating. It has been a long time since I have done calculous so I wouldn’t have been able to derive that by myself. ![]()
In the past I’ve used the calculators on the Mr Pinhole page. You can start with any part of the equation. Out of curiosity I used the value from the video (4x5" and 65mm) to see what Mr Pinhole came up with.

It was close but didn’t quite agree as the site recommended a .34mm pinhole.
Several years ago I 3D printed a lens plate for my 4x5 camera that had a removable pinhole shim and integral shutter. I was playing around with other designs and made a shim that had three pin holes in it.
It was a fun experiment and one that I need to get back to one of these days.
Making your own pinhole is pretty easy. You can pick up a set of precision drill bits cheap. Then by just spinning one between your fingers you can drill through the brass shim. If you use slight pressure it won’t dimple very much and then you can give it a couple of passes on the back side with some sand paper to remove the dimple. That’s how I did the three hole setup.
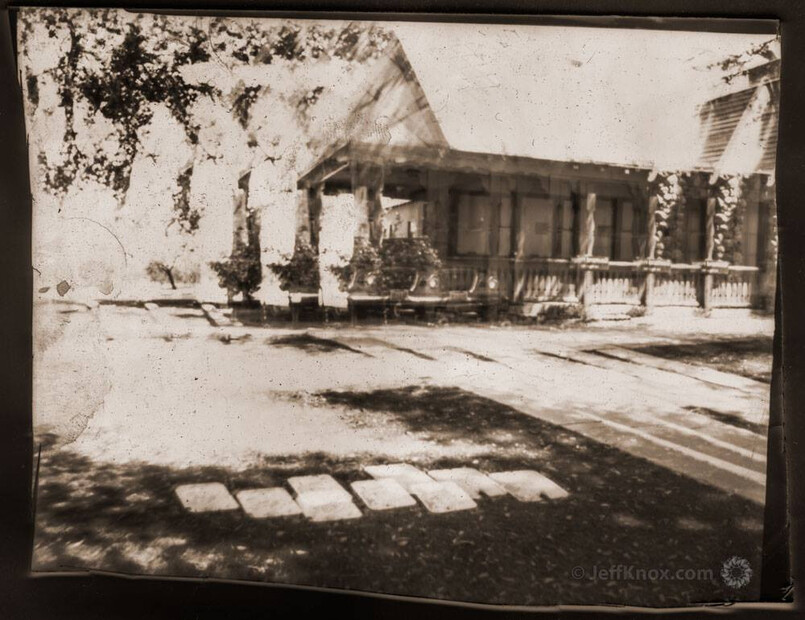
Talking about the ethereal look of a pinhole image this is one of my favorites:
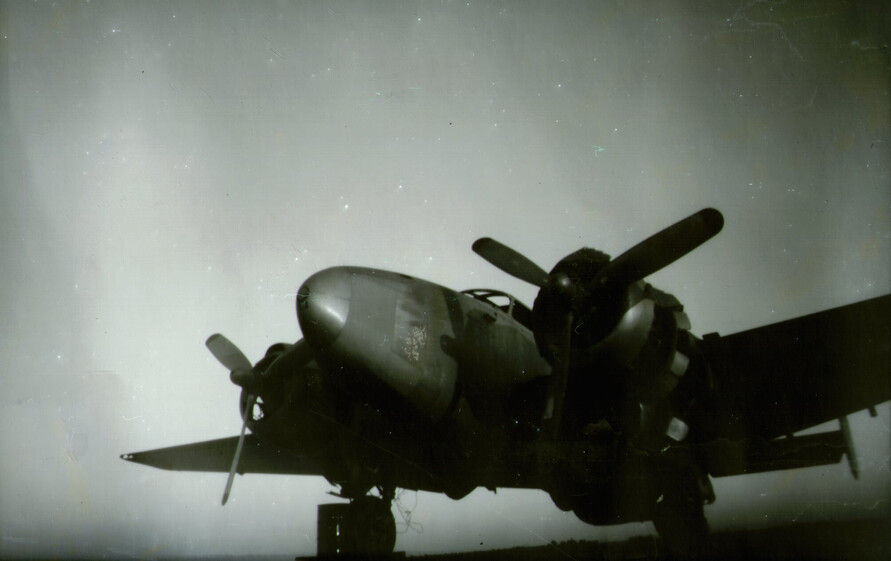
It was taken on photo paper rather than a film negative. I set up the camera right before sunset and left it for 20 or 30 minutes while I ran around scouting other locations for the night. I just stuck the camera in the dirt and piled up a small mound to prop it up. The view was a total guess.
I love how it looks foggy. It was actually a clear evening. I don’t know what the bright spots that like like stars are caused by. When the paper negative was developed it looked pretty bad and quite faint. When it was scanned and inverted I loved the image.
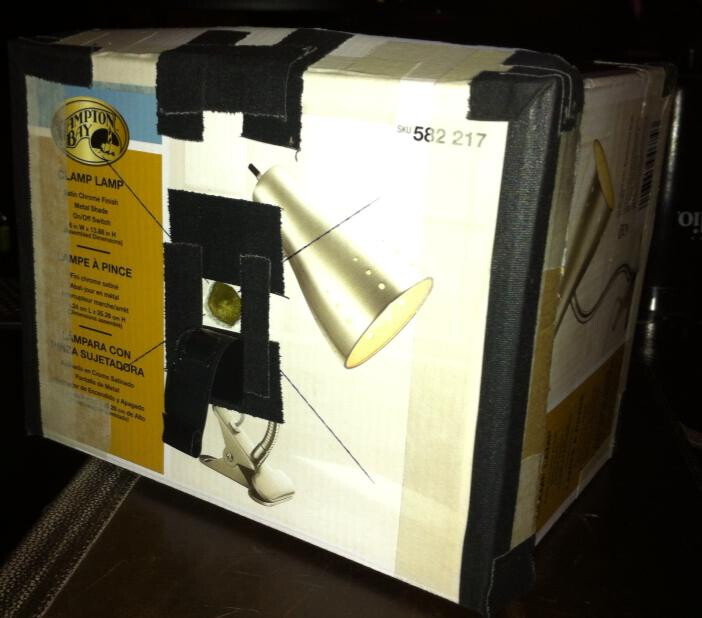
It was made with this marvel of technology.
Please post more of your pinhole journey.
9 Likes
Wow, there’s so much here I don’t know where to begin! But most of all, thanks so much for sharing your experience and insight. It is truly astonishing what pinholes can do. Because we have control of the pinhole we can arrive at some unique images that no lens manufacturer can match. I too am interested in doing multiple pinhole in the near future. Very cool! There is so much we can play with, the possibilities are endless! I am intrigued by the picture of the plane. At first glance it seemed like a model. There is an unworldly character to its “air.” I guess that’s the ethereal quality of pinhole photography. What bird is that BTW? PV-2 Harpoon? I don’t know my planes like I used to. Those spots: I have two negatives that had similar spots and on close inspection I noticed they cast shadows! I am not sure what they were but they seemed to be on the negative itself and substantial enough to cast micro shadows. Sand, perhaps? Sand gets everywhere where I live. The appearance of your camera: the fact that you can get the images you have with a cardboard box makes it by definition, a marvel of technology! But in all seriousness, I guess what makes pinholes so much fun is that technology (in the sense that it implies modernity) is far, far less important than ingenuity. Anyway thanks so much for sharing. I’m working on a compact pinhole I hope to take on a trip soon. I don’t know if it will be done in time but if it does get done and I have time to do a write up, I’ll post. If not, I’ll be taking this camera on the trip and I’ll post new photos to this thread. Cheers!
2 Likes