I’ve been wanting to make a pinhole camera ever since I got my . It is after all, just a box built to high tolerances and what does a do best if not make a box to high tolerances - right!?
The math for the optics came from a man named Cyrus Arthur (The Science of Photography) who posted a YouTube video a few years ago. This was immensely helpful.
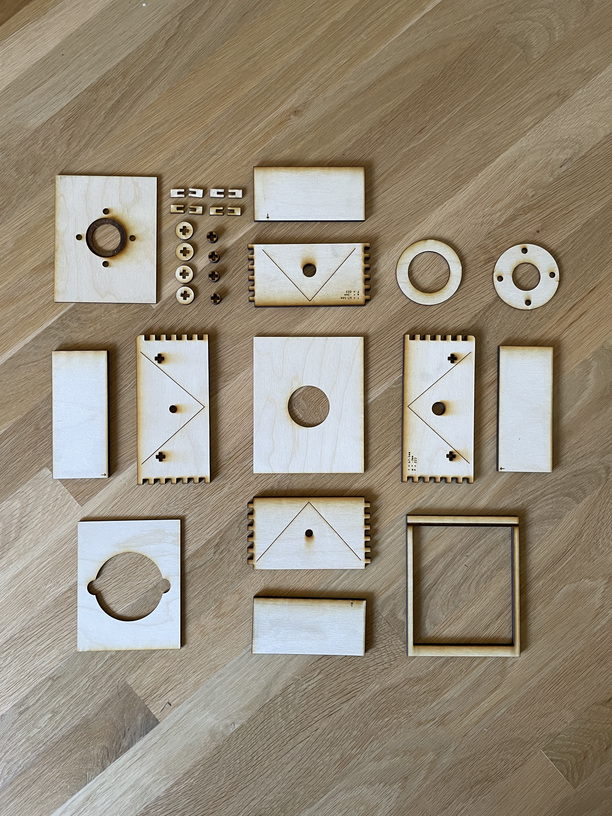
This gave me the depth of the box I needed and the diameter of the pinhole I needed to get the view angle I wanted, which was on the wide side. It comes out to the equivalent of an 18mm lens on a 35mm camera. The rest was measuring the dimensions of a standard 4x5 sheet film holder so that it fits nicely on the back of the box. It is critical to get these measurements correct because it effects the projection length from the pinhole to the film plane and the light-tightness of the camera.
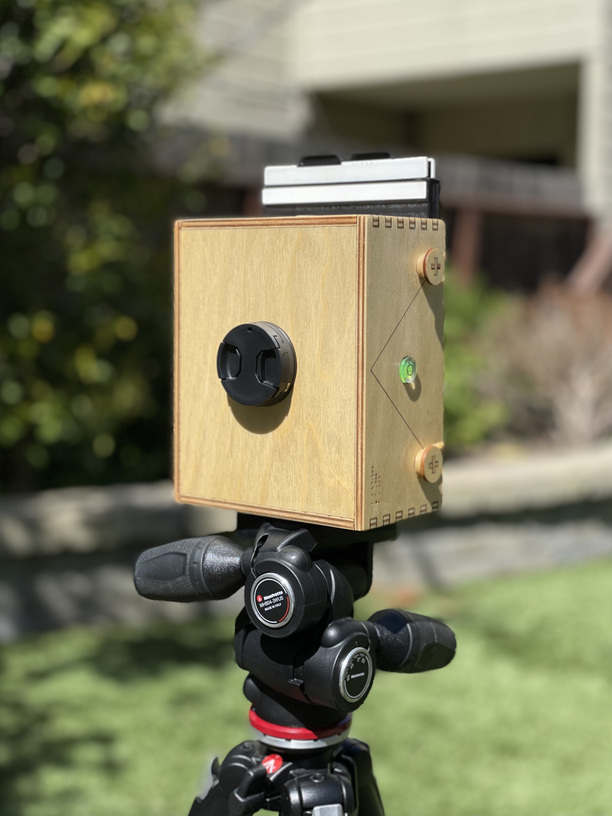
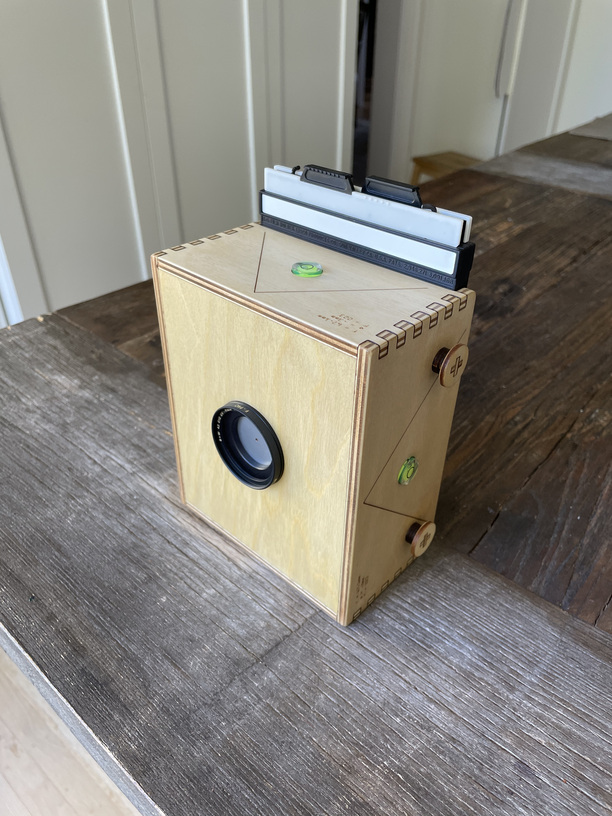
I added some spirit levels to one short side and one long side so I can get level in both portrait and landscape views. There are also 1/4"-20 screw threads inserted in the sides opposite of the spirit levels to accommodate a tripod. I scored the path of light from the pinhole to the edges of the film plane to assist in framing the image. I inserted a step up ring on both the front and rear of the pinhole so that I could attach filters. There are a lot of other teaks I did to make this a proper camera like using stepped joints etc., but it would probably get too boring (if this is not already).
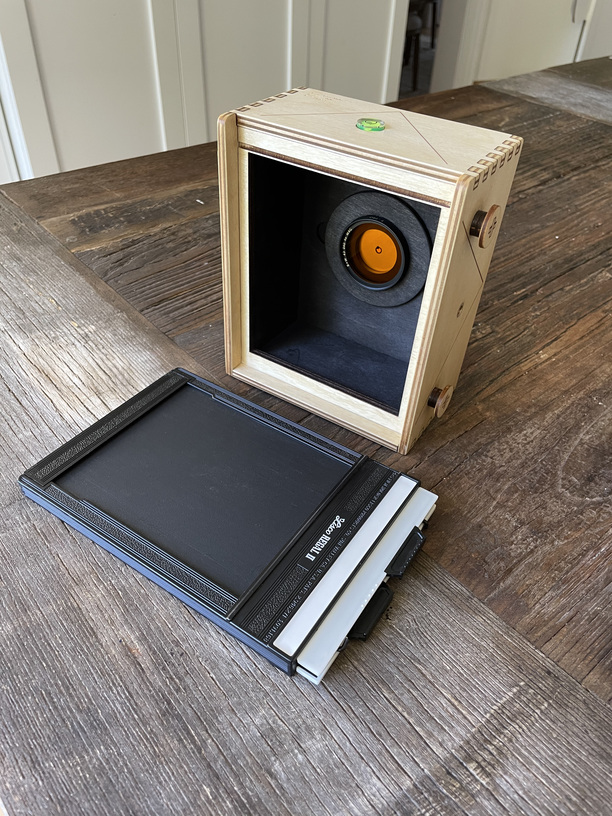
The pinhole is held in place with a retaining ring held in by magnets. I did this so that I have the option of changing the pinhole in the future. Here you can see an orange contrast filter attached to this retaining ring.
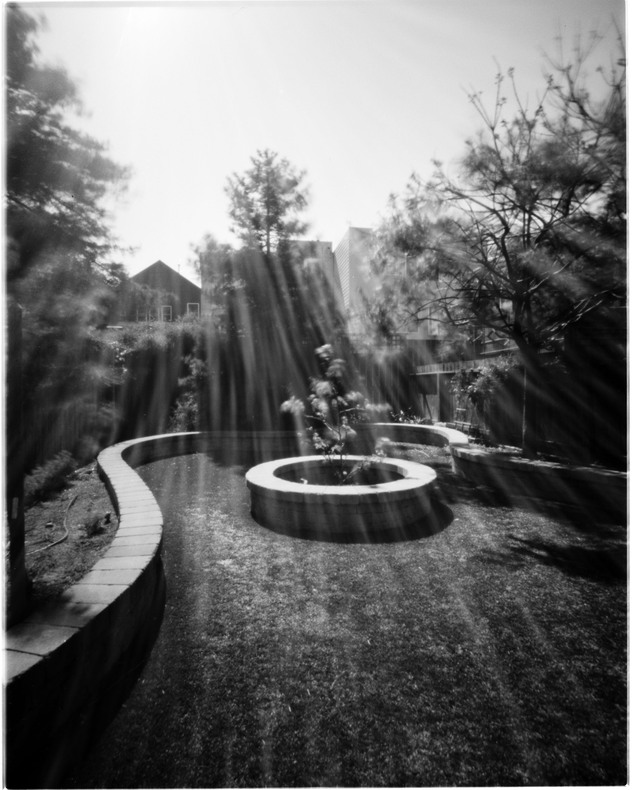
And these are the test shots. This one was pointed at the sun to see the extent of the flare, which was significant, but kinda cool. The exposure was about 5 seconds and it was a windy day so you can see the leaves of the trees get fuzzy from the motion. It gives a dreamy rendering to the whole scene.
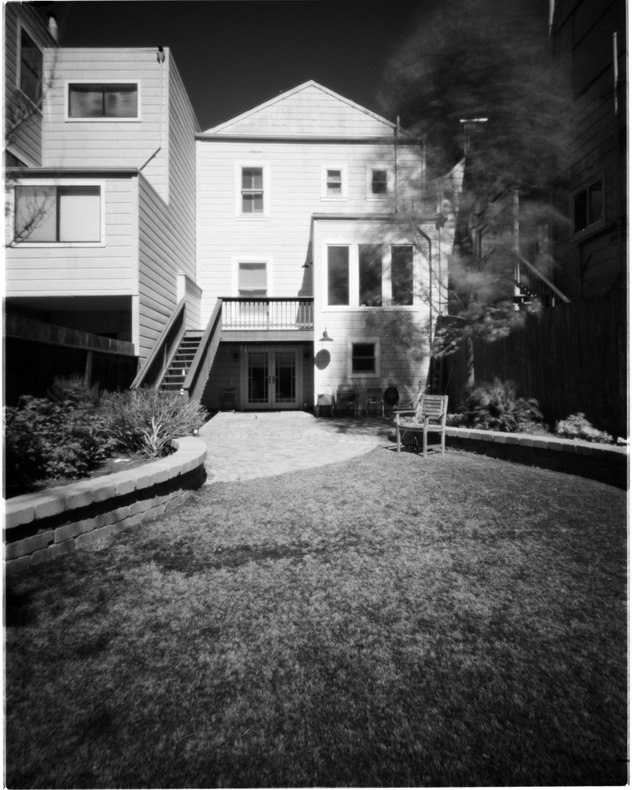
The back of my house. 9 second exposure. The maple tree is getting quite a workout from the wind.
For those of you who are darkroom/photo geeks, the film was Ilford FP4+ shot at ISO 125. The negatives were processed in HC-110 dilution B for 9 minutes. I scanned them and used NegativeLab Pro in Adobe Lightroom to reverse the image. Not a lot of adjustment was made. The exposures were pretty much as I planned.
All in all I have to say it is an incredibly empowering feeling to build your own camera and see those images appear intact on a negative. This is coming from a guy who has spent his life getting the “best” lenses and “best” camera bodies - and for what? To get some kind of optical perfection that does what? I finally feel free of the photo gear rabbit hole. Want a great camera? The best camera is the one you make!
I understand completely. I think color has its place but like everything else in visual arts, it must be used correctly. Sometimes color is the point of the picture. But sometimes it adds a layer of information that is not needed for the subject - camouflaged as you say.
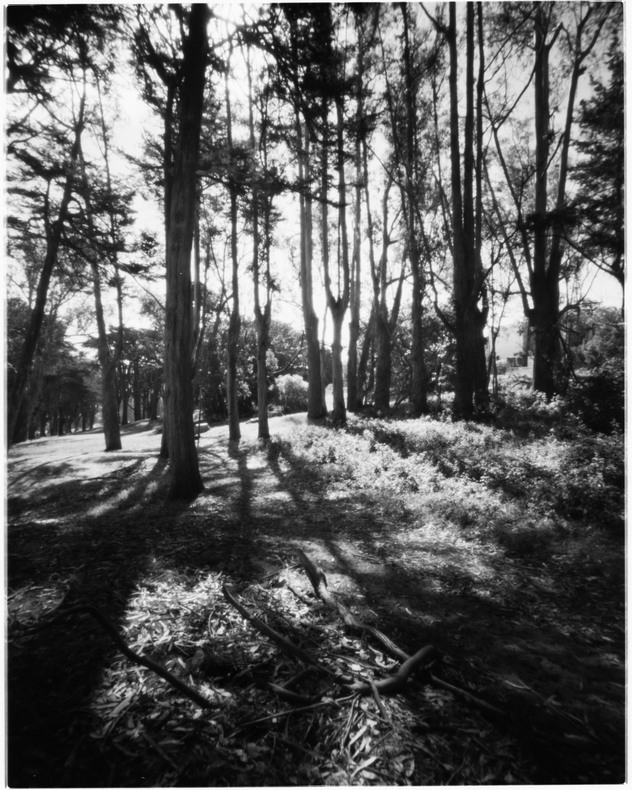
I took this shot yesterday with the same camera in the Presidio. The forum won’t allow me to post it at its original resolution but I think you can see the texture of every leaf on the trees and on the ground. Well, at least the “impression” of detail - and that’s what counts.
This is way cool. I didn’t even know that you could still source photo film.
I did my first photography on my dad’s Browning that was obsolete when I first touched it.
That is an interesting post! It’s cool to know that it can make a hole as small as 64 microns! That works out to .064mm. My pinhole is .3mm. That’s a typical size. They hover around .15mm to .4mm - sometimes larger but rarely smaller.For the purposes of a pinhole camera, the pinhole must be made on the thinnest material possible because the thicker the material the more narrow the angle of view will be. It also must be opaque to light, which is why wood and acrylic would not work. I’ve researched the possibility of cutting brass shim with the Glowforge but the consensus was, “do not do it.” Usually the pinhole is made by a needle of a known diameter and piercing a brass or aluminum shim. The hole is then sanded down to get a smooth edge. Size can be checked by scanning and counting the pixels across the diameter. For this first build I used a laser etched pinhole purchased from an optical supply company because I wanted that to be a known quantity. This was, after all a proof of concept and a proof of the math. In the future I will make my own pinholes using the above mentioned method and if something is off, then I know that it was the pinhole and not anything else in the design of the camera. That said, my aim is to get less precise and more unpredictable in hopes of an aesthetic “happy accident.”
Sure! You can get almost anything. Which Brownie was it? If it used 620 film that was indeed out of production for a long time, but it was revived by different groups. There are also workarounds like re-spooling 120 film on 620 spools (which are available for sale new or old on eBay). Long story short, film is not dead. There is always some way to shoot that old camera.
Right?! I mean that moment right before the image appears on the paper, or when you see the negative come out of the tank for the first time, some things are special because you have to work for it, because you have to wait for it. Convenience takes the magic away.
So much of the fundamental understanding is lost. Not just photography, but across the board.
If my phone died I don’t know how many essential numbers I could remember.
Go-To telescopes, no knowledge of declination and right ascension in relation to the celestial equator required. No need to understand that, the machine will do it.
Great pictures you got for your efforts. Thank you for sharing that with us. Been a while since we’ve seen you around here. don’t be a stranger.
Thank you! Yeah, it really is incredible what you can do with this basic design. This is my first attempt at a pinhole camera and I was blown away by the results. It made me rethink my entire approach to photography. I’m hooked!