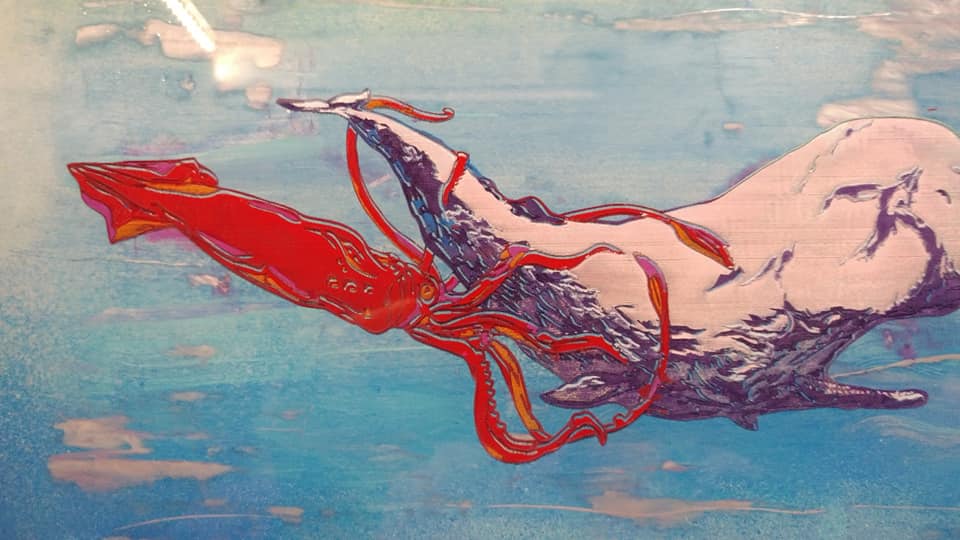
I saw a glass engraving in YouTube that I fell in love with and decided to try and replicate. I had to adjust my settings to get it to print on the glass. I’ve attached the link to the video and the video of my print. The paint seems to be cracking in the middle of me engraving the glass. I used dish soap on top of the glass before pressing start. Is this caused by my settings? Or should I print first and color after? Please help! I’m trying replicate what he did in the video. Thanks!
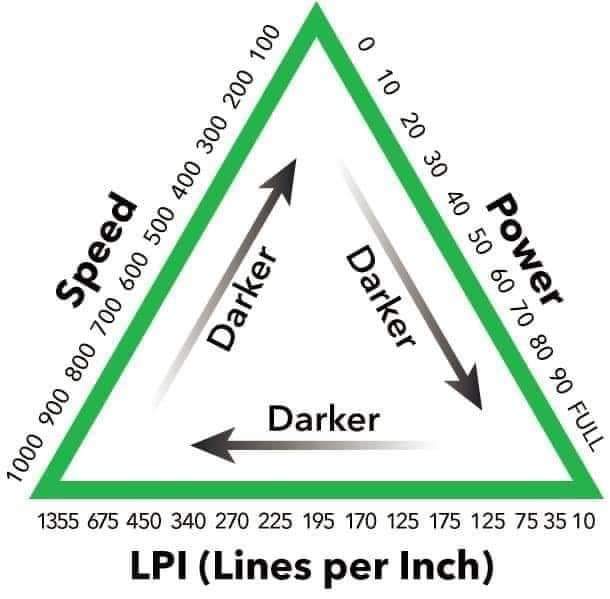
BTW my settings are 400 speed, 100 power, 450 LPI.
I’ve done a lot of engraving on painted acrylic and I’ve never experienced cracked due to the settings. (Not saying it can’t happen though.) But I have had a lot of cracking due to layering spray paint before the first layer was completely dry, and I’ve experienced the new paint lifting the old layer regardless of how dry it was. So is it possible the cracks were there before you started lasering and maybe they just got more noticeable when heated? I guess it’s also possible that the glass gets hotter than acrylic and that extra heat is causing the cracking, so all I can suggest is try upping your speed a bit to keep it cooler.
Not that it translates exactly because I was engraving on acrylic, not glass, but I used a setting of 800/full power/270 lpi for this and didn’t get any paint damage.
I went to the glowforge manual to educate myself a bit on the difference between speed, power and the LPI engraving. You’re right, it’s possible the speed is heating up the glass to the point of causing the paint to lift. This is my second print. I tried the settings the guy used in the video and it printed super light. But the paint did not lift. I’ll try keeping my settings the same but bringing up the speed to see what happens. I might just try the speed the guy used in the video, if not the one you use to see. Thanks!
The guy in the video was using a 15 watt laser. Your Glowforge is 40. And it doesn’t use the same scale for settings as other lasers.
I have no personal knowledge or experience with this kind of engraving, but I would say you are using waaay too much power. You want to just barely take off the top layer of paint. Lower power, increase speed. Do a bunch of small test runs so you can dial it in.
Yes, @chris1 is correct and you can’t rely on settings from a different laser, and my setting probably won’t work in the same way because I was actually trying to remove acrylic and paint, and you just want to remove paint. Just use the piece you’ve already made to test settings until you get it dialed in. If I were to make an educated guess, I’d start testing around 1000/50/340 lip, and then adjust from there. And keep in mind that as long as you don’t move the file or material, you can run the engraving again if it’s loo light, and it should line up fine.
One other thing of note - the Glowforge “engraves” glass by blasting off little bits of class from the surface. There’s always a chance that when the glass comes away, it might take some of the paint with it…
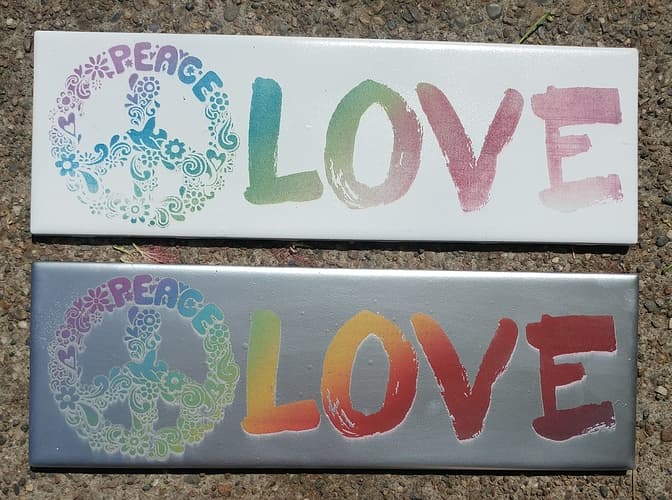
It took me a bit to find an old post of mine where I removed just one layer of paint off tile, but finally found it, and the settings might be helpful.
Ah, sorry. I was confused by the part where you said
In any case, I think you really just need to experiment. Try very low power and/or very high speed, to the point where it’s barely making a mark, and keep moving toward a point in the middle of “too little” and “too much” until you’re happy with the result. What works for someone else is not necessarily going to work for you — at best it’s a starting point.
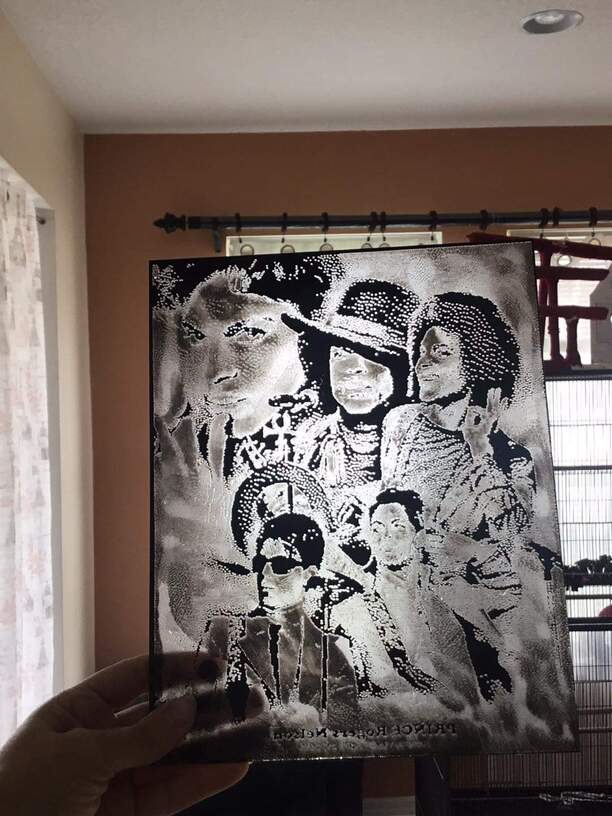
I might have worded myself incorrectly. But I think I’m almost there. This is the glass I engraved last night and it’s not perfect but it’s close. I think.
So I decided to clean the glass with water to see if it looks better. And this is how the glass came out after I did a water rinse to remove the soap that was on top of the glass.