Just over a week ago, Laserus Long was delivered. I set him up, he calibrated. I tried to print the Founders Ruler… nothing. Error after Error trying to send the design down to Laserus. Today it was decided this Laserus Long must go back to HQ and a new Laserus Long will be sent to replace him.
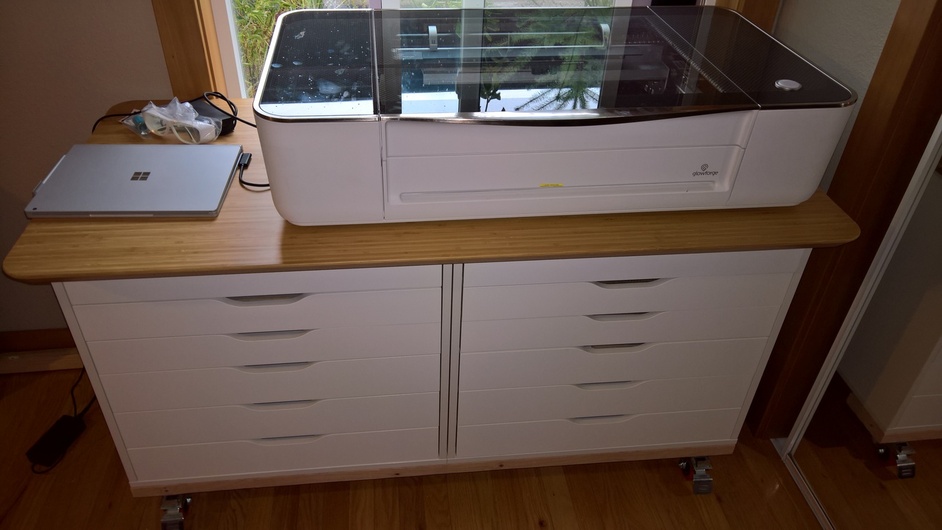
So I didn’t have a fun posting to make with pictures of things my new shiny (and it is Shiny) Glowforge had made. But I do have some to share of the table I made to be the workplace for it.
I wanted a table that had storage for materials, had a little extra room to set things next to the printer, and could be easily moved so I could pivot it for pass-through usage. I almost got a mobile workbench/tool chest from Home Depot–but the local stores were out of stock. I’d liked the multi-shelf IKEA hack that some have done–except I was concerned about stability when moving it around since all the stacked shelves are held together by glue.
Then I found something I thought would work. Combine 2 Alex drawer cabinets (I’ve had my 2D laser printer sitting on one for several years) with a table top tying the two together:
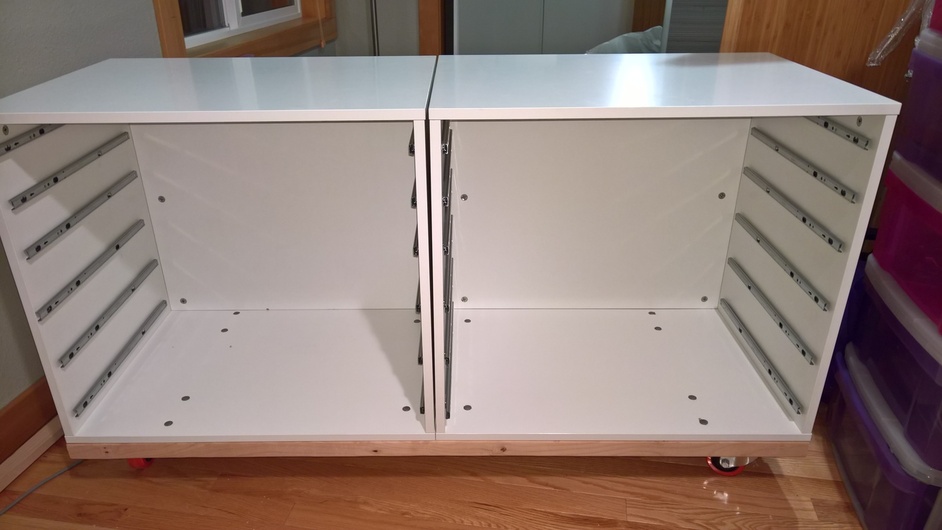
So I started by putting the two Alex units together.
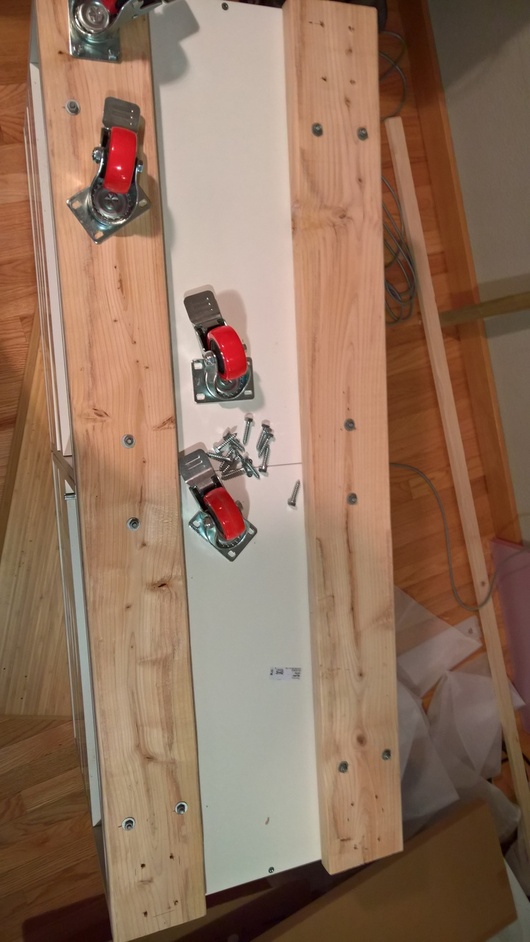
And then I found that my hardwood-on-concrete-slab floor was definitely not uniformly flat, and having the cabinets on 8 casters (four on each) was not going to be a workable solution.
So I added 2 x 6 supports on the bottom, bolting them to the cabinets using carriage bolts so the bolt heads inside would not interfere with the drawers. To the 2 x 6s, I attached 3" locking casters with lag screws.
The table top is HILVER:
It’s a nice Bamboo surface, quite stiff. However, it is not solid. I knew this going in from the web page. The center is described as a honeycomb with a bamboo frame. I just didn’t realize at the time that the bamboo frame was so narrow. The table top has pre-drilled holes for attaching legs:
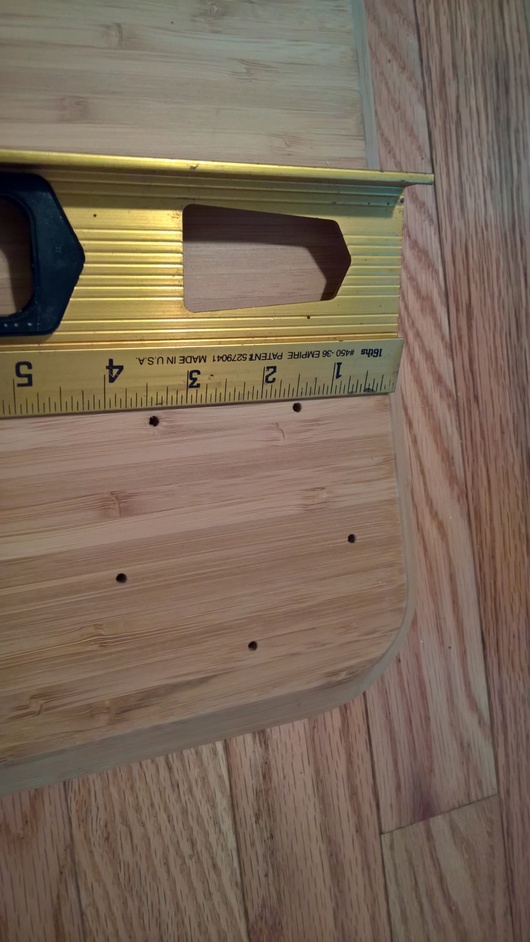
The corners have solid material behind the bamboo. But drilling test pilot holes in other locations found that the frame between those blocks is does not extend even 1/2" from the sides on the bottom (The edge is beveled so the top surface is larger than the bottom by roughly an inch on each side.
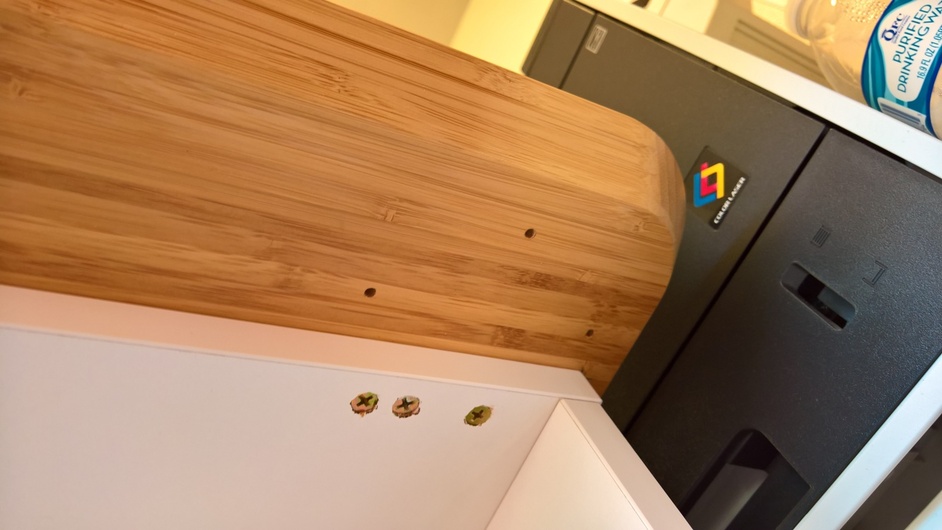
Therefore, my plans of attaching the table anywhere but at the corners were shot down. So I carefully placed three particle-board screws in each corner
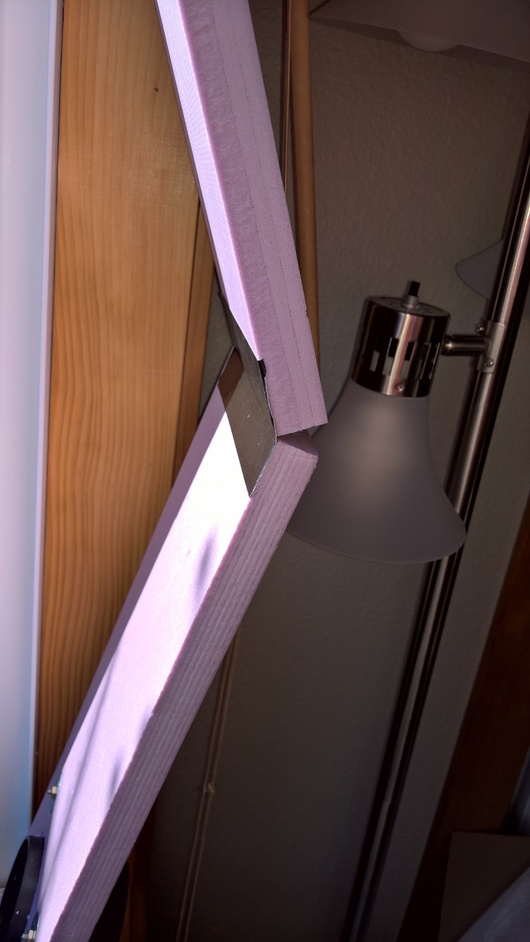
For my venting solution, until the filter unit arrives, I needed to vent out a 4-foot tall horizontal-sliding window. I found this 2’ x 2’ foam insulation panel at Home Depot:
I found that I could cut half way through with a box cutter and then snap it along the score line over the edge of a table. Cutting it in 8" sections, I was able to make an 8" x 46" (inside height of window track) insert by combining two of them. I used the box cutter to cut a hole sized specifically for this blast gate
https://www.amazon.com/gp/product/B06W9MT3S8
I attached it by drilling holes in each corner of the blast gate frame and bolting it to the foam using fender washers on the outside. Note that the build quality of the blast gate is not the best. It is a bit stiff to open or close. When I first opened it while unattached, the gate slid all the way out because one corner of the frame was not properly glued and the tab that is supposed to stop it in the full-open position slipped past its normal stop. The bolts attaching it to the foam, however, will prevent the plastic from separating.
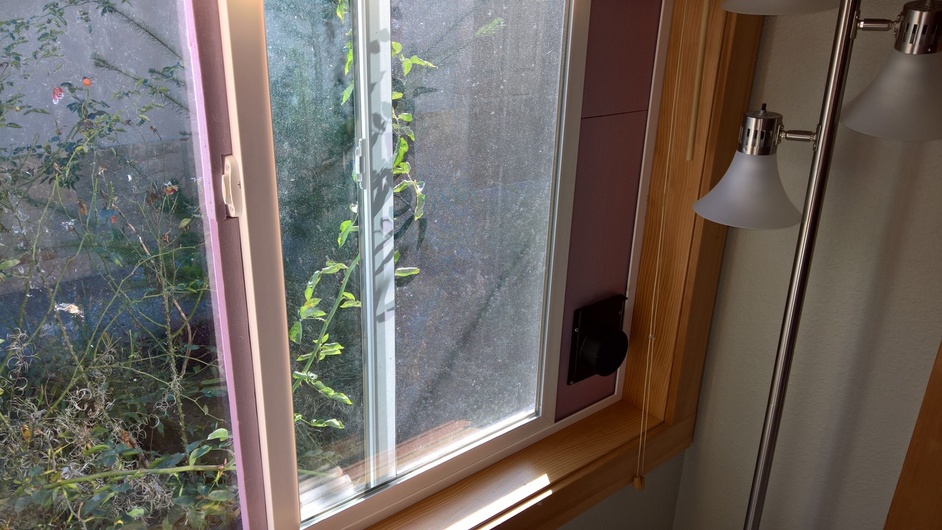
I used some of the left over foam to create pieces to wedge between the inside frame and the non-moving window–both for insulation and to prevent smoke from wafting back in through that 1/2" gap. To make it easy to install and remove, I used Gorilla tape to connect the top and bottom half of the insert only on the outside so that it forms a hinge as well as sealing the gap. That way I can insert the top and bottom in the tracks and then push it straight.