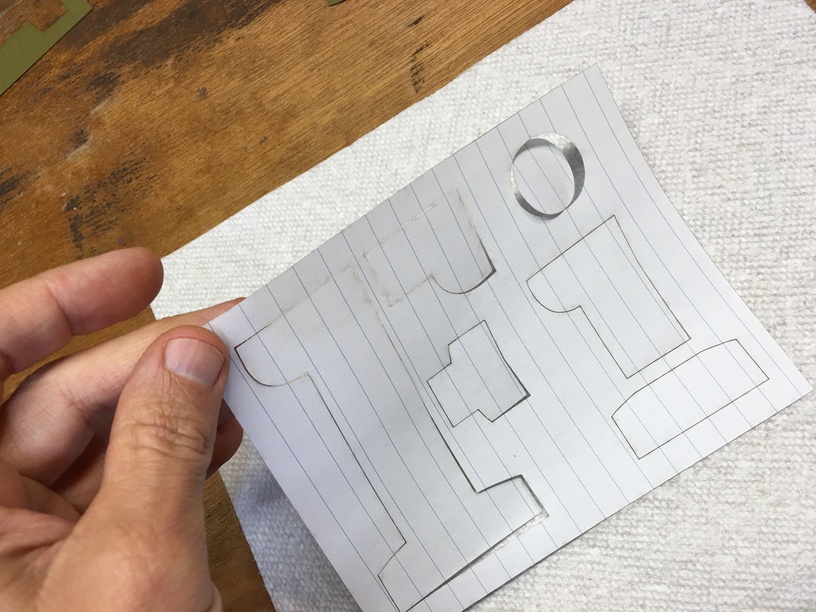
I placed 10 mil Mylar on top of a sheet of paper. It measured at .0135". Held both down with magnets in the corners. Ran at 250 speed, 25 power. Beautiful cut. The one on the left had a few pieces BLOW out, and since they landed where another cut was to happen, I did need to use my blade and cutting mat to get the few areas that didn’t cut through. Easy peasy.
On the right of the first photo you can see where the paper kind of held the detached pieces. Kind of cool.
That being said … next time, I’ll use the Seklema mat!
Needed a couple of stencils for a Christmas card I’m working on. This was a purchased design from AwesomeSVGs. (Actually, Omar accepts donations to support his blog. He more than earned my donation, in my opinion). These were just one part of the card he put together. (Although, the cardstock pieces (not shown here) were done by printing and cutting on the Silhouette Cameo).
Holy Cow, that cut so clean! I still remember a Halloween card with a little bat you showed us and I can’t wait to see what you make with the stencils. The scale one intrigues me so make sure and share the results with us.
OK, I’m a dork and just went to the AwesomeSVG site and saw that the “scales” were actually roof tiles. Now it makes more sense lol.
You should investigate custom dashed lines in svgs. You can dial your dashes in so that the loose pieces are barely held in place and punch out with virtually no trace. For paper I use a 20mm dash followed by a .25mm gap. Paper punches out perfectly, no flyaways.
I like the dashed lines for paper. This Mylar is so thick, if it’s not cut, it will need a blade. A paper sprayed with temp adhesive might solve it for me. Or again, I did spend the money on the Seklema mat.
I got tabs like this to work on thick materials. It’s all about experimenting with the gap, you wants the kerfs to almost touch. It’s harder with something like Mylar but definitely doable in theory.
I love making stencils! Like you, I cut them on sacrificial card stock (I’ve been hoarding my Seklema mat because I don’t want to put a dent in it. Isn’t that dumb?)
I’ve only used my Seklema mat once, and really didn’t use the right settings. Very unlike me to not think it through more. Would like to use it a LOT. The paper really seemed so nice, and gratifying to have most of the parts just kind of stuck to it. That’s the kind of clean-up I like!
Life is starting to calm down a bit for me, and hoping to use it to help with cards. Want to make some more stamps, too!
I’ve created my own Seklema mat, free and easy to make.
Being using it for quite a while now and never had any problem with it!
Once you learn how much glue you need to add to it, leave it to dry, works PERFECTLY!
The Seklema mats are definitely ablative. I have one that has been used for hundreds of jobs (maybe a thousand or so, now?).
I tend to err on the side of cutting all the way through the paper vs. protecting the mat. I am also often cutting the same intricate jobs in approximately the same spots over and over, Which is likely harder on it than lots of distinct jobs.
It looks beat up but, still works well. I do have to clean the ash build up off of it regularly.
I have a brand new one to swap in for when it becomes unserviceable in the middle of a run.
I also save the bits I cut off to make it fit the machine. So, I have some mini-Seklema mats that work for some things.
Anyway, my point is that the Seklema mats you are not using will probably last longer than you fear.
Thanks for sharing your settings. It didn’t quite work for me, so I thought I’d share.
I have a Glowforge Basic and it’s a few years old and needs cleaning. I have noticed I’m having to use higher settings than previously, so that could be it.
Anyway, I tried 250 / 25 and it didn’t quite go through, so I tried 240/30 and it almost made it. I noticed the heat was warping it a bit so instead of going any higher I just went back to 250/25 and did 2 passes. Cut very nice and smooth.
I’ve been testing on the 10 mil mylar and to prevent the scorching I masked it with a roll of light tack masking tape that I was able to remove easily after. With the tape, the 250/25 setting didn’t cut all the way through so I changed the setting to 250/45 and it is a pretty clean cut. This is an older post, but thought I’d share.
Welcome to the community, and thanks for telling us how it worked for you. The forum is packed full of good experiences and great design, so read on and we hope you will add more.
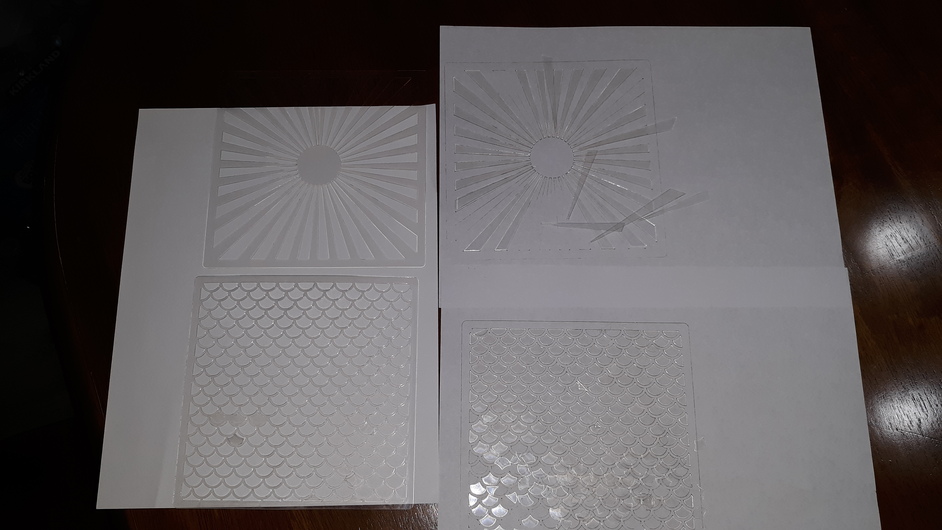
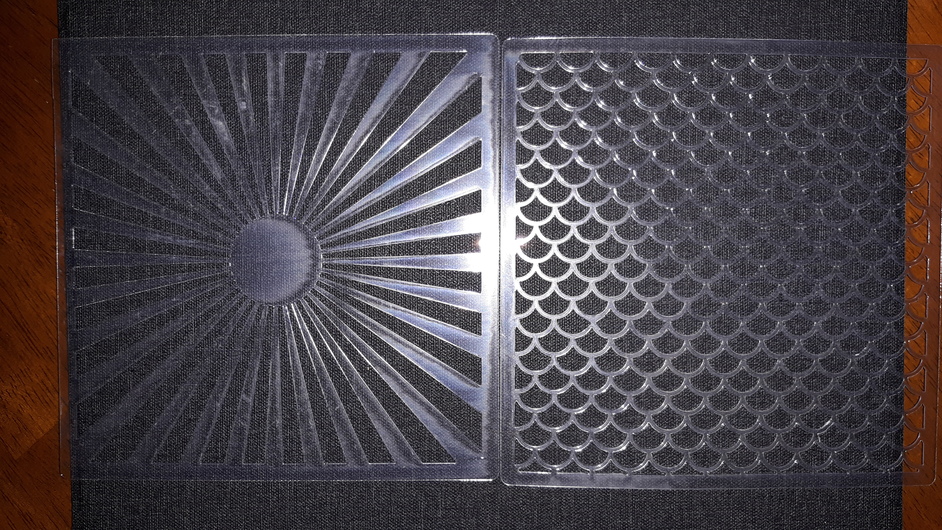
 Now it makes more sense lol.