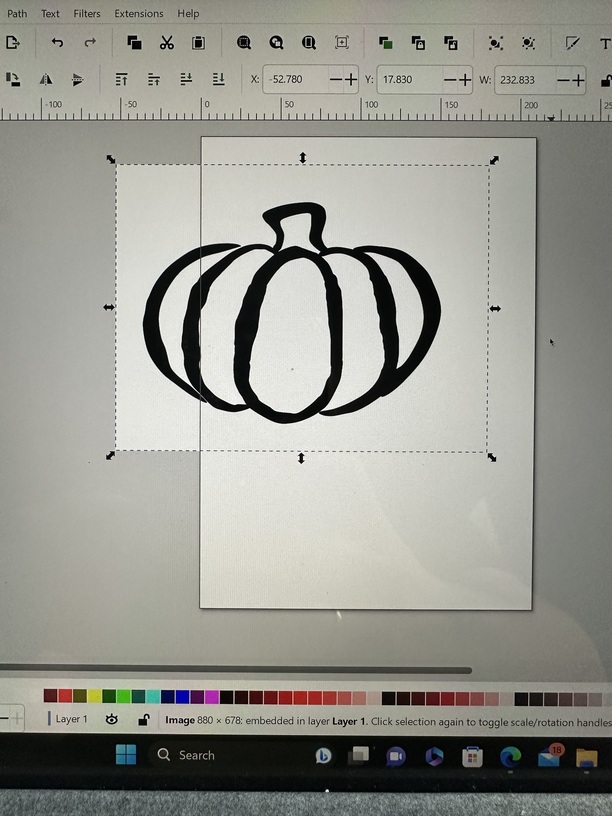
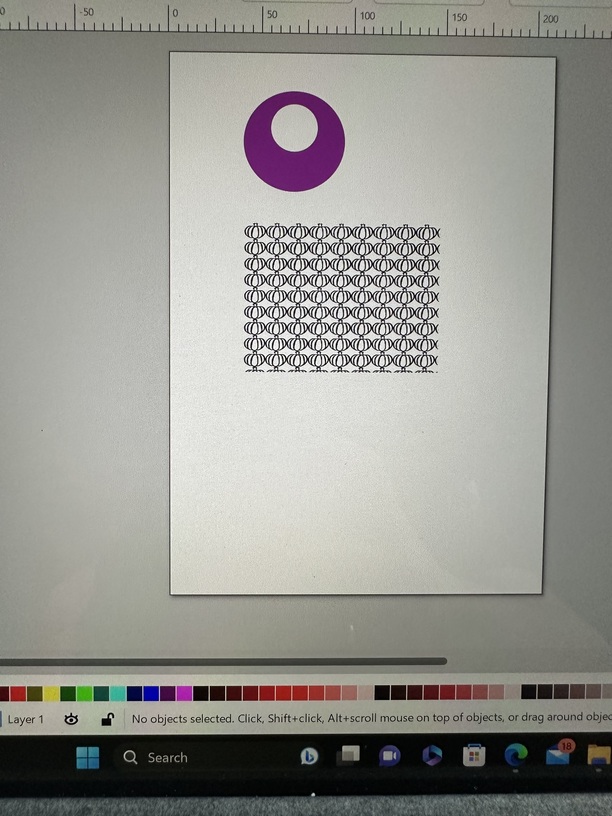
I created a pattern in Inkscape of a pumpkin. I would like that pattern to score or engrave on an earring. I’ve tried following some other ideas and when I import it into the glowforge only the outside line of the earring is showing up. No pumpkins to be found. I’m new to this, but this is what I’ve done so far…
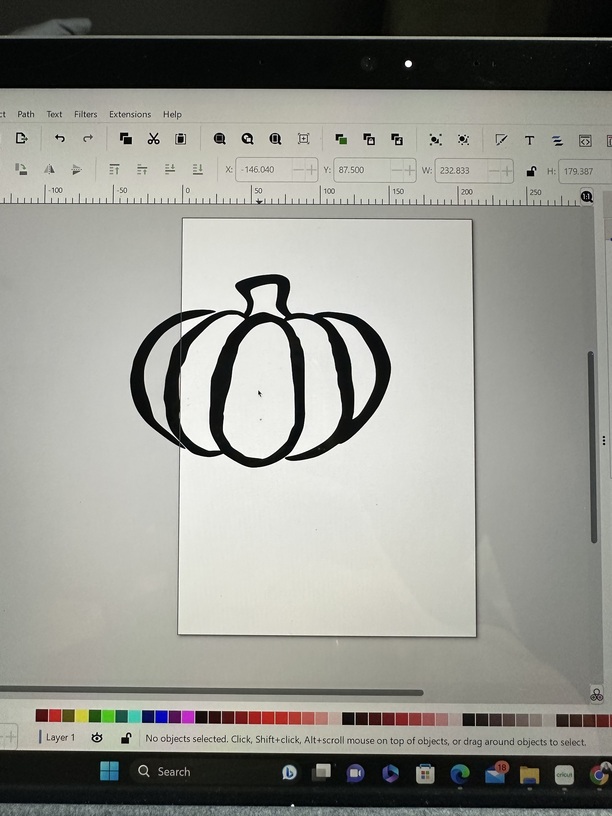
Insert pumpkin, path>trace bitmap> delete original.
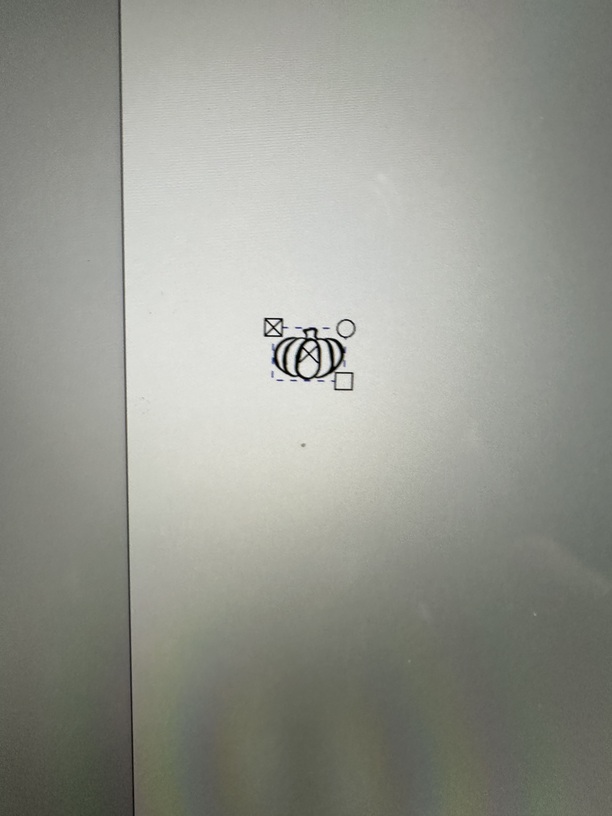
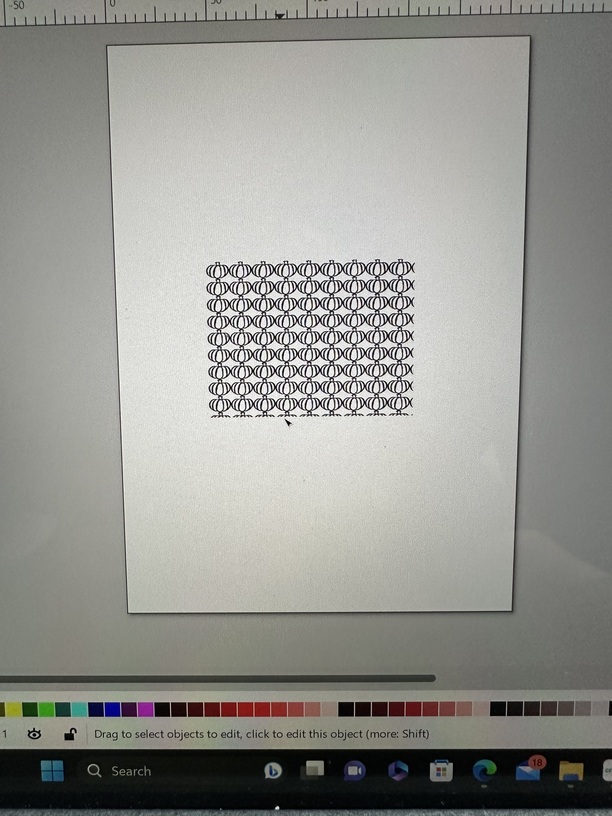
Object>pattern>objects to pattern. I adjust the pattern to how I want it.
Then I created 2 circles of different sizes and selected difference.
What do I do now?
Thank you so much!
3 Likes
Hey, welcome to the forum! The good news is that you were close, you had good instincts. Here’s how I’d do it. (tutorial coming shortly)
7 Likes
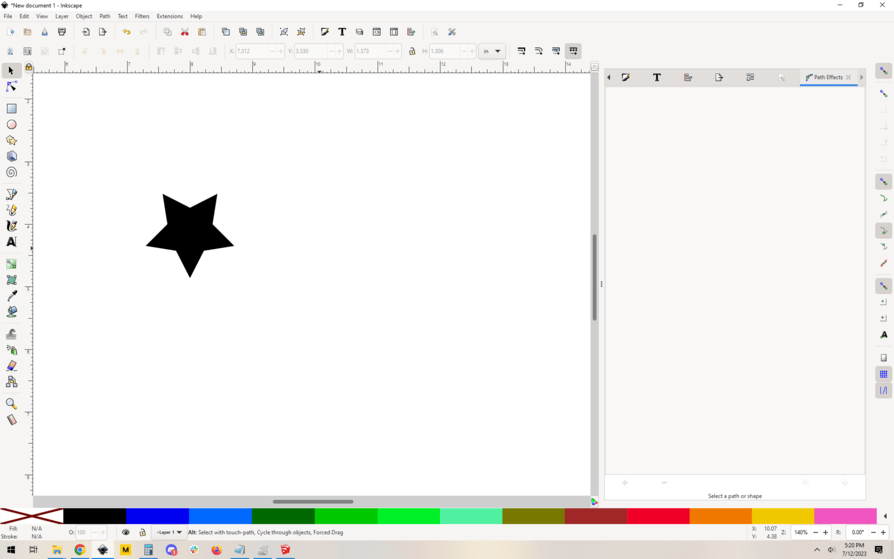
OK so I don’t have your pumpkin but I have a similar concept. Here we go:
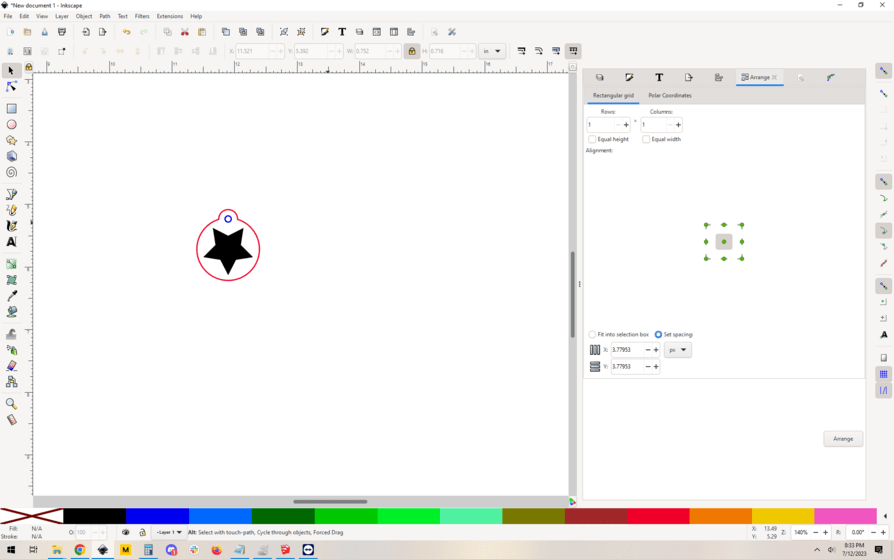
First I get a shape I want on an earring, let’s go with a star:
Now I want to make an earring shape to go with it. For simplicity I will choose a circle. You can use any shape you want, but this is a simple example so circle it is:
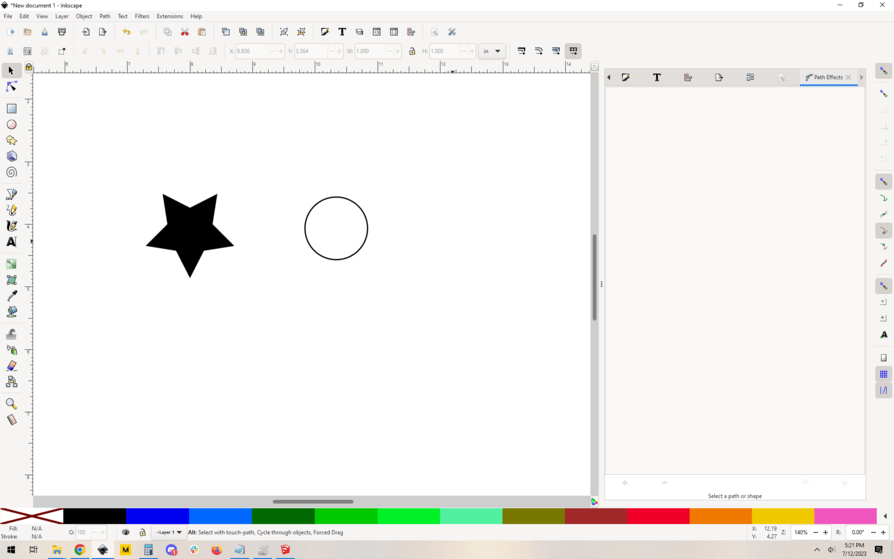
I’ve decided that I want the circle to be 1" in diameter, so i scaled it appropriately.
Now I want to make a hole to hang it from. There are a few ways to do this but I am going to go with what I’ll call the “dog tag” style. I first decide how large the hole should be and choose on a 0.1" diameter hole. I make that first.
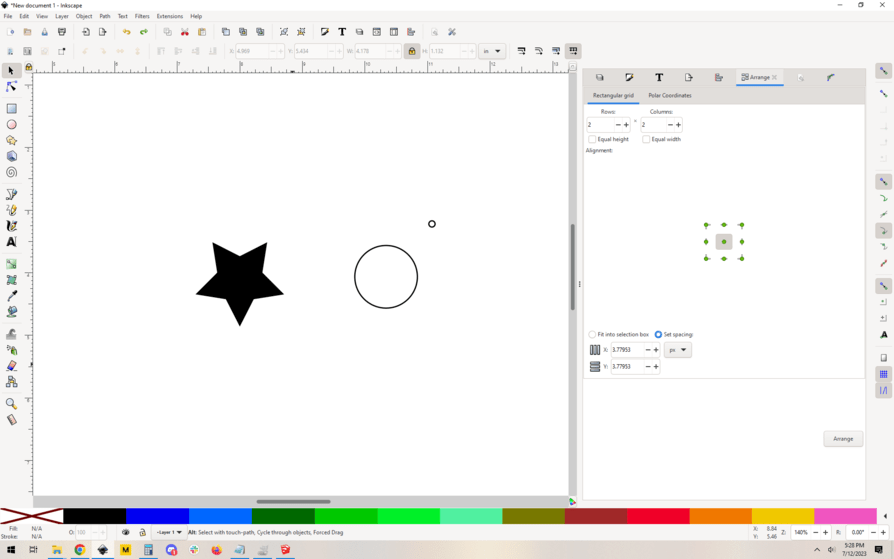
Then I decide that the “ring” that surrounds it should be at least 0.1" thick too, so I make another circle that is 0.3" in diameter.
Then I center those two little guys using the arrange tool, they make a donut:
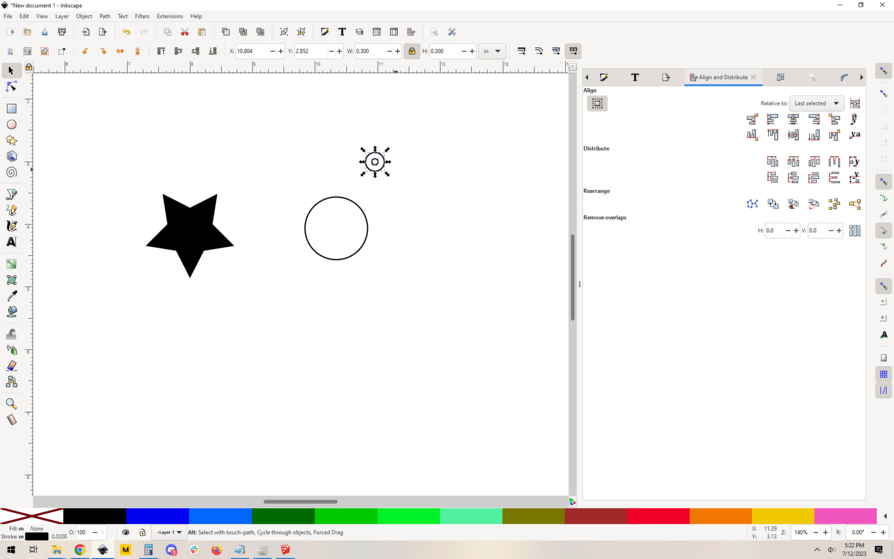
Now I want to align them to my larger circle. This I am going to do roughly by eye:
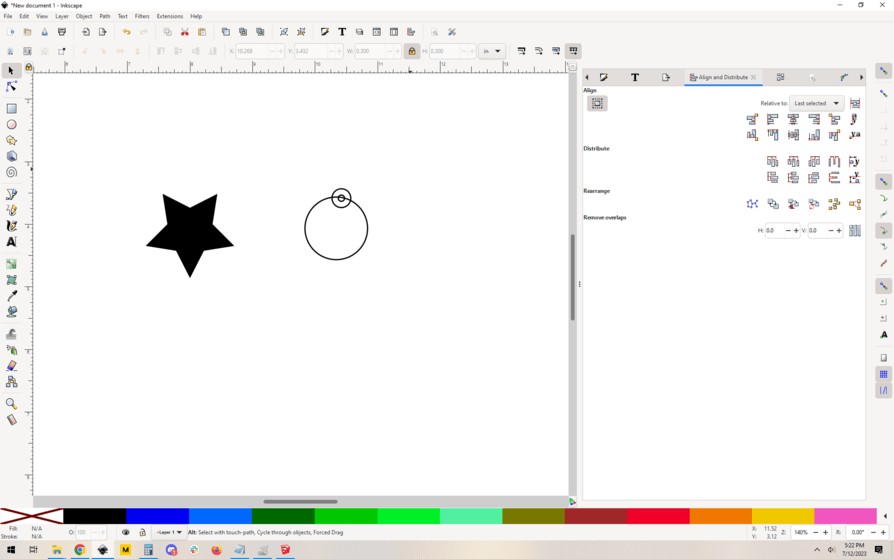
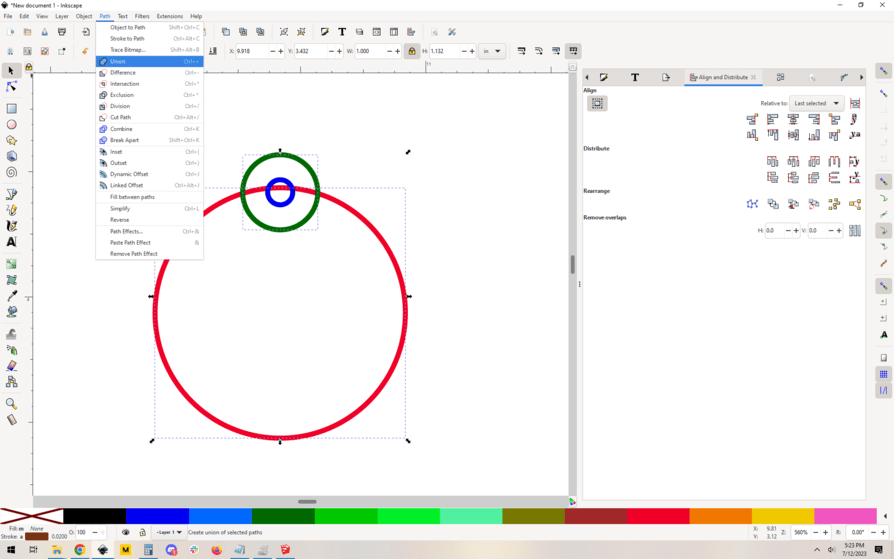
It’s a little misaligned, but that’s ok, I use the alignment tool, select all three circles and center them vertically. I also take a moment to color code them so it’s easier for us to see what’s happening here:
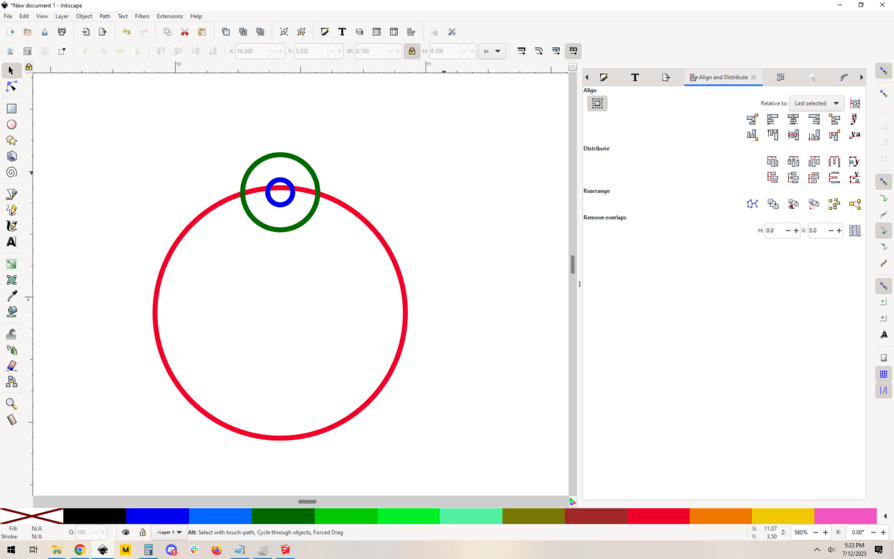
Great, now I want to make the outline shape be a union of the green and red circles. I select the two and do Path->union, and it give us this:
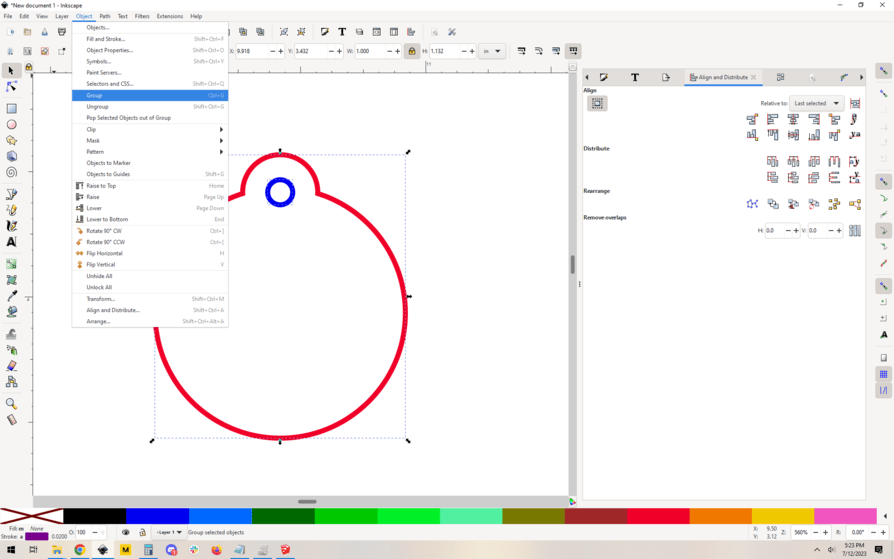
Awesome, earring cut shapes are done. I will Object->group these two so they can’t be separated by accident:
OK cool. Now, bringing our star back into the mix:
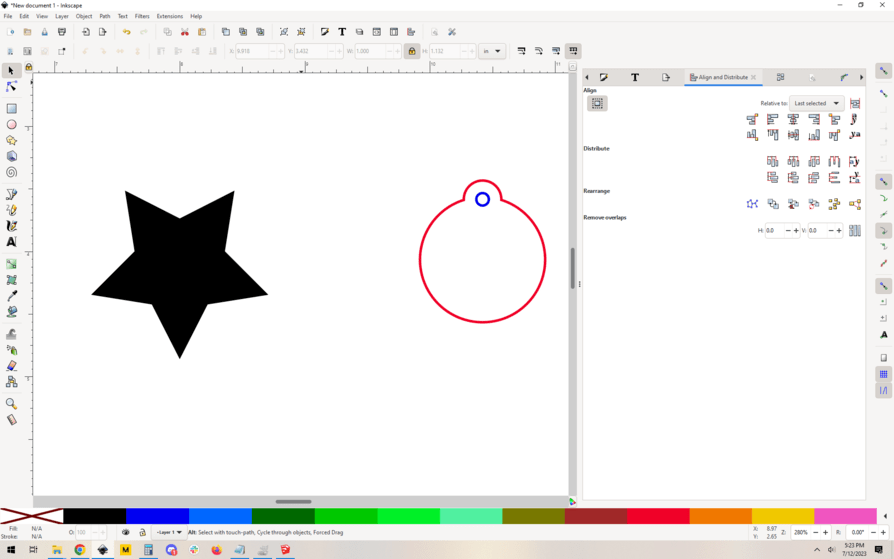
I overlay them and it just is obviously not the right size:

OK so now I scale and align the star until I’m happy Again, i do this by eye. Aligning a pentagonal object to the center of a circle is a little tricky to do the “right” way (it involves guides and moving rotation centers and whatnot, and is a little out of scope for this tutorial) but for this, a quick eyeballing is good enough:
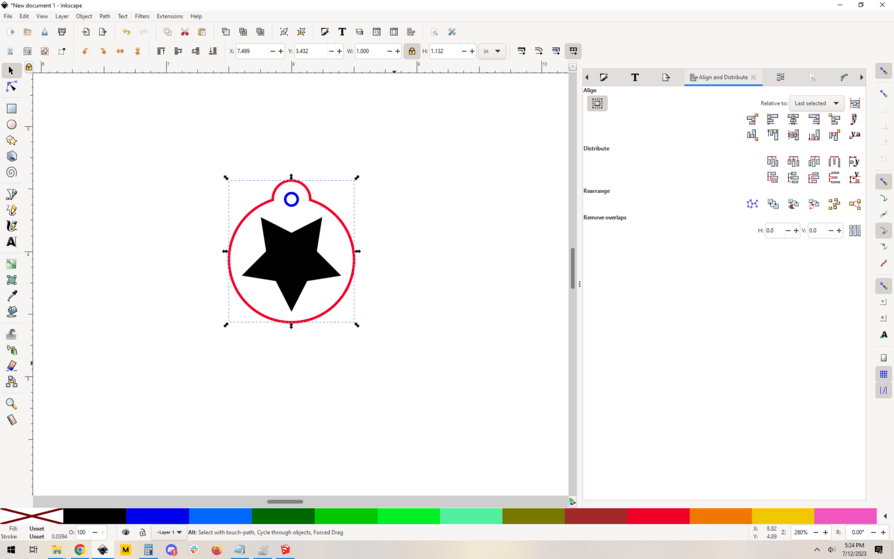
Awesome, I like it! Now, I group the whole thing up, again, so it can’t be separated and alignment is saved how I want it.
Now, I use the clone tool to make a bunch of them in a jumbled mess. (you could just cut and paste, but cloning is sort of a power move. it means that if I want to change the earring design I can just change the one original and all the clones will update):

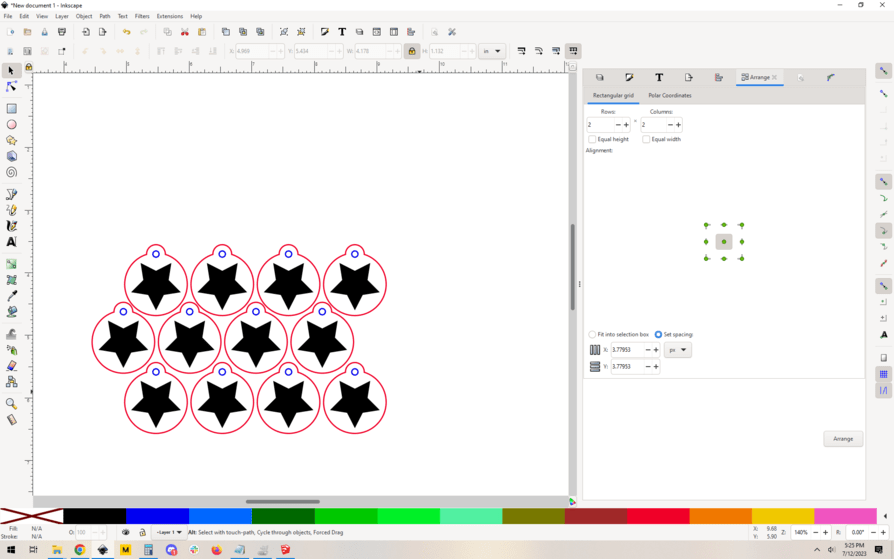
That ugly mess needs to be arranged. Object->arrange, and you get something like this:
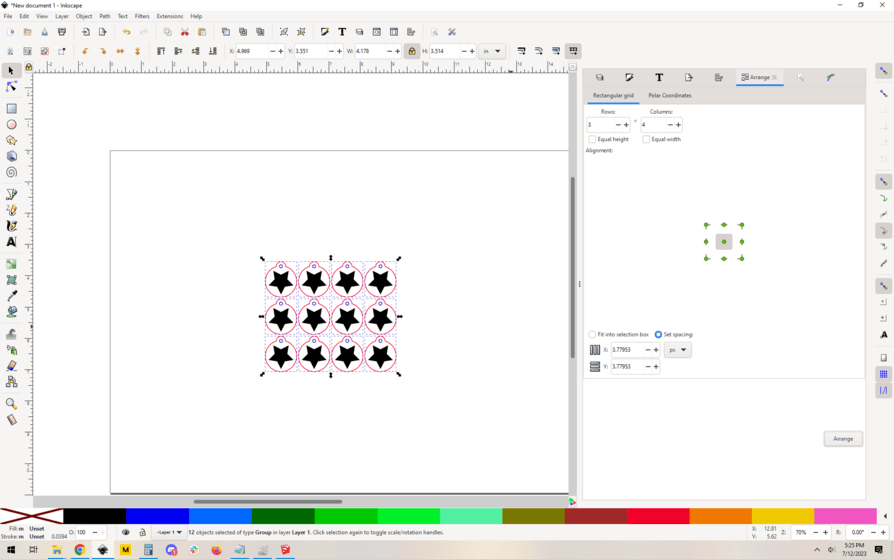
This will work just fine, but I think I might be able to save a little material so I grab whole rows and slightly skew them to pack 'em in a little tighter:
Did I save any materials? I don’t know on this particular example, but on larger jobs of like 40-50 pairs of earrings you will absolutely come out ahead.
Anyway, that’s it! I went kind of fast, if you need any clarification on any of the steps just say the word and I can go into more detail.
9 Likes
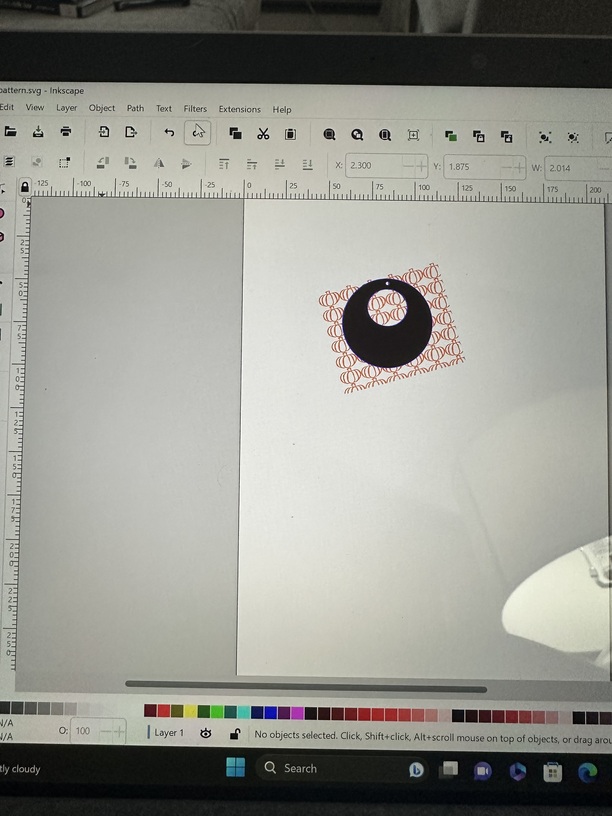
Thank you for that tutorial. I learned some new things. I want to actually score or engrave that pumpkin design on the earring. So after I did what I showed in the previous post, I lined the earring shape and the pattern and then selected path>intersection. The look is what I want, but when I save and move it to the glowforge it just shows the earring shape. I don’t know how to make the pumpkin pattern appear on the earring so I can score or engrave it.
2 Likes
Ah, I see. OK so the issue here is that patterns aren’t paths anymore, it’s some sort of optimized entity. This is how I’d do it: (tutorial incoming, one sec)
2 Likes
Ok!
First start where we left off because why not:
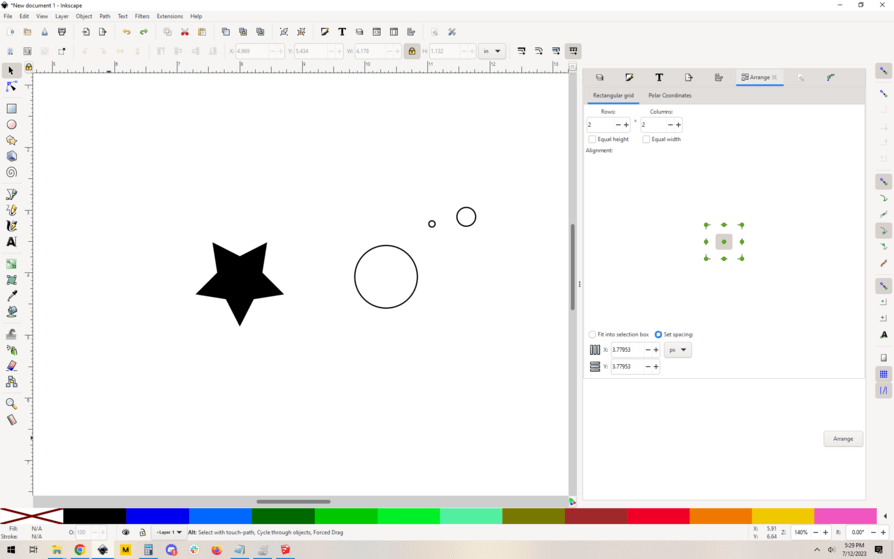
Ungroup this and take the star off to the side. Make it smaller, the size you want for your pattern. Copy and paste it a bunch of times so you have a lot of them:
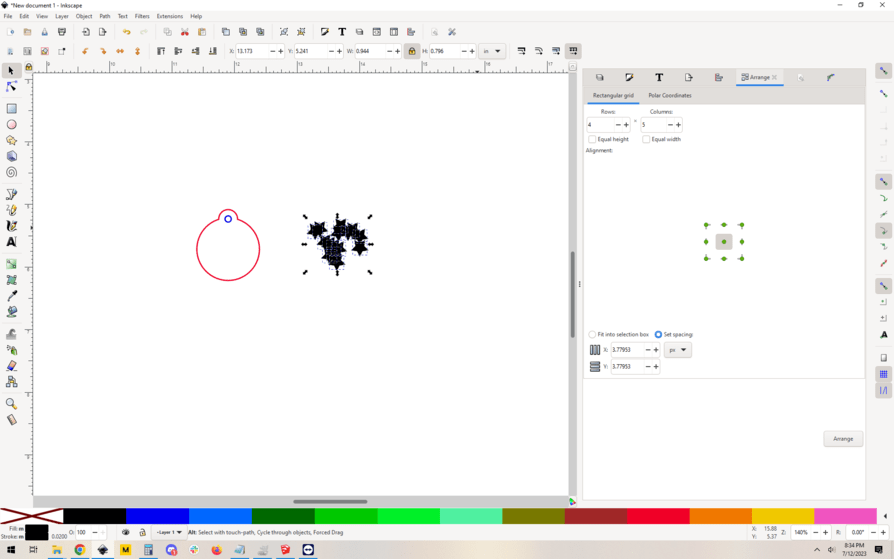
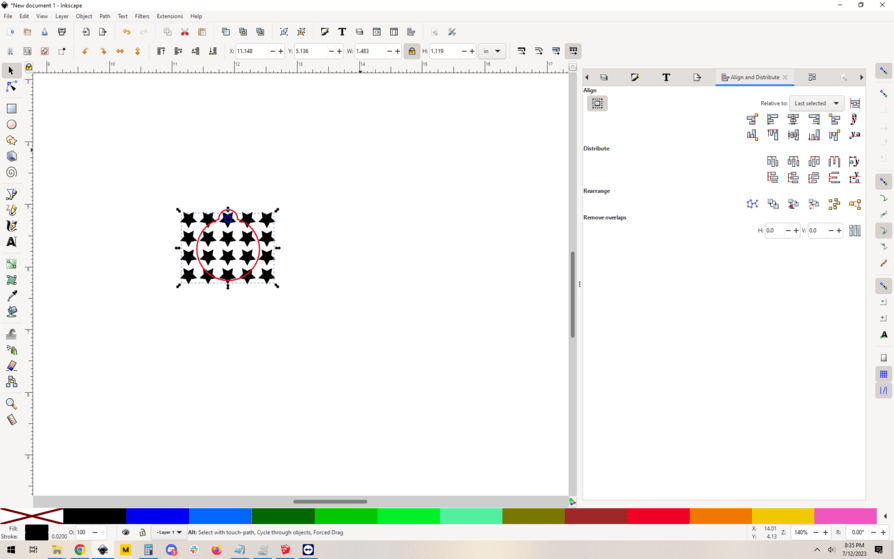
Use the arrange tool to put them into a grid (stay tuned, there is another way to do this but for now lets do a plain grid):

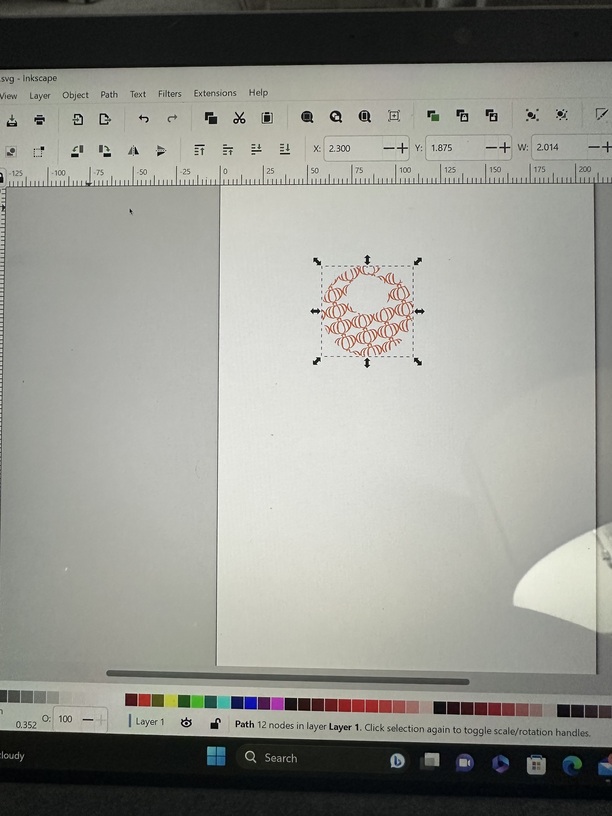
You can see I have a bunch of stars. The trick here is that you want to make them one path. The easiest way to do that here is Path->union. Granted, Path->combine would have worked too but union is kind of the nuclear option so I used that instead. Now you have one big path that is a grid of stars:
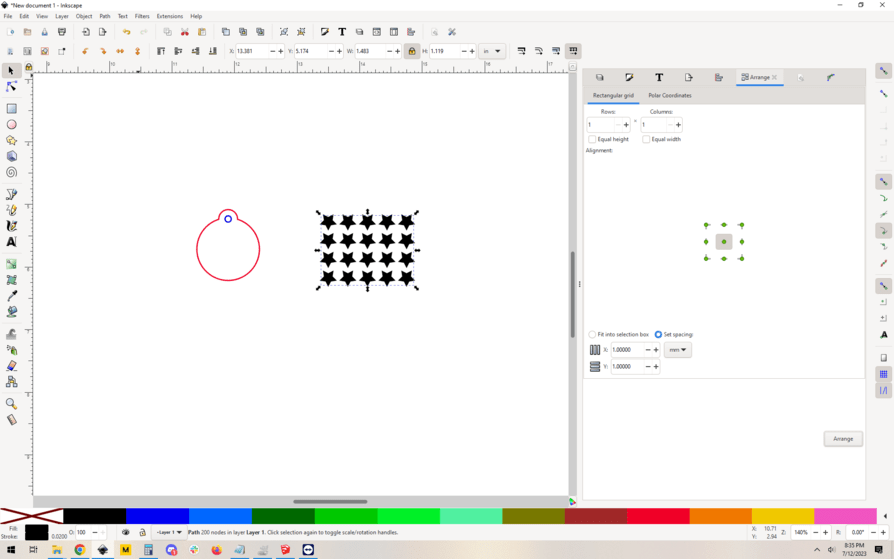
Now you want to align your grid of stars with your earring outline. I did this by eye for this demo, you can use guides and whatnot to get it super precise, but that’s up to your needs.
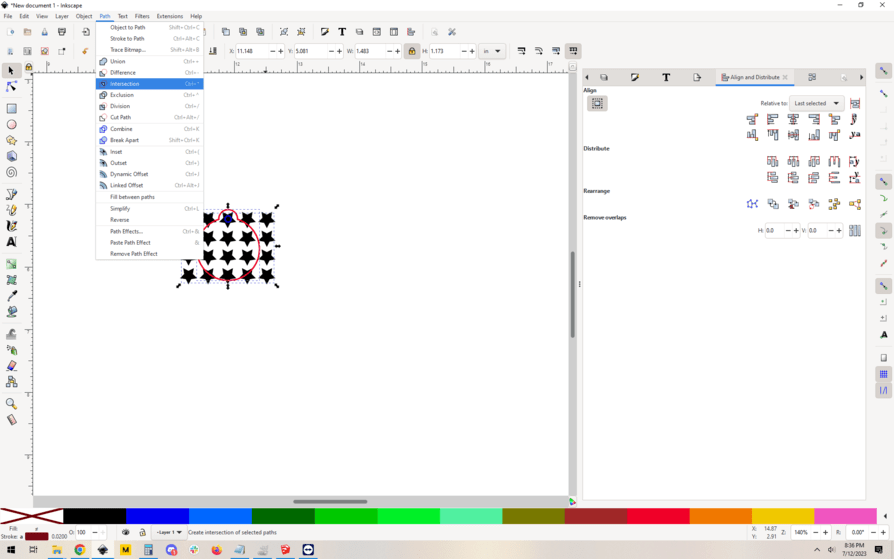
Now here’s the trick. We want to do a Path->intersection, but the intersect process will destroy the earring outline[1], so – First, we copy the red earring outline and then Edit->paste in place. This will look like nothing happened because now you have two earring outlines exactly on top of each other. It’s fine, that’s what we want. Select one of the red outlines (a path) and the grid of stars (also a single path now) and to Path->intersection:
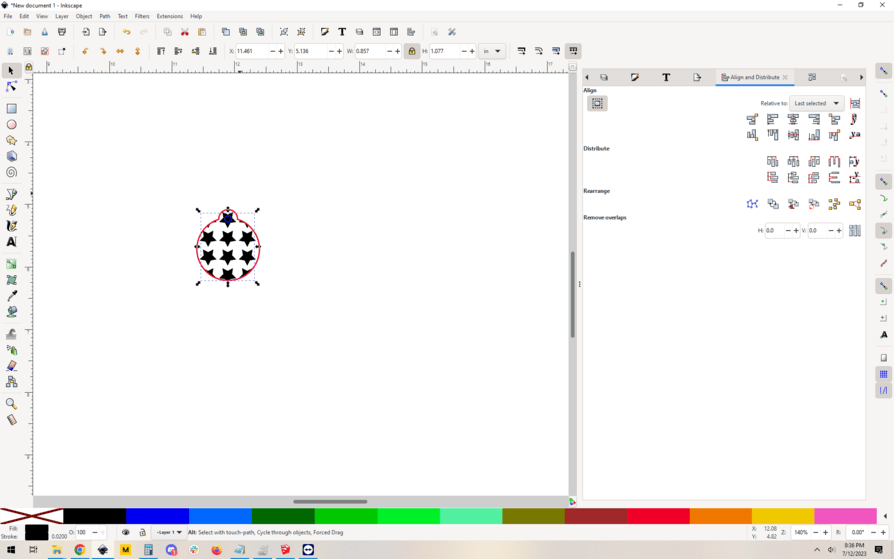
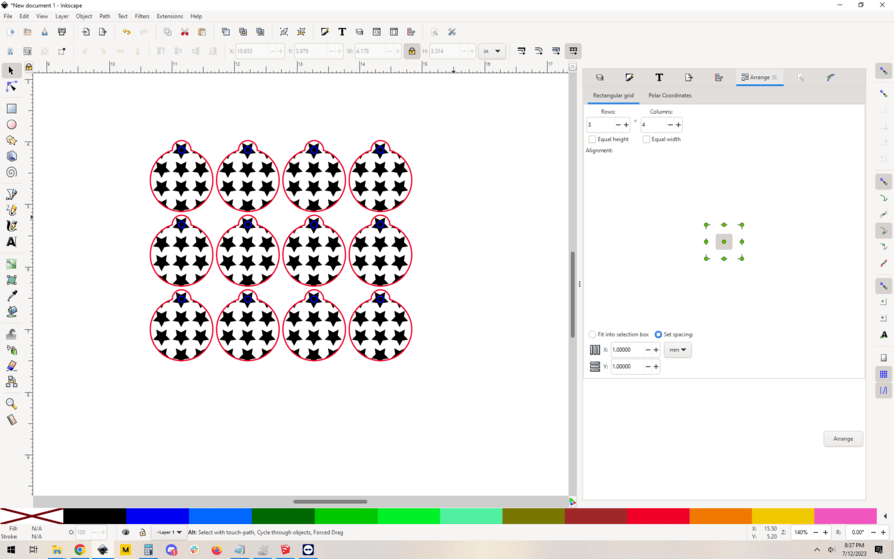
Now you’re left with one earring outline(red), one hole (blue), and a whole bunch of stars, right where you want them. Select them all and group them… then cut/paste or clone them a bunch of times and arrange them like before:
Voila!
ALTERNATE METHOD
Now, as for the other ways to arrange the stars (pumpkins) in a grid, you can try out the options in Edit->clone->create tiled clones. It allows you to make lots of clones with all kinds of options, like scaling and rotation and whatnot. You can get some really interesting arrangements of clones.
After that you simply unclone all the newly gridded clones by selecting them and doing Edit->clone->unlink clone – this turned the clones into lots of individual paths. Follow the rest of the process as above, first union or combining them, then arranging and intersecting etc and finally regrouping.
That’s it!
Technically it destroys both paths and creates a new intersection of the two original paths. Either way, you need to duplicate your cut path for the exterior of the earring first so that you still have it in the right place to enclose the result of your intersection. ↩︎
8 Likes
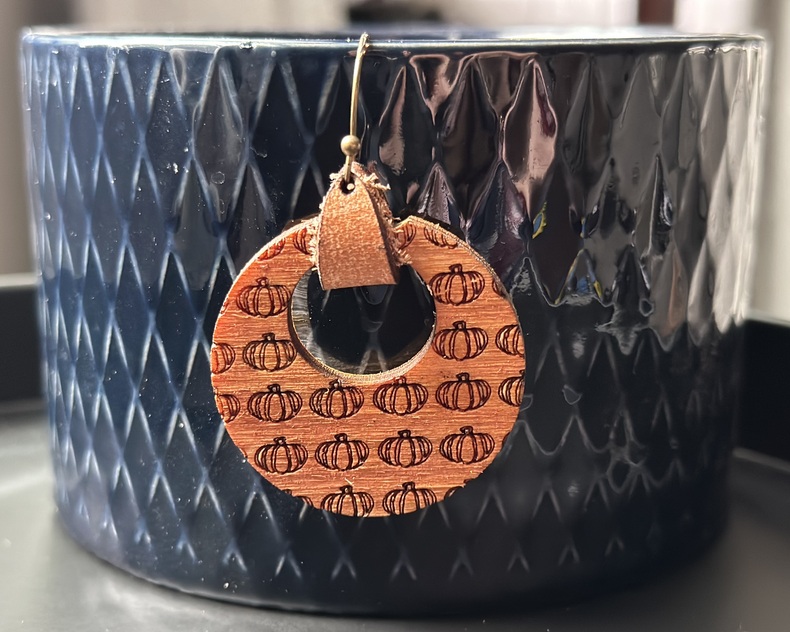
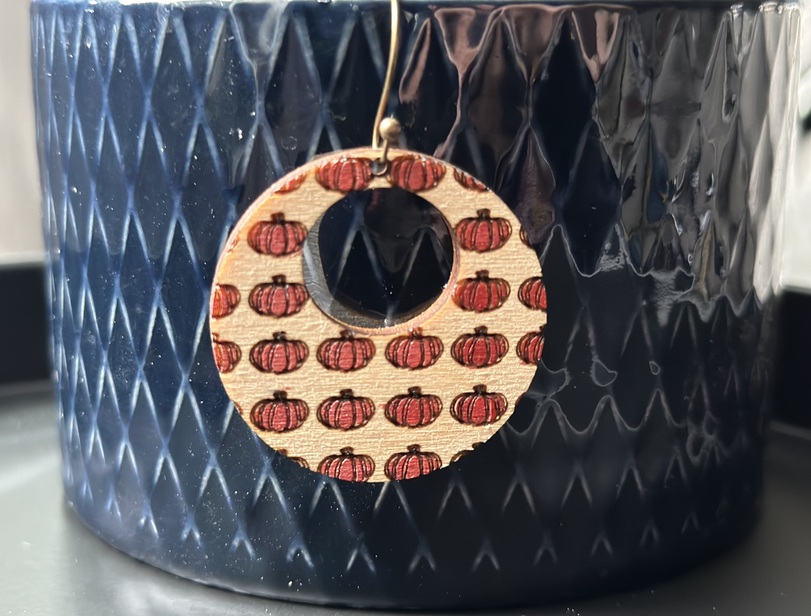
Ah the paint makes such a nice result. Glad I could help, I look forward to seeing what else you make!
5 Likes
Awesome job painting those tiny pumpkins!
4 Likes
This topic was automatically closed 32 days after the last reply. New replies are no longer allowed.