I received my Pro Glowforge on Thursday. I just unboxed it today. I followed the setup successfully. I got it connected the first time with success via the video. I performed about six small cuts (tags).
Now, when I try to perform a print. I get ‘Offline’ status. Then it goes to ‘Calibrating’ then 'Offline again. I turn it off, waited, then back on again. The same thing happens over and over again.
Any ideas. I read through some of the other offline status(s). This is 3 days old.
1 Like
Did you try factory reset and going through setup again yet?
How’s your WiFi strength near the GF? Solid and stable?
2 Likes
No, i idd not try the factory reset. I will WiFi is strong.
What causes this to happen?
I perform the setup again successfully after a reset. I went to the app.glowforge. I saw the printer. I took sent a drawing to the printer, the printer status was calibrating, then offline again.
What browser are you using? Chrome seems to be the most stable with the GF.
1 Like
I’m using Chrome which has been stable while it as working. It was responsive until the Offline status. It indicates when the lid is open. But goes back to Offline.
Early this morning I reset the glowforge twice, then nothing, same condition. I reset it a third time and it came up. It’s working now.
The bigger issue is why does this happens? (question for support). I’ve read multiple post that this condition has happened.
Thanks @evansd2, @laidknow for your comments/help.
This behavior is usually isolated to WiFi connectivity issues. When support is able to get to you they can look up the logs if you can give them a date, time, and timezone.
3 Likes
@ben1,
Ok. Thank you.
I believe that others with this issue sometimes have a plastic doohickey in the back (technical term) near the power switch that can interfere with operation if its not seated properly. This is only on Pro models.
You might check that as well.
John
I’m so sorry you’re having trouble. It looks like you might be having Wi-Fi issues.
The most common solution to Wi-Fi challenges is to restart all the devices involved in connecting to the internet.
- Turn off the computer, phone, or tablet that you’re using
- Turn off your Glowforge
- Unplug your modem
- Unplug your Wi-Fi access point
- Wait one minute, then plug everything back in and turn them back on
If that doesn’t work, we have two more suggestions that often make a big difference:
- Improve the signal path between your Glowforge and your Wi-Fi access point
Wi-Fi signals need a clear path. Remove physical barriers, and move devices closer together:
- Move your Wi-Fi access point up high and make sure it’s in an open space. Avoid locating your
- Wi-Fi access point on the ground, under a desk, in a cabinet, or in a corner where its signal can be blocked.
- Relocate your Wi-Fi access point closer to your Glowforge
- Move your Glowforge closer to your Wi-Fi access point
- Install a Wi-Fi range extender closer to your Glowforge
- Run an ethernet cable and install a second Wi-Fi access point next to your Glowforge
- Reduce electronic and Wi-Fi interference
If your unit is near other devices that use Wi-Fi or a large number of electronics, temporarily turn off other electronics and devices in the area.
We’re not finished! If the trouble continues, could you please run one more test? This test requires a laptop or desktop computer. If possible, try these steps from a laptop computer placed on top of your Glowforge (and on the same Wi-Fi network) for the most accurate results.
- Run the test
- Mac: Open Finder/Applications/Utilities/Terminal, then type the following command, and press the return key: ping -c 50 app.glowforge.com
- Windows: Open the Windows Run dialog box by pressing the Windows key + R
- In the dialog box, type “cmd”, then “Run” or “OK”
- Type the following command, then press the return key:ping -n 50 app.glowforge.com
-
Allow the test to finish. When it is complete you will see results under a “ping statistics” header.
-
Take a screenshot of the results
- Mac: Press Shift-Command-4 and click and drag a box around your image. You’ll find the screenshot file saved on your desktop.
- Windows: Click on the Start Menu and type “snipping tool”. Open the Snipping Tool > New then click and drag a box around your image. Click the Save icon and name and save your file.
- Reply to this email with the following:
-
The file you saved in Step 3.
-
A description of what’s happening, what you’ve tried, and what results you’ve seen so far.
2 Likes
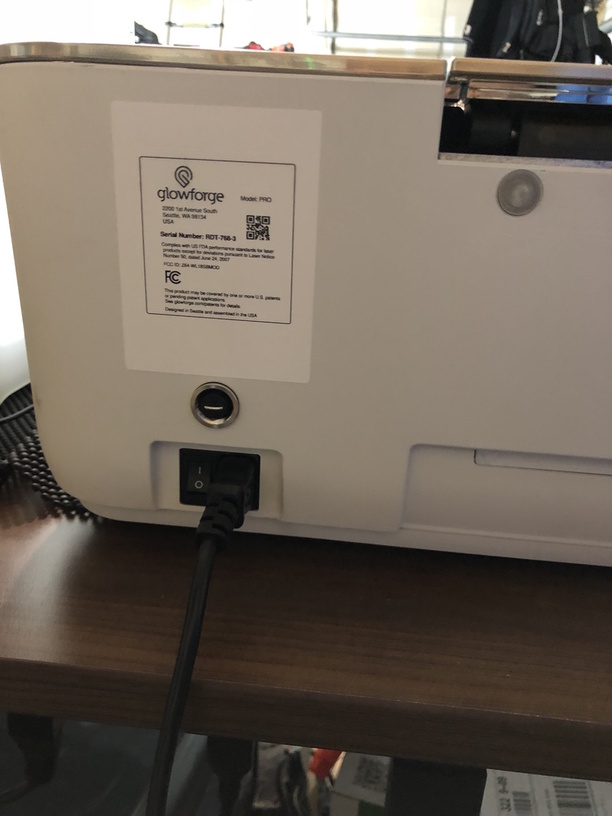

It’s the round thing above the power switch. Sorry, I have a Basic so I don’t have one myself.
Thanks.
The round thing is supposed to be there…correct? I’m new to Glowforge so forgive me is this question is incorrect.
Yes. The silver bar in there will kill the laser if it is removed or not seated. It’s a Pro feature to allow for a disconnect linked to the room’s door so if you’re running it in Class 4 mode (pass through being used it shields removed) someone coming in the room would shut the GF down so there’s no possibility they might be exposed to unshielded lasers. People in the room are supposed to wear safety glasses but someone walking in the room might not have them on.
The staple (that’s what it looks like if you remove it) is a safety interlock. Some might argue it’s Overkill but the FNLs and regulators would disagree. ![]()
1 Like
It’s been a little while since I’ve seen any replies on this thread so I’m going to close it. If you still need help with this please either start a new thread or email support@glowforge.com.