My brand new GF Pro is not showing the PG material, nor is it reading the QR code. I have not been able to calibrate yet.
I can see that the GF Pro IS connected to my WiFi (reading 95%) and I have already cleaned the camera. The printer head will move - so it is not the problem.
When you say it is not showing the PG material are you saying the camera does not display what is actually on the bed of the Glowforge. It is not important that the QR code is not read, simply choose the material from the drop down menu.
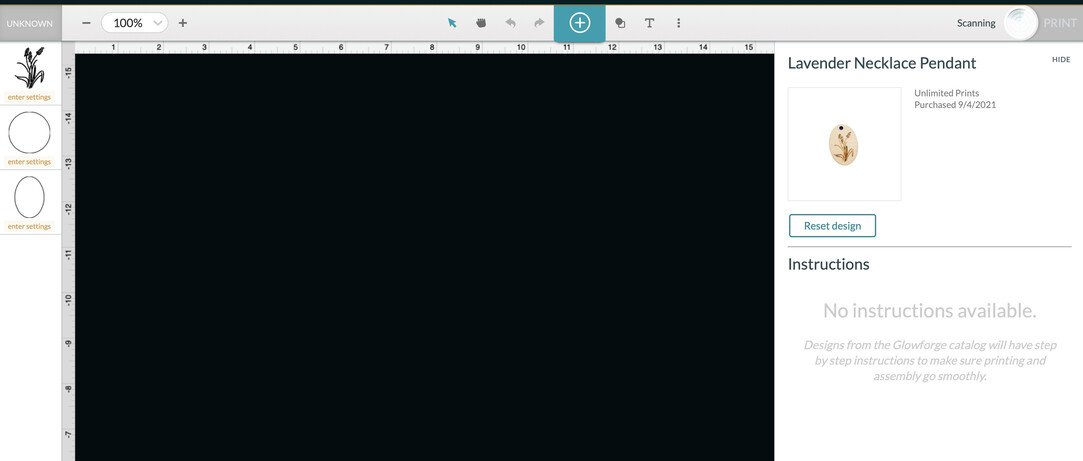
Can you please share a screenshot of what your interface looks like?
Try to hit the minus key a couple of times to ‘zoom out’ of the window and see if you’ve moved away from your regular view. Your view is showing -15 on the left… i think you may have gotten away from the bed view…that -15 should be at 1 to see the bed well at 100%
Your Glowforge is scanning, it has not completed its calibration. Try turning it off, removing everything from the bed and gently move the printhead so that the Glowforge logo is directly under the lid camera. Then turn the Glowforge back on and see if it completes its preparations.
@thestemzonesd I am so sorry your Glowforge printer is not calibrating. We can definitely assist in resolving this with you.
I extracted the logs from your Glowforge to investigate the problem, and it seems like your unit is running into trouble during the calibration step. During calibration, the lid camera finds the Printer Head by taking a series of images. There are a few different reasons this error may be occurring. Please walk through the steps below to get back on track.
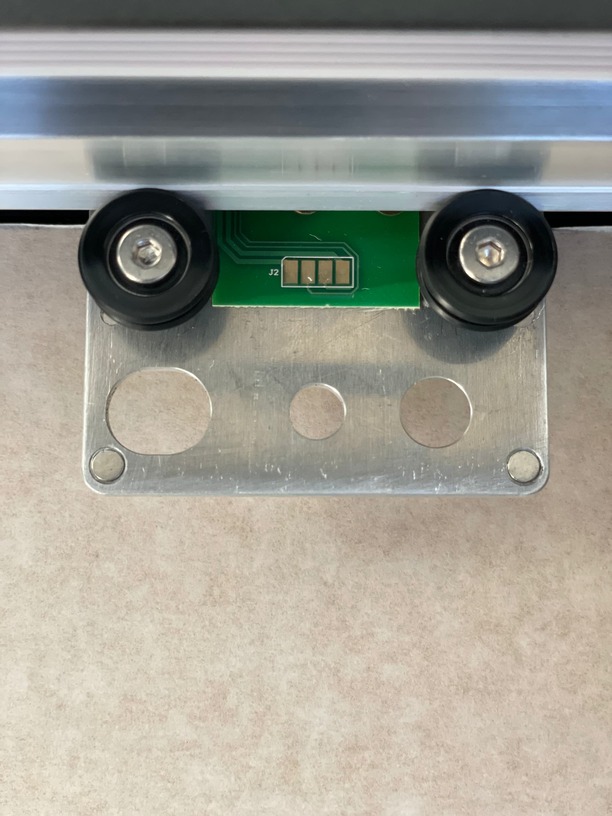
Check that the carriage plate is installed correctly with the teeth on the belt pointing to the inside. You can follow these instructions to clean and check Carriage Plate.
Once you’ve had a chance to perform these troubleshooting steps, turn on your Glowforge and let it try the calibration again. If you are still having trouble, could you do the following for me?
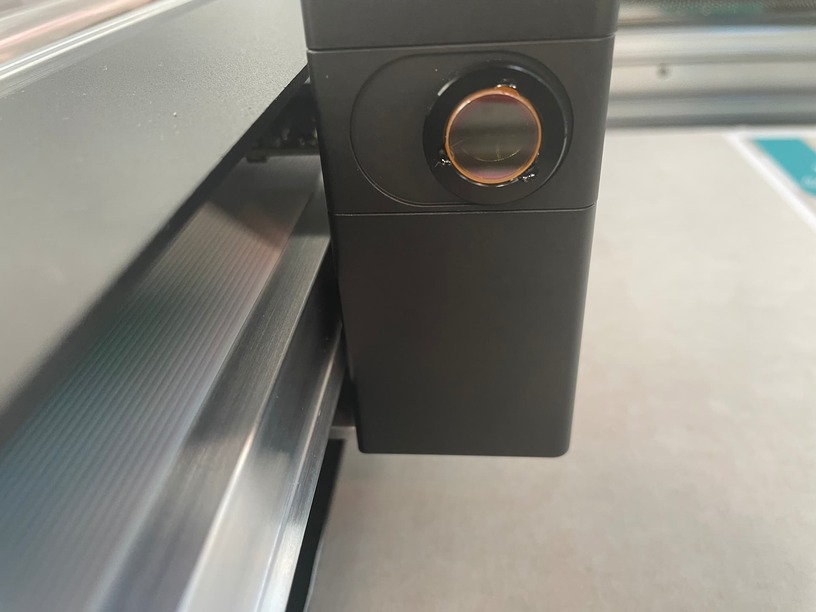
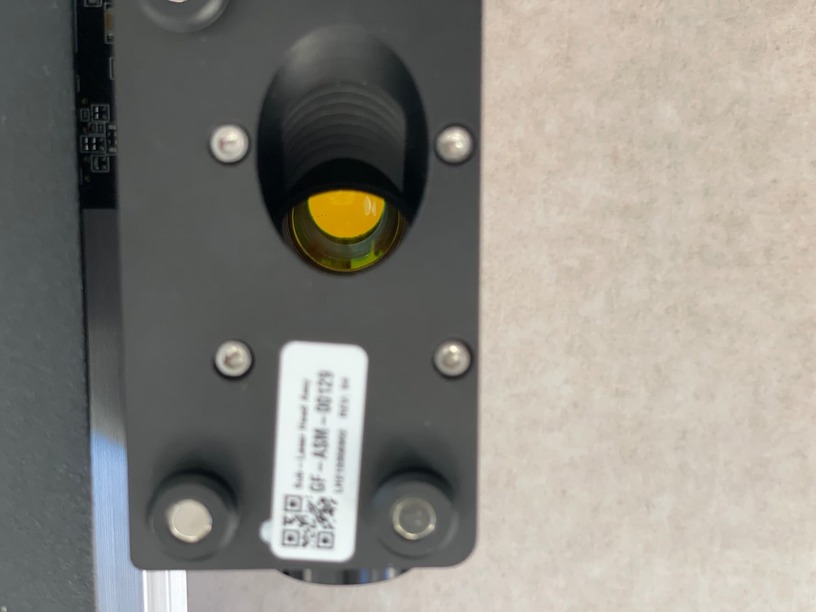
Please send photos of all your cleaned optical components, with special attention to any damage you might find:
Both windows
The printer head window, on the left hand side of the printer head
The laser window on the inside left of the Glowforge
Now I have the Pro taking a picture and displaying the image on my Mac. Now, when I select the first print (Good Measure), and verify that I have the correct proof grade material (draft board), thee laser does not engage/turn on/ fire up.
When I hit the print button on my computer, and then press the large round button on the GF Pro the print head moves around - as if it is printing — however there is NO laser beam, no cutting, no engraving. I am using the settings that came with the Good Measure file.
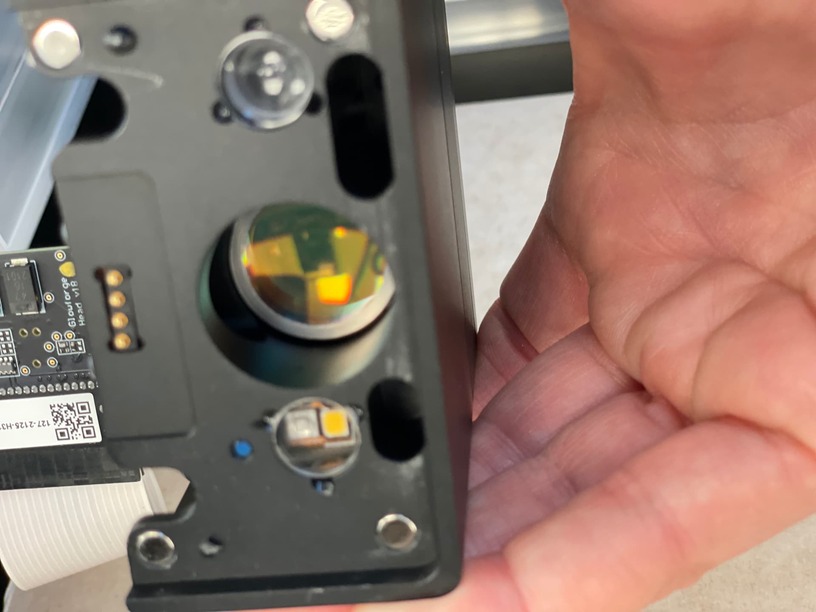
My name is Mercedes and I will be taking over for Faryar. Thank you for the photo’s these are great! Just what we needed to move forward.
I noticed that in some of the photos you sent in are taken without the printer head on. Can I have you follow these steps for me and take photos recreating the troubleshooting steps below? The mirror not being in the head and the head not being on could be causing your calibration issues.
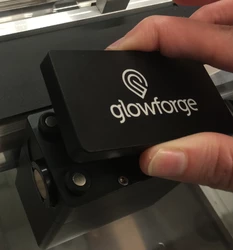
1. Turn off your Glowforge 2. Open the lid and gently move the Printer Head to the center of the laser arm 3. The top of the Printer Head is held on by strong magnets. Grasping only the top, pull up carefully to remove it and set it aside.
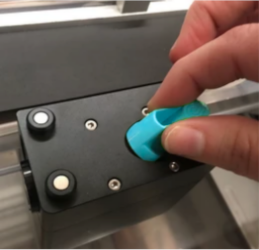
4. Gently pick up the mirror
5. Inspect and clean the mirror
Be careful not to touch the mirror surface with your bare fingers.
Using a Zeiss wipe, gently wipe the surface of the mirror.
Use several passes until the mirror is clean, each time moving to an unused portion of the lens wipe.
If the mirror has a spot in the middle of it after cleaning or is generally unable to be cleaned to a reflective finish, it needs to be replaced. Please take a photo, share it with us, and skip the rest of these instructions.
6. If the mirror is unblemished, replace it carefully
Replacing the mirror incorrectly can permanently damage your Glowforge. Fortunately, we designed it to be easy!
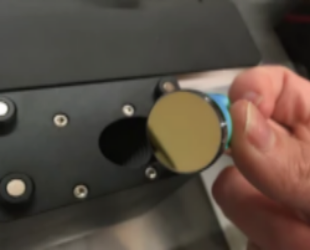
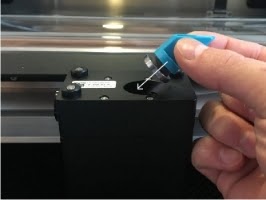
Hold the mirror by the handle and gently slide it into the notch with the mirror at a 45-degree angle to the top of the Printer Head.
7. Set the mirror gently back into the notch. The Glowforge logo on the handle will face up and sit parallel to the floor. It will rest softly in place - there is no need to push it in.
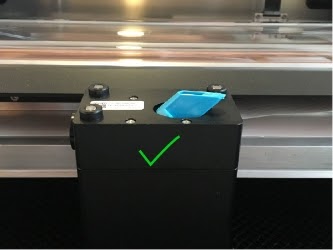
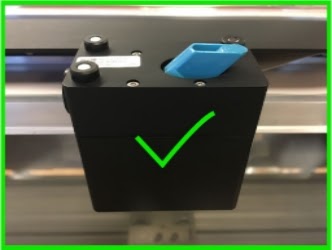
The mirror handle should look like this:
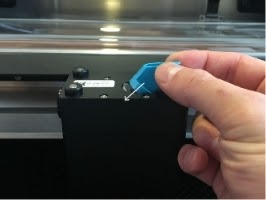
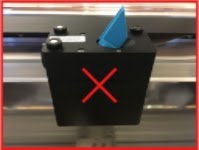
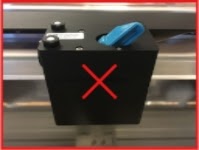
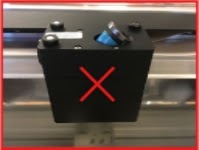
It should NOT look like any of the below:
8. Tap the blue handle once. This will help ensure that the mirror is resting properly in place. 9. Replace the top of the printer head. 10. Close the lid of your Glowforge and turn it on.
I am optimistic that this will be the fix to your calibration issues! Let me know how it goes, please send pictures if you are still unable to print after these steps.